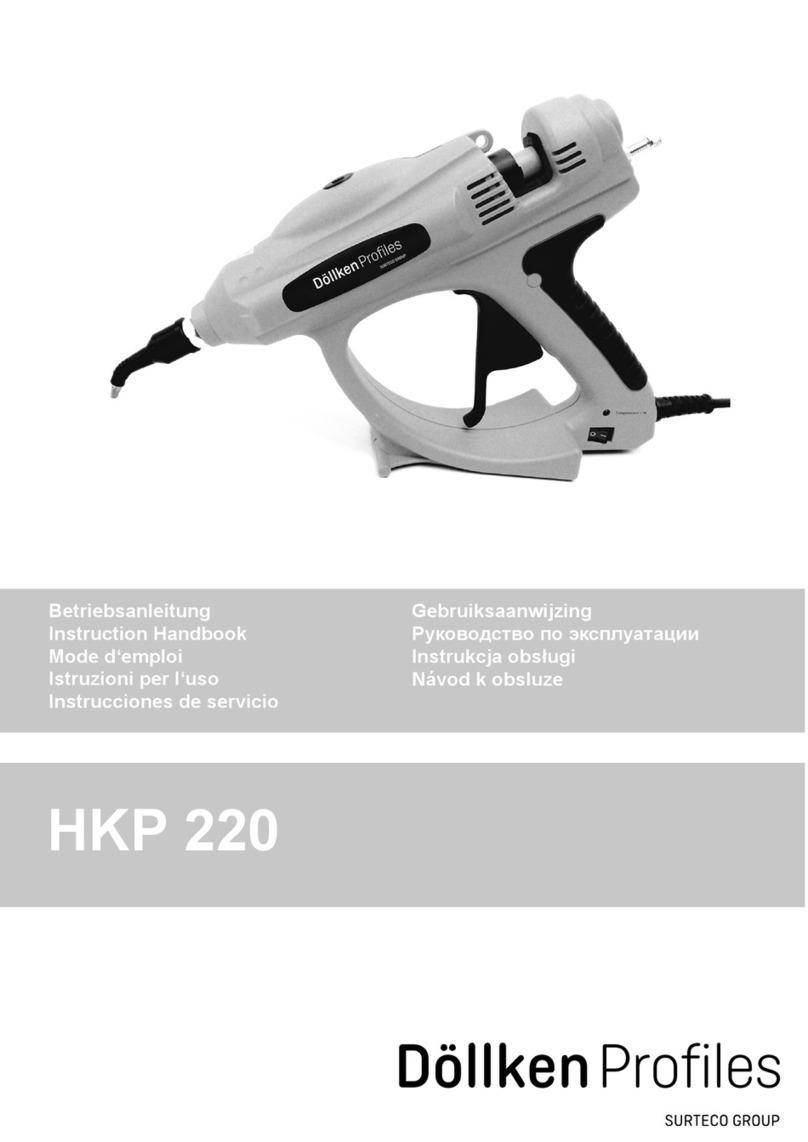
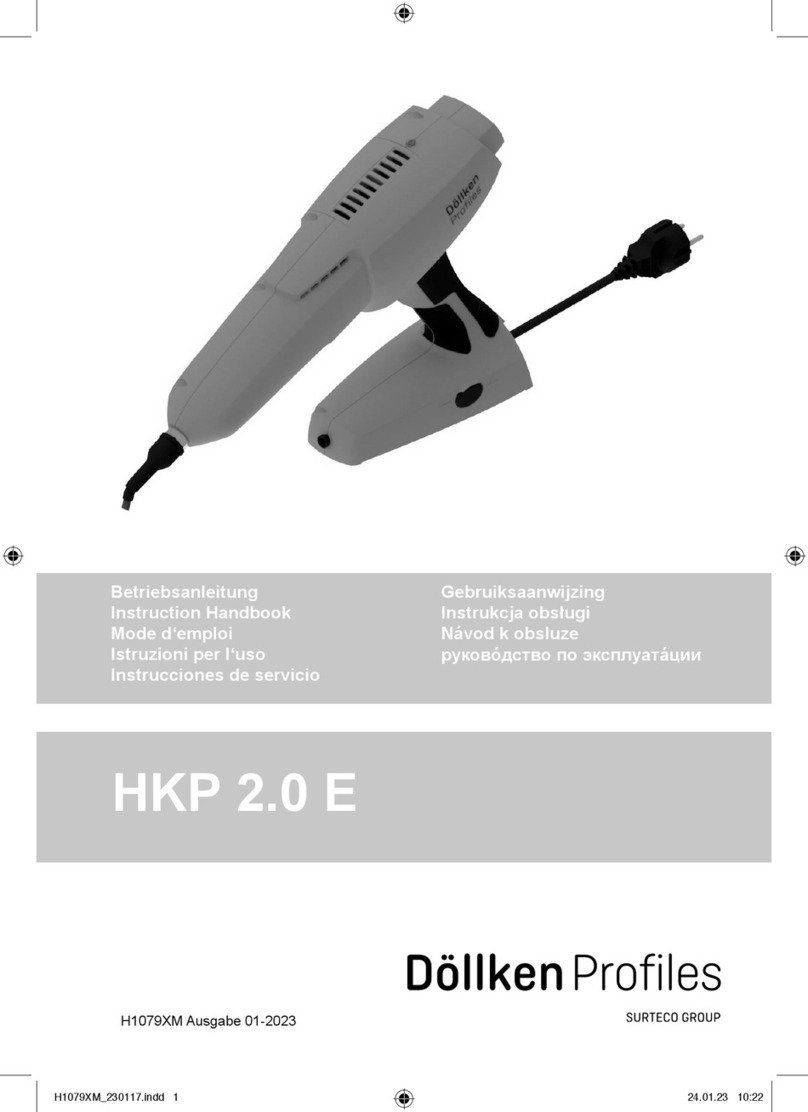
SURTECO Dollken Profiles HKP 220 manual

Betriebsanleitung
Instruction Handbook
Mode d‘emploi
Istruzioni per l‘uso
Instrucciones de servicio
Gebruiksaanwijzing
Руководство по эксплуатации
Instrukcja obsługi
Návod k obsluze
HKP 220

2
HKP220
Deutsch.................................................................................................................................................... 3
English...................................................................................................................................................... 8
Français ..................................................................................................................................................13
Italiano ....................................................................................................................................................18
Español .................................................................................................................................................. 23
Nederlands ............................................................................................................................................28
Русский язык ...................................................................................................................................... 33
Polski...................................................................................................................................................... 39
Česky......................................................................................................................................................44
D

3
1 Allgemeines
Bitte lesen Sie diese Betriebsanleitung sorgfältig und vollständig vor der ersten Inbe-
triebnahme der Klebepistole HKP220. Beachten Sie besonders die Sicherheitshinwei-
se in Kapitel 2.
Diese Betriebsanleitung muß für jeden Anwender stets griffbereit sein.
Alle in dieser Betriebsanleitung genannten Positionsnummern (z.B. „Hakendüse (1)“)
beziehen sich auf die Abbildung auf Seite 2.
1.1 Einsatzbereich
Die Klebepistole HKP220 dient der Verarbeitung von Döllken-Heißschmelzkleber in
Kerzenform (bestimmungsgemäße Verwendung).
Jede andere Verwendung ist unzulässig.
1.2 Technische Daten
Bezeichnung HKP220
Lieferumfang Klebepistole, Betriebsanleitung
Abmessungen [mm] 330 x 250 x 80
Gewicht [g] 1.010
Betriebsspannung [V AC] 220…240, 50 Hz
Leistungsaufnahme [W] 600
Isolationsklasse Klasse 1
Schutzklasse IP20
Arbeitstemperatur [°C] 210…220
Regelung Bimetall-Temperaturregler
Klebstoff Döllken-Heißschmelzkleber, Ø 18 mm
Klebeleistung [kg/h] 1,4…2,0
1.3 Geräteelemente
1Hakendüse
2Standfuß
3Abzug
4Ein-/Aus-Schalter
5Netzkabel
6Isolierhülse
7Kontroll-LED
Allgemeines
D

4
2 Sicherheitshinweise
2.1 Mögliche Gefährdungen
Verbrennungsgefahr!
Hakendüse (1) und geschmolzener Schmelzklebstoff können über 200°C heiss
sein. Tragen Sie Wärmeschutzhandschuhe, wenn eine Berührung unvermeidlich
ist.
Xi Geruchsbelästigung!
Schmelzklebstoffe geben Dämpfe ab, die geruchsbelästigend wirken können.
Sorgen Sie deshalb für ausreichende Lüftung.
Bei unsachgemässer Verarbeitung können vereinzelt Reizungen der Schleimhäu-
te auftreten. Suchen Sie in diesem Fall sofort einen Arzt auf!
2.2 Hinweise zum sicheren Betrieb
Halten Sie zum Schutz vor Funktionsstörungen und Fehlbedienungen stets die fol-
genden Hinweise genau ein:
• Entfernen Sie brennbare oder wärmeempfindliche Gegenstände aus dem Bereich
der Hakendüse (1).
• Verwenden Sie das Gerät nur nach vollständigem Aufheizen.
• Das aufgeheizte Gerät muß auf dem Standfuß (2) abgestellt werden. Es darf nicht
auf die Seite gelegt werden.
• Betätigen Sie den Abzug (3) niemals gewaltsam.
• Schützen Sie das Gerät vor Feuchtigkeit und Nässe (Schutz vor elektrischem
Schlag).
• Beachten Sie die Montagehinweise für Döllken-Heißschmelzkleber (Schutz vor
Verarbeitungsfehlern).
• Achten Sie bei der Arbeit über Kopf auf mögliche Tropfenbildung, um Verbrennungen
von Personal oder Arbeitsgegenständen zu vermeiden.
• Ziehen Sie vor jedem Eingriff am Gerät (Instandhaltung, Reinigung) den Netzstecker.
• Das Gerät darf nur an Steckdosen mit Schutzleiter betrieben werden.
• Ein evtl. verwendetes Verlängerungskabel muß über einen Schutzleiter verfügen.
Prüfen Sie vor der Verwendung die Unversehrtheit des Verlängerungskabels.
• Ziehen Sie nach jeder Benutzung den Netzstecker. Lassen Sie das Gerät vor der
Lagerung vollständig abkühlen.
• Sollte Ihnen eine Beschädigung am Gerät oder am Netzkabel auffallen, ziehen Sie
sofort den Netzstecker. Lassen Sie das Gerät umgehend von einer Elektro-Fachkraft
überprüfen. Es darf erst nach einer ordnungsgemäßen Reparatur (siehe Kap. 5)
wieder in Betrieb genommen werden.
Sicherheitshinweise D

5
3 Betrieb
Beachten Sie stets die Sicherheitshinweise in Kapitel 2.
Achtung!
Beachten Sie die folgenden Hinweise, um Verletzungsgefahren und Schäden am
Gerät zu vermeiden:
1. Legen Sie das betriebswarme Gerät niemals auf der Seite liegend ab. Dabei
kann unkontrolliert Klebstoff austreten. Verbrennungsgefahr/Beschädigungen
am Gerät!
2. Klebstoffreste in der Schmelzkammer dürfen niemals gewaltsam (z.B. mir
einem Schaber oder Schraubendreher) entfernt werden. Dabei kann die Innen-
auskleidung der Schmelzkammer beschädigt werden.
3. „Eingefrorene“ Schmelzklebstoffkerzen dürfen niemals gewaltsam (z.B. mit
einer Zange) gelöst werden.
4. Schmelzklebstoffkerzen dürfen niemals aus der Pistole gezogen werden,
dadurch kann die Mechanik blockiert werden.
Für den Transport im Koffer können die überstehenden Schmelzklebstoff-
kerzen am Gerät abgeschnitten und bei der weiteren Verwendung wieder
eingeschoben werden.
3.1 Inbetriebnahme
1. Stecken Sie den Netzstecker in eine Schutzkontakt-Steckdose.
2. Schalten Sie das Gerät am Ein/Aus-Schalter (4) ein.
Die rote Betriebsleuchte des Ein/Aus-Schalters (4) leuchtet auf. Das Gerät heizt
sofort auf.
3. Beim Einschalten ist die Kontroll-LED aus (7),
die Pistole ist somit nicht betriebsbereit.
Erst wenn die LED leuchtet, ist die Pistole komplett aufgeheizt und betriebsbereit.
4. Bei bereits eingesetzter Klebstoffkerze kann flüssiger Klebstoff aus der Düse treten.
Stellen Sie das Gerät daher auf einer geeigneten Unterlage ab. Lassen Sie das Gerät
ca. 10 Minuten aufheizen
5. Stecken Sie die Schmelzklebstoffkerze durch die Öffnung an der Rückseite des
Gerätes bis in die schwarze Isolierhülse (6).
Betrieb
D

6
3.2 Verarbeitungshinweise
Bitte beachten Sie die Döllken-Montagehinweise für Heißschmelzkleber, um stets
einwandfreie Klebeverbindungen zu erreichen.
• Die zu verklebenden Flächen sollen Raumtemperatur haben und frei von Staub, Fett
und Feuchtigkeit sein. Reste von Wachsen, Trennölen, Weichmachern oder Imprä-
gnierungen können sofort oder später ein Lösen der Verklebung verursachen.
• Tragen Sie den Klebstoff kontinuierlich lienienförmig auf die Profilrückseite auf.
• Die Kleberauftragsmenge ist abhängig von der Wandbeschaffenheit.
• Bei welligen, ungeraden Wänden muss die Rückstellkraft der Sockelleiste durch
einen höheren Klebeauftrag kompensiert werden.
• Dabei muss beachtet werden, dass die Verklebung des Profils innerhalb 30 Sekun-
den erfolgen sollte, um eine optimale Haftung zu erreichen.
• Die Profile müssen direkt nach dem Auftrag fest an die Wand gedrückt werden, da-
durch werden diese vor dem Aushärten des Klebers in Einbaulage fixiert und dürfen
nicht mehr abgezogen werden.
• Bei kalten Wandflächen (unter 16 °C) verringert sich die Verarbeitungszeit des Kle-
bers erheblich!
3.3 Pausen/Arbeitsende
Schalten Sie das Gerät am Netzschalter (4) aus, wenn Sie voraussichtlich länger als
20 bis 25 Minuten keinen Klebstoff benötigen.
Der Klebstoff kann im Gerät verbleiben und später wieder aufgeschmolzen werden.
3.4 Austausch der Hakendüse
Verbrennungsgefahr!
Tragen Sie bei den nachfolgend beschriebenen Arbeitsschritten in jedem Fall
Wärmeschutzhandschuhe!
Führen Sie zum Austausch einer defekten Hakendüse folgende Schritte durch:
1. Heizen Sie das Gerät auf.
2. Trennen Sie das Gerät vom Netz, indem Sie den Netzstecker ziehen.
3.
Schrauben Sie die defekte Hakendüse (1) über einer geeigneten Unterlage ab.
Betätigen Sie dabei keinesfalls den Abzug, um ein unkontrolliertes Austreten von
Klebstoff zu vermeiden.
4. Schrauben Sie die neue Hakendüse handfest auf, richten diese aus und schrauben
mit der Kontermutter fest.
Das Gerät kann anschließend sofort wieder in Betrieb genommen werden.
Betrieb D
7
Hinweis
Die Hakendüse ist für das rückseitige Verkleben der Sockelleisten ausgelegt.
Vor Stößen und Verbiegung schützen!
4 Wartung
Das Gerät ist wartungsfrei. Die Hakendüse ist ein Verschleißteil und sollte bei Abnut-
zungserscheinungen getauscht werden.
5 Reparatur
Reparaturen dürfen ausschließlich durch Elektro-Fachkräfte durchgeführt werden.
Nutzen Sie zu Ihrer Sicherheit unseren zeit- und kostengünstigen Reparatur-Service.
6 Gewährleistung
Das Gerät wurde nach dem neuesten Stand der Technik entwickelt und hergestellt. Wir
bieten dem Erstkäufer auf Funktion, Material und Verarbeitung eine Gewährleistung
entsprechend den gesetzlichen Vorschriften. Ausgenommen ist normaler Verschleiß.
Die Gewährleistung erlischt, wenn unsachgemäße Behandlung, Anwendung von
Gewalt, Verwendung eines fremden Klebstoffes, Reparatur durch Dritte oder Einbau
anderer als Original-Ersatzteile feststellbar ist.
Die Gewährleistung erstreckt sich auf Instandsetzung oder Umtausch nach unserer
Wahl. Eine über unseren Lieferumfang hinausgehende Gewährleistung ist ausge-
schlossen, da wir auf den sach- und fachgerechten Einsatz des Gerätes keinen Einfluß
haben.
Bitte beachten Sie unsere Geschäftsbedingungen!
7 Entsorgung
Führen Sie Gerät, Verpackung und Zubehör einer umweltgerechten Wiederverwertung
zu. Beachten Sie dabei auch die in Ihrem Land gültigen Gesetze und Richtlinien.
Altgeräte werden kostenfrei über den Großhändler zutrückgenommen
Kontakt:
Döllken Profiles GmbH, Customer Support
+49 3643 4170 711, info@doellken-profiles.com
WEEE-Reg.-Nr. DE 41380720
Technische Änderungen und Irrtümer sowie Änderungen im Erscheinungsbild vorbe-
halten.
Stand: März 2023
Mit dem Erscheinen dieser Ausgabe verlieren alle vorherigen ihre Gültigkeit.
www.doellken-profiles.com
Wartung
D

8
1 General
Before first operating the HKP220 adhesive pistol, please read this operating manual
carefully and thoroughly through. Please pay special attention to the safety informa-
tion in chapter 2.
This operating manual must be available to every user.
All position numbers stated in this operating manual (e.g. “hook nozzle (1)”) apply to
the figure on page 2.
1.1 Scope of application
The HKP220 is intended for use with Döllken hot-melt adhesive in candle form (cor-
rect intended use).
Any other usage is unauthorized.
1.2 Specifications
Description HKP220
Included in delivery adhesive pistol, instruction handbook
Dimensions [mm] 330 x 250 x 80
Weight [g] 1,010
Operational voltage [V AC] 220 to 240, 50 Hz
Power consumption [W] 600
Insulating Class 1
Safety class IP20
Working temperature [°C] 210 to 220
Controller bimetallic temperature regulator
Adhesive Döllken hot-melt adhesive, Ø 18 mm
Adhesive performance [kg/h*] 1.4 to 2.0
1.3 Device elements
1 Hook nozzle
2 Stand
3 Trigger
4 On/Off switch
5 Power cable
6 Insulating sleeve
7 Indicator LED
General GB

9
2 Safety information
2.1 Possible hazards
Burn hazard!
The hook nozzle (1) and melted hot-melt adhesive can reach temperatures of
over 230 °C. Always wear heat protecting gloves if contact is unavoidable.
Xi Irritating smells!
Hot-melt adhesives give off vapors which can have irritating smells. Ensure that
there is sufficient ventilation.
If the device is improperly used, isolated instances of mucous membrane
irritation could occur. You should contact a doctor immediately in such cases!
2.2 Information for safe operation
In order to protect against malfunctions and maloperation, always follow the following
information exactly:
• Remove combustible or heat-sensitive objects from the vicinity of the hook nozzle
(1).
• Only use the device when it is up to temperature.
• The warmed-up device must be placed on its stand (2). It must never be placed on
its side.
• Never operate the trigger (3) with excessive force.
• Protect the device from moisture and wetness (electric shock protection).
• Observe the instructions for Döllken hot-melt adhesive (processing error avoid-
ance).
• If working above head height, ensure that drops do not form to protect against
burns to personnel or working equipment.
• Always remove the power cable before carrying out any work to the device (mainte-
nance, cleaning).
• The device may only be operated on sockets with a protective earth.
• Any extension cables must also be provided with a protective earth. Check that the
extension cable is in good condition before use.
• Always remove the mains plug after use. Allow the device to cool down completely
before storing it.
• If you observe damage to the device or the power cable, remove the mains plug im-
mediately. Ensure that the device is checked immediately by an electrician. It may
only be put into operation once again after repairs have been correctly carried out
(see chapter 5).
Safety information
GB

10
3 Operation
Please always pay attention to the safety information in chapter 2.
Attention!
Observe the following instructions to prevent the risk of injuries and damage to
the device:
1. Never lay down the device on its side in its hot operative state. This could cau-
se the unchecked leakage of adhesive. Risk of burns/damage to the device!
2. Never remove the adhesive residues from the melting chamber by force (e.g.
with a scraper or screwdriver). This could damage the interior lining of the
melting chamber.
3. „Frozen“ hot melt adhesive candles must never be removed by force (e.g.
using pliers).
4. Hot melt adhesive candles must never be drawn out of the gun, as this may
block the mechanics.
For transport in the case, the protruding hot melt adhesive candles at the
device can be cut off and re-inserted when required for further use.
3.1 Initial operation
1. Insert the mains plug into a power socket with protective earth.
2. Switch the device on using the on/off switch (4).
The red operating lamp on the on/off switch (4) illuminates. The device starts to
warm up immediately.
3. The indicator LED is off (7) when the pistol is switched on,
hence the pistol is not ready to operate.
The gun is not fully heated and ready for operation until the LED is illuminated.
4. If the adhesive candle has already been inserted, liquid adhesive can come out of
the nozzle. You should place the device on a suitable surface to protect against
this. Allow the device to heat up for 10 minutes.
5. Push the hot-melt adhesive candle to the opening in the rear of the device as far
as the black insulation socket (6).
Operation GB

11
3.2 Operating information
Please observe the Doellken assembly instructions for hot-melt adhesives in order to
always achieve perfect bonded joints.
• The surfaces to be bonded should be at room temperature and free from dust,
grease and moisture. Residues of waxes, release oils, plasticisers or impregnations
may cause the bond to loosen immediately or later.
• Apply the adhesive continuously to the back of the profile in the form of a line
• The amount of adhesive applied depends on the wall condition.
• In the case of wavy, uneven walls, the restoring force of the skirting board must be
compensated for by applying more adhesive.
• It must be noted that the profile should be glued within 30 seconds to achieve
optimum adhesion.
• The profiles must be pressed firmly against the wall directly after application, this
fixes them in the installation position before the adhesive hardens and they must
not be pulled off again.
• If the wall surface is cold (below 16 °C), the working time of the adhesive is consid-
erably reduced!
3.3 Breaks/end of work
Turn the device off at the power switch (5) if you do not require any adhesive for longer
than 20 or 25 minutes.
The adhesive can remain in the device and be remelted later on.
3.4 Changing the hook nozzle
Burn hazard!
When carrying out the working steps described below, you must wear heat-
protective gloves!
To replace a defective hook nozzle, please carry out the following steps.
1. Heat the device up.
2. Separate the device from the mains by removing the mains plug.
3. Unscrew the defective hook nozzle (1) above a suitable surface..
It is imperative that you do not pull the trigger, to prevent uncontrolled ejection of
adhesive.
4. Screw on the new hook nozzle hand-tight, align it and tighten it with the lock nut.
The device can be put into operation again immediately.
Note
The hook nozzle has been designed for glueing the rear side of skirting boards.
Protect from impacts and bending!
Operation
GB

12
4 Maintenance
The device is maintenance-free. The nozzle hook is a wear part and should be re-
placed if any signs of wear become noticeable.
5 Repair
Repairs may only be carried out by trained electricians.
For your own safety, we recommend that you use our rapid and inexpensive repair
service.
6 Warranty
The device has been developed and manufactured using state-of-the-art technology.
We offer all original purchasers a warranty corresponding to the statutory require-
ments for function, material and manufacture. Normal wear and tear is excluded.
The warranty ceases if incorrect handling, application of force, use of non-original
adhesive, repair by third parties or fitting of non-original spare parts is determined.
The warranty includes overhaul or replacement as decided by the manufacturer. Any
warranty beyond our scope of delivery is excluded since we have no influence on the
correct and professional use of the device.
Please observe our general terms and conditions!
7 Disposal
Provide for environmentally-friendly recycling of the device, packaging and
accessories, also observing the laws and regulations applicable in your country.
Old devices will be taken back free of charge by the wholesale dealer.
Contact:
Döllken Profiles GmbH,
Customer Support
+49 3643 4170 711, info@doellken-profiles.com
WEEE-Reg.-Nr. DE 41380720
Technical changes and errors as well as changes in appearance reserved.
Edition: March 2023
With the publication of this edition, all previous editions lose their validity.
www.doellken-profiles.com
Maintenance GB

13
1 Généralités
Veuillez lire attentivement et entièrement ce mode d’emploi avant de mettre en
service le pistolet à colle HKP220. Veillez en particulier aux consignes de sécurité
mentionnées dans le chapitre 2.
Ce mode d’emploi doit être toujours accessible pour chaque utilisateur.
Tous les numéros de position nommés dans ce mode d’emploi (par ex. „buse coudée (1)“) se
réfèrent à la figure reproduite en page 2.
1.1 Domaine d’utilisation
Le pistolet à colle HKP 220 sert à utiliser des colles thermofusibles Döllken sous forme
de cartouches (utilisation conforme à l’utilisation).
Toute autre utilisation n’est pas permise.
1.2 Caractéristiques techniques
Désignation HKP220
Fourniture Pistolet à colle, mode d’emploi
Dimensions [mm] 330 x 250 x 80
Poids [g] 1.010
Tension de service [V AC] 220…240, 50 Hz
Puissance absorbée [W] 600
Classe d’isolation classe 1
Classe de protection IP20
Température de travail [°C] 210…220
Régulation Thermorégulateur bimétallique
Colle Colle thermofusible Döllken, Ø 18 mm
Puissance de collage [kg/h*] 1,4…2,0
1.3 Eléments de l’appareil
1 Buse coudée
2 Pied
3 Gâchette
4 Interrupteur arrêt-marche
5 Cordon d‘alimentation
6 Douille d‘isolation
7 Voyant de contrôle lumineux DEL
Généralités
F

14
2 Consignes de sécurité
2.1 Dangers possibles
Danger de brûlure!
La buse coudée (1) et la colle thermofusible fondue peuvent atteindre une
température supérieure à 200 °C. Portez des gants calorifuges si un contact est
inévitable.
Xi Odeurs désagréables!
Les colles thermofusibles dégagent des vapeurs qui peuvent avoir une odeur
désagréable. C’est pourquoi vous devez assurer une aération suffisante.
En cas d’application incorrecte, des irritations ponctuelles des muqueuses
peuvent survenir. Dans ce cas, consultez immédiatement un médecin!
2.2 Consignes concernant une utilisation sûre
Veuillez toujours observer les consignes suivantes afin de vous protéger contre les
perturbations de fonctionnement et des commandes erronées:
• Retirez les objets inflammables ou sensibles à la chaleur de la zone de la buse
coudée (1).
• N’utilisez l’appareil qu’après chauffage complet.
• L’appareil chauffé doit être posé sur le pied (2). Il ne doit pas être posé sur le côté.
• N’actionnez jamais la gâchette (3) en employant la force.
• Protégez l’appareil de l’humidité (protection contre l’électrocution).
• Respectez les consignes de montage pour les colles thermofusibles Döllken (pro-
tection contre les erreurs d’utilisation).
• Faites attention à la formation de gouttes lorsque vous travaillez en hauteur afin
d’éviter des brûlures du personnel ou des objets de travail.
• Avant chaque intervention sur l’appareil (entretien, nettoyage), veuillez le débran-
cher.
• L’appareil ne doit être utilisé que sur des prises avec la terre.
• Une rallonge éventuellement utilisée doit disposer de la terre. Avant l’utilisation,
contrôlez l’intégrité de la rallonge.
• Débranchez l’appareil après chaque utilisation. Laissez refroidir l’appareil complè-
tement avant de le ranger.
• Si vous deviez remarquer un endommagement sur l’appareil, débranchez immédia-
tement celui-ci. Faites contrôler l’appareil immédiatement par un électricien. Il ne
doit être remis en service qu’après une réparation en bonne et de forme (voir chap.
5).
Consignes de sécurité F

15
3 Utilisation
Respectez toujours les consignes de sécurité mentionnées dans le chapitre 2.
Attention !
Afin d‘éviter tout risque de blessure ou d‘endommagement de l‘appareil, re-
spectez les indications suivantes :
1. Ne placez jamais sur le côté l‘appareil encore chaud. La colle pourrait
s‘échapper de manière incontrôlée. Danger de brûlures/endommagements de
l’appareil!
2. Les résidus de colle restés dans la chambre de fusion ne doivent pas être
éliminés par quelque procédé agressif que ce soit (avec un grattoir ou un
tournevis p. ex.) Le revêtement intérieur de la chambre de fusion pourrait être
endommagé.
3. Les cartouches de colle thermofusible « gelées » ne doivent jamais être déta-
chées par la force (p. ex. avec une pince).
4. Afin de ne pas bloquer le mécanisme, les cartouches de colle thermofusible
ne doivent jamais être retirées du pistolet.
Pour le transport dans une mallette, les cartouches de colle thermofusible
qui dépassent peuvent être coupées sur l’appareil, puis réinsérées lors d’une
utilisation ultérieure.
3.1 Mise en service
1. Branchez la fiche secteur sur une prise de courant de sécurité.
2. Mettez l’appareil en circuit sur l’interrupteur marche/arrêt (4).
Le voyant d’utilisation rouge de l’interrupteur marche/arrêt (4) s’allume. L’appareil
chauffe immédiatement.
3. A la mise sous tension, le voyant de contrôle lumineux DEL est éteint (7)
et le pistolet n’est pas prêt à fonctionner.
Le pistolet est entièrement chauffé et prêt à fonctionner seulement quand la DEL
est allumée.
4. De la colle liquide peut sortir de la buse lorsque la cartouche de colle est déjà en
place. C’est pourquoi vous devez poser l’appareil sur un support approprié. Laissez
l’appareil chauffer pendant env. 10 minutes (selon le type de colle).
5. Enfichez la cartouche de colle thermofusible à travers l’ouverture située à l’arrière
de l’appareil jusque dans la douille d’isolation noire (6).
Utilisation
F

16
3.2 Consignes de traitement
Veuillez respecter les instructions de montage Doellken pour les colles
thermofusibles afin de toujours obtenir des assemblages collés parfaits.
• Les surfaces à coller doivent être à température ambiante et exemptes de pous-
sière, de graisse et d’humidité. Des résidus de cires, d’huiles de décoffrage, de
plastifiants ou d’imprégnations peuvent provoquer un décollement immédiat ou
ultérieur du collage.
• Appliquer la colle en continu sur le dos du profilé, en forme de lien.
• La quantité de colle à appliquer dépend de la nature du mur.
• Dans le cas de murs ondulés et irréguliers, la force de rappel de la plinthe doit être
compensée par une application de colle plus importante.
• Il faut noter que le collage du profilé doit être effectué dans les 30 secondes afin
d’obtenir une adhérence optimale.
• Les profilés doivent être pressés fermement contre le mur directement après
l’application, ils sont ainsi fixés en position de montage avant le durcissement de la
colle et ne doivent plus être retirés.
• En cas de surfaces murales froides (moins de 16 °C), le temps d’utilisation de la
colle est considérablement réduit !
3.3 Pauses/fin de travail
Mettez l’appareil hors circuit sur l’interrupteur secteur (4) si vous n’avez probablement
pas besoin de colle pendant plus de 20…25 minutes.
La colle peut rester dans l’appareil et être de nouveau fondue plus tard.
3.4 Changement de buse coudée
Danger de brûlure!
Pour les étapes de travaux suivants, portez en tout cas des gants
calorifuges!
Effectuez les étapes suivantes pour le changement d’une buse coudée défectueuse:
1. Chauffez l’appareil.
2. Coupez l’appareil du secteur en le débranchant.
3. Dévissez la buse coudée(1) défectueuse au-dessus d’un support
approprié.
N’actionnez en aucun cas la gâchette afin d’éviter une sortie non contrôlée de colle.
4. Vissez la nouvelle buse à crochet à la main, alignez-la et vissez-la avec le
contre-écrou. L’appareil peut être ensuite remis en service.
Remarque
La buse crochet est dimensionnée pour le collage verso des plinthes.
La protéger des chocs et de la déformation !
Utilisation F

17
4 Maintenance
L’appareil n’a pas besoin de maintenance. La buse coudée est une pièce d’usure et
doit être remplacée lorsqu’elle présente des signes d’usure..
5 Réparation
Les réparations ne doivent être effectuées que par des électriciens.
Pour votre sécurité, profitez de notre service de réparation qui vous épargnera du
temps et de l’argent.
6 Garantie
L’appareil a été développé et fabriqué selon le dernier état de la technique. Nous
offrons au premier acheteur une garantie sur le fonctionnement, le matériau et le
façonnement conformément aux prescriptions légales. L’usure normale est exclue.
La garantie s’éteint si l’on peut constater un traitement incorrect, l’emploi de la force,
l’utilisation d’une colle étrangère, une réparation par un tiers ou le montage de pièces
de rechange autres que des pièces originales.
La garantie s’étend à l’entretien ou au remplacement selon notre choix. Toute garantie
allant au-delà de notre fourniture est exclue étant donné que nous n’avons pas
d’influence sur l’utilisation correcte et conforme de l’appareil.
Veuillez observer nos conditions générales de vente!
7 Elimination
Confiez l’appareil, l’emballage et les accessoires pour qu’ils soient recyclés de façon
écologique. Respectez également les lois et directives valables dans votre pays.
Les appareils usagés sont repris gratuitement par l’intermédiaire du grossiste.
Contact:
Döllken Profiles GmbH, Customer Support
+49 3643 4170 711, info@doellken-profiles.com
WEEE-Reg.-Nr. DE 41380720
Respectez également les lois et directives valables dans votre pays.
Sous réserve de modifications techniques, d’erreurs et de changements d’apparence.
Version: Mars 2023
Avec la parution de cette édition, toutes les précédentes perdent leur validité.
www.doellken-profiles.
Maintenance
F

18
1 Generalità
Si raccomanda agli utenti di leggere attentamente e per intero le presenti istruzioni
per l‘uso prima della prima messa in funzione della pistola per colla a caldo HKP220.
Osservare in modo particolare le norme di sicurezza nel capitolo 2.
Le presenti istruzioni per l‘uso devono essere sempre a portata di mano di ogni utiliz-
zatore.
Tutti i numeri di posizione (ad es. „Ugello a gancio (1)“) menzionati nelle presenti istru-
zioni per l‘uso si riferiscono alla figura a pagina 2.
1.1 Campo di impiego
La pistola per colla a caldo HKP 220 serve per lavorazione di adesivi a caldo Döllken a
forma di cartuccia (impiego conforme alle disposizioni).
Qualsiasi altro utilizzo non è consentito.
1.2 Dati tecnici
Denominazione HKP220
Fornitura Pistola per colla, istruzioni per l‘uso
Dimensioni [mm] 330 x 250 x 80
Peso [g] 1.010
Tensione di esercizio [V CA] 220…240, 50 Hz
Potenza assorbita [W] 600
Classe di isolamento Classe 1
Classe di protezione IP20
Temperatura di esercizio [°C] 210…220
Regolazione Termostato bimetallo
Adesivo Adesivi a caldo Döllken, Ø 18 mm
Capacità adesiva [kg/h*] 1,4…2,0
1.3 Elementi dell‘apparecchio
1 Ugello a gancio
2 Piede di sostegno
3 Grilletto
4 Interruttore on-off
5 Cavo di rete
6 Guaina isolante
7 LED di controllo
Generalità I

19
2 Istruzioni di sicurezza
2.1 Possibili pericoli
Pericolo di ustioni!
L‘ugello a gancio (1) e l‘adesivo fuso possono raggiungere temperature superiori
ai 200 °C. Indossare guanti termoisolanti quando un contatto è inevitabile.
Xi Disturbi olfattivi!
Gli adesivi a caldo emanano vapori che possono causare disturbi olfattivi. È
pertanto necessario assicurare una sufficiente aerazione.
In caso di lavorazione non appropriata è possibile che in alcuni casi si verifichino
irritazioni delle mucose. In tal caso è necessario consultare immediatamente un
medico!
2.2 Indicazioni per un funzionamento sicuro
Per evitare anomalie di funzionamento e comandi errati, attenersi sempre alle se-
guenti istruzioni:
• Allontanare gli oggetti infiammabili o termosensibili dalla zona dell‘ugello a gancio (1).
• Usare l’apparecchio solo quando è completamente caldo.
• L‘apparecchio riscaldato deve essere poggiato sul piede di sostegno (2). Non deve
essere posato di lato.
• Il grilletto (3) non deve mai essere azionato con forza.
• Proteggere l‘apparecchio dall‘umidità e dal bagnato (protezione da scosse elettri-
che).
• Osservare le istruzioni di montaggio per adesivi a caldo Döllken (protezione da errori
di lavorazione).
• Durante i lavori al di sopra della testa, fare attenzione alla possibile formazione di
gocce per evitare ustioni al personale o bruciature agli oggetti di lavoro.
• Prima di ogni intervento sull‘apparecchio (manutenzione, pulizia), staccare la spina
elettrica.
• L‘apparecchio deve essere collegato solo a prese dotate di conduttore di terra.
• Se si utilizza un cavo di prolunga, questo deve essere dotato di un conduttore di
terra. Prima dell‘utilizzo, controllare l‘integrità del cavo di prolunga.
• Staccare la spina elettrica dopo ogni utilizzo. Lasciare raffreddare l‘apparecchio
prima del magazzinaggio.
• Se si riscontra un danno sull‘apparecchio e sul cavo di rete, staccare immedia-
tamente la spina elettrica. Subito far controllare l‘apparecchio da un elettricista
specializzato. Può essere rimesso in funzione solo dopo essere stato riparato in
modo regolare (vedi cap. 5).
Istruzioni di sicurezza
I

20
3 Esercizio
Osservare sempre le istruzioni di sicurezza riportati nel capitolo 2.
Attenzione!
Rispettare le seguenti indicazioni al fine di evitare il rischio di lesioni e di danni
all‘apparecchio:
1. Mai posare l‘apparecchio caldo di lato poiché ciò potrebbe provocare la fuori-
uscita incontrollata di adesivo. Pericolo di ustioni/danni sall’apparecchio!
2. I residui di adesivo nella camera di fusione non devono mai essere rimossi
agendo con forza (ad es. con un raschietto o con un cacciavite) poiché ciò
potrebbe danneggiare il rivestimento interno della camera di fusione.
3. Non è consentito distaccare con forza in nessun caso i bastoncini di colla a
caldo solidificati, come ad esempio con una pinza.
4. Non è consentito in nessun caso estrarre i bastoncini di colla a caldo dalla
pistola eventualmente provocando il blocco del sistema meccanico.
È possibile tagliare i bastoncini di colla a caldo che sporgono dall‘apparecchio
per le operazioni di trasporto nella valigia e inserirle nuovamente per altre
applicazioni.
3.1 Messa in servizio
1. Inserire la spina elettrica in una presa con contatto di terra.
2. Accendere l‘apparecchio tramite l‘interruttore on-off (4). La spia di funzionamento
rossa dell‘interruttore on-off (4) si accende.
L‘apparecchio si riscalda immediatamente.
3. All’accensione il LED di controllo è spento (7),
pertanto la pistola non è pronta per l’uso.
La pistola risulta completamente riscaldata e pronta per l’uso solo quando si
accende il LED.
4. In caso di cartuccia di colla già inserita, è possibile che la colla fuoriesca dall‘ugello.
Pertanto, collocare l‘apparecchio su un supporto idoneo. Far riscaldare l‘apparec-
chio per circa 10 minuti (secondo il tipo di adesivo).
5. Introdurre la cartuccia di adesivo a caldo attraverso l‘apertura sul lato posteriore
dell‘apparecchio fino a farla entrare nella guaina isolante nera (6).
Esercizio I
Other manuals for Dollken Profiles HKP 220
1
Table of contents
Languages:
Other SURTECO Glue Gun manuals