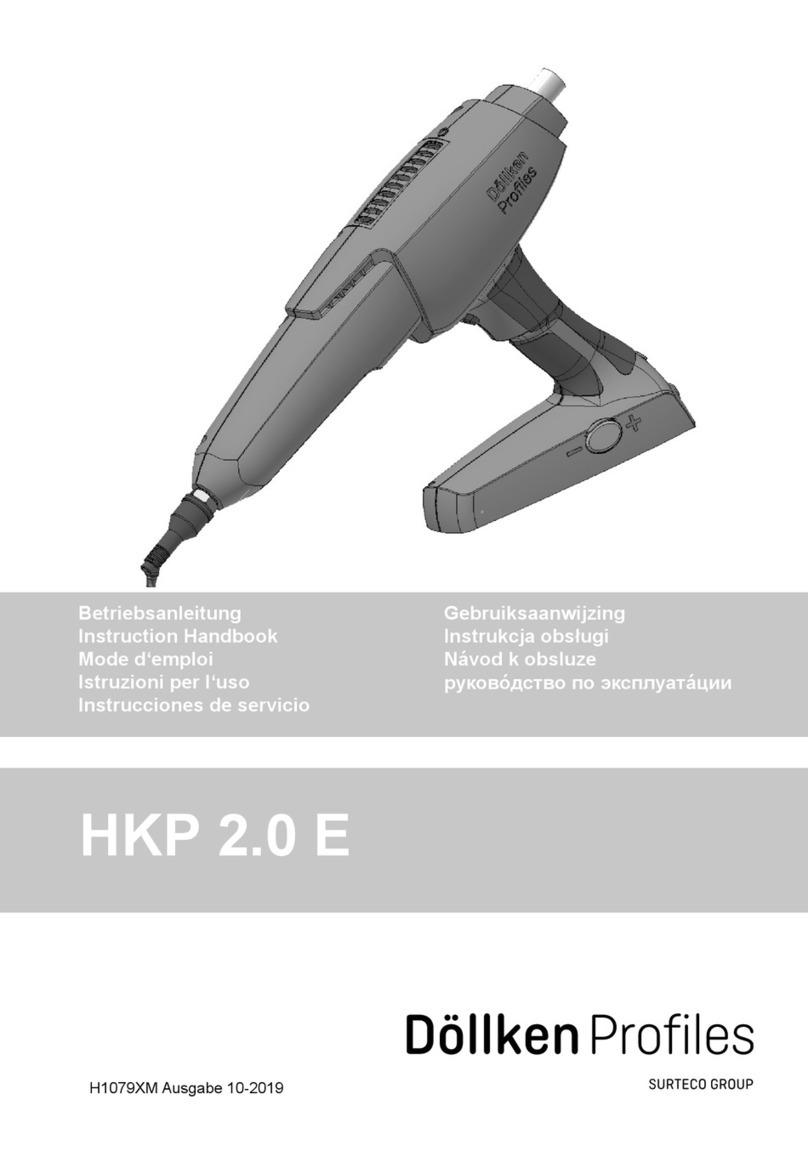
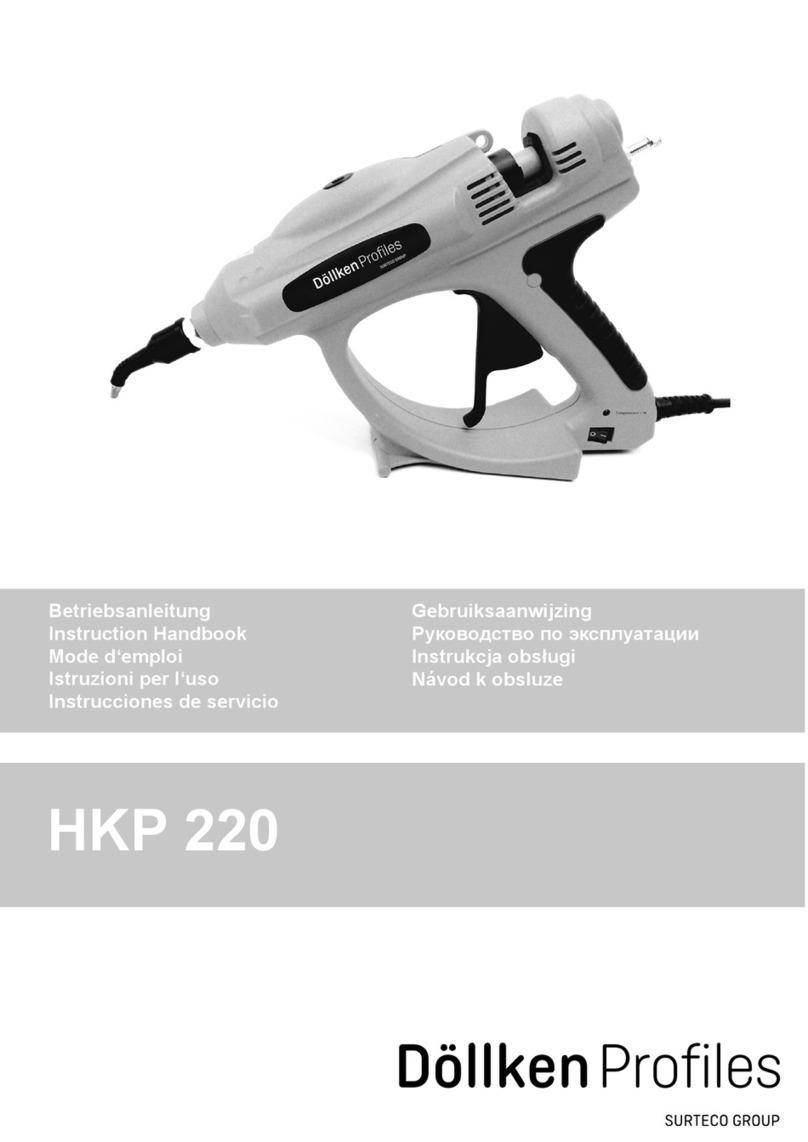
Dollken Profiles HKP 2.0 E manual

H1079XM Ausgabe 01-2023
Betriebsanleitung
Instruction Handbook
Mode d‘emploi
Istruzioni per l‘uso
Instrucciones de servicio
Gebruiksaanwijzing
Instrukcja obsługi
Návod k obsluze
руково
дство по эксплуата
ции
HKP 2.0 E
H1079XM_230117.indd 1 24.01.23 10:22

2
HKP 2.0 E
Deutsch .......................................................................................................................3
English.........................................................................................................................9
Français.....................................................................................................................15
Italiano.......................................................................................................................21
Español......................................................................................................................27
Русский язык ...........................................................................................................33
Nederlands................................................................................................................41
Polski.........................................................................................................................47
Česky.........................................................................................................................53
2
1
3
6
8
74
5
910
D
H1079XM_230117.indd 2 24.01.23 10:22

Sicherheitshinweise
3
1 Sicherheitshinweise
1.1 Mögliche Gefährdungen
Verbrennungsgefahr!
Hakendüse (1) und geschmolzener Schmelzklebstoff können über
200 °C heiss sein. Tragen Sie Wärmeschutzhandschuhe bei der Benut-
zung der Klebepistole.
Xi Geruchsbelästigung!
Schmelzklebstoffe geben Dämpfe ab, die geruchsbelästigend wirken
können. Sorgen Sie deshalb für ausreichende Lüftung.
Bei unsachgemässer Verarbeitung können vereinzelt Reizungen der
Schleimhäute auftreten. Suchen Sie in diesem Fall sofort einen Arzt auf!
1.2 Hinweise zum sicheren Betrieb
Halten Sie zum Schutz vor Funktionsstörungen und Fehlbedienungen stets
die folgenden Hinweise genau ein:
• Das Gerät nicht unbeaufsichtigt betreiben.
• Stecken Sie keinen Finger in die hintere Öffnung des Gerätes.
• EntfernenSiebrennbareoderwärmeempndlicheGegenständeausdem
Bereich der Hakendüse (1).
• Das aufgeheizte Gerät muß auf dem Standfuß (2) abgestellt werden. Es
darf nicht auf die Seite gelegt werden.
• Verwenden Sie das Gerät nur nach vollständigem Aufzeizen.
• Schützen Sie das Gerät vor Feuchtigkeit und Nässe (Schutz vor elektri-
schem Schlag).
Benutzen Sie das Elektrowerkzeug nicht im feuchten Zustand und nicht in
feuchter Umgebung.
• Beachten Sie die Montagehinweise für Döllken-Heißschmelzkleber (Schutz
vor Verarbeitungsfehlern).
• Achten Sie bei der Arbeit über Kopf auf mögliche Tropfenbildung, um Ver-
brennungen von Personal oder Arbeitsgegenständen zu vermeiden.
• Das Öffnen des Gerätes während des Betriebes ist nicht zulässig - Verlet-
zungsgefahr!
• Ziehen Sie vor jedem Eingriff am Gerät (Instandhaltung, Reinigung) den
Netzstecker.
• Das Gerät darf nur an Steckdosen mit Schutzleiter betrieben werden.
• Ein evtl. verwendetes Verlängerungskabel muß über einen Schutzleiter
verfügen. Prüfen Sie vor der Verwendung die Unversehrtheit des Verlänge-
rungskabels.
• Tragen Sie das Werkzeug nicht am Kabel und ziehen Sie nicht den Ste-
cker am Kabel aus der Steckdose.
D
H1079XM_230117.indd 3 24.01.23 10:22

Allgemeines
4
Schützen Sie das Kabel vor Hitze, Öl und scharfen Kanten. Knicken Sie
das Kabel beim Einpacken nicht stark ab.
• Ziehen Sie nach jeder Benutzung den Netzstecker. Lassen Sie das Gerät
vor der Lagerung vollständig abkühlen.
• Sollte Ihnen eine Beschädigung am Gerät oder am Netzkabel auffallen,
ziehen Sie sofort den Netzstecker. Lassen Sie das Gerät umgehend von
einer Elektro-Fachkraft überprüfen. Es darf erst nach einer ordnungsge-
mäßen Reparatur (siehe Kap. 5) wieder in Betrieb genommen werden.
• Bewahren Sie die Sicherheitshinweise gut auf.
2 Allgemeines
Bitte lesen Sie diese Betriebsanleitung sorgfältig und vollständig vor der
ersten Inbetriebnahme der Klebepistole HKP 2.0 E. Beachten Sie besonders
die Sicherheitshinweise in Kapitel 1.
Diese Betriebsanleitung muß für jeden Anwender stets griffbereit sein.
Alle in dieser Betriebsanleitung genannten Positionsnummern (z.B. „Hakendü-
se (1)“) beziehen sich auf die Abbildung auf Seite 2.
2.1 Einsatzbereich
Die Klebepistole HKP 2.0 E dient der Verarbeitung von Döllken-Heiß-
schmelzkleber in Kerzenform (bestimmungsgemäße Verwendung).
Jede andere Verwendung ist unzulässig.
2.2 Technische Daten
Bezeichnung HKP 2.0 E
Lieferumfang Klebepistole, Betriebsanleitung
Abmessungen [mm] 390 x 230 x 90
Gewicht [g] 1.100
Betriebsspannung [V AC] 220…240, 50 Hz
Leistungsaufnahme [W] 600
Isolationsklasse Klasse 1
Schutzklasse IP20
Arbeitstemperatur [°C] 200 fest eingestellt
Regelung elektronisch
Klebstoff Döllken-Heißschmelzkleber, Ø 18 mm
Klebeleistung [kg/h]
3,5 mit Schaltstufe „+“
2,1 mit Schaltstufe „-“
fest eingestellt
D
H1079XM_230117.indd 4 24.01.23 10:22

Betrieb
5
2.3 Geräteelemente
1 Hakendüse
2 Standfuß
3 Schalter Vorschub
4 Einstellung Förderleistung
5 Display Tasten gesperrt - Geräteschutz
6 Ein-/Ausschalter
7 Netzkabel
8 Sensor Einschub Klebesticks
9 LED Spot - Arbeitsleuchte
10 integrierte Signalhupe - Sticknachschub
3 Betrieb
Beachten Sie stets die Sicherheitshinweise in Kapitel 1.
3.1 Sicherheit im Umgang
Achtung!
Beachten Sie die folgenden Hinweise, um Verletzungsgefahren und
Schäden am Gerät zu vermeiden:
1.Legen Sie das betriebswarme Gerät niemals auf der Seite liegend ab.
Dabei kann unkontrolliert Klebstoff austreten. Verbrennungsgefahr/
Beschädigungen am Gerät!
2.Klebstoffreste in der Schmelzkammer dürfen niemals gewaltsam (z.B.
mir einem Schaber oder Schraubendreher) entfernt werden. Dabei
kann die Innenauskleidung der Schmelzkammer beschädigt werden.
3.„Eingefrorene“ Klebesticks dürfen niemals gewaltsam (z.B. mit einer
Zange) gelöst werden.
4.Verwenden Sie das Gerät nur nach vollständigem Aufheizen, ange-
zeigt durch das grüne Display.
5.Beachten Sie die Montagehinweise für Döllken-Heißschmelzkleber
(Schutz vor Verarbeitungsfehlern).
6.Ziehen Sie in keinem Fall den Klebestick aus dem Gerät heraus.
Dadurch wird der Transportmechanismus beschädigt!
D
H1079XM_230117.indd 5 24.01.23 10:22

Betrieb
6
3.2 Inbetriebnahme
1.Den Netzstecker in eine Schutzkontakt-Steckdose stecken.
2.Das Gerät am Ein-/Aus-Schalter (6) einschalten - am Display (5) rechts.
Das Display (5) leuchtet blau auf.
Das Gerät heizt sofort auf.
Zum Schutz des Gerätes sind die Einstelltasten am Display ohne Funktion.
3.Bei der Erstinbetriebnahme den festen Sitz der Hakendüse am aufge-
heizten Gerät prüfen - falls notwendig Kontermutter nachziehen.
4.Das Gerät 10 min durchheizen lassen, um eine konstante Fördertempera-
tur zu gewährleisten.
5.Wenn das Display grün leuchtet, ist die Pistole betriebsbereit. Bei der
Erstinbetriebnahme ertönt ein Signalton, bis ein Klebestick eingeschoben
wurde.
6.BeibereitseingesetztemKlebestickkannüssigerKlebstoffausderDüse
tropfen. Das Gerät daher auf einer geeigneten Unterlage abstellen.
7.Klebestick einschieben, wenn der Sensor zum Einschub der Klebesticks
(8) reagiert und der Signalton (10) ertönt.
LED Spot - Arbeitsleuchte
Sobald die Arbeitstemperatur erreicht ist, schaltet der LED Spot ein.
Wird das Gerät am Ein/Aus-Schalter (6) ausgeschaltet, leuchtet der LED
Spot solange bis die Arbeitstemperatur unterschritten wird.
Damit bleibt leicht zu erkennen, dass das Gerät noch heiß ist.
3.3 Einstellung Förderleistung
AufderlinkenSeiteamStandfußbendetsicheinSchalter(4)fürdieEin-
stellung der Förderleistung vom Heißschmelzkleber.
• Schalterstellung „+“ für das kontinuierliche Verkleben mit maximalem
Durchlauf Heißschmelzkleber.
• Schalterstellung „-“ für kleine Flächen, besonders präzises Verkleben mit
geringerem Durchlauf Heißschmelzkleber.
Bild 1: Einstellung Förderleistung
D
H1079XM_230117.indd 6 24.01.23 10:22

Betrieb
7
3.4 Verarbeitungshinweise
Bitte beachten Sie die Döllken-Montagehinweise für Heißschmelzkleber, um
stets einwandfreie Klebeverbindungen zu erreichen.
• Die zu verklebenden Flächen sollen auf mind. 18 °C akklimatisiert sein und
frei von Staub, Fett und Feuchtigkeit sein. Reste von Wachsen, Trennölen,
Weichmachern oder Imprägnierungen auf den Werkstücken können sofort
oder später ein Lösen der Verklebung verursachen.
• TragenSiedenKlebstoffkontinuierlichlinienförmigaufdieProlrückseite
auf.
• Die Kleberauftragsmenge ist abhängig von der Wandbeschaffenheit.
• Bei welligen, ungeraden Wänden muss die Rückstellkraft der Sockelleiste
durch einen höheren Klebeauftrag kompensiert werden.
• Dabeimussbeachtetwerden,dassdieVerklebungdesProlsinnerhalb
30 Sekunden erfolgen sollte, um eine optimale Haftung zu erreichen.
• DieProlemüssendirektnachdemAuftragfestandieWandgedrückt,in
Einbaulagexiertundnichtmehrabgezogenwerden.
• BeikaltenWandächen(unter16°C)verringertsichdieVerarbeitungszeit!
3.5 Pausen/Arbeitsende
Schalten Sie das Gerät am Netzschalter (6) aus, wenn Sie voraussichtlich
länger als 20 Minuten keinen Klebstoff benötigen.
Der Klebstoff kann im Gerät verbleiben und später wieder aufgeschmolzen
werden.
3.6 Austausch der Hakendüse
Verbrennungsgefahr!
Tragen Sie bei den nachfolgend beschriebenen Arbeitsschritten in
jedem Fall Wärmeschutzhandschuhe!
Führen Sie zum Austausch einer defekten Hakendüse folgende Schritte
durch:
1. Heizen Sie das Gerät auf.
2.Trennen Sie das Gerät vom Netz, indem Sie den Netzstecker ziehen.
3.
Schrauben Sie die defekte Hakendüse (1) über einer geeigneten Unterlage ab
.
4.Schrauben Sie die neue Hakendüse ein, ausgerichtet mit der Spitze nach
unten, und kontern Sie diese mit der Mutter.
5.Ist das Gerät aufgeheizt nochmals die Düse auf festen Sitz kontrollieren.
Hinweis
Die Hakendüse ist für das rückseitige Verkleben der Sockelleisten
ausgelegt.
Vor Stößen und Verbiegung schützen!
D
H1079XM_230117.indd 7 24.01.23 10:22
Wartung
8
4 Wartung
Das Gerät ist wartungsfrei. Die Hakendüse ist ein Verschleißteil und sollte
bei Abnutzungserscheinungen getauscht werden.
5 Reparatur
Reparaturen dürfen ausschließlich durch Elektro-Fachkräfte durchgeführt
werden.
Nutzen Sie zu Ihrer Sicherheit unseren zeit- und kostengünstigen Reparatur-
Service.
6 Gewährleistung
Das Gerät wurde nach dem neuesten Stand der Technik entwickelt und her-
gestellt. Wir bieten dem Erstkäufer auf Funktion, Material und Verarbeitung
eine Gewährleistung entsprechend den gesetzlichen Vorschriften. Ausge-
nommen ist normale Abnutzung.
Die Gewährleistung erlischt, wenn unsachgemäße Behandlung, Anwendung
von Gewalt, Verwendung eines fremden Klebstoffes, Änderungen an der
elektronischen Steuerung, Reparatur durch Dritte oder Einbau anderer als
Original-Ersatzteile feststellbar ist.
Die Gewährleistung erstreckt sich auf Instandsetzung oder Umtausch nach
unserer Wahl. Eine über unseren Lieferumfang hinausgehende Gewährleis-
tung ist ausgeschlossen, da wir auf den sach- und fachgerechten Einsatz
desGeräteskeinenEinußhaben.
Bitte beachten Sie unsere Geschäftsbedingungen!
7 Entsorgung
Führen Sie Gerät, Verpackung und Zubehör einer umweltgerechten Wieder-
verwertung zu..
Beachten Sie dabei auch die in Ihrem Land gültigen Gesetze und Richtlinien.
Altgeräte werden kostenfrei über den Großhändler zurückgenommen.
Kontakt:DöllkenProlesGmbH,CustomerSupport
+4936434170711,info@doellken-proles.com
WEEE-Reg.-Nr. DE 41380720.
Technische Änderungen und Irrtümer sowie Änderungen im Erschei-
nungsbild vorbehalten.
Stand: Januar 2023
Mit dem Erscheinen dieser Ausgabe verlieren alle vorherigen ihre Gültigkeit.
www.doellken-proles.com
D
H1079XM_230117.indd 8 24.01.23 10:22

Safety information
9
1 Safety information
1.1 Possible hazards
Burn hazard!
The hook nozzle (1) and melted hot-melt adhesive can reach
temperatures of over 200 °C. Always wear heat protecting gloves when
using the glue gun.
Xi Irritating smells!
Hot-melt adhesives give off vapors which can have irritating smells.
Ensurethatthereissufcientventilation.
If the device is improperly used, isolated instances of mucous
membrane irritation could occur. You should contact a doctor
immediately in such cases!
1.2 Information for safe operation
In order to protect against malfunctions and maloperation, always follow the
following information exactly:
• Do not operate the device unsupervised.
• Donotinsertyourngerintotheopeningatthebackofthedevice.
• Remove combustible or heat-sensitive objects from the vicinity of the hook
nozzle (1).
• The warmed-up device must be placed on its stand (2). It must never be
placed on its side.
• Use only after the device has completely heated up.
• Protect the device from moisture and wetness (electric shock protection).
Do not use the power tool when it is damp or in a damp environment.
• Observe the instructions for Döllken hot-melt adhesive (processing error
avoidance).
• If working above head height, ensure that drops do not form to protect
against burns to personnel or working equipment.
• Opening the device during operation is not permitted - risk of injury!
• Always remove the power cable before carrying out any work to the device
(maintenance, cleaning).
• The device may only be operated on sockets with a protective earth.
• Any extension cables must also be provided with a protective earth. Check
that the extension cable is in good condition before use.
• Do not carry the tool by the cable and do not pull on the cable to discon-
nect the plug from the socket.
Protect the cable from heat, oil and sharp edges. Do not severely bend the
cable when packing.
GB
H1079XM_230117.indd 9 24.01.23 10:22

General
10
• Always remove the mains plug after use. Allow the device to cool down
completely before storing it.
• If you observe damage to the device or the power cable, remove the mains
plug immediately. Ensure that the device is checked immediately by an
electrician. It may only be put into operation once again after repairs have
been correctly carried out (see chapter 5).
• Keep the safety instructions in a safe place.
2 General
BeforerstoperatingtheHKP2.0Eadhesivepistol,pleasereadthisoperat-
ing manual carefully and thoroughly through. Please pay special attention to
the safety information in chapter 1.
This operating manual must be available to every user.
All position numbers stated in this operating manual (e.g. “hook nozzle (1)”)
applytothegureonpage2.
2.1 Scope of application
The HKP 2.0 E is intended for use with Döllken hot-melt adhesive in candle
form (correct intended use).
Any other usage is unauthorized.
2.2 Specications
Description HKP 2.0 E
Included in delivery adhesive pistol, instruction handbook
Dimensions [mm] 390 x 230 x 90
Weight [g] 1,100
Operational voltage [V AC] 220 to 240, 50 Hz
Power consumption [W] 600
Insulating Class Class 1
Safety class IP20
Working temperature [°C] 200 non-adjustable
Controller electronic
Adhesive Döllken hot-melt adhesive, Ø 18 mm
Adhesive performance [kg/h*] 3.5 with switching step „+“
2.1 with switching step „-“
non-adjustable
GB
H1079XM_230117.indd 10 24.01.23 10:22

Operation
11
2.3 Device elements
1 Hook nozzle
2 Stand
3 Setting feed switch
4 Delivery rate switch
5 Display buttons blocked - device protection
6 On/Off switch
7 Power cable
8 Sensor slot for glue sticks
9 LED spot light
10 Integrated signal horn - stick feed
3 Operation
Please always pay attention to the safety information in chapter 1.
3.1 Safety in handling
Attention!
Observe the following instructions to prevent the risk of injuries and
damage to the device:
1.Never lay down the device on its side in its hot operative state. This
could cause the unchecked leakage of adhesive. Risk of burns/dama-
ge to the device!
2.Never remove the adhesive residues from the melting chamber by
force (e.g. with a scraper or screwdriver). This could damage the inte-
rior lining of the melting chamber.
3.Never loosen „frozen“ hot-melt adhesive candles by force (e.g. with
tongs).
4.Use the device only after it has completely heated up, indicated by the
green display.
5.Observe the instructions for Döllken hot-melt adhesive (processing
error avoidance).
6.Never extract the adhesive candle from the device, since this can
damage the transport mechanism!
3.2 Initial operation
1. Insert the mains plug into a protective earth conductor outlet.
2. Switch on the device with the On/Off switch (6) - on the display (5) at
right.
The display (5) lights up blue.
The device heats up immediately.
To protect the device, the setting keys on the display have no function.
3. Checkthatthehooknozzleontheheateddeviceisrmlyseatedduring
rstcommissioning-tightenthecounternut,ifnecessary.
GB
H1079XM_230117.indd 11 24.01.23 10:22

Operation
12
4. Allow the device to heat thoroughly for 10 min to ensure a constant
delivery temperature.
5. Whenthedisplayisgreen,thepistolisreadytooperate.Duringrst
commissioning, an acoustic signal sounds until a glue stick has been
inserted.
6. Liquid adhesive may drip from the nozzle when the adhesive stick is
already inserted. Therefore, place the device on a suitable surface.
7. Insert the glue stick when the sensor for inserting the glue stick (8) reacts
and the acoustic signal (10) sounds.
LED spotlight - working light
As soon as the working temperature is reached, the LED spotlight switches
on.
If the device is switched off at the On/Off switch (6), the LED spotlight re-
mains lit until the temperature drops below the working temperature.
This makes it easy to see that the device is still hot.
3.3 Setting the stroke limit
The left side of the supporting foot has a switch (4) for adjusting the hot melt
adhesive delivery rate.
• Switch setting „+“ for continuous glueing with maximum throughput of hot
melt adhesive.
• Switch setting „-“ for small areas, particularly precise glueing with low
throughput of hot melt adhesive.
Fig. 1: Conveying capacity setting
GB
H1079XM_230117.indd 12 24.01.23 10:22

Operation
13
3.4 Operating information
Please observe the supplied Döllken instructions for hot-melt adhesive to
ensure perfect adhesive application.
• Surfaces to be glued should be be acclimatized to at least 18 °C and free
of dust, grease and moisture. Remainders of wax, separating oils, plasticiz-
ers or impregnation media on the workpieces can lead to loosening of the
adhesion immediately or later.
• Applytheadhesiveinacontinuouslineonthebackoftheprole.
• The amount of applied adhesive depends on the structure of the wall.
• For wavy, uneven walls, the restoring force of the skirting board must be
compensated for by applying more adhesive.
• Itisimportanttonotethattheproleshouldbebondedwithin30seconds
to achieve optimum adhesion.
• Immediatelyafterapplication,theprolesmustbepressedrmlyagainst
thewall,xedintheinstallationpositionandnotpulledoff.
• Cold wall surfaces (below 16 °C) will reduce the working time!
3.5 Breaks/end of work
Turn the device off at the power switch (6) if you do not require any adhesive
for longer than 20 minutes.
The adhesive can remain in the device and be remelted later on.
3.6 Changing the hook nozzle
Burn hazard!
When carrying out the working steps described below, you must wear
heat-protective gloves!
To replace a defective hook nozzle, please carry out the following steps.
1.Heat the device up.
2.Separate the device from the mains by removing the mains plug.
3.Unscrew the defective hook nozzle (1) above a suitable surface.
4.Screw in the new hook nozzle with the tip pointing downwards and lock it
with the nut.
5.Checkthatthehooknozzleontheheateddeviceisrmlyseated.
Note
The hook nozzle has been designed for glueing the rear side of skirting
boards.
Protect from impacts and bending!
GB
H1079XM_230117.indd 13 24.01.23 10:22

Maintenance
14
4 Maintenance
The device is maintenance-free. The hook nozzle is a wear part and should
be replaced upon signs of wear.
5 Repair
Repairs may only be carried out by trained electricians.
For your own safety, we recommend that you use our rapid and inexpensive
repair service.
6 Warranty
The device has been developed and manufactured using state-of-the-art
technology. We offer all original purchasers a warranty corresponding to the
statutory requirements for function, material and manufacture. Normal wear
and tear is excluded.
The warranty ceases if incorrect handling, application of force, use of non-
originaladhesive,repairbythirdpartiesorttingofnon-originalspareparts
is determined.
The warranty includes overhaul or replacement as decided by the manufac-
turer. Any warranty beyond our scope of delivery is excluded since we have
noinuenceonthecorrectandprofessionaluseofthedevice.
Please observe our general terms and conditions!
7 Disposal
Please dispose of the device, the packaging and accessories using envi-
ronmental friendly recycling methods. Comply with the laws and directives
applicable in your country.
Old models will be taken back free of charge via the wholesaler.
Contact:DöllkenProlesGmbH,CustomerSupport
+4936434170711,info@doellken-proles.com
WEEE Reg. No. DE 41380720.
Subject to technical changes and errors as well as changes in appea-
rance.
Status: January 2023
With the publication of this edition, all previous editions lose their validity.
www.doellken-proles.com
GB
H1079XM_230117.indd 14 24.01.23 10:22

15
1 Consignes de sécurité
1.1 Dangers possibles
Danger de brûlure!
La buse coudée (1) et la colle thermofusible fondue peuvent atteindre
une température supérieure à 200 °C. Portez des gants calorifuges
pendant l‘utilisation du pistolet à colle.
Xi Odeurs désagréables!
Les colles thermofusibles dégagent des vapeurs qui peuvent avoir une
odeur désagréable. C’est pourquoi vous devez assurer une aération
sufsante.
En cas d’application incorrecte, des irritations ponctuelles des
muqueuses peuvent survenir. Dans ce cas, consultez immédiatement
un médecin!
1.2 Consignes concernant une utilisation sûre
Veuilleztoujoursobserverlesconsignessuivantesandevousprotéger
contre les perturbations de fonctionnement et des commandes erronées:
• Ne laissez pas fonctionner l’appareil sans surveillance.
• N’introduisezpasdedoigtdansl’oriceàl’arrièredel’appareil.
• Retirezlesobjetsinammablesousensiblesàlachaleurdelazonedela
buse coudée (1).
• N’utilisezl’appareilqu’aprèschauffagecomplet.
• L’appareil chauffé doit être posé sur le pied (2). Il ne doit pas être posé sur
le côté.
• N’utilisezl’appareilqu’aprèsqu’ilaentièrementchauffé.
• Protégez l’appareil de l’humidité (protection contre l’électrocution).
• N’utilisez pas l’outil électrique à l’état humide/mouillé et pas dans un envi-
ronnement humide.
• Respectez les consignes de montage pour les colles thermofusibles Döll-
ken (protection contre les erreurs d’utilisation).
• Faites attention à la formation de gouttes lorsque vous travaillez en hau-
teurand’éviterdesbrûluresdupersonneloudesobjetsdetravail.
• Il est interdit d’ouvrir l’appareil pendant son fonctionnement – Risque de
blessures !
• Avant chaque intervention sur l’appareil (entretien, nettoyage), veuillez le
débrancher.
• L’appareil ne doit être utilisé que sur des prises avec la terre.
• Une rallonge éventuellement utilisée doit disposer de la terre. Avant l’utili-
sation, contrôlez l’intégrité de la rallonge.
• Ne transportez pas l’outil électrique par son cordon d’alimentation et ne
retirezpaslachemâledelaprisedecourantparcecordon.
Généralités
F
H1079XM_230117.indd 15 24.01.23 10:22

16
Protégez le cordon d’alimentation de la chaleur, de l’huile et des arêtes
vives. Au moment de déballer l’appareil, ne pliez pas fortement le cordon
d’alimentation.
• Débranchezl’appareilaprèschaqueutilisation.Laissezrefroidirl’appareil
complètementavantdeleranger.
• Si vous deviez remarquer un endommagement sur l’appareil, débranchez
immédiatement celui-ci. Faites contrôler l’appareil immédiatement par
unélectricien.Ilnedoitêtreremisenservicequ’aprèsuneréparationen
bonne et de forme (voir chap. 5).
• Conservez bien les consignes de sécurité.
2 Généralités
Veuillezlireattentivementetentièrementcemoded’emploiavantdemettre
en service le pistolet à colle HKP 2.0 E. Veillez en particulier aux consignes
de sécurité mentionnées dans le chapitre 1.
Ce mode d’emploi doit être toujours accessible pour chaque utilisateur.
Tous les numéros de position nommés dans ce mode d’emploi (par ex. „buse
coudée(1)“)seréfèrentàlagurereproduiteenpage2.
2.1 Domaine d’utilisation
Le pistolet à colle HKP 2.0 E sert à utiliser des colles thermofusibles Döllken
sous forme de cartouches (utilisation conforme à l’utilisation).
Toute autre utilisation n’est pas permise.
2.2 Caractéristiques techniques
Désignation HKP 2.0 E
Fourniture Pistolet à colle, mode d’emploi
Dimensions [mm] 390 x 230 x 90
Poids [g] 1.100
Tension de service [V AC] 220…240, 50 Hz
Puissance absorbée [W] 600
Classe d’isolation classe classe 1
Classe de protection IP20
Température de travail [°C] régléexesur200
Régulation électronique
Colle Colle thermofusible Döllken, Ø 18 mm
Puissance de collage [kg/h*] 3,5 au niveau „+“
2,1 au niveau „-“
régléexe
Consignes de sécurité
F
H1079XM_230117.indd 16 24.01.23 10:22

17
2.3 Eléments de l’appareil
1 Buse coudée
2 Pied
3 Interrupteur d‘avance
4 Réglage de débit
5 Touches d‘écran inopérantes - protection de l‘appareil
6 Interrupteur marche/arrêt
7 Cordon d‘alimentation
8Capteurd‘insertiondesbâtonsdecolle
9 Spot à LED - voyant de travail
10 Avertisseur sonore intégré - avance du stick de colle
3 Utilisation
Respectez toujours les consignes de sécurité mentionnées dans le chapitre 1.
3.1 Sécurité de maniement
Attention !
And‘évitertoutrisquedeblessureoud‘endommagementdel‘appareil,
respectez les indications suivantes :
1.Ne placez jamais sur le côté l‘appareil encore chaud. La colle pourrait
s‘échapperdemanièreincontrôlée.Dangerdebrûlures/endommage-
ments de l’appareil!
2.Les résidus de colle restés dans la chambre de fusion ne doivent
pas être éliminés par quelque procédé agressif que ce soit (avec un
grattoir ou un tournevis p. ex.) Le revêtement intérieur de la chambre
de fusion pourrait être endommagé.
3.Les cartouches de colle „congelées“ ne doivent jamais être ouvertes
parlamanièreforte(avecunepincep.ex.).
4.N‘utilisezl‘appareilqu‘aprèsqu‘ilaentièrementchauffé,cequiest
signalé par l‘écran vert.
5.Respectez les consignes de montage pour les colles thermofusibles
Döllken (protection contre les erreurs d’utilisation).
6.N’actionnezjamaislagâchetteenemployantlaforce.Lemécanisme
de transport peut en être endommagé !
Utilisation
F
H1079XM_230117.indd 17 24.01.23 10:22

18
3.2 Mise en service
1.Brancherlachesecteurdansuneprisesecteuràcontactdeterre.
2.Allumer l’appareil par l’interrupteur Marche/Arrêt (6) – à droite sur l’écran
(5).
L’écran (5) s’allume en bleu.
L’appareil chauffe immédiatement.
Pour protéger l’appareil, les touches de réglage sur l’écran sont inopé-
rantes.
3.Lorsdelapremièremiseenservice,vérierquelabuseàcrochetest
fermement en assise sur l’appareil échauffé – resserrer le contre-écrou si
nécessaire.
4.Laisserchaufferl’appareil10minutesàcœurandegarantirunetempéra-
ture d’avance constante.
5.Lorsque l’écran s’allume en vert, le pistolet est prêt à fonctionner. Lors de
lapremièremiseenservice,unsignalsonoreretentittantqu’unbâtonnet
de colle n’a pas été inséré.
6.Silebâtonnetdecolleétaitdéjàenplace,delacolleliquidepeutcoulerde
la buse. Pour cette raison, déposer l’appareil sur un support approprié.
7.Introduirelebâtonnetdecollelorsquelecapteurréagitpourdemander
l’introductiondubâtonnetdecolle(8)etquelesignalsonore(10)retentit.
Spot à LED – Éclairage de travail
Dèsquelatempératuredetravailestatteinte,lespotàLEDs’allume.
Aprèsavoiréteintl’appareilparl’interrupteurMarche/Arrêt(6),lespotàLED
reste allumé tant que la température de travail n’est pas redescendue en
dessous du seuil.
Cela permet de reconnaître facilement que l’appareil est encore chaud.
3.3 Réglage de la limitation de course
Sur le côté gauche contre le pied se trouve un interrupteur (4) permettant de
régler le débit de la colle fusible.
• Interrupteur sur la position « + » pour le collage continu avec un débit de
passage de colle fusible maximal.
• Interrupteur sur la position « - » pour les petites surfaces, collage particu-
lièrementprécisavecunplusfaibledébitdepassagedecollefusible.
Fig. 1: Réglage de l’avance du bâtonnet
Utilisation
F
H1079XM_230117.indd 18 24.01.23 10:22

19
3.4 Consignes de traitement
Veuillez respecter les consignes de montage ci-jointes pour les colles ther-
mofusibles Döllken a n d’obtenir toujours des collages parfaits:
• Les surfaces à coller doivent avoir atteint une température d‘au moins
18°Cetêtreexemptesdepoussière,degraisseetd‘humidité.Desrestes
decires,huilesdedécof-frage,plastiantsouimprégnationssurlespièces
peuvent provoquer tôt ou tard un décollement du collage.
• Appliquezlacollesousformedelignescontinuessurledosduprolé.
• La quantité de colle appliquée dépend de la nature du mur.
• Avec les murs ondulés, non rectilignes, il faut compenser la force de rappel
de la plinthe en accroissant la quantité de colle appliquée.
• Ilfautcefaisantveilleràcequelecollageduproléaitlieudansles30
secondes pour parvenir à une adhérence optimale.
• Immédiatementaprèsl’enduction,ilfautpousserfermementlesprolés
contre le mur, les immobiliser en position et ne plus les détacher.
• Sur les murs froids (en dessous de 16 °C), le délai de préparation et pose
diminue !
3.5 Pauses/n de travail
Mettez l’appareil hors circuit sur l’interrupteur secteur (6) si vous n’avez pro-
bablement pas besoin de colle pendant plus de 20 minutes.
La colle peut rester dans l’appareil et être de nouveau fondue plus tard.
3.6 Changement de buse coudée
Danger de brûlure!
Pour les étapes de travaux suivants, portez en tout cas des gants
calorifuges!
Effectuez les étapes suivantes pour le changement d’une buse coudée
défectueuse:
1.Chauffez l’appareil.
2.Coupez l’appareil du secteur en le débranchant.
3.Dévissez la buse coudée(1) défectueuse au-dessus d’un support
approprié.
N’actionnezenaucuncaslagâchetteand’éviterunesortienoncontrôlée
de colle.
4.Vissez la nouvelle buse coudée en l’orientant de sorte que sa pointe
regarde vers le bas, et contrez-la avec l’écrou.
5.Vérierquelabuseàcrochetestfermementenassisesurl’appareil
échauffé
Maintenance
F
H1079XM_230117.indd 19 24.01.23 10:22

20
Remarque
La buse crochet est dimensionnée pour le collage verso des plinthes.
La protéger des chocs et de la déformation !
4 Maintenance
L’appareilestsansmaintenance.Labuseàcrochetestunepièced’usure
qu’il faudra remplacer à l‘apparition de signes d’usure.
5 Réparation
Les réparations ne doivent être effectuées que par des électriciens.
Pourvotresécurité,protezdenotreservicederéparationquivousépargne-
ra du temps et de l’argent.
6 Garantie
L’appareil a été développé et fabriqué selon le dernier état de la technique.
Nous offrons au premier acheteur une garantie sur le fonctionnement, le
matériau et le façonnement conformément aux prescriptions légales. L’usure
normale est exclue.
La garantie s’éteint si l’on peut constater un traitement incorrect, l’emploi de
laforce,l’utilisationd’unecolleétrangère,uneréparationparuntiersoule
montagedepiècesderechangeautresquedespiècesoriginales.
La garantie s’étend à l’entretien ou au remplacement selon notre choix. Toute
garantie allant au-delà de notre fourniture est exclue étant donné que nous
n’avonspasd’inuencesurl’utilisationcorrecteetconformedel’appareil.
Veuillez observer nos conditions générales de vente!
7 Elimination
Envoyez l’appareil, l’emballage et l’accessoire à un recyclage conforme à
l’environnement.
À ce titre, tenez également compte des lois et directives valables dans votre
pays. Les appareils usagés peuvent être repris gratuitement via le grossiste.
Contact:DöllkenProlesGmbH,CustomerSupport
+4936434170711,info@doellken-proles.com
N° d’enr. WEEE DE 41380720.
Sous réserve de modications techniques, d’erreurs et omissions ainsi
que de modications de l’apparence.
Version : Janvier 2023
La parution de cette édition rend caduque toutes les éditions précédentes.
www.doellken-proles.com
F
H1079XM_230117.indd 20 24.01.23 10:22
Table of contents
Languages:
Other Dollken Glue Gun manuals