Symple Height Adjustable Base
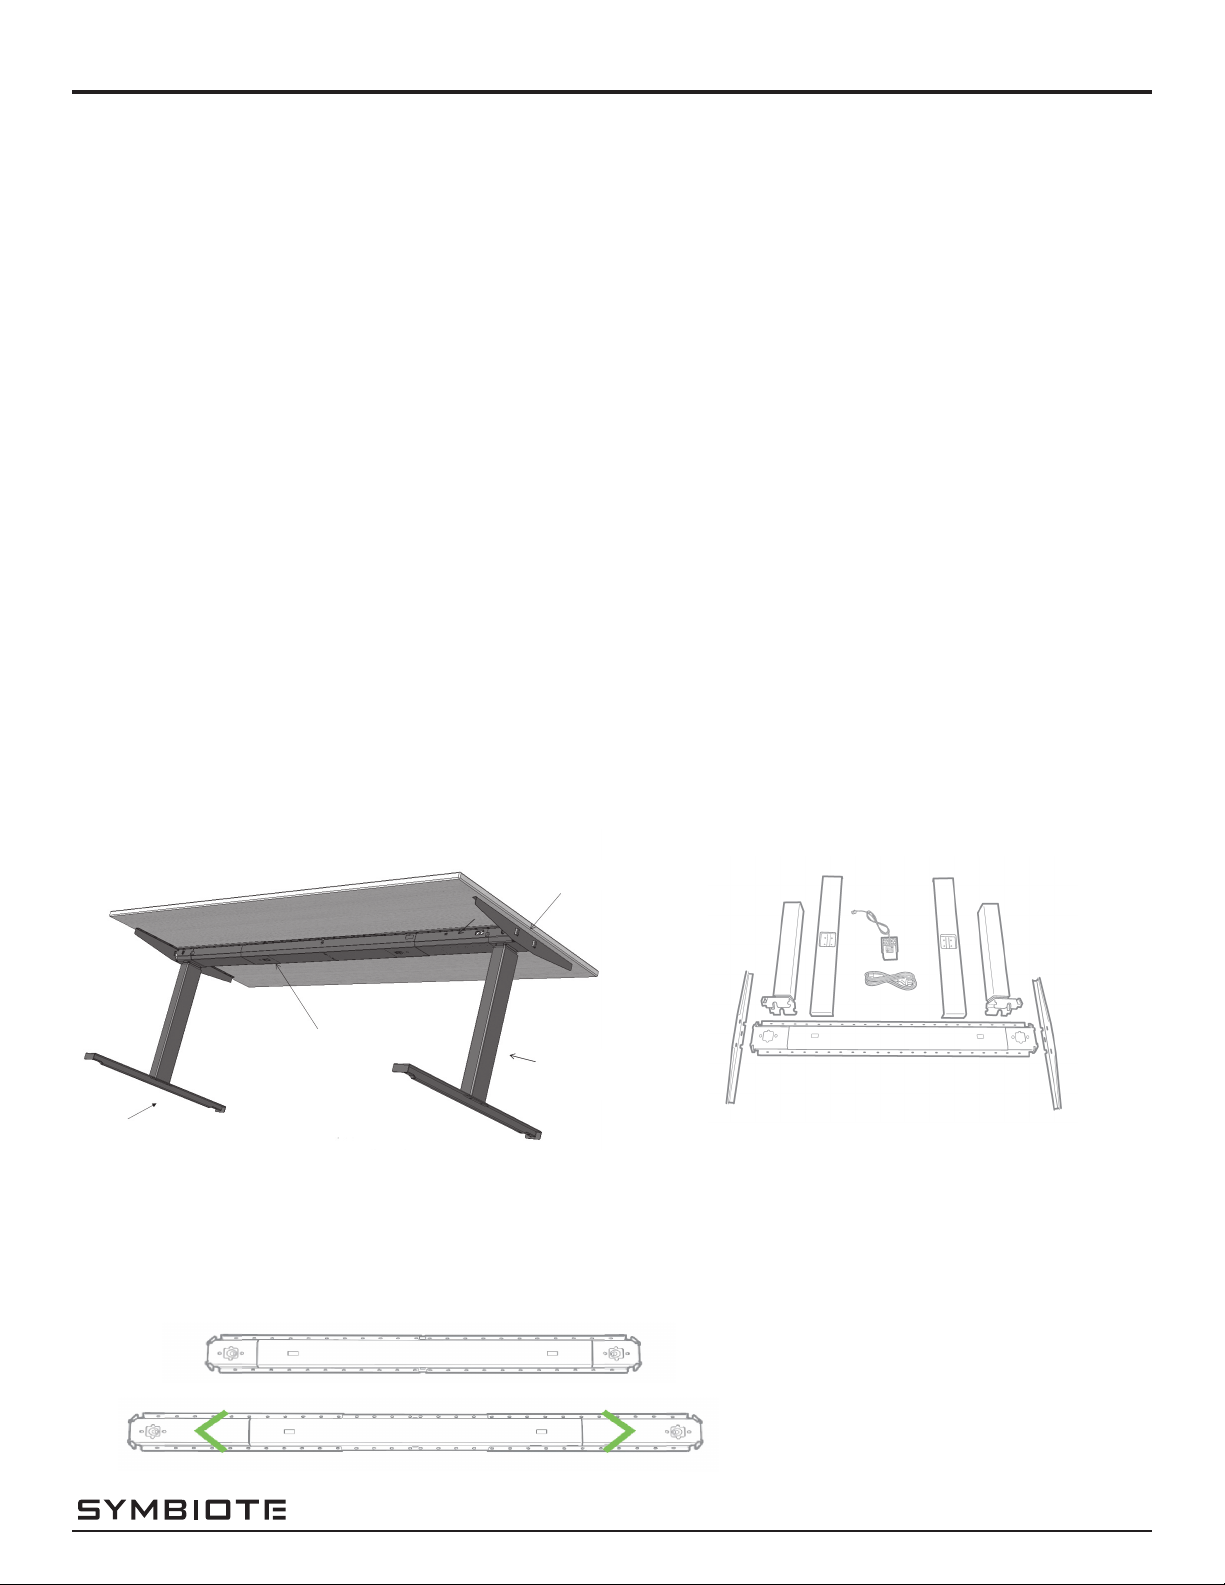
1. Turn tabletop upside down. Extend stretcher to desired length, 45" to 68", adjustable in 2" steps. The
stretchermustnotbepulledcompletelyapartinordernottopullthedriveshaapart.Minimum
adjustment in the connection end is 4" (to keep power and RJ45 connector ports accessible); otherwise
adjustable in 2" steps.
Notes:
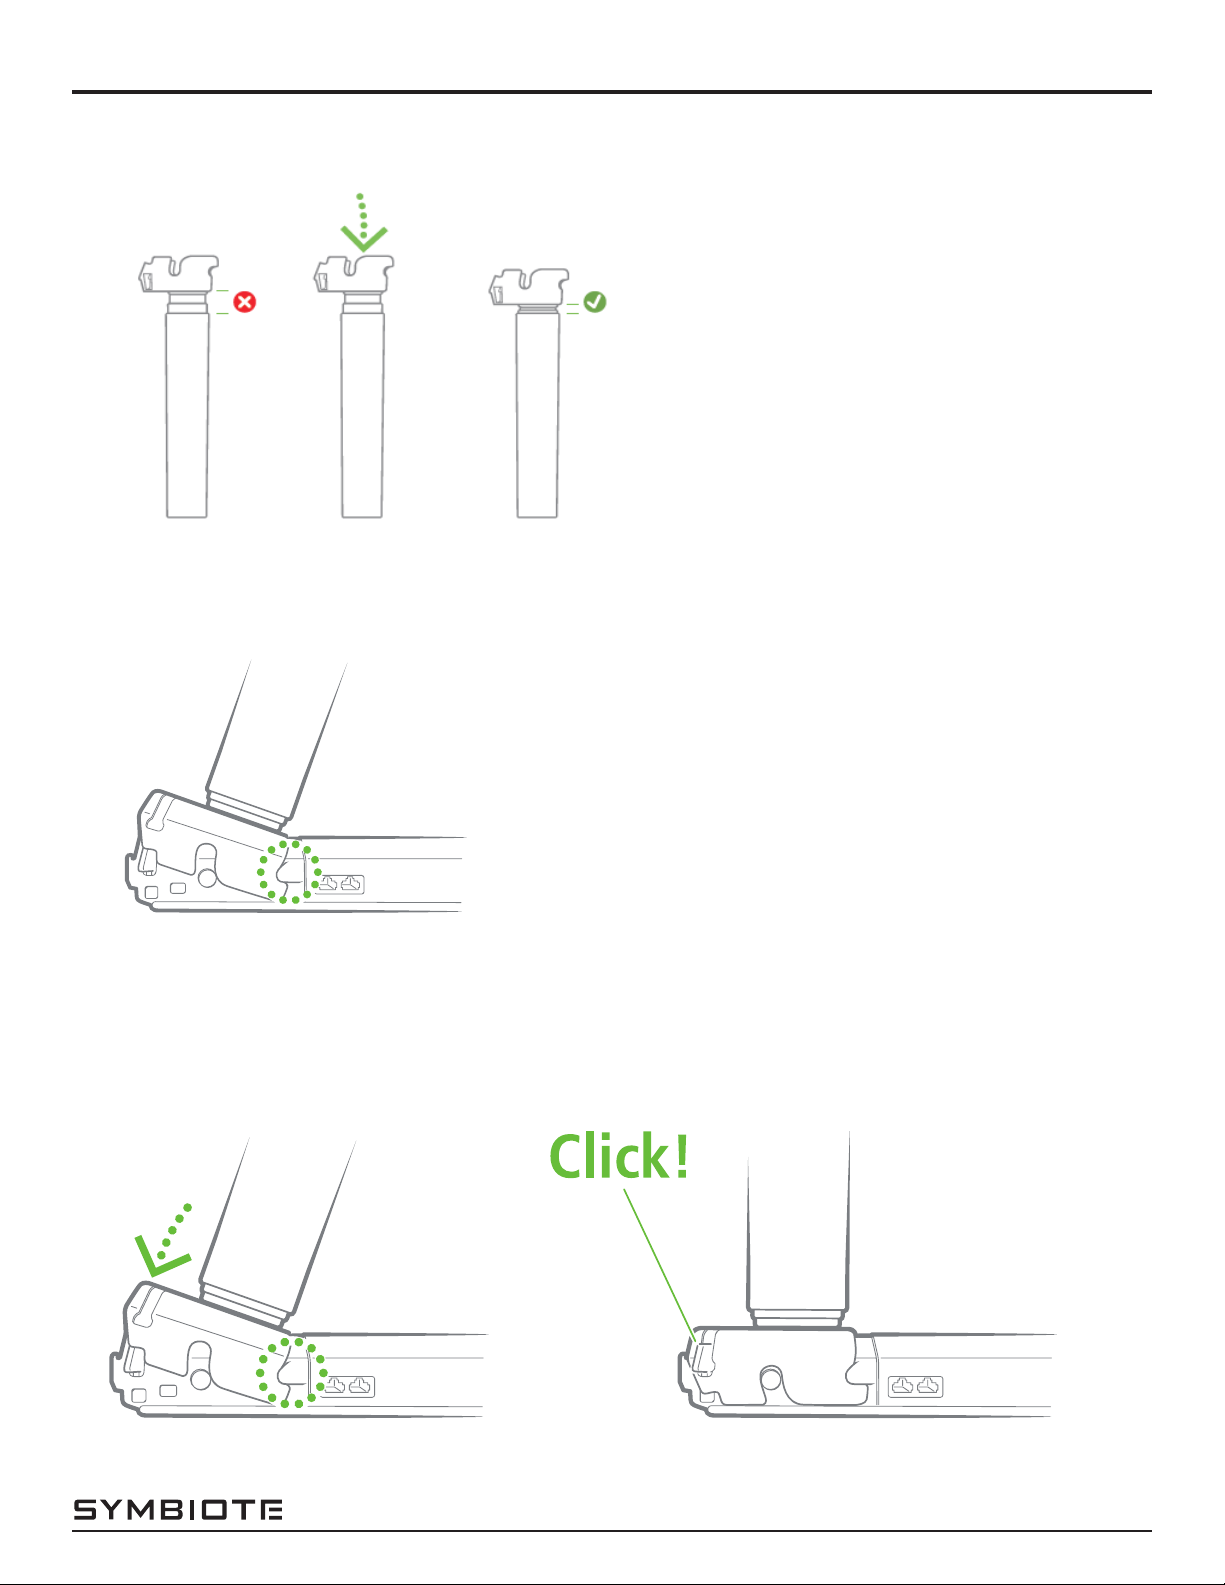
• This product is shipped in separate boxes. Check packaging and items for visible damage and ensure the
driveshaismountedcorrectlyandnotpulledapart.
• Read this manual, completely, before using this product. Failure to follow instructions and safety precau-
tions in this manual can result in property damage, serious injury, or death.
• Use with 24", 30" and 36" D surfaces to construct a height adjustable table.
• Telescopingexpandablebasetssurfacewidthsfrom48"to96".
• This product contains an automatically-reset thermal limiter which protects the unit from damage due to
heat generation. Continuous use may result in a temporary shutdown of the electric height adjustment
feature of the table base. If this occurs, please allow a cooling period of two hours before resuming normal
use. The electric height adjustment feature of this product is not intended for continuous operation. The
dutycycleis5%≈1-minutecontinuoususeatfullload,followedbya19-minutepause.
• Electrical rating: 120V, 60 Hz, 3 Amps
WARNING: Do not tighten the #10-12 surface screws more than 25 in-lbs. in laminated surfaces or 40 in-lbs.
in phenolic surfaces. Silicone adhesive recommended to attach epoxy surfaces.
Product Numbers
• SWEG28J
Hardware Pack: SWEHP (p/n 20103111-01)
Required Tools
• ³/16"Allen Wrench
• #2 Phillips Bit
• Cordless Drill/Driver
• TapeMeasure
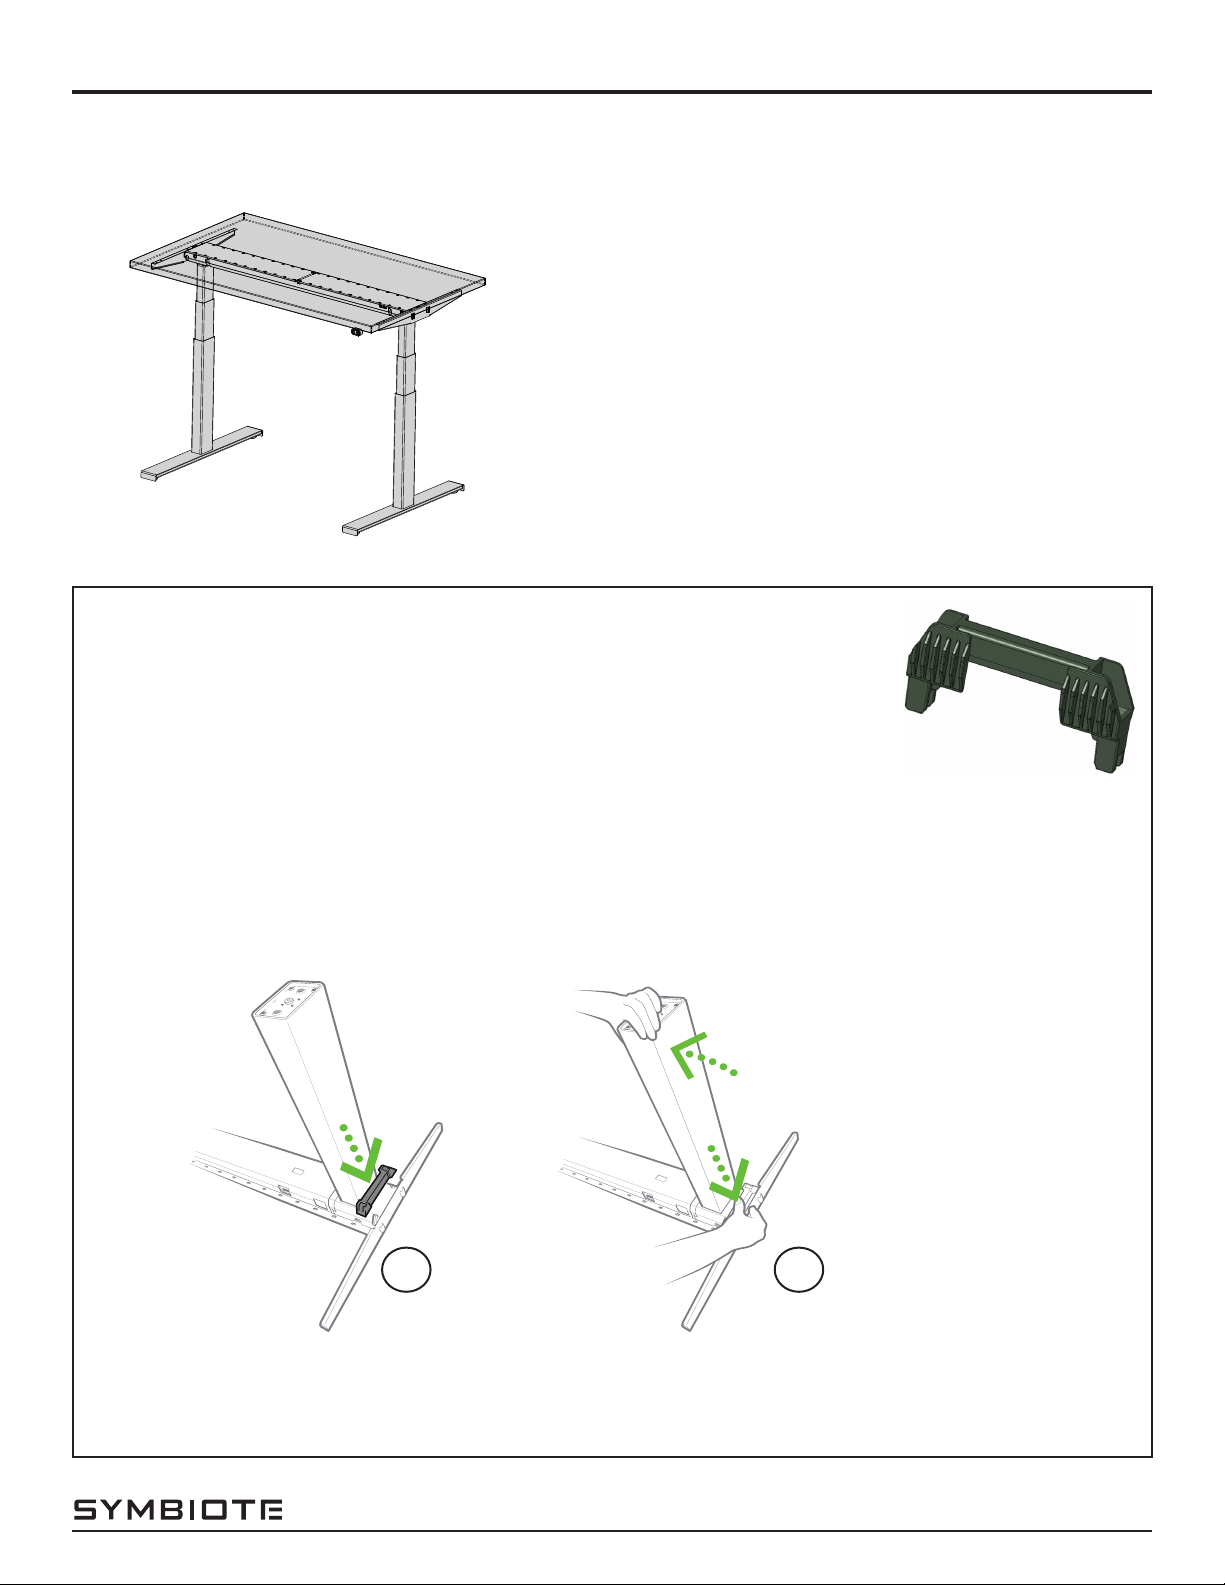
Stretcher
Cantilever (x2)
Feet (x2)
Leg (x2)
INSTALLATION INSTRUCTIONS
p/n 20102501-01 rev A
SYMBIOTE.COM
sheet 1 of 8