Syntace GmbH · Dammweg1 · 83342 Tacherting · Germany · Tel. +49 (0)8634-66666 · Fax: +49 (0)8634-6365 · E-Mail: syntace@syntace.de · www.syntace.de
TIP: FOR ALUMINUM SEATPOSTS
• Apply a little mounting paste onto seatpost. You can prevent sti-
cking that way.
Pic. 1
Important: The seat post has to in-
serted at least to the marking „mi-
nimum insert“.
Caution: In many frames the seatpost
has to be inserted even further, usu-
ally at least to the lower edge of the
top tube. If the seatpost is not being
inserted far enough, the frame and/or
the seatpost can be damaged.
CAUTION FOR CARBON SEATPOSTS: Please ensure the
seatpost clamping mechanism (frame and seat postclamp) are
suitable for carbon seatposts. Not permitted are for example
clamping mechanisms that apply an asymmetrical clamping
force causing the post to be highly stressed at one point. The
Syntace P6 seatpost can also NOT be used with seat clamps
touching the seatpost. If this happens, the seatpost could be
damaged and could possibly break! In case you have a clamp
touching the post, exchange for a different model such as the
Syntace SuperLock. If you are not certain please contact the
respective manufacturer.
• Tighten the clamp just enough so you cannot turn the seat
anymore.
Shortening seatpost
If you do not use the entire length of your seatpost, it can be shor-
tened to save some unnecessary weight. Please only shorten the post
when you have determined your maximum seat post height.
• First measure the min. insert length of the post as well as the
distance from the top of your seat tube to bottom of the top tube
of your frame. The larger of the two values will be your min. insert
length for the seatpost in the respective frame. The additional
length of the seatpost which remains in the seat tube when the post
is at your own personal (maximum) height, can be sawed off.
• To saw-off, carefully place the post in a vice with V-clamps. If pos-
sible, clamp the end which will be removed anyway.
• Please use a fine metal saw blade to cut the carbon post and use a
fine sand paper to deburr. You can protect the cutting surface from
fraying by applying a clear coat or superglue.
ATTENTION: Fine carbon particles are a health hazard. Please
do not breath in or vacuum up with a vacuum cleaner. It is best
to clean up with a wet paper towel. The metal saw blade will no
longer be good for cutting metal but can be used if you need to
cut carbon again in the future.
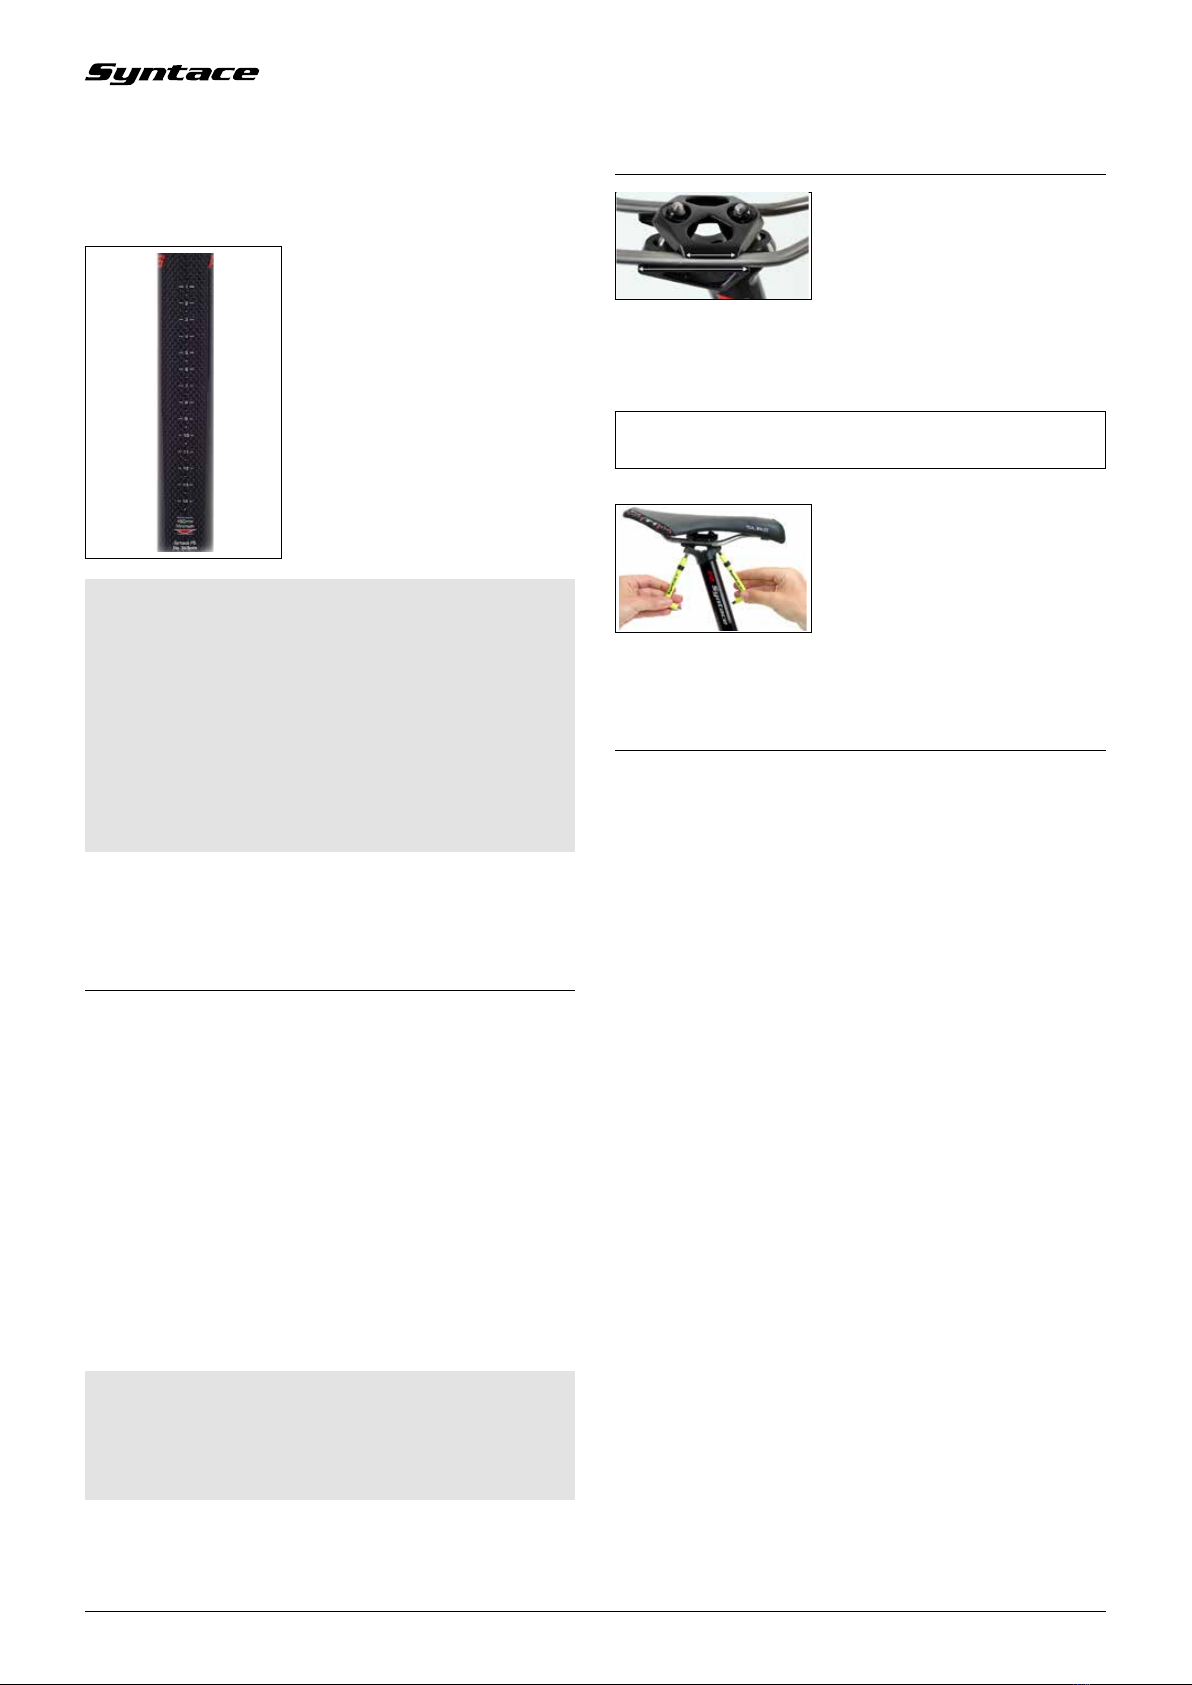
Installation of seat
Pic. 2
The clamp for the seat is suited for
standard 7 mm rails, as well as for
Carbon rails with an oval cross section
with height of up to 11mm (Pic. 2).
• Loosen both clamping screws until the threads disappear in the
nuts. It is not necessary to completely unscrew the clamping
screws.
TIP: First adjust the tilt and then the horizontal position of the
seat.
Pic. 3
• Tighten the clamping screws alterna-
ting and in steps up to a torque value
of 6 to max. 8 Nm (Pic. 3)
• Try to move seat vigorously and
retighten.
• After 1-2 hours of use, retighten to
prescribed torque. Regularly check
for tightness.
Care, maintenance and safety
Proper maintenance and care will ensure a long life and reliable
function of your Syntace products. Please follow these simple steps
to maintain your system:
• Check the inside of your Syntace seatpost regularly for moisture
and remove if found.
• To prevent dirt from entering the seat tube, we recommend using
a seatpost clamp with a wiper seal (such as the Syntace SuperLock)
and/or an additional wiper device (such as the Syntace Little Joe).
• Check screws for proper torque regularly.
• Check the seatpost regularly for signs of fatigue (discoloration,
cracks and dents, for example).
• Warning: Upon longer exposure, brake fluid may attack epoxies and
resins as well as other coatings used in carbon components (Brake
fluid is highly deliquescent). Therefore, if brought into contact with
any carbon component please ensure that the affected area is
thoroughly cleaned with water to avoid any damage.
• Should the Syntace aluminum seatpost be bent due to a crash:
Never attempt to straighten it! Contact your dealer or Syntace to
arrange for replacement.
• Attention: please take note of the seatpost’s wear limit. When
frequently adjusting the height of your seatpost in muddy or dusty
conditions, material wear actually takes place on the surface of
both the seat tube and seatpost. The wear on carbon seatposts is
much higher than on alloy seatposts due to the coated resin matrix/
fibers used. To keep this wear to a minimum, we recommended re-
moving the seatpost from the frame after every ride in wet/muddy
conditions and then to clean it. The inside of the seat tube should
also be cleaned with a rag. Check the diameter of the seatpost from
time to time. At no position along the post, the diameter is allowed
to become less than 0.2 mm than the nominal specified diameter of
the seatpost! If this is the case, the seatpost requires replacing to
prevent the frame from being crushed resulting in possible defor-
mation or cracking in the clamping area.