manuals.online logo
Brands
  1. Home
  2. •
  3. Brands
  4. •
  5. systectherm
  6. •
  7. Heater
  8. •
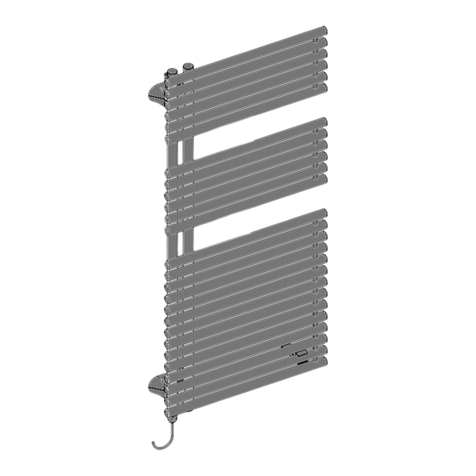
  9. systectherm MIRADA 4 User manual

systectherm MIRADA 4 User manual

E3E10
DE – Gebrauchs- und Montageanleitung für Designheizkörper E3E10
EN – Instructions for installation and use of design radiators E3E10
FR – Instructions d'utilisation et de montage des radiateurs design E3E10
IT – Istruzioni d'uso e di montaggio per radiatori di design E3E10
2022/04 • 6920866
MIRADA 4
(MIRADA 4)
(MIRADA 4)
(MIRADA 4)
(MIRADA 4)
2
2.1 Sicherheitshinweise
Ŷ
Vor der Montage/Inbetriebnahme diese Anlei-
tung gründlich lesen.
Ŷ
Nach der Montage die Anleitung dem End-
verbraucher überlassen.
Ŷ
Sicherheitshinweise in der separaten Anlei-
tung des Elektro-Sets beachten.
Gefahr
Lebensgefahr!
Ŷ
Lage der Versorgungsleitungen (Strom, Gas,
Wasser) prüfen.
Ŷ
Keine Leitungen anbohren.
Ŷ
Gerät nur im spannungsfreien Zustand mon-
tieren und anschließen.
Warnung
Verletzungsgefahr!
Ŷ
Gewicht des Heizkörpers beachten (siehe
Seite 8).
Ŷ
Ab 25 kg mit Hebeeinrichtung oder mehre-
ren Personen arbeiten.
Warnung
Personen- und Sachschäden!
Ŷ
Untergrund auf Tragfähigkeit prüfen. Ge-
wicht des Heizkörpers (siehe Seite 8) und
mögliche Zusatzlasten beachten.
Ŷ
Befestigungsmaterial auf Eignung prüfen
und auf die bauliche Situation abstimmen.
Ŷ
Gesonderte Anforderungen, z. B. für
öffentliche Gebäude (Schulen o. Ä.),
berücksichtigen.
2.2 Einsatzbedingungen
Ŷ
Heizkörper nicht an das Heizungssystem
anschließen.
Ŷ
Bei Montage in Räumen mit Bade- bzw. Du-
scheinrichtungen: Schutzbereiche gemäß na-
tionalen Installationsnormen (in Deutschland
DIN VDE 0100-701) beachten. Darüber hinaus
alle örtlichen Vorschriften beachten.
Ŷ
Elektrische Geräte in oben genannten Räumen
sind zulässig, wenn diese durch eine Fehler-
stromschutzeinrichtung (RCD) (in Deutschland
gemäß DIN EN 61008-1 (VDE 0664-10)) ge-
schützt sind.
Ŷ
Schalter im Bad müssen so installiert sein, dass
diese nicht von der Badewanne oder der Du-
sche aus bedient werden können.
Ŷ
Steckdosen dürfen nur außerhalb der Schutz-
bereiche montiert werden.
Ŷ
Hinweis: Die Montage der Produkte im Schutz-
bereich 1 ist vom Hersteller nicht zugelassen.
Ŷ
Empfehlung gemäß Norm IEC 60335-2-43:
1. DE – Gebrauchsanleitung
1.1 Zulässiger Gebrauch
Der Heizkörper darf nur verwendet werden zum
Heizen von Innenräumen und zum Trocknen von
Textilien, die in Wasser gewaschen wurden.
Jeder andere Gebrauch ist nicht bestimmungsge-
mäß und daher unzulässig.
Fehlgebrauch
Der Heizkörper ist nicht geeignet als Sitzgelegen-
heit, als Kletter- oder Steighilfe.
1.2 Sicherheitshinweise
Warnung
Lebensgefahr durch Stromschlag!
Ŷ
Betreiben Sie das Gerät nicht mit beschädig-
tem Anschlusskabel.
Ŷ
Lassen Sie ein beschädigtes Anschlusskabel
nur vom Hersteller, seinem Kundendienst
oder von Personen vergleichbarer Qualifika-
tion austauschen.
Gefahr
Lebensgefahr!
Ŷ
Löschen Sie im Brandfall nicht mit Wasser.
Ŷ
Verwenden Sie Feuerlöscher mit Kohlenstoff-
dioxid, Schaum, Pulver oder Sand.
Warnung
Verbrennungsgefahr!
Die Oberfläche des Heizkörpers kann bis zu
90 °C (194 °F) heiß werden und Verbrennungen
verursachen.
Ŷ
Seien Sie vorsichtig beim Berühren des
Heizkörpers.
Ŷ
Besonderes Augenmerk muss auf die Anwe-
senheit von Kindern und gefährdeten Perso-
nen gelegt werden.
Das Gerät kann von Personen mit beschränk-
ten körperlichen, sensorischen und geistigen
Fähigkeiten oder mangelnder Erfahrung und
Wissen sowie Kindern ab 8Jahren und darü-
ber benutzt werden, wenn sie beaufsichtigt
oder bezüglich des sicheren Gebrauchs des
Gerätes unterwiesen wurden und die daraus
resultierenden Gefahren verstehen.
Kinder jünger als 3 Jahre sind vom Gerät
fernzuhalten, es sei denn, sie werden stän-
dig überwacht.
Kinder ab 3 Jahren und jünger als 8Jahre
dürfen das Gerät unter obigen Vorausset-
zungen nur ein- und ausschalten, sofern
das Gerät in seiner normalen Gebrauchslage
platziert oder installiert ist.
Kinder ab 3 Jahren und jünger als 8Jahre
dürfen den Stecker nicht in die Steckdose
stecken, das Gerät nicht reinigen und nicht
die Wartung durch den Benutzer durchfüh-
ren.
Ŷ
Beaufsichtigen Sie Kinder, um sicherzustellen,
dass diese nicht mit dem Gerät spielen.
Wird das Gerät ohne separaten Raumthermosta-
ten betrieben:
Ŷ
Verwenden Sie das Gerät nicht in kleinen Räu-
men, in denen sich Personen aufhalten, die
nicht fähig sind, den Raum selbstständig zu
verlassen, es sei denn, sie befinden sich unter
ständiger Aufsicht.
Bei Auslaufen von Wärmeträgerflüssigkeit:
Ŷ
Fangen Sie die Flüssigkeit in einem Behälter auf.
Ŷ
Informieren Sie Ihren Fachhandwerker.
Ŷ
Ersetzen Sie ausgelaufene Flüssigkeit nicht
durch Wasser.
1.3 Reinigung
Ŷ
Trennen Sie das Gerät vor der Reinigung oder
Wartung von der Stromversorgung.
Ŷ
Verwenden Sie nur milde, nicht scheuernde
Reinigungsmittel.
1.4 Reklamation
Ŷ
Wenden Sie sich an Ihren Fachhandwerker.
1.5 Montage und Reparaturen
Ŷ
Lassen Sie die Montage und Reparaturen nur
vom Fachhandwerker ausführen, damit Ihre
Gewährleistungsansprüche nicht erlöschen.
1.6 Entsorgung
Ŷ
Führen Sie ausgediente Komponenten mit
Zubehör dem Recycling oder der ordnungsge-
mäßen Entsorgung zu. Beachten Sie dabei die
örtlichen Vorschriften.
Ŷ
Führen Sie das Gerät der getrennten
Sammlung von Elektro- und Elektronik-
geräten zu.
Ŷ
Entsorgen Sie Wärmeträgerflüssigkeit gemäß
den behördlichen Bestimmungen über einen
zugelassenen Entsorgungsfachbetrieb (Abfall-
schlüssel-Nr. 160115).
2. Montage
Der Heizkörper darf nur von einem Fachhand-
werker montiert werden. Das Elektro-Set darf nur
von einer Elektrofachkraft (in Deutschland gemäß
BGV A3) montiert und angeschlossen werden.
3
Um jegliche Gefahr für Kleinkinder zu vermei-
den, Heizkörper so montieren, dass sich die
Unterkante mindestens 600 mm über dem Bo-
den befindet.
Ŷ
Vorgabe gemäß Ökodesign-Richtlinie
2009/125/EG:

Die Installation und Inbetrieb-
nahme des Gerätes ist ausschließlich zulässig
in Verbindung mit einer Raumtemperatur-
reglung, die gewisse Mindestanforderungen
erfüllt, wie z.B. eine elektronische Raumtem-
peraturkontrolle und Wochentagsregelung
und Raumtemperaturkontrolle mit Erkennung
offener Fenster.
Ŷ
Bei der Installation eine bauseitige Fehler-
stromschutzeinrichtung vorsehen (Auslöse-
grenze kleiner gleich 30 mA).
Ŷ
Wird ein Gerät ohne Stecker direkt an die fest
verlegte elektrische Installation angeschlos-
sen: Trennvorrichtung gemäß den örtlichen
Einrichtungsbestimmungen zur Netztrennung
einbauen.
Ŷ
Heizkörper nur mit der zugelassenen Span-
nung betreiben (siehe Typenschild).
Ŷ
Heizkörper nur in der Schutzfolie lagern und
transportieren.
2.3 Technische Merkmale
Ŷ
Elektrischer Anschluss:
–Heizstab im Sammelrohr vormontiert
–Anschluss über Elektro-Set
Ŷ
Prüfruck: 13 bar
Ŷ
Füllung: nicht brennbare, ungiftige
Wärmeträgerflussigkeit
Ŷ
Betriebsart: Elektrobetrieb, unabhängig vom
Heizungssystem, mit Regelung über Elektro-Set
2.4 Hinweise zur Montage
Anzahl der Befestigungspunkte:
Die Anzahl der Befestigungspunkte wurde für
Leichthochlochziegel T14 festgelegt und geprüft.
Ŷ
Heizkörper so abstellen, dass dieser nicht be-
schädigt wird.
Ŷ
Kabel nicht rollen.
Ŷ
Sicherstellen, dass in Kabelreichweite eine vor-
schriftsmäßig installierte Geräteanschlussdo-
se bzw. Wandsteckdose (230 V, Absicherung
16 A) vorhanden ist.
Der elektrische Anschluss aus der Wand muss
frei zugänglich sein und darf nicht in der Projek-
tionsfläche des Heizkörpers und des Regelgeräts
liegen.
Ŷ
Der Heizkörper darf nicht unmittelbar unter
einer Steckdose montiert werden.
1. EN – Instruction manual
1.1 Permissible use
The radiator may only be used for heating interior
spaces and for drying textiles. Textiles may only
be hung on the designated hangers (towel rail).
Any other use is contrary to the intended purpose
and therefore not permissible.
Misuse
The radiator is not suitable to sit on or as a clim-
bing aid or for accessing heights.
1.2 Safety information
Warning
Danger of death from electric shocks!
Ŷ
Do not operate the unit if the connection ca-
ble is damaged.
Ŷ
If a connection cable is damaged, have it
replaced by the manufacturer, the manufac-
turer's customer service or persons with com-
parable qualifications.
Danger
Life-threatening situation!
Ŷ
In case of fire, do not extinguish with water.
Ŷ
Use fire extinguishers with carbon dioxide,
foam, powder, or sand.
Warning
Risk of burns!
The radiator surface temperature can rise to 90°C
(194°F) and cause burns.
Ŷ
Be careful when touching the radiator.
Ŷ
Pay particular attention to the presence of chil-
dren and any other people who may be at risk.
The unit may be used by persons with limited
physical, sensory and mental abilities or by
persons with little experience and knowledge
as well as children over 8years old under su-
pervision, providing they have been instruc-
ted on safe use of the device and understand
the ensuing risks.
Children less than 3years old are to be kept
away from the unit unless they are under
constant supervision.
Children over than 3years old and less than
8years old may only switch on and off the
unit subject to the above conditions, provi-
ded the device is placed or installed in its
normal position of use.
Children over 3years old and less than 8ye-
ars old may not insert the plug in the socket,
clean the unit, or carry out maintenance by
the user.
Ŷ
Supervise children to ensure that they do not
play with the unit.
If the unit is operated without a separate room
thermostat:
Ŷ
Do not use the unit in small rooms that peo-
ple may be in and who are unable to leave
the room on their own, unless they are under
constant supervision.
During discharge of heat transfer fluid:
Ŷ
Collect the fluid in a container.
Ŷ
Inform your specialist.
Ŷ
Do not replace the discharged fluid with water.
1.3 Cleaning
Ŷ
Disconnect the unit from the power supply be-
fore cleaning or maintenance.
Ŷ
Use only mild, non-scouring cleaning agents.
1.4 Complaints
Ŷ
Please contact your specialist partner.
1.5 Installation and repairs
Ŷ
Only allow specialist partners to carry out
installation and repair work to prevent any
warranty claims from being rendered null and
void.
1.6 Disposal
Ŷ
Recycle or dispose of disused components pro-
perly, including accessories. Observe the local
regulations for disposal.
Ŷ
Dispose of the unit in the separate
collection for electrical and electronic
devices.
Ŷ
Dispose of the heat transfer fluid according to
official regulations employing an authorized
firm specializing in waste management (Waste
Code No. 160115).
2. Installation
The radiator may only be installed by a specialist
partner. The electric set may only be installed and
connected by an electrical specialist (in Germany
according to BGV A3).
2.1 Safety information
Ŷ
Read these instructions thoroughly prior to in-
stallation/initial operation.
Ŷ
After installation, hand over the instruc-
tions to the end consumer.
Ŷ
Observe the safety directions in the separate
electric set instructions.
4
Danger
Life-threatening situation!
Ŷ
Check the condition of the supply lines (elec-
tricity, gas, water).
Ŷ
Do not drill into any of the lines.
Ŷ
Only install and connect the unit when it is
de-energised.
Warning
Risk of injury!
Ŷ
Note the radiator's weight (see page 8).
Ŷ
At 25 kg and above, the work should be
carried out with a lifting device or byseveral
persons.
Warning
Personal injury and material damage!
Ŷ
Check the base for adequate carrying capa-
city. Note the radiator's weight (see page 8)
and any possible additional load.
Ŷ
Check fixing material is suitable and match it
to the structural situation.
Ŷ
Special requirements, e.g. for public buil-
dings (schools or similar), must be taken into
account.
2.2 Conditions of use
Ŷ
Do not connect the radiator to the heating
system.
Ŷ
When installing in rooms with bath or shower
facilities: comply with protective areas accor-
ding to national installation standards (in Ger-
many DIN VDE0100-701). Also follow all local
regulations.
Ŷ
Electrical equipment is permitted in the afore-
mentioned rooms if it is protected by a residual
current protective device (RCD) (in Germany
according to DINEN61008-1 (VDE0664-10)).
Ŷ
The switch in the bathroom needs to be instal-
led so that it cannot be operated from the ba-
thtub or when in the shower.
Ŷ
Sockets may only be installed outside safety
areas.
Ŷ
Note: The manufacturer prohibits installation
of the products in safety area 1.
Ŷ
Recommendation according to IEC stan-
dard 60335-2-43: To prevent any risk to small
children, install the radiator so that the bottom
edge is at least 600mm above the floor.
Ŷ
Specification according to Ecodesign di-
rective 2009/125/EC: The unit may only be
installed and initially operated in associati-
on with a room temperature regulator which
meets specific minimum requirements, such as
an electronic room thermostat and weekday
controller and room temperature regulator
which detects open windows.
Ŷ
During installation, a residual-current-operated
protective device (with trigger limit less than or
equal to 30mA) must be provided on-site.
Ŷ
If a unit is connected directly to the fixed elec-
trical installations: incorporate a disconnecting
device in accordance with the local regulations
for mains disconnection.
Ŷ
Only operate the radiator with the approved
voltage (see nameplate).
Ŷ
Store and transport radiator only in the
protec-
tive foil.
2.3 Technical features
Ŷ
Electrical connection:
–Heating element pre-installed in the collec-
tor
–Connection via electric set
Ŷ
Test pressure: 13 bar
Ŷ
Fill: non-combustible, non-toxic heat transfer
liquid
Ŷ
Duty type: electrical operation, irrespective of the
heating system, with adjustment via electric set
2.4 Directions for installation
Number of fixing points:
The number of fixing points was determined and
checked on vertically cored lightweight brick T14.
Ŷ
Set the radiator down in such a way that it is
not damaged.
Ŷ
Do not roll the cable.
Ŷ
Ensure that a correctly mounted unit connec-
tion box or wall socket (230V, 16A fuse) is
available within the cable range.
The electrical connection at the wall must be
freely accessible and must not project out to the
surface of the radiator or the control unit.
Ŷ
The radiator must not be installed directly be-
neath a wall socket.
1. FR – Notice d'utilisation
1.1 Utilisation conforme
Le radiateur doit être utilisé exclusivement
pour le chauffage d'espaces intérieurs et le sécha-
ge de textiles ayant été lavés à l'eau.
Toute autre utilisation n'est pas conforme à l'usa-
ge prévu et est donc interdite.
Utilisation non conforme
Le radiateur ne doit pas être utilisé comme siège,
échelle ou escabeau.
1.2 Consignes de sécurité
Avertissement
Danger de mort par électrocution!
Ŷ
Ne pas utiliser l'appareil si le câble de raccor-
dement est endommagé.
Ŷ
Si le câble de raccordement est endommagé,
il doit être remplacé par le fabricant, son ser-
vice après-vente ou une personne disposant
d'une qualification similaire.
Danger
Danger de mort!
Ŷ
En cas d'incendie, ne jamais éteindre avec
de l'eau.
Ŷ
Utiliser des extincteurs au gaz carbonique, à
mousse, à poudre ou du sable.
Avertissement
Risque de brûlure!
La surface du radiateur peut atteindre une
température de 90 °C (194 °F) et causer des
brûlures.
Ŷ
User de prudence au toucher du radiateur.
Ŷ
Prêter une attention particulière en présence
d'enfants et de personnes à risque.
L'appareil peut être utilisé par des personnes
présentant un handicap physique, sensoriel
et mental ou manquant de connaissances
et d'expérience ainsi que par des enfants à
partir de 8 ans s'ils sont sous surveillance ou
ont été instruits sur une utilisation sécurisée
de l'appareil et s'ils comprennent les dangers
encourus.
Les enfants de moins de 3 ans doivent être
tenus à l'écart de l'appareil, à moins de les
surveiller en permanence.
Les enfants de plus de 3 ans et de moins de
8 ans ne peuvent allumer et éteindre l'appa-
reil que si les conditions antérieures sont re-
spectées et dans la mesure où l'appareil est
installé ou situé dans sa position habituelle
de fonctionnement.
5
Les enfants de plus de 3 ans et de moins de
8 ans ne peuvent ni introduire la fiche dans
la prise, ni nettoyer l'appareil, ni effectuer la
maintenance relevant de l'utilisateur.
Ŷ
Surveiller les enfants afin de s'assurer qu'ils ne
jouent pas avec l'appareil.
Si l'appareil est exploité sans thermostats d'am-
biance séparés:
Ŷ
Ne pas utiliser l'appareil dans des locaux de
petite taille, dans des locaux abritant des per-
sonnes qui ne sont pas en mesure de quitter
la pièce par elles-mêmes, sauf si ces dernières
sont surveillées en permanence.
En cas de fuite de fluide caloporteur :
Ŷ
Collecter le liquide dans un récipient.
Ŷ
Informer l'installateur spécialisé.
Ŷ
Ne pas remplacer le fluide qui s'est écoulé
avec de l'eau.
1.3 Nettoyage
Ŷ
Avant le nettoyage ou la maintenance, couper
l'appareil de l'alimentation électrique.
Ŷ
Utiliser uniquement des détergents doux, non
agressifs.
1.4 Réclamation
Ŷ
S'adresser à son artisan professionnel.
1.5 Montage et réparations
Ŷ
Ne faire exécuter le montage et les réparations
que par un artisan professionnel pour conser-
ver ses droits à la garantie.
1.6 Élimination
Ŷ
Amener les composants usés avec leurs ac-
cessoires au recyclage ou au traitement des
déchets. Respecter pour cela les prescriptions
locales.
Ŷ
Apporter l'appareil dans un point de
collecte séparé d'appareils électriques
et électroniques.
Ŷ
Éliminer le fluide caloporteur selon les régle-
mentations officielles grâce à un système d'éli-
mination adapté (critère de classement des
déchets n° 160115).
2. Montage
Le montage du radiateur doit être exécuté par un
artisan professionnel. Le montage et le raccorde-
ment du set électrique ne doivent être exécutés
que par un électricien spécialisé (en Allemagne
selon BGV A3)
2.1 Consignes de sécurité
Ŷ
Lire intégralement cette notice avant le monta-
ge/la mise en service.
Ŷ
Après le montage, remettre les instructions
à l'utilisateur final.
Ŷ
Respecter les consignes de sécurité dans les in-
structions séparées relatives au set électrique.
Danger
Danger de mort!
Ŷ
Contrôler la position des conduites d'alimen-
tation (électricité, gaz, eau).
Ŷ
Ne pas percer de conduite.
Ŷ
Monter et raccorder l'appareil uniquement
lorsqu'il est hors tension.
Avertissement
Risque de blessure!
Ŷ
Tenir compte du poids du radiateur (voir page 8).
Ŷ
À partir de 25kg, utiliser des dispositifs de
levage ou travailler à plusieurs.
Avertissement
Blessures corporelles et dégâts matériels!
Ŷ
Contrôler la force portante du support. Tenir
compte du poids du radiateur (voir page 8)
et des charges complémentaires éventuelles.
Ŷ
Contrôler l'adéquation du matériel de fixa-
tion et la définir en fonction de la situation
de montage.
Ŷ
Tenir compte des exigences spéciales, par ex.
pour les bâtiments publics (écoles, etc.).
2.2 Conditions d'utilisation
Ŷ
Ne pas raccorder le radiateur au système de
chauffage.
Ŷ
En cas de montage dans des pièces équipées de
baignoires ou de douches: respecter les zones
de protection conformément aux normes d'in-
stallations nationales (en Allemagne DIN VDE
0100-701). Respecter également l'ensemble
des dispositions locales en vigueur.
Ŷ
Les appareils électriques sont admis dans les
pièces mentionnées ci-dessus lorsqu'ils sont
protégés avec un système de protection contre
les courants de court-circuit (RCD) (en Allemag-
ne selon DIN EN 61008-1 (VDE 0664-10)).
Ŷ
Les interrupteurs dans la salle de bains doivent
être installés de manière à ne pas pouvoir être
utilisés de la baignoire ou de la douche.
Ŷ
Les prises ne peuvent être montées qu'en de-
hors des zones de protection.
Ŷ
Remarque: le montage de produits dans la
zone de sécurité 1 est interdit par le fabricant.
Ŷ
Recommandation conformément à la
norme CEI 60335-2-43: afin d'éviter tout dan-
ger pour les enfants en bas âge, il convient de
monter le radiateur de manière à ce que le bord
inférieur se trouve à une distance d'au moins
600mm au-dessus du sol.
Ŷ
Spécification conformément à la directive
sur l'écoconception 2009/125/CE: L'instal-
lation et la mise en service de l'appareil sont
uniquement autorisées en association avec une
régulation de la température ambiante, qui
répond à certaines exigences minimales, telles
que le contrôle électronique de la température
ambiante, la régulation en fonction du jour de
la semaine et le contrôle de la température am-
biante avec détection de fenêtre ouverte.
Ŷ
Lors de l'installation, prévoir un système de
protection contre les courants de court-circuit
(limite de déclenchement inférieure à 30mA).
Ŷ
Si un appareil est raccordé sans connecteur
directement à l'installation électrique fixe:
monter un disjoncteur conformément aux pre-
scriptions locales d'équipement pour l'isolation
du réseau.
Ŷ
N'exploiter le radiateur qu'à la tension admis-
sible (voir la plaque signalétique).
Ŷ
Ne stocker et ne transporter le radiateur que
dans un film d'emballage de protection.
2.3 Caractéristiques techniques
Ŷ
Raccordement électrique:
–Le thermoplongeur est prémonté dans le
tube collecteur
–Raccordement à l'aide du set électrique
Ŷ
Pression d'essai : 13 bars
Ŷ
Remplissage: fluides caloporteurs ininflammab-
les et non toxiques
Ŷ
Mode de fonctionnement: fonctionnement élec-
trique, indépendant du système de chauffage,
avec régulation via le kit électrique
Remarques relatives au montage
Nombre de points de fixation:
Le nombre de points de fixation a été défini et testé
pour les briques légères en terre cuite à creux ver-
ticaux T14.
Ŷ
Arrêter le radiateur de manière à qu'il ne soit
pas endommagé.
Ŷ
Ne pas enrouler le câble.
Ŷ
S'assurer qu'une prise de raccordement d'ap-
pareillage ou une prise murale (230V, fusible
16A) est disponible à portée de câble.
Le raccordement électrique sortant du mur doit
être facilement accessible et ne doit pas être situé
dans la surface de projection du radiateur et du
régulateur.
Ŷ
Le radiateur ne doit pas être monté directement
sous une prise.
6
Ŷ
Seguire le avvertenze di sicurezza presenti nelle
istruzioni separate del set elettrico.
Pericolo
Pericolo di morte!
Ŷ
Verificare la posizione delle linee di alimenta-
zione (corrente, gas, acqua).
Ŷ
Non forare le tubazioni.
Ŷ
Montare e collegare l'apparecchio solo in as-
senza di tensione.
Attenzione
Pericolo di lesioni!
Ŷ
Fare attenzione al peso del radiatore (vedere
pagina 8).
Ŷ
Se il peso supera i 25kg effettuare le opera-
zioni con un attrezzo di sollevamento o con
l'aiuto di altre persone.
Attenzione
Danni a persone e danni materiali!
Ŷ
Controllare la portata della base di appoggio.
Fare attenzione al peso del radiatore (vedere
pagina 8) e a eventuali carichi aggiuntivi.
Ŷ
Verificare che il materiale di montaggio sia
idoneo e sceglierlo adatto alla situazione
architettonica.
Ŷ
Rispettare i requisiti particolari, ad es. per
edifici pubblici (scuole o simili).
2.2 Condizioni di utilizzo
Ŷ
Non collegare il radiatore al sistema di
riscaldamento.
Ŷ
Con il montaggio in stanze con vasca o doc-
cia: osservare le zone di protezione secondo le
norme di installazione nazionali (in Germania
DIN VDE 0100-701). Inoltre osservare tutte le
disposizioni locali.
Ŷ
Gli apparecchi elettrici nelle stanze sopra cita-
te sono ammessi solo se sono protetti tramite
un dispositivo di protezione dalle correnti di
guasto (RCD) (in Germania secondo DIN EN
61008-1 (VDE 0664-10)).
Ŷ
In bagno gli interruttori devono essere instal-
lati in modo da non poter essere azionati dalla
vasca da bagno o dalla doccia.
Ŷ
Le prese possono essere montate solo al di fu-
ori delle zone di protezione.
Ŷ
Nota: il montaggio dei prodotti nella zona di
protezione 1 non è consentito dal produttore.
Ŷ
Suggerimento in conformità alla norma
CEI 60335-2-43: per evitare qualsiasi perico-
lo ai bambini più piccoli, montare il radiatore
in modo che il bordo inferiore si trovi almeno
600mm sopra il pavimento.
1. IT – Istruzioni per l'uso
1.1 Uso consentito
Il radiatore può essere utilizzato solo per il
riscaldamento di ambienti interni e per asciugare
tessuti lavati in acqua.Ogni altro uso non è consi-
derato conforme alle disposizioni ed è quindi non
ammesso.
Utilizzo non conforme
Il radiatore non deve essere utilizzato come sedia
o come scaletta.
1.2 Avvertenze di sicurezza
Attenzione
Pericolo di morte per scossa elettrica!
Ŷ
Non mettere in funzione l'apparecchio con il
cavo di collegamento danneggiato.
Ŷ
Far sostituire il cavo di collegamento dan-
neggiato solo dal produttore, dal suo servizio
di assistenza clienti o da persone aventi le
stesse qualifiche.
Pericolo
Pericolo di morte!
Ŷ
In caso di incendio, non spegnerlo con
l'acqua.
Ŷ
Utilizzare estintori ad anidride carbonica,
schiuma, polvere o sabbia.
Attenzione
Pericolo di ustioni!
La superficie del radiatore può raggiungere una
temperatura fino a 90 °C (194 °F) e causare
ustioni.
Ŷ
Prestare attenzione quando si tocca il radiatore.
Ŷ
Prestare particolare attenzione all'eventuale
presenza di bambini e persone che potrebbero
essere messe in pericolo.
Questo apparecchio può essere utilizzato da
persone con limitate capacità fisiche, senso-
riali o mentali o con scarsa esperienza o co-
noscenza e da bambini dagli 8 anni in su, se
non lasciati soli o se istruiti sull’utilizzo sicuro
dell’apparecchio e in grado di capire i pericoli
che possono sorgere.
I bambini di età inferiore ai 3 anni devono
essere mantenuti lontani dall'apparecchio, a
meno che non vengano costantemente con-
trollati.
I bambini dai 3 agli 8 anni possono solo ac-
cendere e spegnere l'apparecchio nel rispet-
to delle condizioni sopra indicate e con l'ap-
parecchio posizionato o installato nella sua
posizione d'uso normale.
I bambini dai 3 agli 8 anni non possono in-
serire la spina nella presa, pulire l'apparec-
chio né eseguire la manutenzione ad opera
dell'utente.
Ŷ
Sorvegliare i bambini per assicurarsi che non
giochino con l'apparecchio.
Se l'apparecchio viene azionato senza termostato
ambiente separato:
Ŷ
Non utilizzare l'apparecchio in locali piccoli in
cui soggiornano persone non in grado di las-
ciare il locale in autonomia, a meno che non
siano sorvegliati costantemente.
Con perdite del fluido termoconvettore:
Ŷ
raccogliere il fluido in un contenitore.
Ŷ
Informare l'installatore specializzato.
Ŷ
Non sostituire la sostanza fuoriuscita con acqua.
1.3 Pulizia
Ŷ
Staccare l'apparecchio dall'alimentazio-
ne di corrente prima della pulizia o della
manutenzione.
Ŷ
Utilizzare solo detergenti delicati e non abrasivi.
1.4 Reclamo
Ŷ
Contattare l'installatore specializzato.
1.5 Montaggio e riparazioni
Ŷ
Per non perdere la garanzia sul prodotto, far
eseguire il montaggio e le riparazioni solo da
un installatore specializzato.
1.6 Smaltimento
Ŷ
Portare i componenti con gli accessori non
più utilizzabili in un centro di riciclo o smaltirli
correttamente. Osservare a proposito le dispo-
sizioni locali.
Ŷ
Portare l'apparecchio presso i punti di
raccolta separata per apparecchi elett-
rici ed elettronici.
Ŷ
Smaltire il fluido termoconvettore secondo le
disposizioni delle autorità competenti attraver-
so un'azienda di smaltimento autorizzata (n.
codice di smaltimento rifiuti 160115).
2. Montaggio
Il radiatore può essere montato solo da un artigia-
no specializzato. Il set elettrico può essere monta-
to e installato solo da un elettricista specializzato
(in Germania secondo BGV A3)
2.1 Avvertenze di sicurezza
Ŷ
Leggere attentamente le istruzioni prima di
procedere al montaggio/alla messa in funzione.
Ŷ
Dopo il montaggio cedere le istruzioni
all'utente finale.
7
Ŷ
Disposizione secondo la direttiva Eco-De-
sign 2009/125/CE: L'installazione e la messa
in funzione dell'apparecchio sono consentite
esclusivamente in combinazione con una re-
golazione della temperatura ambiente che
soddisfi determinati requisiti minimi, ad es.
controllo elettronico della temperatura ambi-
ente e regolazione del giorno della settimana
e controllo della temperatura ambiente con
riconoscimento di finestre aperte.
Ŷ
Al momento dell'installazione il cliente deve
prevedere un dispositivo di protezione dalle
correnti di guasto (con un limite di intervento
minore o uguale a 30mA).
Ŷ
Se l'apparecchio viene collegato senza spina
direttamente all'installazione elettrica a posa
fissa: installare il dispositivo di sezionamento
secondo le disposizioni locali relative al dispo-
sitivo per il sezionamento di rete.
Ŷ
Far funzionare il radiatore solo con la tensione
consentita (vedere targhetta identificativa).
Ŷ
Stoccare e trasportare il radiatore solo nell'im-
ballo protettivo.
2.3 Caratteristiche tecniche
Ŷ
Collegamento elettrico:
–Barra termica premontata nel collettore
–Collegamento mediante set elettrico
Ŷ
Pressione di prova: 13 bar
Ŷ
Riempimento: fluido termoconvettore non infi-
ammabile, atossico
Ŷ
Modalità di funzionamento: funzionamento
elettrico, indipendente dal sistema di riscalda-
mento con regolazione mediante kit elettrico
2.4 Istruzioni di montaggio
Numero dei punti di fissaggio:
Il numero dei punti di fissaggio è stato determi-
nato e verificato per laterizi leggeri a fori alti T14.
Ŷ
Posare il radiatore in modo tale che non venga
danneggiato.
Ŷ
Non arrotolare il cavo.
Ŷ
Assicurarsi che la copertura del cavo includa
una presa a spina o una presa a parete (230V,
fusibile 16A) installata a norma.
Il collegamento elettrico alla parete deve essere
facilmente accessibile e non deve trovarsi nelle
superfici di proiezione del radiatore e dell'appa-
recchio di regolazione.
Ŷ
Il radiatore non deve essere montato diretta-
mente sotto una presa.
8
A
L/2
H
BL
>50
>50
L/2 L/2
108
150
140
140
*
50-60
64-74
H150
L
BT
108
BH
BL
Ø20
13
B
NR H
[mm] L
[mm] L/2
[mm] BH
[mm] BL
[mm] BT
[mm] G
[kg]
E3E10080045 592 410 205 742 450 46 9,7
E3E10080050 592 460 230 742 500 46 10,5
E3E10080060 592 560 280 742 600 46 12,2
E3E10080075 592 710 355 742 750 46 14,6
E3E10080090 592 860 430 742 900 46 17,1
E3E10120045 1021 410 205 1171 450 46 15,1
E3E10120050 1021 460 230 1171 500 46 16,4
E3E10120060 1021 560 280 1171 600 46 18,9
E3E10120075 1021 710 355 1171 750 46 22,7
E3E10120090 1021 860 430 1171 900 46 26,6
E3E10150045 1351 410 205 1501 450 46 19,9
E3E10150050 1351 460 230 1501 500 46 21,5
E3E10150060 1351 560 280 1501 600 46 24,9
E3E10150075 1351 710 355 1501 750 46 29,9
E3E10150090 1351 860 430 1501 900 46 34,9
E3E10180045 1648 410 205 1798 450 46 23,3
E3E10180050 1648 460 230 1798 500 46 25,3
E3E10180060 1648 560 280 1798 600 46 29,3
E3E10180075 1648 710 355 1798 750 46 35,1
E3E10180090 1648 860 430 1798 900 46 40,9
Legende Legend Légende Leggenda
G Gewicht (befüllt) Weight (filled) Poids (rempli) Peso (pieno)
H Abstand Bohrloch zu
Unterkante Anschlussmuffe
Spacing of drilled hole to lower
edge connecting sleeve
Ecart entre trou de perçage et
arête inférieure du manchon de
raccordement
Distanza foro da bordo inferiore
muffola di allacciamento
L Abstand der Bohrlöcher Spacing of the drilled holes Ecart entre les trous de perçage Distanza dei fori
NR Artikel-Nr.
Article No.
Article No. N° d'article Codice articolo
* ggf. Bauraum für Elektroregler
beachten
Observe installation space for
electric controller
Respecter l'espace de montage du
régulateur électrique
Rispettare lo spazio per
l'installazione del termostato
elettrico
Ŷ
Lage der Versorgungsleitungen prüfen.
Ŷ
Untergrund auf Tragfähigkeit prüfen.
Ŷ
Schrauben und Dübel auf Eignung prüfen.
Ŷ
Check the location of the supply lines.
Ŷ
Check the bearing surface for load-carrying
capacity.
Ŷ
Check the suitability of the screws and anchors.
Ŷ
Contrôler la position des tuyauteries
d'alimentation.
Ŷ
Vérifier la capacité de charge du support.
Ŷ
Contrôler l'aptitude des vis et chevilles.
Ŷ
Controllare l'ubicazione delle linee di
alimentazione.
Ŷ
Controllare la portata del supporto.
Ŷ
Controllare l'idoneità delle viti e dei tasselli.
DE – Maße und Gewichte EN – Dimensions and weights FR – Dimensions et poids IT – Quote e pesi
Rückansicht • View from the rear
Vue arrière • Vista posteriore
9
1
2a
2b
4
5
6
7
10
4x
2x
4
11
Ŷ
Keine Leitungen anbohren. Lebensgefahr!
Ŷ
Do not drill into any of the lines. Danger to
life!
Ŷ
Ne pas percer de conduites. Danger de mort!
Ŷ
Non danneggiare le linee. Pericolo di
morte!
12
13
2x
2x
Ø 10
105
2x
2x
3
13
Ø 10
3, 4
DE – Montage EN – Installation FR – Montage IT – Montaggio
8
2x
2x
90° 90°
4
9
90 ˚
13
90 ˚
83
2x
4
L/2
H
BL
L/2 L/2
150
108
10
15
15
16
17
14 18
19
Ŷ
Elektro-Set von einer Elektrofachkraft mon-
tieren und anschließen lassen (gemäß Instal-
lationsanweisung des Elektro-Sets).
Ŷ
Installation and connection of the electrical
unit should be performed by an electrician
(according to installation instructions of the
electrical unit).
Ŷ
Faire effectuer le montage et le raccordement
du kit électrique par un électricien (con-
formément aux instructions d'installation du
kit électrique).
Ŷ
Montare e far collegare il kit elettrico da un
elettricista specializzato (secondo le istruzioni
di installazione del kit elettrico).
2x
3
2x
3
3
2x
DE – Montage EN – Installation FR – Montage IT – Montaggio
Systec Therm AG · Letzistrasse 35 · CH-9015 St.Gallen
Telefon +41 71 274 00 50 · info@systectherm.ch · www.systectherm.ch

This manual suits for next models

1

Other systectherm Heater manuals

systectherm Elea ABTE1A User manual

systectherm

systectherm Elea ABTE1A User manual

systectherm Boa LME10 User manual

systectherm

systectherm Boa LME10 User manual

systectherm Mirada User manual

systectherm

systectherm Mirada User manual

systectherm ADAX NEO H WiFi User manual

systectherm

systectherm ADAX NEO H WiFi User manual

systectherm ADAX NEO H 02 DT User manual

systectherm

systectherm ADAX NEO H 02 DT User manual

Popular Heater manuals by other brands

Truma Trumatic E 2400 E Operating and installation instructions

Truma

Truma Trumatic E 2400 E Operating and installation instructions

Luna 0248-00161 manual

Luna

Luna 0248-00161 manual

Electrorad Digi-Line DE Series Installation and operating instruction manual

Electrorad Digi-Line

Electrorad Digi-Line DE Series Installation and operating instruction manual

EUROM VK2002 manual

EUROM

EUROM VK2002 manual

KIPI 24 kW manual

KIPI

KIPI 24 kW manual

AREBOS AR-HE-HS2500CS user manual

AREBOS

AREBOS AR-HE-HS2500CS user manual

FACTO ECH102 manual

FACTO

FACTO ECH102 manual

SHX SHX21PTC2000KE operating manual

SHX

SHX SHX21PTC2000KE operating manual

cecotec Ready Warm 7400 Quartz Sky Smart instruction manual

cecotec

cecotec Ready Warm 7400 Quartz Sky Smart instruction manual

Fox GR-110 user manual

Fox

Fox GR-110 user manual

Sengoku OR-77 owner's manual

Sengoku

Sengoku OR-77 owner's manual

Xvent Wind Manual for use and installation

Xvent

Xvent Wind Manual for use and installation

Amax Gas TR Series Supplementary Instruction Booklet

Amax Gas

Amax Gas TR Series Supplementary Instruction Booklet

EOS Vitae protect Assembly and operating instruction

EOS

EOS Vitae protect Assembly and operating instruction

Dimplex DHCER20 instruction manual

Dimplex

Dimplex DHCER20 instruction manual

BRAYER BR4883 instruction manual

BRAYER

BRAYER BR4883 instruction manual

L.B. White Premier TS080 Owner's manual and instructions

L.B. White

L.B. White Premier TS080 Owner's manual and instructions

Thermo-bug 2.0 basic operating manual

Thermo-bug

Thermo-bug 2.0 basic operating manual

manuals.online logo
manuals.online logoBrands
  • About & Mission
  • Contact us
  • Privacy Policy
  • Terms and Conditions

Copyright 2025 Manuals.Online. All Rights Reserved.