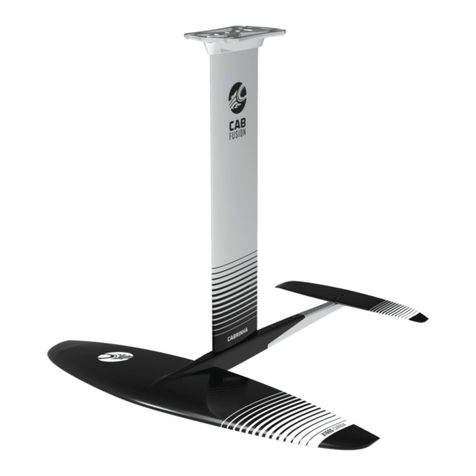
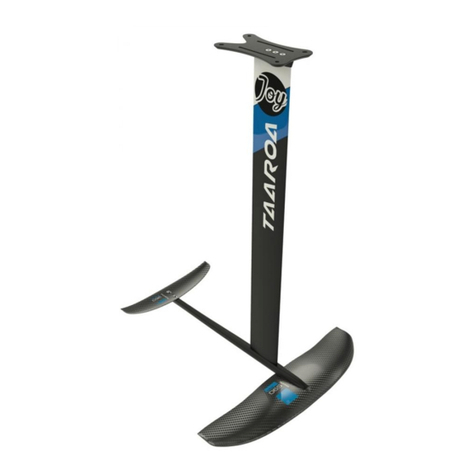
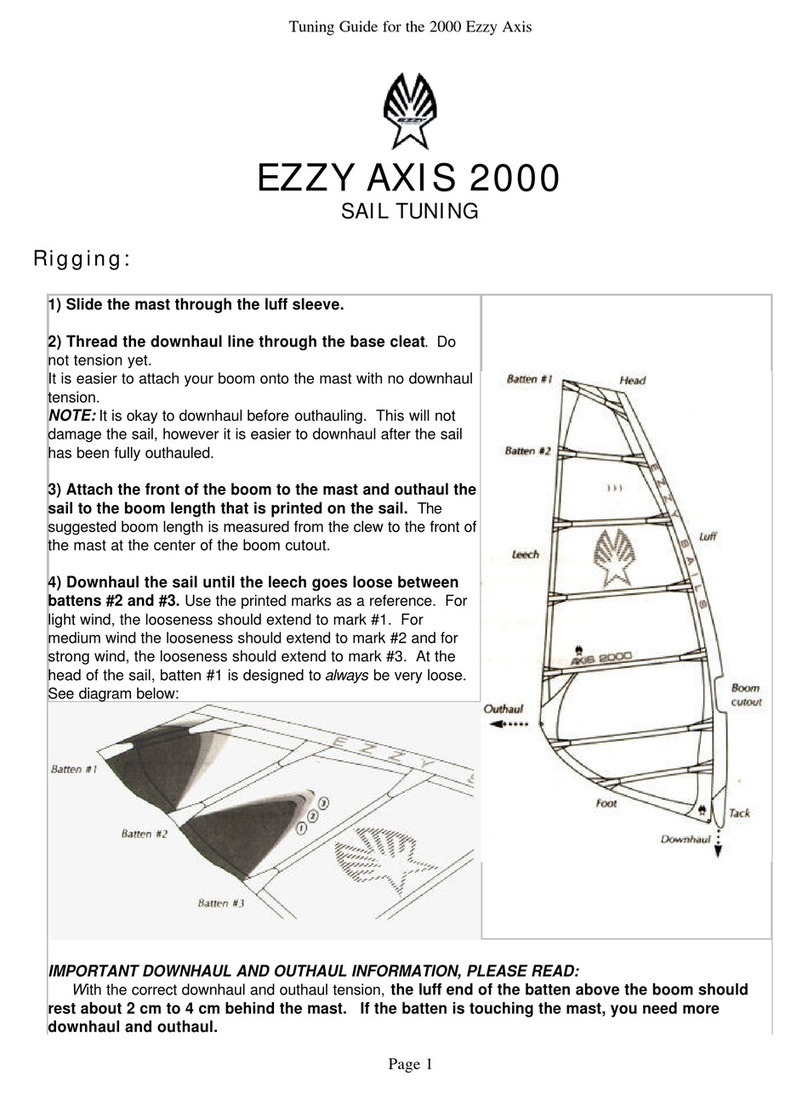
TAAROA NOE 80 User manual

ENlanguage
For TAAROA hydrofoils.
USER
GUIDE
tro-hydrofoil.com

EN
User guide.
— Table of content
01
02
03
Safety. p.03
Navigation conditions. p.05
p.06
p.07
p.08
Components.
04 Assembly and disassembly of the foil.
05
06
07
08
09
10
Assembly and disassembly on the board.
Using the foil.
Foil maintenance.
List of products.
Limitation of liability.
Technical support.
p.09
p.12
p.13
p.14
p.15
Warning
Insurance
Navigation location
Equipment
Assistance
Agreement
Weather
isk acceptance
Navigation conditions
By steps
Mast mounting systems
Fixing systems
Handling on land
By steps
Leaving & returning to shore
Position
Settings
Physical condition
Be careful of others

3
There are certain risks involved in foiling that can cause serious or fatal accidents. For this reason, it is
imperative to read this User Guide before using your hydrofoil and to comply with the instructions for
use that it contains. Prior training is also advised.
Before getting on your hydrofoil, check that you have insurance which covers civil liability while foiling.
Additionally, make sure that your insurance sufficiently covers you in case of personal injury (without
a third party being held responsible).
It is absolutely essential that you select the appropriate environment to foil based on your abilities.
Always consider that foiling requires a greater water depth than wind or kitesurfing (see Section 6).
If you are a beginner, the right spot may not be the most crowded spot in the water. Clear, open, reef-
free zones are best. Where possible, avoid populated breaks as foiling can be dangerous to other
people in the water.
Safety.
—01
01
02
03
Warning
Insurance
Navigation location
It is highly recommended that you wear a suitable life jacket and a helmet while foiling, among other
safety measures. This equipment is vital to your safety, though it does not exempt you from also being
careful and cautious while foiling.
The helmet
This will protect you during falls on the water’s surface or in case of a bump with the board or the foil.
The life jacket
A suitable life jacket increases floatability and as such can facilitate water starts and relaunching of
the kite board. It can also facilitate your ascent while windsurfing or wakefoiling. It may further help
cushion falls. Finally, a life jacket can be very useful when swimming back to shore after a technical
issue, or in adopting a safety position while waiting for help. Warning: A life jacket may be mandatory
in certain locations; you must always respect the applicable navigation rules.
04 Equipment
The boots
The use of boots is recommended, since a foil has sharp surfaces which can potentially cause foot
injuries in the event of a fall.
The wetsuit
Adapt your clothing to the weather conditions to avoid hypothermia. Depending on the water
temperature, choose either a full wetsuit (water <19 °C) or a short websuit (water> 19 °C). Please also
be aware that when you are cold you use more energy. Fatigue can also impact your reactivity and
cause accidents.
EN

4
1. Foiling is risky and can only be undertaken after reading and understanding all the instructions included in this
User Guide.
2. Foils are composed of extremely sharp pieces, which can cause injury to yourself and to others.
3. Wearing a suitable helmet, a life jacket and boots is highly recommended.
4. Be aware of the impact risks. Because of its reduced drag, the foil and board combination can reach higher
speeds than a single board; the foil can maintain its speed for a while before stopping.
5. The practice of foiling is prohibited in swimming areas and, more generally, in any area reserved for other activi-
ties. Make sure you know the local rules that apply to water sports and foiling.
6. Do not leave the foil in the water without supervision; currents can cause the foil to drift quickly.
7. Handling the foil in the water should be done in a gentle and controlled manner to avoid injury to yourself, others,
or damage to the foil.
Safety.
—01
TO EMEMBE
Foiling on water requires a good physical condition. We recommend to be at least 16 years old to
practice foiling. If you have any medical issues or poor physical condition, please consult with your
doctor before practicing. Weight limits associated to each product are available in the product sec-
tion of our website (www.taaroa-hydrofoil.com).
05 Physical condition
EN

5
Navigation conditions.
—02
Do not go foiling alone. It is advisable to practice foiling in the presence of a third party who is either
foiling with you or who remains on the beach, but who will be in a position to notify emergency ser-
vices in the event of an accident. If you do foil alone, remember to notify an emergency contact about
where you plan to foil and for how long.
Check the weather before going foiling (via the telephone, web, or harbor master’s office). Consider
the following: What wind strength is forecasted and in which direction? You also need to know how
the wind strength and direction will change during the day. The foil allows you to navigate in marginal
conditions. In particular, be careful of the risk that the wind will switch completely. You should also not
sail in stormy weather, the wing or sail attracting lightning. Also find out about tide times and areas of
strong currents.
01
02
Assistance
Weather
Never sail in offshore winds if you do not have a service boat. There is always a risk of switching winds
or damaged equipment. Further, when the wind is offshore, it is more difficult to return to shore by
swimming because the wind and the current push you toward the open sea.
It is also not recommended to sail when the wind is onshore if you are a beginner because the wind
then pushes you directly to the beach. This will make learning more difficult (you will not be able to
navigate along the shore without pulling and you will arrive very quickly in low water areas). It is also
more risky to practice when the wind is onshore because the slightest gust or error will lead you to the
sand. It is therefore advisable to foil when the wind is side-on. You will be able to go down wind with
leisure and you will also be sure that you can get back to shore easily at the slightest problem.
Beyond the 300-meter boundary and up to a mile from an accessible shoreline, foiling can be prac-
ticed without speed limit. Inside the 300-meter zone, you must foil with caution and at a speed of less
than 5 knots, unless an exemption has been granted by the Maritime Authority.
The practice of foiling is prohibited in swimming areas and, more generally, in any area reserved for
other activities. In addition, foiling requires a particular environment, which includes sufficient depth
(see Section 6), all of which can be impacted by weather conditions. It is also important to avoid
places with natural or artificial obstacles (rocks, shoals, etc.). Before foiling, survey the area and check
with the site manager or ask local practitioners about specific rules that may apply.
03 Navigation conditions
Do not practice in a swimming area or an area reserved for other activities. Even in an authorized area,
always pay attention to other individuals in or out of the water.
Help other practitioners. Always pay attention to other practitioners. Do not hesitate to offer assistan-
ce to a practitioner who is having difficulty or needs help.
espect the audience. Warn spectators about the potential danger of staying downwind while you
foil. Do not entrust your equipment to a person who has never foiled.
04 Be careful of others
EN
6
Components.
—03
Mast with board mounting box and a fuse-
lage fixing mount (either a Standard Kite Mount or a
Standard Windfoil Mount)
Front wing with three fixing points
(V-Fix system)
Stabilizer with two attachments allowing
the precise and fast adjustment of
the angle of the stabilizer thanks to
two screws and a half-moon geometry
directly shaped in the fuselage
(Quick N Precise)
Fuselage with anchor point for the mast
Set of screws for fixing the front wing
(3 screws)
Set of screws for fixing the stabilizer (2 screws)
Set of screws for fixing the mast to the
fuselage (2 screws)
Set of screws for attaching your board (2
screws or 4 screws for a plate mount)
Protection covers for these elements to
avoid damage during transport (not shown in the
diagram above)
01 Description
WANING
The shape of the wing profile and the wing’s surface must not be modified, altered, coated or sanded. Otherwise,
there is a risk that the balance and functioning of the foil may be impacted.
The rear edge of the wings (the trailing edge) must remain very thin in order to guarantee the foil performance.
Because of this thinness, the rear wing is more fragile upon impact. As mentioned, itis important to pay very close
attention to these sharp edges when handling and using the foil so that you don’t injure yourself or others.
EN

7
Assembly and Disassembly of the foil.
—04
02 By steps :
Assembly
Disassembly
Mount the wings on the fuselage. Front wing
with 3 M6x16mm Torx screws for the KF range;
Front wing with 3 M8x30mm Torx screws for
LA1250 and LA1600, 2 M8x30 and 1 M8x35mm
Torx screws for LA2000; 3 M8x16mm Torx
screws for the all other front wings;
Tail wing 300 with 2 M6x16mm Torx screws, all
other tail wings with 2 M6x12mm Torx screws.
Mount the fuselage to the mast with 2
M8x30mm Torx screws for the NOE and UP
range and 2 M6x20mm Torx screws for the JOY
and SWORD range. Make sure that the mast is
perfectly moored at the fuselage.
Mount the mast on the board using the mast
box by following the instructions on the next sec-
tion (see Section 5).
First remove the rear stabilizer and then the
front wing.
emove the fuselage from the mast.
emove the mast from the board.
WANING
Be sure to tighten all the components until you obtain an optimal, one-piece assembly without forcing or dama-
ging the foil. It is recommended to apply a torque of 10 N.m.
All TAAOA foils have a specific mast mounting system on the foil’s fuselage. This system is called
the Standard Kitefoil Mount (SKM) for the JOY and SWORD range and the Standard Windfoil Mount
(SWM) for the NOE and UP range. This allows the components of TAAOA foils to be easily inter-
changed for more modularity.
01 Mast mounting systems
Standard Kitefoil Mount Standard Windfoil Mount
EN

8
Assembly & disassembly on the board.
—05
Assemble
the foil on
the board
To
Disassemble
the foil
For the Plate Mount only: mount the mast to the Plate Mount by using the 2 M6x30mm Torx
screws. The Tuttle, Power Box and Mini Pro Box mounts are already affixed to the mast. Lay the
board upside down (hull up).
Insert the heel of the foil, already mounted onto the mast box provided, in the hull or align
the rails of the board in the case of a Plate Mount.
In the case of a Tuttle, Power Box or mini Pro Box, tilt the board on the edge and carefully
drive it inside the board mounting box.
Tighten the M6x55mm screws for the NOE and UP range and M8x40mm screws for the
SWORD and JOY range with a TOX key, remembering to place the 18mm rubber washers.
Lay the board upside down (hull up).
Place the board + foil upside down (hull up).
Disassemble the wings and fuselage.
Tilt the board on its edge to unscrew the screws attaching the board to the mast box
(Power Box, Tuttle Box, mini Pro Box); or unscrew with the board upside down in the case of
a plate mount.
By steps :02
J OY/
SWORD
MAST
NOE
MAST
TAAOA masts are mounted on the board by a mounting box system. Different
types of mounting boxes are available to adapt to the board mounting systems :
Mini Pro Box
Deep Tuttle
Plate Mount
Power Box
01
EN
Deep Tuttle
Plate Mount Power Box
UP
MAST

9
Using the foil.
—06
Handling on land :
01
Because of its geometry and weight, the foil's behavior drastically differs on land
and on the sea.
Don’t leave the foil assembled with the board placed upside down or right side up. It might tip over or
get damaged. Always lay the assembled foil on its edge as follows :
Walk into the water with your board under your arm (on its side).
Leaving & returning to shore :
Advance until you reach a depth greater than the height of the foil in order to eliminate any risk of
impact. Because the board and the foil sink when you, the rider, climb on the board, it is important to
maintain a margin of safety. In shallow waters, we recommend that you move away by swimming, kee-
ping the board and the foil on the edge until reaching an area where the water depth is sufficient and
safe. When you are towed, we recommend keeping the board and the foil on its edge until reaching
an area where the water is sufficiently deep.
When returning to shore, get off the board with the same distance from the shore as you did when
you got on. Then walk or swim or get towed back to shore. emember to keep the board and the foil
under your arm, on its side, like you did when starting.
02
—
— b
— c
EN

10
Using the foil.
—06
The Quick N’ Precise system allows you to adjust the stabilizer’s position and angle. Below are the
settings we recommend depending on your desired performance.
Position
This setting decreases the angle of the rear wing, which then increases the lift of the front wing and
the maneuverability, while reducing stability. This setting is recommended for fast navigation, heavy
swell (or big waves), for lighter riders, and shorter boards.
All your adjustments must be made on the ground, while stationary.
Rear
earCenter
Front
Front
This setting increases the angle of the rear wing, which then decreases the lift of the front wing and
your maneuverability while increasing your stability. This setting is recommended for less lift or for low
speed navigation and small swell (or small waves), for heavier riders, and longer boards.
More stability
Less maneuverability
Less stability
More maneuverability
Neutral
03
EN

11
Using the foil.
—06
It is advisable to experiment with different settings to find the one that suits you best. Do not hesitate
to change it depending on the conditions. Our technical experts will be happy to answer any ques-
tions (see Section 10). All your adjustments must be made on the ground at a standstill.
Settings
Rear
Angle
Front
Flow
Flow
Flow
Nose-up setting (more stability)
Nose-down setting (more maneuverability)
Neutral setting
04
EN

12
Foil maintenance.
—07
— a
01
— b
— c
— d
emove the front wing of the fuselage and the mast from the fuselage.
Clean and rinse all the parts of the foil with clean (fresh) water before storing.
Protect the parts by storing them in their TAAOA carrying case or any other suitable protection.
Be sure to keep the foil’s surface clean and smooth. The foil’s functionality depends on a dynamic
balance between each part—the mast and the wings are sensitive to imperfections. If the surface
finish or other parts are damaged, the risk of injury or sudden falls increases.
In the event that the foil’s surface is roughed after a fall or impact, fill it with resin or epoxy putty and
sand until you’re able to find a professional who can repair it. For other advice about repairs, don’t
hesitate to contact our customer service (see Section 10).
Mast Fuselage Front wing Rear stabilizer Screws
Always rince the foil with fresh water after each use and remember the following:
EN

13
List of products.
—08
NOE 80 / NOE 97 / NOE 97 UHM
JOY 90 HR / JOY 100 HR / SWORD 108 UHM
UP 55-65-75-85 / UP 80 HR / UP 90 HR
HA600 / HA700 / HA700 UHM
HA1050 / HA1450
LA 900 / LA1250 / LA1600 / LA2000
KF LA700 / KF LA800
KF HA520 / KF HA520 UHM / KF HA550
Below is the list of TAAOA products for which this User Guide applies :
MASTS
01
FRONT
WINGS
EN
KF 54 Ti / KF 60 / KF 60 Ti
55 / 65 / 75 / 85 / 85 Ti / 95 / 105
FUSELAGES
170 UHM / 200 / 225
250 / 300 / 400
TA I L
WINGS

14
Limitation of liability.
—09
By purchasing, handling and / or using a TAAOA product that appears on the list provided in Section
12 of this User Guide, you acknowledge having read and understood this User Guide, including all of
the instructions and warnings contained in this User Guide. You agree that all users of the equipment
will read and understand this User Guide, including the operating instructions and warnings.
02
01 Agreement
The use of this equipment and its components involves certain risks and dangers which can cause
serious injuries, sometimes even fatal injuries, for the user or third parties. By using this equipment,
you assume and accept any risk of injury to yourself or any other third party while using this equip-
ment. The risk inherent in this sport can be significantly reduced by following the warning instructions
in this Guide and using common sense.
FLY 4 ALL IS NOT ESPONSIBLE FO ANY DAMAGE CAUSED TO THE USE O ANY THID
PATY FO NON-COMPLIANCE WITH THE POVISIONS OF THIS GUIDE.
isk acceptance
EN

15
Technical support
— 10
If you have any questions about TAAOA products :
Please consult our website where you will find helpful content :
https://www.taaroa-hydrofoil.com/forum/help-1
Email us at the following email address :
support@fly4all.altassian.net
EN

advncing with technology
tro-hydrofoil.com
This manual suits for next models
35
Table of contents
Other TAAROA Windsurfing Equipment manuals