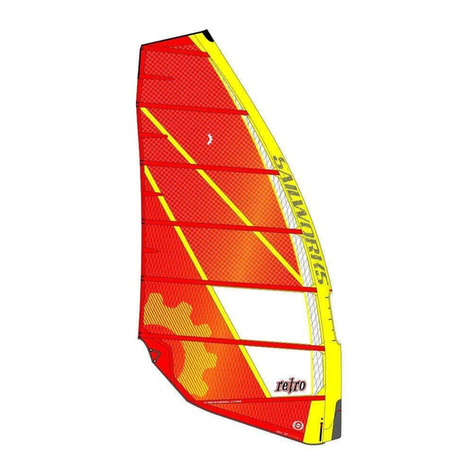
Sailworks GEAR 2000 Quick start guide

Specifications
First Time Rigging
Rig Assembly
Tuning Tips
Settings Chart
Trouble Shooting
Sail Maintenance
5.2
5.6
6.0
6.
6.9
7.
7.9
8.5
9.1
9.9
10.7
2000
into the millennium
GO DEEPER
Rigging & Tuning Guide
SAIL MAINTENANCE
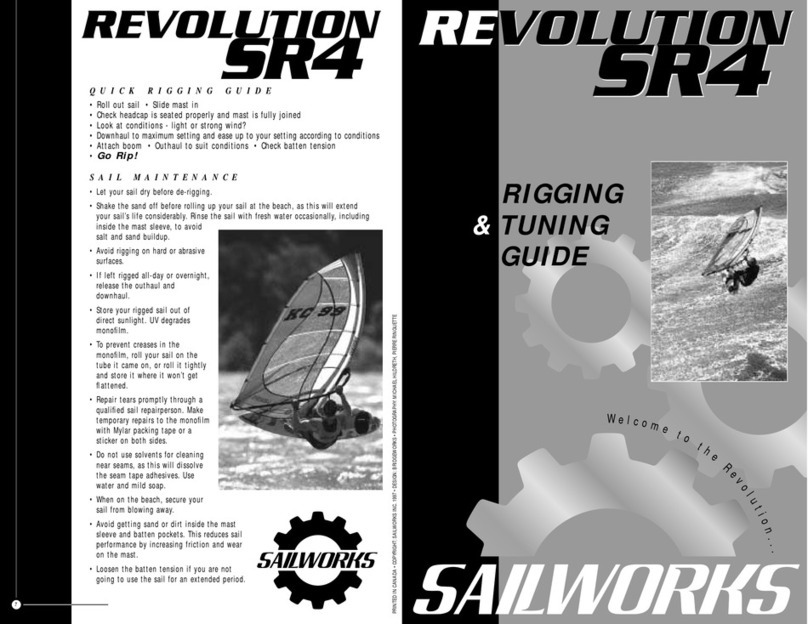
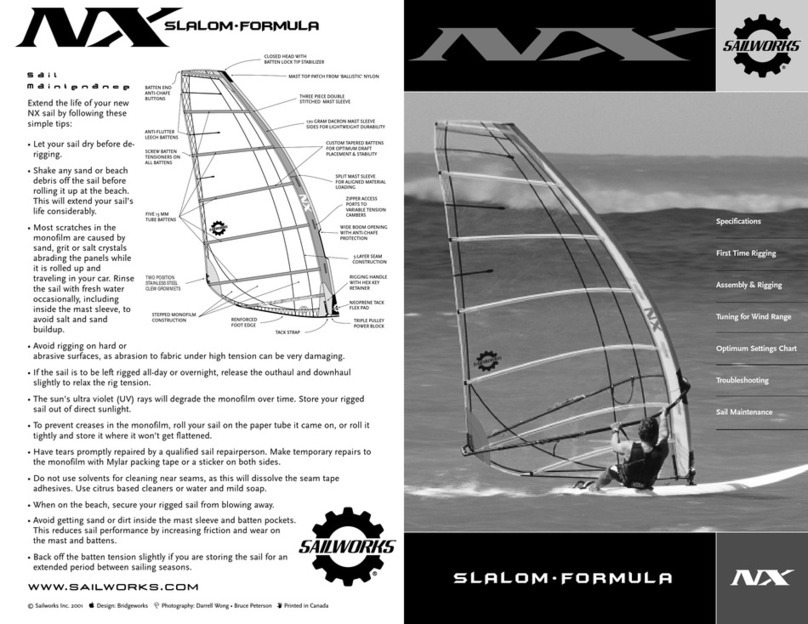
Extend the life of your new X-T2sail by following
these simple tips:
• Let your sail dry before de-rigging.
• Shake the sand off before rolling up your sail at the
beach, as this will extend your sail’s life considerably.
• Most scratches in the monofilm are caused by sand,
grit or salt crystals abrading the sail while it is rolled
up and traveling in your car. Rinse the sail with
fresh water occasionally, including inside the
mast sleeve, to avoid salt and sand buildup.
• Avoid rigging on hard or abrasive surfaces.
• If the sail is to be left rigged all day or overnight,
release the outhaul and downhaul.
• The sun’s ultra violet (UV) rays will degrade
the monofilm. Store your rigged sail out of
direct sunlight.
• To prevent creases in the monofilm, roll your sail on
the tube it came on, or roll it tightly and store it
where it won’t get flattened.
• Repair tears promptly through a qualified sail
repairperson. Make temporary repairs to the
monofilm with Mylar packing tape or a sticker on
both sides.
• Do not use solvents for cleaning near seams, as this
will dissolve the seam tape adhesives. Use citrus
based cleaners or water and mild soap.
• When on the beach, secure your sail from
blowing away.
• Avoid getting sand or dirt inside the
mast sleeve and batten pockets.
This reduces sail performance by
increasing friction and wear on the mast
and battens.
• Back off some batten tension if you are not
going to use the sail for an extended period.
© Sailworks Inc. 2000 yDesign: Bridgeworks ®Photography: Darrell Wong • Bruce Peterson ÚPrinted in Canada

USE THE RIGHT MAST
For best wind range and performance, use the specific Sailworks XR mast that each size was
designed, tested and refined for. Alternatively, choose a high-carbon content mast that closely
matches the recommended mast compatibility. Pay particular attention to the mast length and
IMCS stiffness to ensure compatibility with the sail’s shaping and tension profile. Your mast
MUST be within this required range regardless of the brand or model. Note that not all sail sizes
work on the same mast. As a rule, larger sails need longer and stiffer masts while smaller sails
require shorter and softer masts.
All of the X-T2sails are finished with a closed-head, non-adjustable, mast sleeve due to the design
and function of the T-Top fitting. Do not try to use a mast that is longer than the specified luff
length. The luff and boom lengths listed are intended as a guide to rig assembly and sail trim.
Depending on the rig components you choose, these dimensions may not always correspond
exactly to the settings that are best for you. We measure boom length from the front of the mast
at the middle of the boom opening, to the back corner of the sail between the two clew
grommets. We measure luff length on a rigged sail from the underside of the T-Top fitting (top of
the mast), around the front of the mast curve to a point perpendicular to the tack pulleys.
CHANGE THE MAST TOP PLUG
The X-T2’s rotating T-Top headcap fitting requires a harder density mast top plug than is typically
supplied with most masts. Two sizes of solid white Delrin mast plugs and two sizes of ribbed
clear urethane mast plugs are supplied with these instructions: choose the one that best fits your
mast tip. A tight solid fit between the mast plug and the mast
is necessary to give adequate tension and support to the T-Top
fitting and head batten. Use the monofilm shims provided to
ensure a snug fit of the mast plug to the mast tip (see photo).
FIRST TIME RIGGING
JUST WHEN YOU THOUGHT
YOU COULDN'T GO ANY FASTER…
It’s the edge you've been waiting for.
Dream-like top end speed and handling
WITHOUT any loss of low-end power.
X-T2is an unmistakable development
from the original X-T Racing, but the
feel is totally different. A much freer
leech, improved T-Top system, and refined shaping and tension profiles
are key design factors that will put you in a whole new state of speed-
balance. In swells and chop that previously may have demanded some
trimming movements, X-T2has a balance and forgiveness factor that
lets you stay locked and in the zone.
The Sailworks team has sweated over every tiny detail to produce what
designer Bruce Peterson describes as his "fastest, cleanest, easiest
Sailworks race sail ever."
X-T
2
DIMENSIONS REQUIRED MAST
Note that the luff and boom lengths listed are intended as a guide to rig assembly and sail trim. Depending on the rig components you
choose, these dimensions may not always correspond exactly to the settings that are best for you. We measure boom length from the
front of the mast at the middle of the boom opening, to the back of the clew. We measure luff length on a rigged sail from the top of the
mast, around the front of the mast curve to a point opposite the triple pulleys.
*Requires fixed base extension or 520 cm mast. Do not use mast tip extension.
Ideal mast Alternative mast
SIZE LUFF BOOM WEIGHT # # IDEAL MCS IMCS XR
m2MEDIAN (cm/ft) MEDIAN (cm/ft) (kg/lbs) CAMS BTNS MAST CURVE % STIFFNESS 30 60 90
5.2 30 / 1 ' 1" 172 / 5' 8" .1 / 8.8 3 7 XR- 30 12 21 - 23
5.6 3 / 1 ' 3" 178 / 5' 10" .2 / 9.2 3 7 XR- 30 12 21 - 23
6.0 5 / 1 ' 7" 185 / 6' 1" .3 / 9.5 3 7 XR- 30 12 21 - 23
6. 58 / 15' 0" 192 / 6' " .5 / 9.9 3 7 XR- 30 12 21 - 23
6.9 71 / 15' 6" 201 / 6' 7" .7 / 10.3 3 7 XR- 60 12 21 - 25
7. 85 / 15' 11" 209 / 6' 10" .9 / 10.8 3 7 XR- 60 12 2 - 26
7.9 99 / 16' " 219 / 7' 2" 5.1 / 11.2 3 7 XR- 90 12 2 - 30
8.5 51 / 16' 10" 228 / 7' 6" 5.3 / 11.7 3 7 XR- 90 12 28 - 30
9.1 529 / 17' " 237 / 7' 9" 5.5 / 12.1 3 7 XR- 90* 12 29 - 3
9.9 5 5 / 17' 11" 2 9 / 8' 2" 5.8 / 12.8 3 7 XR- 90* 12 29 - 3
10.7 56 / 18' 6" 260 / 8' 6" 6.1 / 13.6 3 7 XR- 90* 12 29 - 3

ASSEMBLY
AND
RIGGING
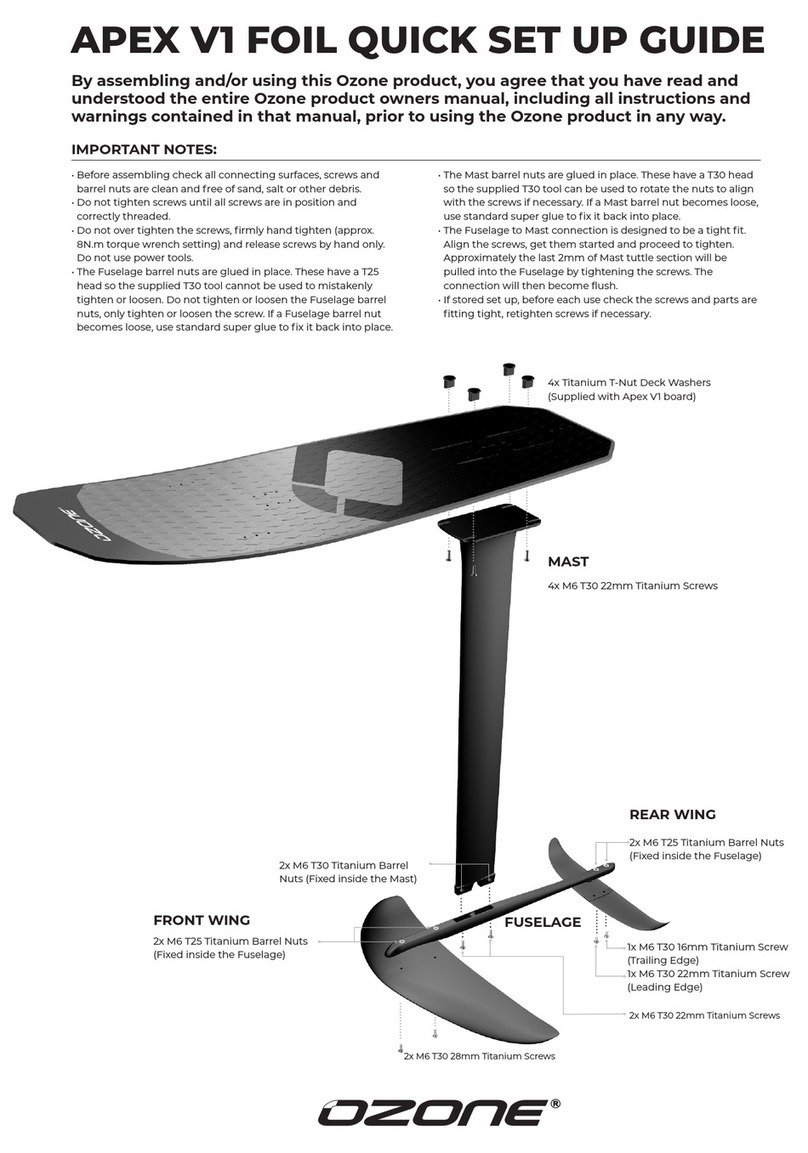
1. INSERT THE MAST
Push back the boom-opening flap between the two diamond-
shaped cutouts in the mast sleeve. Guide the mast up the
mast sleeve, coming out the lower boom cutout and back in
the upper boom cutout. Try to keep the cams on the mast, but
don’t worry if they come off – keep inserting the mast. Do
NOT try to re-seat the cams without the boom attached (Any
cams that do come off the mast can easily be re-seated once
the boom is attached and the outhaul pulled). Pull the sail
down the mast in sections by working the mast tip to the top
of the luff before pulling the tack of the sail down to the
base of the mast.
Open the access flap at the top of the mast sleeve and check
that the T-Top stem fitting is seated completely into the mast
tip plug – see photo. The key to easily fitting the T-Top fitting
into the mast is to keep some slack in the mast sleeve just
below the tip of the mast. Do not try to seat the T-Top fitting
while the luff is under tension. Do not downhaul the sail until you are certain the T-Top fitting
is properly seated into the mast. Also check that the two-piece coupling of the mast is joined
completely before downhauling.
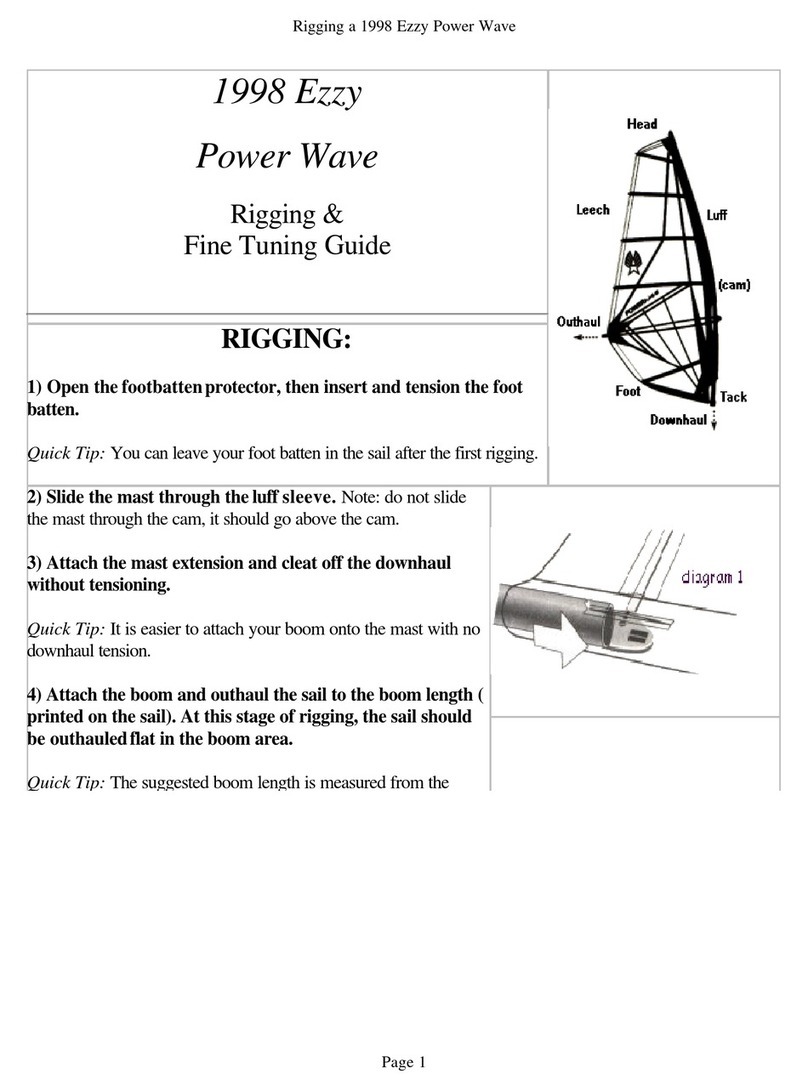
2. ATTACH THE MAST BASE
Estimate the amount of mast base
extension needed by subtracting the mast
length from the sail’s luff length. Your
downhaul system should have a low-
friction 6:1 purchase. The triple pulley tack
fitting works best with 4.0 or 5.0 mm pre-
stretched line. To minimize downhauling
friction, replace worn lines with a fresh line
as needed. Lace the downhaul line through
the triple tack pulley: keep the path of line
looping in the same direction each time
you feed it through the tack pulley and
through your base pulley. We recommend a
counter-clockwise direction working from the underside upwards – see photos. Don’t cross the
lines, as this increases friction and makes the downhaul harder to pull. Do not fully downhaul
the sail yet – stop at just "hand-tight".
3. ATTACH THE BOOM
If you plan to use the on-the-fly adjustable outhaul system supplied with the sail, set
that up now. Follow the instructions enclosed with the adjustable outhaul for setup and
use. Adjust your boom to the length specified for the sail. Attach the boom to the mast at the
middle of the boom opening and re-adjust it after the sail is fully rigged. Be careful not to
attach it too high in the boom opening - you must account for the sail to be downhauled
further. Be careful not to pinch the mast sleeve under the boom clamp.
Lace the outhaul through the clew grommet that matches your height preference. Pull the
outhaul completely so the sail is flat, using the recommended boom length. This setting - loose
downhaul and tight outhaul - makes it very easy to put the cams on the mast, and to adjust
the cam tension, if necessary.
4. ADJUST THE VTC CAMS
Your new X-T2comes with Sailworks’ unique VTC
system. This cam system allows you to adjust the
cam tension separately from the batten tension,
and also adapts to fit a variety of mast
diameters.
With the sail assembled as described in steps 1-3
above (hand-tight downhaul, full outhaul), open
the zipper access port at each cam and re-seat any cams that may have
come off the mast as follows: The correct technique is to push down and
back on the batten while pushing up and forward on the cam from the
underside of the sail. Next, pop open the adjustment buckle by pulling up
on the webbing tail (The adjustment buckle "snap-fits" into the side of the
cam). To tension the cam, pull the webbing strap forward (toward the mast) while pushing the
batten down and back from the mast – see photo. As you push down on the batten, work the
slack webbing free by pulling the strap forward and back a few times. Rotate the cam from side
to side with your hand to equalize the strap tension within the cam. The webbing inside the
cams is held very snugly so it may take more than one attempt to pull out all the slack. The
correct setting should tension the mast sleeve snugly without impeding rotation. Set the cams
tight against the mast for optimal control and power in high winds; slightly looser for easier
rotation in light winds.
Snap the buckle firmly back into the side of the cam. It should sit flush with the side of the
cam when closed. If the cams are set very tight, don’t try to close the zippers until the sail is
fully downhauled; if you then cannot close the zippers, you’ve set the cams too tight. Once the
cam tension is set, you don’t need to re-adjust it for each session!
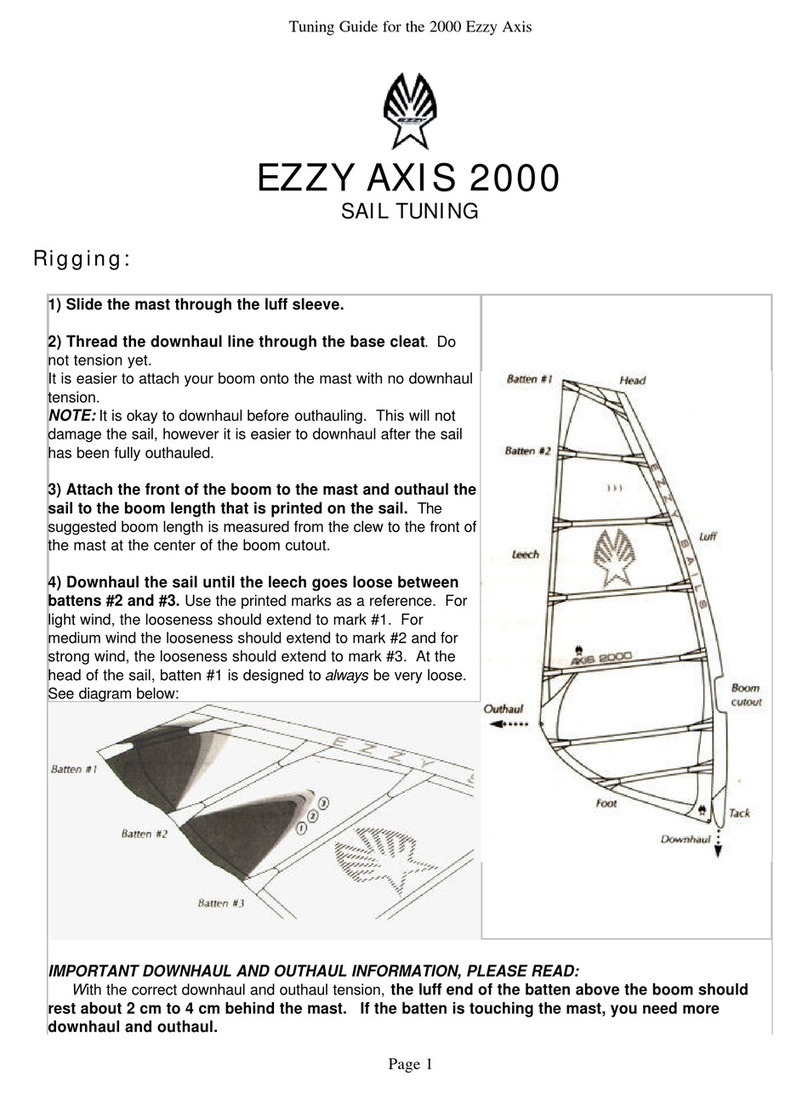
5. TUNE THE DOWNHAUL - CONTROLLING THE SHAPE AND TWIST
(refer also to the tuning chart on the following pages.)
The downhaul controls the sail’s shape, twist and performance. Discover its effect by slowly
pulling and releasing the line. If necessary, use an easy-rig or downhauling tool so it is easier to
pull hard. Observe the change in depth and tension of the leading edge (front 1/3 of the sail),
and the flattening and loosening of the head area (upper leech between batten #2 & #3) as
more downhaul is pulled. Specifically notice the change in the angles, or twist, of the battens;
the top batten should open to leeward the furthest—called "progressive twist. The twist profile
is cut into the sail, but is ultimately controlled by the downhaul tension. More downhaul
induces more twist; less downhaul allows less twist. Twist improves sail efficiency and makes it
easier to control.
The ideal downhaul setting gives a
tight luff and a lean (not blunt)
entry, and the leech area between
the top two battens should
become loose. This static looseness
of the leech is normal and will pull
tight as the sail twists open under
wind load. Follow the reference
marks on the sail for guidelines on
downhaul tension (See the photos
on the next page). Once you’re
familiar with the correct downhaul
setting, re-check the mast base
height. If necessary, re-adjust it so
that the tack pulley sits very close
to the mast base

6. TENSION THE STREAMLINED
BATTEN TENSIONERS (SBT’s)
The battens are tensioned
using the hex-key tool found under the strap in the
tack handle. Insert the hex-key into the cap screw
inside the SBT at the leech end of each batten. Turn
the hex-key to the right (clockwise) to tighten.
Tension the battens JUST until the wrinkles across the
batten pockets disappear. Look for a continuous
smooth shape to the sailcloth next to the batten pocket (see photos
to the left). You should see a smooth reflection, with no wrinkles
alongside the battens. The batten tension will need to be re-
tightened after one or two uses as the sail sets into its final shape,
but then it need not be readjusted for every session! If you leave the
batten tension too loose, the cap screws may fall out.
CAUTION: DO NOT OVER-TENSION THE BATTENS - POOR
ROTATION, EXCESSIVE FOIL DEPTH AND DAMAGE TO THE SAIL CAN RESULT.
7. ADJUST THE T-TOP HEAD BATTEN
The head batten on the X-T2does NOT require strong batten tension.
This batten is designed to function under deflective load to pull
upwards on the leech. Over-tensioning the head batten will cause
the head area to lose all support. If the head and tip of the sail look
dramatically loose, reduce the head batten tension to increase
support to the head area (See photos to the left).
8. BALANCE THE OUTHAUL SETTING
Release any outhaul tension and allow the sail to relax naturally to its
fullest depth. Pull just enough outhaul tension to pull the sail up off the
boom tube and tighten the clew area. This is a good all-around outhaul
setting. If necessary, re-adjust the back end of your boom to just touch
the clew of the sail and tie off the outhaul. If you are using the
adjustable outhaul system you need to set your boom length slightly longer to allow for the
outhaul to be pulled further.
From a neutral setting, slightly less outhaul (negative) will make the sail fuller and more
powerful for reaching, but it will also be harder to control when over-powered or sailing
upwind. For upwind sailing or over-powered conditions, a small amount of outhaul tension
(positive 1-2 cm, or 2") will improve performance by making the sail flatter and tighter.
9. TUNING FOR WIND RANGE
You can expand the X-T2’s wind range significantly by simply adjusting your downhaul. As a
general rule, you release a little downhaul tension when sailing in lighter winds. This creates
more power by allowing the sail to be fuller, and by increasing leech tension. It will also reduce
the twist, which makes pumping more efficient.
In stronger winds or very bumpy water, the downhaul should be pulled more to tighten and flatten
the sail and reduce the excess power. Strong downhaul tension also increases the twist, which
improves control and handling by lowering the center of effort. IMPORTANT: Whenever you pull or
release the downhaul, you’ll need to readjust outhaul too, as the two adjustments are inter-related.
The tack strap at the base of the sail can be used to slightly alter the depth and tension in the sail.
For very bumpy water conditions, or when you are sailing very over powered, pull the tack strap
very tight. This will increase the depth of draft below the boom and increase tension along the foot
edge, which lowers the center of effort and allows the upper leech to respond more freely.
To save time rigging next session, take note or mark off the position of successful
downhaul and outhaul settings so they are easy to repeat. See the Sailworks website –
www.sailworks.com - for more rigging information and frequently asked questions.
Needs more batten tension
Correct batten tension
correct setting
top batten too tight
S E T T I N G S C H A R T
LEECH TWIST PROFILE CROSS SECTION PROFILE DOWNHAUL SETTINGS OUTHAUL SETTINGS
LOW END
Low End Performance Low End Downhaul Low End Outhaul
• Light wind/underpowered • Leech is loose behind both • Boom length becomes shorter
• Flat water white arc lines on sail • Pull the outhaul about 1.5 cm
• Downwind sailing • Deeper foil from neutral
• More power, less control • Less twist • Deeper foil
Mid Range Settings Mid Range Downhaul Mid Range Outhaul
• Steady/moderate wind • Leech is loose between both • Boom at referenced length on tack
• Choppy water white arc lines on sail • Pull the outhaul about 3 cm
• All-round sailing • Lean foil from neutral
• Power and control • Moderate twist • Lean foil
Top End Performance Top End Downhaul Top End Outhaul
• High wind/overpowered • Leech is loose ahead of both • Boom length becomes longer
• Upwind sailing white arc lines on sail • Pull the outhaul about 5 cm
• More control, less power • Flatter foil from neutral
• More twist • Flatter foil
MID RANGE
TOP END
LOW END
MID RANGE
TOP END
Loose BEHIND
both marks
Loose BETWEEN
both marks
Loose AHEAD
of both marks
Other Sailworks Windsurfing Equipment manuals