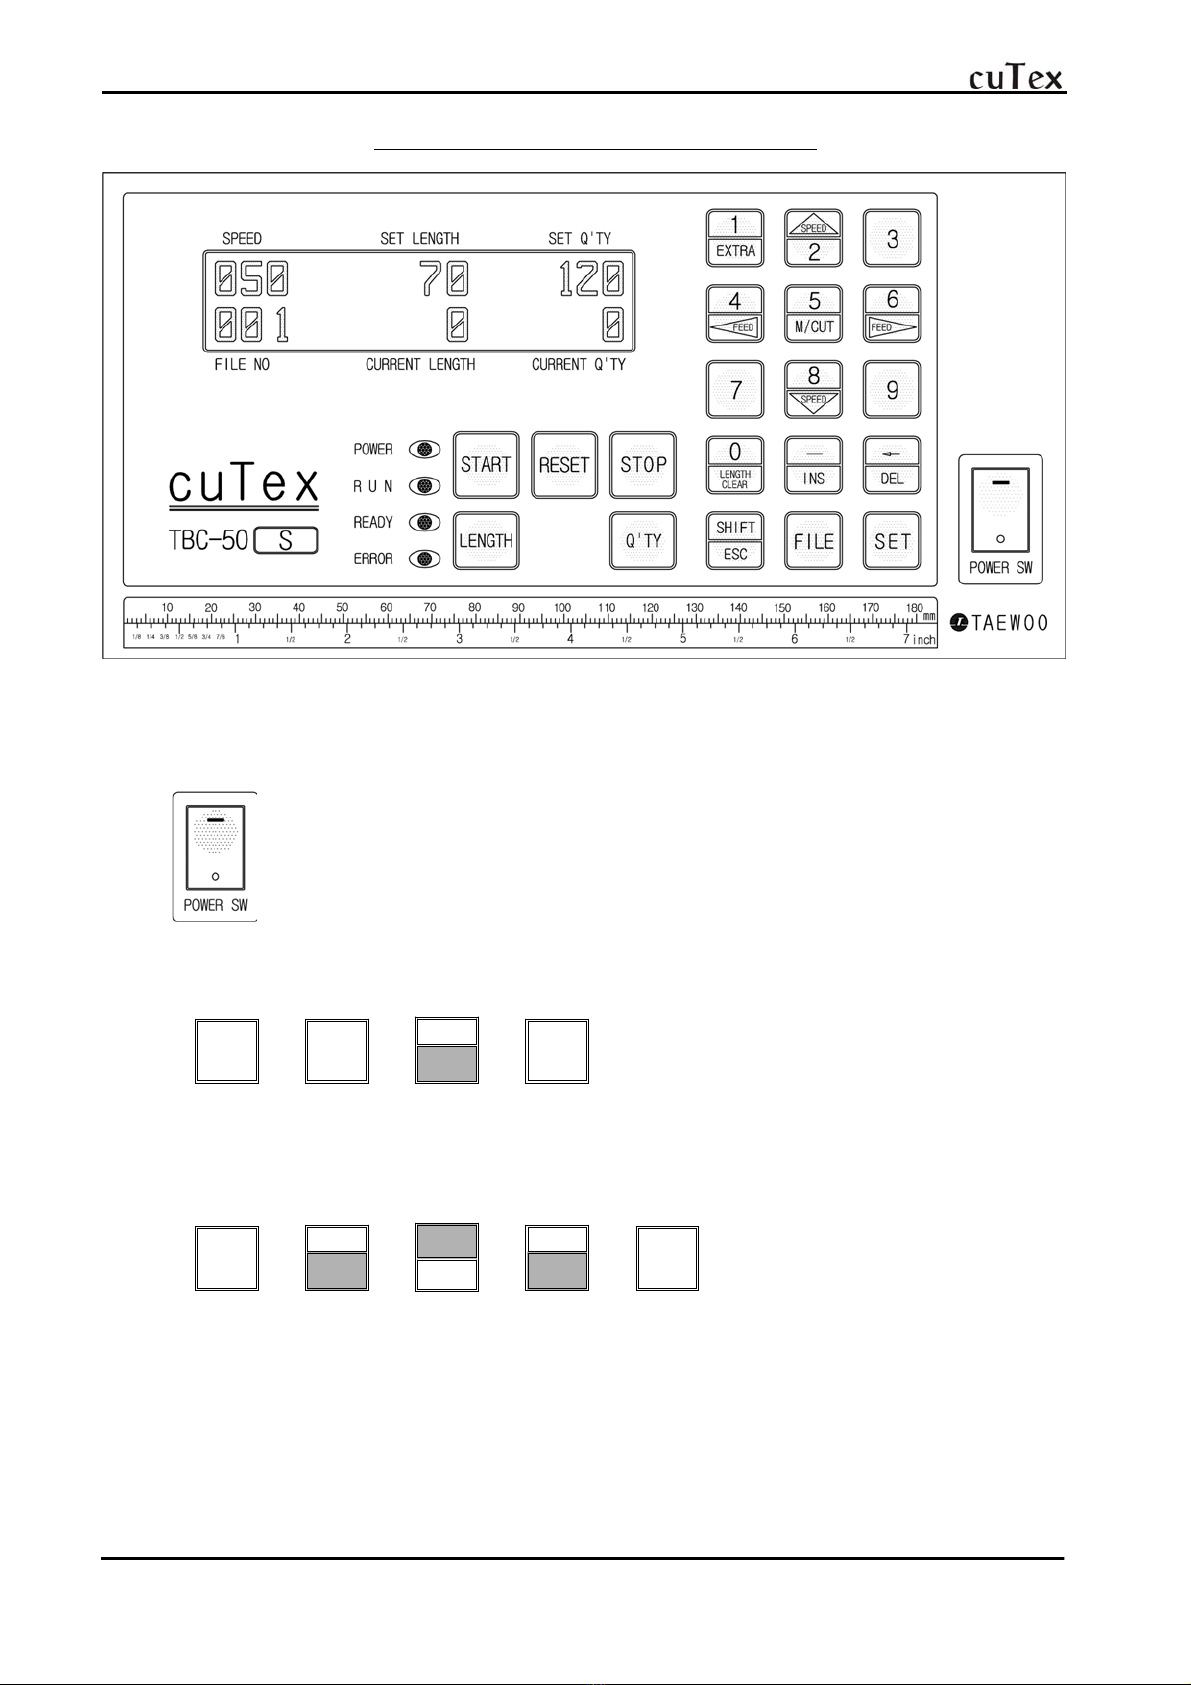
E-mail : cutex@chol.com http://www.cutex.kr
- 9 -
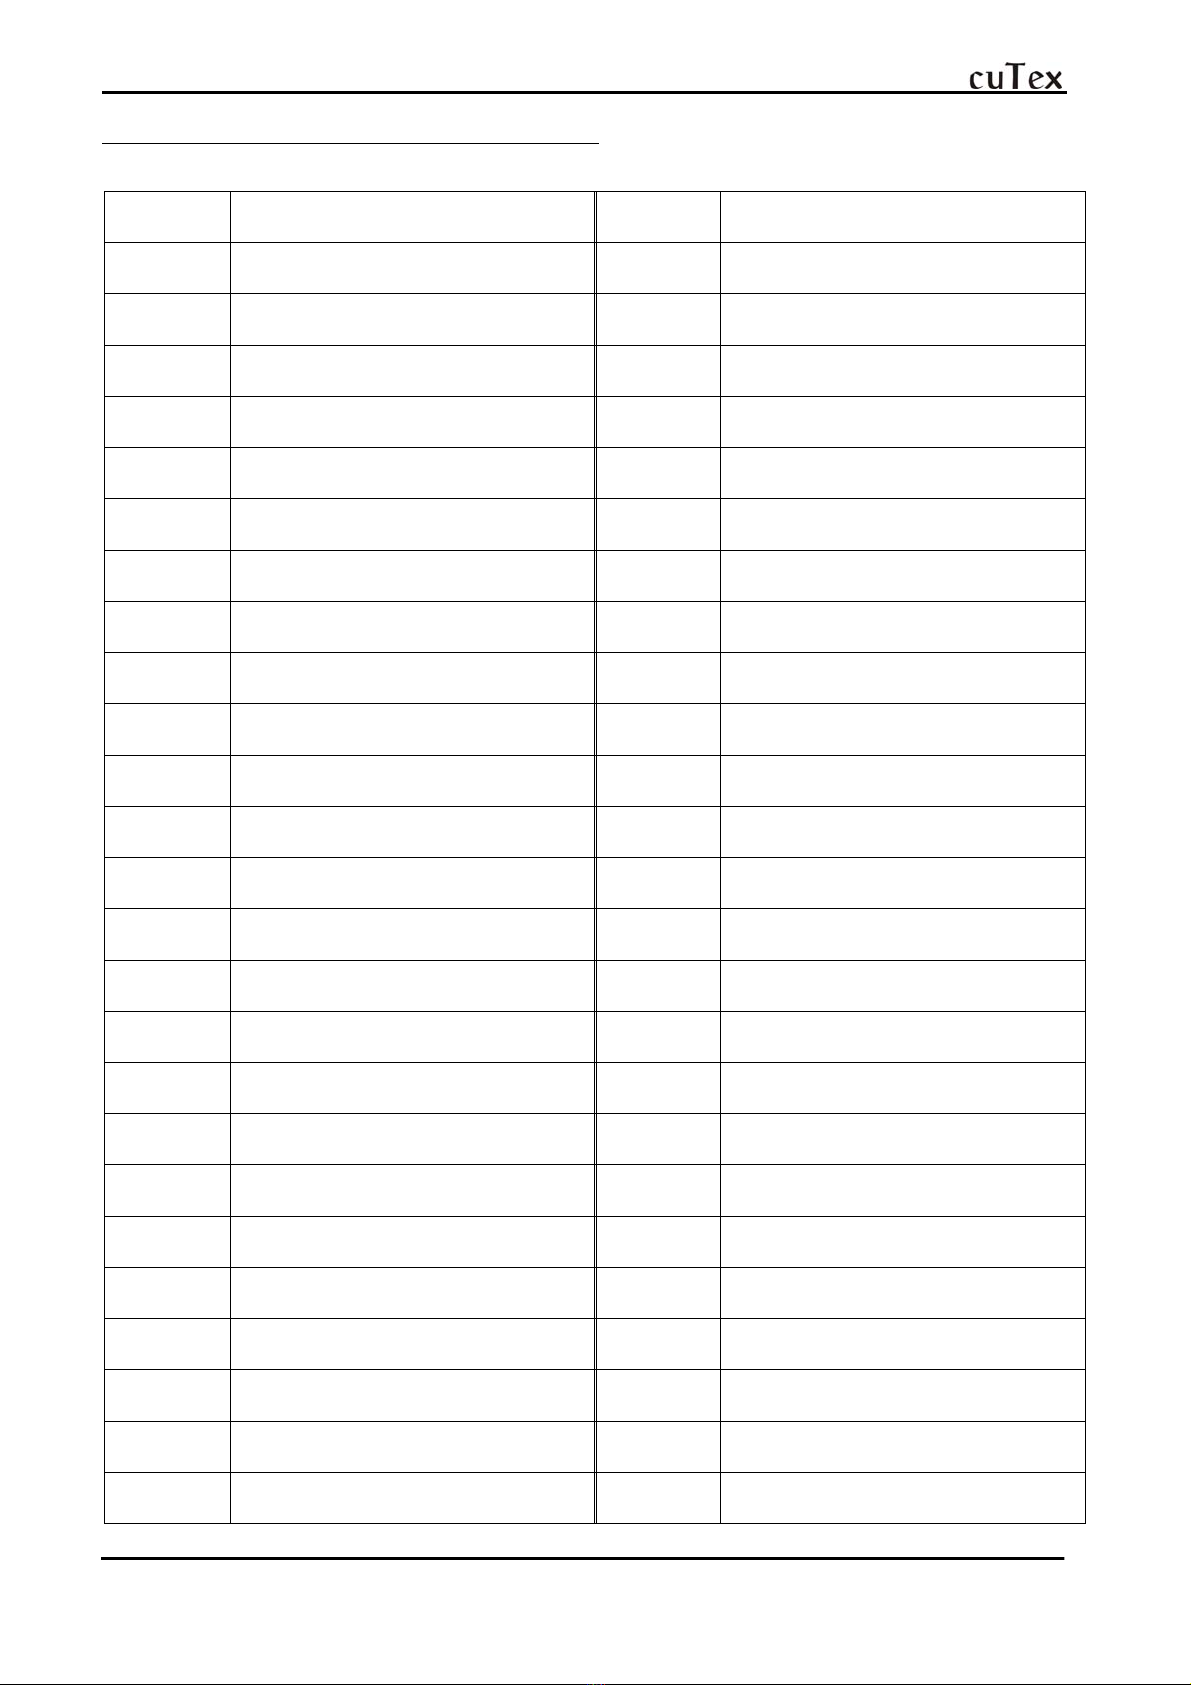
TBC-50S Part List A (Feeding part)
Part No. Description Part No. Description
A-1 Clamping Bolt(M3×5L) A-26 Guide Clamping Bracket
A-2 Knife Safety Cover A-27 Stopper
A-3 Space Plate of Roller Bracket A-27-1 Stopper Bracket
A-4 Clamping Bolt(M3×5L) A-27-2 Pressure Stopper Shaft
A-5 Pressure-control Bolt A-27-3 Rubber Ring
A-6 Pressure-control Spring Cover A-27-4 Clamping Ring
A-7 Pressure-control Spring A-27-5 Clamping Bolt (M3×4)
A-8 Detent Screw(M4×6L) A-27-6 Clamping Bolt (M5×12)
A-9 Slide Block of Upper Roller A-27-7 Clamping Bolt (M4×4)
A-10 Right Roller Bracket A-27-8 Stopper
A-11 Slide Lever A-27-9 Spring Clamping Bolt
A-12 Oilless A-27-10 Spring (M4×15)
A-13 Clamping Washer A-28 Lower Roller
A-14 Wrench Bolt(M×14L) A-29 Upper Roller
A-15 Tie Bar of Stepping Motor A-30 Front-guide Pin
A-16 Bearing Cover A-31 Lever Shaft
A-17 Clamping Bolt(M3×5L) A-32 Guide Ring
A-18 Feed-timing Gear(MXL30T) A-33 Knob Bolt of Guide Ring
A-19 Detent Screw(M4×6L) A-34 Round Screw(M4×5L)
A-20 Drive-timing Gear(MXL20T) A-35 Lever Bracket
A-21 Detent Screw(M3×6L) A-36 Detent Screw(M5×5L)
A-22 Timing Belt(MXL75) A-37 Lever
A-23 Stepping Motor A-38 Left Roller Bracket
A-24 Clamping Bolt(M4×13L)
A-25 Ball Bearing(#696)