Taiji TSK-110B User manual


■Accessories
-2-
NamesofParts
TSK-110B
TSK-210B
TSK-220B
TSK-420B
2
3
3
6
1
1
1
1
1
1
1
1
Dispensing lamp
Water supply lamp
Power lamp
Power switch
Temperature indicator lamp
Temperature control switch
Nozzle
Tray
Server bottle holder
Water tank overow outlet /
Water drain valve
Bottle holder funnel
Bottle holder (lter inside)
Air vent
Water tank inlet
Manual dispensing switch
Water level indicator
Drain Tubing
FunnelCap
<TSK-110B,210B,220B,420B>

-3-
1
■Accessories
TSK-130B
TSK-230B
1
1
Joint hose
Water supply lamp
Power lamp
Power switch
Temperature indicator lamp
Temperature control switch
Nozzle
Server bottle holder
Tray
Sake level indicator
Sake level indicator ttings
Sake level indicator mounting
screw
Sake level indicator mounting
metal
(* for TSK-130A only)
Air vent
Water tank inlet
Dispensing lamp
Manual dispensing switch
Water level indicator
Water tank overow outlet /
Water drain valve
Funnel
1
1
Drain
Tubing
1
1
Stopcock
1
1
Sake level
indicator
1
1
Sake level
indicator ttings
1
-
Sake level
indicator
mounting metal
4
2
Sake level
indicator
mounting screw
1
Cleaning brush
1
1
Joint cap
<TSK-130B, 230B>


-7-
1. Push the power cord plug into a wall outlet.
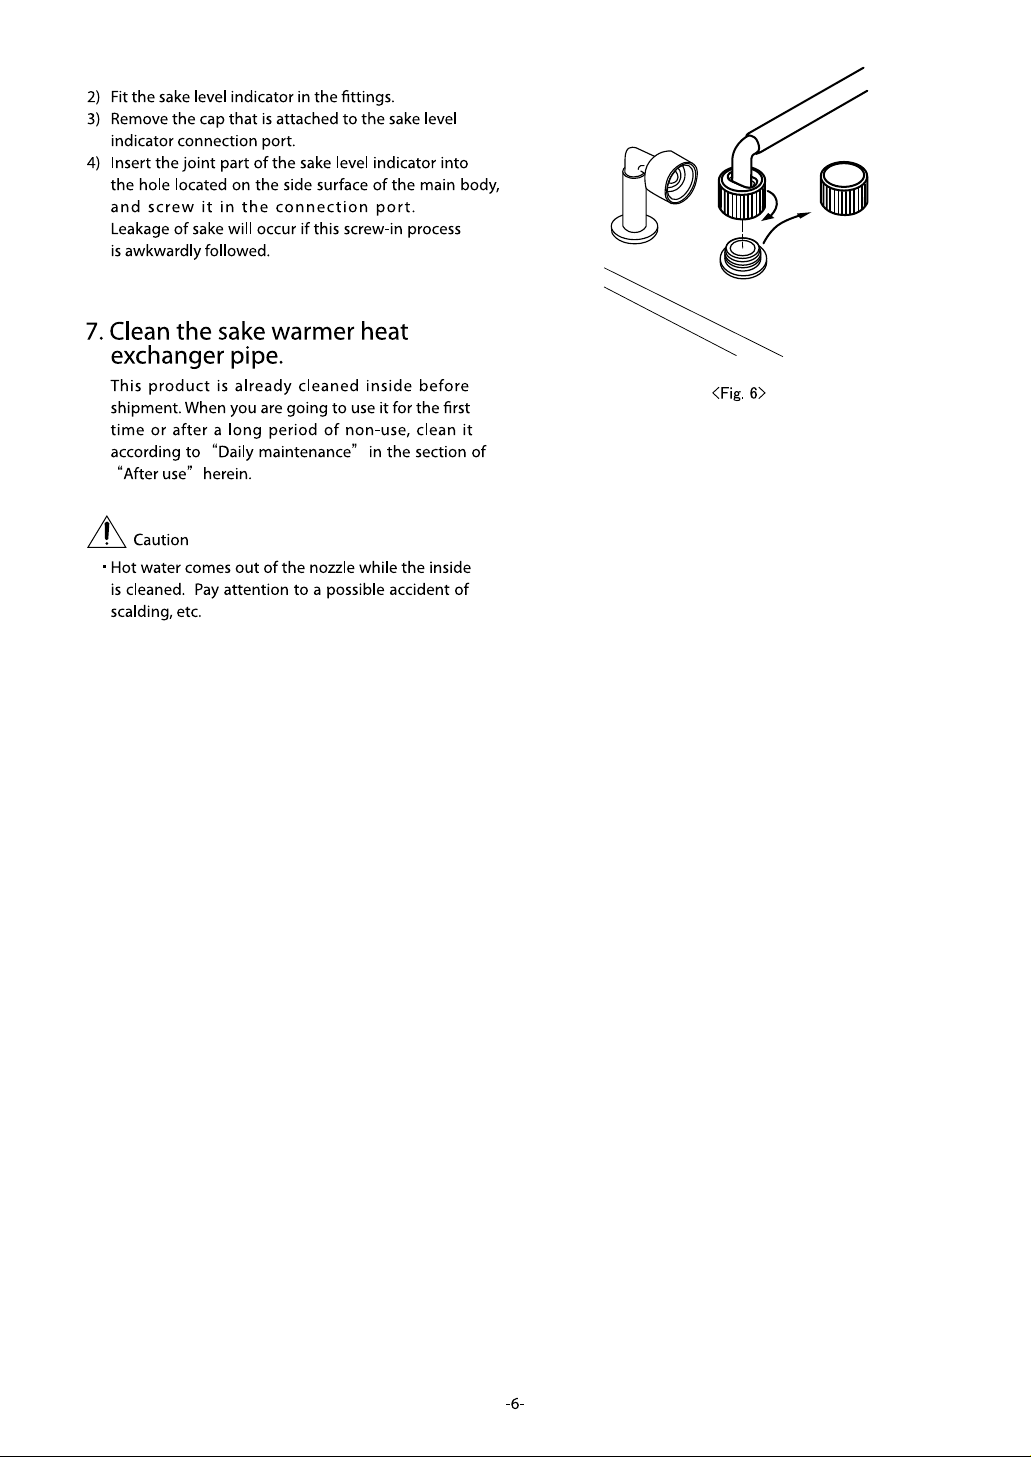
2. Press the power switch.
When the
“
power switch
”
is pressed, the
“
power
lamp
”
is lit. At the same time, the
“
water supply lamp
”
is lit and an alarm gose o to indicate the
“
need for water supply
”
.
3. Add water or hot water to the water tank.
Use the provided funnel and ll water or hot water until
the water level reaches the
“
optimum
”
level on the
water level indicator. (Fig. 7)
・The water tank holds approximately 4.7 liters
of water. (About 6.7 liters for the TSK-220B, TSK-
230B, and TSK-420B)
・The water supply lamp goes out and alarm stops
when the water level reaches the lowest level
but keep adding water until it reaches the
“
optimum
”
level.
・
Excessive water (beyond the maximum level) will be
discharged through the overow outlet.
Caution
・Never feed any liquid other than water or hot water.
4. Adjust the sake warming temperature.
1) When the
“
temperature control switch
”
is
pressed once, the temperature setting mode is assumed.
Initial setting is at [OFF].
・The setting indication and the sake warming
temperature are as specied below. However,
they can change under various conditions, and
they should be used as a guideline.
Lukewarm Approx. 45°C
Hot Approx. 65°C
2) Each time the
“
temperature control switch
”
is
pressed once, the temperature indicator lamp
moves up from one after another along the
diagonal line. (Fig. 8)
Instructions for Use
<Fig. 7>
<Fig. 8>


-12-
<TSK-110B, 210B, 220B, 420B>
1. Daily maintenance (cleaning of sake passage)
1) Remove the 1.8-liter sake bottle and pour out the sake left in the dispenser.
・To drain sake, press the
“
manual dispensing switch
”
and wait until the sake stops coming out.
2) Remove the bottle holder funnel.
・Fill the bottle holder with hot water (approx. 70℃) while being careful not to over ow. Throw the nozzle
down or press the
“
manual dispensing switch
”
.
・Do not use any detergent.
3) Hot water comes out of the nozzle and the pipe inside is cleaned.
・Repeat the above-mentioned steps of 2) and 3) three times or so.
4) Turn o the power switch.
5) Pull out the power cord plug from the wall outlet.
2. Clean the bottle holder funnel and the lter at least twice a week.
Pull out the dust removal lter upwards. Neatly wash the bottle holder funnel with warm water. Remove dust from
the lter net. Clean the lter in warm water (below. 70℃) well and carefully wipe it o. Place the lter in the bottle
holder. The lter knob sould be positioned upward.
3. Clean the bottle cap at least twice a week.
Remove it from the 1.8-liter sake bottle and clean it with water (below. 70℃).
4. Water in the water bath tank should be replaced once a month.
At that time, turn o the power switch without fail and open the water drain valve
connecting the drain tubing to drain water.
5. Care of the main unit
Wipe the machine with a dry cloth. If it is hard to clean it, wipe it with a cloth dipped in a neutral detergent
solution or soap and water, then wipe it well with a dry cloth.
The front of the machine is made of resin, so do not use paint thinner or other volatile uids or alkaline
detergents.
6.
7.
After Use
<Fig. 21>
Clean the nozzle at least twice a month. (Fig. 21)
Gently scrub the sensor electrode on the tip of the nozzle with a
tooth brush. Nozzle
Sensor
Maintenance for server bottle holder and tray
Remove the server bottle holder from the main unit and
remove the tray from the server bottle holder.
Neatly wash them with warm water.

-13-
<TSK-130B, 230B>
1. Daily maintenance (cleaning of sake passage)
(1) Remove the used cubic container in the following procedure:
・Leave the power switch turned ON.
1) Turn the knob of the stopcock to the left and adjust it to the
“
CLOSE
”
position. Throw the nozzle (sake outlet)
down to drain the sake remaining inside. For the TSK-230B, it is necessary to throw both nozzles down to
drain sake.
2) After the nozzle has been thrown down, remove the joint part between the stopcock and the joint hose.
For a machine that has no sake level indicator, the inner sake cannot be drained unless this work is nished rst.
3) When the inner sake has been drained out, return the nozzle and remove the cubic container from the main body.
4) Remove the stopcock from the cubic container.
(2) Pour about 2 liters of hot water (below. 70℃) in a cubic container intended for cleaning (an empty cubic container).
After mounting the stopcock, place it on the main body and connect the stopcock to the joint hose.
・Never use any detergent.
(3) place an empty container under the nozzle to drain hot water. Turn the knob of the stopcock to the right and adjust
it to the
“
OPEN
”
position. Push the nozzle straight down or press the
“
manual dispensing switch.
”
(4) Hot water comes out of the nozzle and the pipe inside is cleaned.
(5) After cleaning, remove the cubic container for cleaning in the procedure of (1) above and turn the power switch o.
・The drained sake should be used for cooking and so on. After cleaning, however, some water drops may
remain inside. When you dispense sake next time, drain some at the beginning.
2. Clean the sake level indicator frequently.
Remove the sake level indicator from the main unit and then remove the upper cap of the sake level indicator.
Using the provided cleaning brush, clean inside of the pipe.
3. Water in the water bath tank should be replaced once a month.
At that time, turn o the power switch without fail and open the water drain valve
connecting the drain tubing to drain water.
4.
5. Clean the nozzle at least twice a month. (Fig. 22)
Gently scrub the sensor electrode on the tip of the nozzle with a tooth brush.
6. Maintenance for server bottle holder and tray
Remove the server bottle holder from the main unit and
remove the tray from the server bottle holder.
Neatly wash them with warm water.
<Fig. 22>
Nozzle
Sensor
Care of main unit
Wipe main unit with a dry cloth. If it is hard to clean it, wipe it with a cloth dipped in a neutral detergent
solution or soap and water, then wipe it well with a dry cloth.
The front of the machine is made of resin, so do not use paint thinner or other volatile uids or alkaline
detergents.


TAIJI & CO., LTD.
8-2, Okawa-cho, Kawasaki-ku, Kawasaki--shi, Kanagawa-ken 210-0858, Japan
Telephone: 81-44-329-6338 Fax: 81-44-329-5860
URL http://www.taiji.co.jp/e
Email: [email protected].jp
Printed in Japan
(2009E)
This manual suits for next models
5
Table of contents
Other Taiji Dispenser manuals
Popular Dispenser manuals by other brands

Lynx
Lynx LM24BF Care & installation manual

Franke
Franke Rodan Installation and operating instructions

Zojirushi
Zojirushi CD-LCC30 Operating insructions

ALCO
ALCO AL-83142 installation instructions

Royal Catering
Royal Catering RCSD-3A1 user manual

Belson Outdoors
Belson Outdoors MINISAN MSN01-1000 instruction sheet