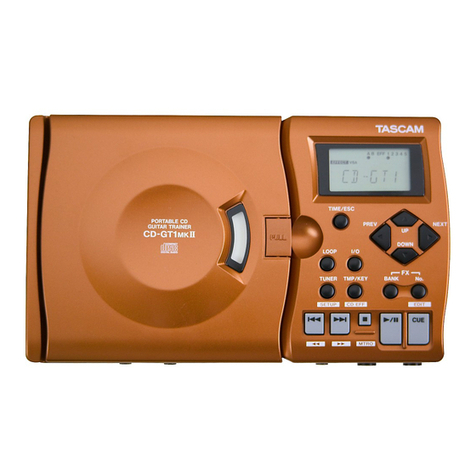
Tascam CD-GT1 User manual

»
CD-GT1
Portable CD Guitar
Trainer
OWNERʼS MANUAL (EN / F / D / I / E)
is appliance has a serial number located
on the rear panel lease record the model
number and serial number and retain them
for your records
odel number
_____________
erial number
_____________
EnglishFrançais
Deutsch
Español Italiano
D00728500B

2
— TASCAM CD-GT1
Important safety precautions
Y
CAUTION: TO REDUCE THE RISK OF ELECTRIC
SHOCK, DO NOT REMOVE COVER (OR BACK).
NO USER-SERVICABLE PARTS INSIDE. REFER
SERVICING TO QUALIFIED SERVICE PERSON-
NEL.
E
The lightning ash with arrowhead symbol,
within an equilateral trinagle, is intended to
alert the user to the presence of uninsulated
“dangerous voltage” within the product’s en-
closure that may be of suf cient magnitude to
constitute a risk of electric shock to persons.
R
WARNING: TO PREVENT FIRE OR SHOCK
HAZARD, DO NOT EXPOSE THIS APPLIANCE TO
RAIN OR MOISTURE.
FOR U.S.A.
TO THE USER
This equipment has been tested and found to
comply with the limits for a Class B digital de-
vice, pursuant to Part 15 of the FCC Rules. These
limits are designed to provide reasonable pro-
tection against harmful interference when the
equipment is operated in a commercial environ-
ment. This equipment generates, uses, and can
radiate radio frequency energy and, if not in-
stalled and used in accordance with the instruc-
tion manual, may cause harmful interference to
radio communications.. However, there is no
guarantee that interference will not occur in a
particular installation. If this equipment does
cause harmful interference to radio or television
reception, which can be determined by turning
the equipment off and on, the user is encour-
aged to try to correct the interference by one or
more of the following countermeasures.
a)
Reorient or relocate the receiving antenna
b)
Increase the separation between the
equipment and receiver.
c)
Connect the equipment into an outlet on a
circuit other from that to which the receiver
is connected.
d)
Consult the dealer or an experienced radio/
TV technician for help.
CAUTION
Changes or modi cations to this equipment not
expressly approved by TEAC CORPORATION for
compliance could void the user’s authority to
operate this equipment.

TASCAM CD-GT1 —
3
Important Safety Instructions
1
Read these instructions.
2
Keep these instructions.
3
Heed all warnings.
4
Follow all instructions.
5
Do not use this apparatus near water.
6
Clean only with dry cloth.
7
Do not block any ventilation openings. Install
in accordance with the manufacturer’s instructions.
8
Do not install near any heat sources such as
radiators, heat registers, stoves, or other apparatus
(including ampli ers) that produce heat.
9
Do not defeat the safety purpose of the po-
larized or grounding-type plug. A polarized plug
has two blades with one wider than the other. A
grounding type plug has two blades and a third
grounding prong. The wide blade or the third prong
are provided for your safety. If the provided plug
does not t into your outlet, consult an electrician
for replacement of the obsolete outlet.
10
Protect the power cord from being walked on
or pinched particularly at plugs, convenience recep-
tacles, and the point where they exit from the ap-
paratus.
11
Only use attachments/accessories speci ed by
the manufacturer.
12
Use only with the cart, stand, tripod, bracket,
or table speci ed by the manufacturer, or sold with
the apparatus. When a cart is used, use caution
when moving the cart/apparatus combination to
avoid injury from tip-over.
13
Unplug this apparatus during lightning storms
or when unused for long periods of time.
14
Refer all servicing to quali ed service person-
nel. Servicing is required when the apparatus has
been damaged in any way, such as power-supply
cord or plug is damaged, liquid has been spilled or
objects have fallen into the apparatus, the appara-
tus has been exposed to rain or moisture, does not
operate normally, or has been dropped.
•
Do not expose this apparatus to drips or
splashes.
•
Do not place any objects lled with liquids,
such as vases, on the apparatus.
•
Do not install this apparatus in a con ned
space such as a book case or similar unit.
•
The apparatus draws nominal non-operating
power from the AC outlet with its POWER switch in
the off position.
NOTES
The CD-GT1 cannot play un nalized CD-
R/RW discs. In addition, some nalized
CD-R/RW discs may be unplayable on
the CD-GT-1.
To avoid the possibility of slight noise
when you use the unit with the AC
adapter, remove the batteries before con-
necting the AC adapter. If any batteries
are accidentally left in the unit, you should
always switch the unit off when changing
between AC adapter and battery power.
The microphone input is unbalanced. Use
an unbalanced microphone cable tted
with a 1/4” plug.
Ni-MH batteries may exhibit reduced per-
formance in an environment under 10ºC
(50F). Also, if these batteries are not used
for some time after charging, they may
also exhibit reduced performance.
The performance of alkaline batteries also
depends on temperature and time since
manufacture (low temperatures and lon-
ger periods mean shorter battery life, re-
gardless of the battery indicator as shown
on the display).
Bear this in mind when operating the unit,
and use freshly recharged Ni-MH batter-
ies, new alkaline batteries or use an AC
adapter if battery life seems inadequate.
4
— TASCAM CD-GT1
Safety Information
This product has been designed and manu-
factured according to FDA regulations “title
21, CFR, chapter1, subchapter J, based on the
Radiation Control for Health and Safety Act
of 1968”, and is classi ed as a class 1 laser
product. There is no hazardous invisible laser
radiation during operation because invisible
laser radiation emitted inside of this product is
completely con ned in the protective housings.
The label required in this regulation is shown
here.
CAUTION
•
DO NOT REMOVE THE PROTECTIVE HOUSING
USING A SCREWDRIVER.
•
USE OF CONTROLS OR ADJUSTMENTS OR
PERFORMANCE OF PROCEDURES OTHER
THAN THOSE SPECIFIED HEREIN MAY RESULT
IN HAZARDOUS RADIATION EXPOSURE.
•
IF THIS PRODUCT DEVELOPS TROUBLE, CON-
TACT YOUR NEAREST QUALIFIED SERVICE
PERSONNEL, AND DO NOT USE THE PROD-
UCT IN ITS DAMAGED STATE.
Optical pickup: Type KSM-900AAA
Manufacturer: SONY CORPORATION
Laser output: <1 mW play on the objec-
tive lens
Wavelength: 775—816 nm
Important Safety Instructions

TASCAM CD-GT1 —
5
English
Table of contents
.............................................................
5
First steps with your CD-GT1
..........................................
6
Making connections
........................................................
7
Adjusting the balance
.....................................................
8
Using the menu system
...................................................
9
Using the CD player
.........................................................
10
Pitch and tempo changes
................................................
11
Using effects
...............................................................
.....
12
Effect presets and parameters
........................................
13
Using the tuner
...............................................................
.
14
Facts and gures (speci cations)
....................................
15
Table of contents

6
— TASCAM CD-GT1
6 — TASCAM CD-GT16
English
English
First steps with your CD-GT1
About this manual
About this manual
hen we refer to a key or connector
or control on the we write it
like this
like this
PLAY
hen we refer to an item shown on
the display we write it like this
MENU
Inserting batteries
e uses four
batteries not supplied e recom
mend the use of rechargeable i
batteries alkaline batteries may also
be used
lways use batteries of the same
type
lways replace all batteries to
gether
f you are not going to use the
for some time remove
the batteries
lace the batteries following the
+
and
–
markings inside the battery
–
markings inside the battery
–
compartment
aximize battery life by using
the unit in the following tempera
ture range ° to ° ° to
°
lways dispose of used batteries
as recommended by your local
authorities
hen the battery level drops the unit
automatically shuts down and must be
restarted with the
POWER
switch after
the batteries have been replaced
ote that the battery indicator on the
display only provides a rough estimate
of remaining battery life and under
some circumstances there may not be
enough power in the batteries to power
the despite the battery
power indication on the display
Using an AC adapter
nly use a adapter
not supplied sing another type of
adapter may damage your
lways make sure that the voltage
matches the voltage written on the
adapter
Switching on the unit
e has two power switches
se the rst
POWER
switch sliding
switch to turn the power to the whole
unit on and o
e second switch
GUITAR
controls
the power to the
GUITAR/INPUT
jack
and e ect unit f this section is o you
cannot use this jack or use any of the
guitarmicrelated menu systems e ect
and tuner
lso note the
HOLD
switch that locks
the s controls and keys when
it is in the
ON
position
Auto power-save
f the unit is powered using batteries
for more than minutes in stop mode
or with no disc loaded or opened the
player shuts down the part of
the display goes blank but you can
still use the guitar section
estart the player alone by using
the
PLAY
key or use the
PLAY
key or use the
PLAY
POWER
switch if both the and guitar sec
tions are turned o

English
TASCAM CD-GT1 —
7
English
Making connections
Inputs
Connecting a guitar
o connect a guitar or bass guitar to
the unit simply connect one end of the
guitar cord to the guitar and connect
the other to the
GUITAR/MIC IN
jack
of the
f you use e ects pedals or stomp
boxes you can connect the output of
these to the remember that
the has its own e ects
et the
GUITAR/MIC
switch to
GUITAR
ake sure the
GUITAR
power button
is pushed in
WARNING
NEVER connect a guitar ampli er to the
CD-GT1’s
GUITAR/MIC
input, as you will
damage your equipment if you do this.
Connecting a microphone
onnect a suitable microphone ask
your dealer if you are not
sure to the
GUITAR/MIC IN
jack of
the
et the
GUITAR/MIC
switch to
MIC
Connecting a stereo line source
ou can also connect a stereo line
source such as the outputs from a syn
thesizer a guitar preampli er or rack
mount e ects unit or a cassette deck
etc to the se the
LINE
IN
minijack beside the
GUITAR/MIC
IN
jack
WARNING
You should NEVER connect the speaker out-
puts of a guitar ampli er to anything except
speakers. If you are in any doubt at all about
what you can connect to your CD-GT1, ask
someone who knows.
Connecting a footswitch
ou can connect a footswitch to the
to step through the e ect
slot settings or to cue the player
handso see later in this manual
for details
o avoid problems with your
use only a
footswitch or similar nonlatching
pushtomake footswitch connected
to the
FOOT
jack
Outputs
onnect the unit to a stereo systems
input or mixer input etc using
a suitable stereo cable not supplied
connected to the s
LINE
OUT
stereo minijack
onnect a pair of headphones not
supplied to the
PHONES
stereo mini
jack for private listening

8
— TASCAM CD-GT1
8 — TASCAM CD-GT18
English
English
Adjusting the balance
Inputs
Inputs
e has three input sources
the being played
the guitar or microphone connect
ed to the
GUITAR/MIC IN
jack
any stereo input connected to the
LINE IN
jack
e rst and last of these cannot have
their input levels changed by the
but see below for details of how
to balance the with the input
se the level control of the device
connected to
LINE IN
to adjust the
level of this source remember that
this source cannot be e ected by
the s e ects
se the s
INPUT
control
to adjust the level of the guitar or
mic before it is sent to the e ect
hen a menu is not selected you
can use the
5
and
b
keys to set
the relative balance of the guitar
or microphone but not the
LINE
IN
source compared to the output
from the player is
MIX
value
can be set to between
–5
and
+5
emember that this is only pos
sible when not in menu mode
se the s menu system
to adjust the output level of the
e ect
Outputs
ere are two outputs the line and the
headphones ese cannot have their
levels set seperately—use the
OUTPUT
control to set the overall output level
Use the INPUT control to
adjust the GUITAR/MIC IN
level
You can't adjust the
input level of LINE IN
with the CD-GT1
Use the CD-GT1's menu
system to set the output
level of the internal effect
Use the OUTPUT
control to adjust
the overall level
to the LINE OUT
and headphones
The MIX feature (5 and b
keys outside menu mode)
adjusts the balance betwen
input and CD

English
TASCAM CD-GT1 —
9
English
Using the menu system
ee the table on this page for details of
the di erent menus and their settings
o enter the menu system press the
LCD MENU
key until the menu you
want appears shown in a ashing re
versed box and the rst menu item is
shown on the main part of the screen
se the up or down keys
5
and
b
to set the value of the rst menu
item
ote that you do not need to press
ENTER
to set the values e settings
change as soon as the key is pressed
ress
ENTER
to move to the next
menu item in the list
ress
MENU
to move to the next menu
and its rst menu item
xit the menu system using the
DISPLAY/ESC
key
NOTE
The
TUNER
menu requires you to press
ENTER
after the
TUNER
menu is shown on
screen (as the effect sound is cut when the
tuner is operational).
Menu Menu item Values Notes
EFFECT
EFF
ON/OFF
turns effect on or off
LIB
00 to 42
preset number
Parameter
—
depends on effect type
LVL
0 to 64
effect output level
PITCH
PIT
0 to –50% (pitch) or
0, –8, –16, –32 and
–50 (SSA)
sets pitch shift or slow speed
audition values
SSA
SSA ON/OFF
Sets slow speed audition on or off
KEY
KEY
O
6 to
I
6 (or SSA)
Sets pitch shift in semitones
FINE
–50 to +50 (or SSA)
sets pitch shift in cents
MENU
PLAY
ALL/SGL
all or single play
CUE
CUE/FLS
cue or “ ash play” operation
FOOT
EFF/CUE
sets footswitch mode: either step
through the effect slots, or cueing
TUNER
AT/MT
E2 to E5 (when tuning)
MODE
AT/MT
automatic or manual tuning
CAL
435 to 445
calibration in Hz

10
— TASCAM CD-GT1
English
English
Using the CD player
e s player works
e s player works
in much the same way as other
players with a few minor di erences
and special features as explained on
this page
oad s label side up shiny side
down in the pen and
close the player door by hand
Playback
ress the playpause key
y
J
key to
start playback and to pause playback
ress the stop key
H
to stop play
back
hen you use the player with batter
ies starting and stopping playback take
longer than under power this saves
battery power
Display
se the
DISPLAY/ESC
key to change
the display between track elapsed
time track remaining time and total
remaining time you cannot do this in
menu mode
Skipping between tracks
se the two skipsearch keys marked
as
m
/
.
and
/
/
,
to move
back and forward a track at a time by
pressing and releasing the appropri
ate key
Searching within tracks
se the skipsearch keys to search
within the disc by pressing and holding
the appropriate key
The CUE key
e
CUE
key is a special feature of the
hen you press this key
the playback position returns to the last
point where playback started
hat happens next depends on the
CUE
menu item setting in the
MENU
menu
f this is set to
CUE
playback is paused
at the cue point but if it is set to
FLS
playback restarts from the cue point if
CUE
is pressed from play or pause
TIP
With a footswitch connected, you can use
this instead of the
CUE
key for hands-free
operation (set the
FOOT
menu item to
CUE
).
CUE).CUE
Looping (track)
sing the
PLAY
menu item set
SGL
sin
gle play ress the
LOOP
key so that
you see
LOOP 1
on the display bottom
left e current track will repeat
Looping (disc)
sing the
PLAY
menu item set
ALL
play
all the disc ress the
LOOP
key so
that you see
LOOP
alone on the display
bottom left e whole disc will
repeat
Looping (I/O points)
se the
I/O
key to set the start in
point of the loop then use the key to
set the out point e section between
the points will repeat seamlessly
ressing the
I/O
key again clears the
loop points and cancels loop mode
ith these points set
I-O
shown on the
display you can restart the loop
mode if it has been canceled using the
LOOP
key
Canceling looping
ress the
LOOP
key so that
LOOP
does
not show on the display bottom left

English
TASCAM CD-GT1 —
11
English
Pitch and tempo changes
ere are three modes for changing the
way a is played back
NOTE
Only one of these modes can be active at
a time.
ese modes help you to play along
at a di erent key or a di erent tempo
so that you can learn your favorite ri s
and licks
TIP
Use these together with the looping function
to help your practice.
KEY mode
e key mode changes the key of the
music by six semitones up or down
e tempo does not change
e value is set in semitones and cents
ths of a semitone shown as
I
6
to
O
6
hen both semitones and cents
are the
KEY
mode is o if is on
this is also o
hen this mode is on the display
shows
KEY
se this mode when you nd the key
of the track di cult to play or
sing in
SSA mode
e low peed udition mode
slows down the tempo without chang
ing the key e settings are o –
– – and – all percent
hen this mode is active the display
left side shows
SSA
se this mode to
practice di cult fast licks
PITCH mode
e pitch mode changes both pitch and
tempo in steps down to –
is the o setting
hen this mode is active the display
shows
PITCH
Making settings
se the menu system to turn on
or o
PITCH
menu and then set the
value for the pitch or settings
PITCH
menu again
or
with o
choose
KEY
from the next
KEY
menu
and make the
KEY
semitone and
FINE
settings
Remember!
hift pitch alone=
KEY
low down and keep pitch =
SSA
low down and drop pitch =
PITCH

12
— TASCAM CD-GT1
English
English
Using effects
How effects work
ere are two e ect banks
A
and
B
each with ve slots numbered from
1
through
5
where you can store your
own e ect settings
E ects are created from the preset
e ects available guitar and vo
cal hen a bank and slot are selected
if a preset e ect is recalled and edited
that bank slot is automatically lled
with the edited e ect
Storing your own effect settings
in a bank slot
ress the
BANK
key to select either the
A
or
B
bank as shown on the display
ress the
No.
key to select the bank slot
1
through
5
as shown on the display
ress the
LCD MENU
key until
EFFECT
appears on the display
se the
5
key to turn the e ect
ON
ress
ENTER
and then select the
preset e ect
00
through
42
with the
5
and
b
keys
NOTE
If there were any settings in the selected
bank slot to start with, they will be overwrit-
ten when you recall a library entry.
ress
ENTER
once more to start edit
ing the parameters with the
5
and
b
keys see the table later for details of
these parameters
e last parameter is always
LVL
the
output level from the e ect unit
0
to
64
is is only available when the ef
fect is active and is bypassed with the
e ect o
et the level and then press the
DISPLAY/ESC
key to exit the e ect
settings e e ect settings you have
made are automatically stored in the
bank slot you rst chose
Recalling an effect with your
settings
hen you have stored the e ect set
tings in a bank slot as described above
you can recall them simply pressing
the
BANK
and
No.
keys to select the
appropriate bank slot you should also
make sure that the e ect is switched
on
TIP
If you have a footswitch connected and
the
FOOT
menu item is set to
EFF
, you can
step through the bank slots by pressing the
footswitch.

English
TASCAM CD-GT1 —
13
English
Effect presets and parameters
e preset e ects can be divided into
three categories
Distortion Clean sound Vocal
00 DIST-TONE-FLA-REV
15 COMP-TONE-FLA-REV
30 De-esser
01 DIST-TONE-FLA-DLY
16 COMP-TONE-FLA-DLY
31 Chorister
02 DIST-TONE-PHA-REV
17 COMP-TONE-PHA-REV
32 Emphasis
03 DIST-TONE-PHA-DLY
18 COMP-TONE-PHA-DLY
33 Shout
04 DIST-TONE-EXC-REV
19 COMP-TONE-EXC-REV
34 Mood Vocal
05 DIST-TONE-EXC-DLY
20 COMP-TONE-EXC-DLY
35 Response
06 DIST-TONE-CHO-REV
21 COMP-TONE-CHO-REV
36 Proclaim
07 DIST-TONE-CHO-DLY
22 COMP-TONE-CHO-DLY
37 Quivering Voice
08 DIST-TONE-TRM-REV
23 COMP-TONE-TRM-REV
38 Duet
09 DIST-TONE-TRM-DLY
24 COMP-TONE-TRM-DLY
39 Lo-Fi Vocal
10 DIST-TONE-VIB-REV
25 COMP-TONE-VIB-REV
40 Megaphone
11 DIST-TONE-VIB-DLY
26 COMP-TONE-VIB-DLY
41 Screaming
12 DIST-TONE-WAH-REV
27 COMP-TONE-WAH-REV
42 Panning Vocal
13 DIST-TONE-WAH-DLY
28 COMP-TONE-WAH-DLY
—
14 DIST-TONE-PIT-DLY
29 COMP-TONE-PIT-DLY
—
s this shows each of the guitar
distortion and clean presets has four
components each of which can be
adjusted individually and are shown on
the display as listed in the table here
The parameters
DIST
istortion gain
COMP
ompressor gain
TONE
one control
FLA
langer setting
REV
everb setting
DLY
elay setting
PHA
haser setting
EXC
xciter setting
PIT
itch shifter setting
CHO
horus setting
TRM
remolo setting
VIB
ibrato setting
WAH
utowah setting
ll presets also have a
LVL
level setting
from
0
to
64
e vocal presets have one parameter
each shown on the display as
PAR

14
— TASCAM CD-GT1
English
English
Using the tuner
e s builtin guitar tuner
has two modes an automatic mode
where the pitch of the incoming signal
is detected and displayed automati
cally and a manual mode where you
set the target and tune to it
ress the
MENU
key until the display
shows
TUNER,
and then press
ENTER
Flat Sharp
On-key
hen you enter the tuner mode any
e ect is automatically turned o
f the tuner is in automatic mode
shown as
AT
on the display just play a
note on your guitar e tuner guesses
the closest note and shows it on the
display une the string roughly so that
the right note appears and then adjust
the tuning until the display shows a
large center blob
f the tuner is in manual mode shown
as
MT
on the display use the
5
and
b
keys to set the note on the display and
then tune as above
Calibrating the tuner.
sually the above iddle is tuned
to z in most estern music
ere may be times when you need to
tune to a di erent standard you are
playing with another instrument or to
a which does not use the z
tuning se the tuners
CAL
calibration
menu to set the reference to a tun
ing between z and z
NOTE
Although you do not need to play a CD
when you are tuning, the CD-GT1 must be
switched on, and the
GUITAR
button must
be pressed in to allow tuning of the guitar
plugged into the CD-GT1.

English
TASCAM CD-GT1 —
15
English
Facts and gures (speci cations)
Disc types
8 cm single, 12 cm
CD
AD/DA
16-bit
Digital signal
processing
32-bit
Nominal output level
(LINE OUT)
–10 dBV
Maximum output level
(LINE OUT)
0 dBV (1 Vrms)
Output impedance
1 k
Ω
Maximum output level
(PHONES)
> 18 mW (into 32
Ω
Nominal input levels
LINE IN
MIC IN
GUITAR IN
–10 dBV
–40 dBV
–15 dBV
CD playback characteristics
Frequency response
20 Hz to 20 kHz
±1.0 dB
Dynamic range
> 88 dB
S/N ratio
> 88 dB
THD
< 0.01%
Voltage requirements
DC 9V (PS-PS5 AC
adapter)
AA batteries x 4
(NiMH or alkaline)
Power consumption
4 W (PS-PS5 AC
adapter)
Dimensions (w x d x h)
including feet
232 x 138 x 40
(mm) / 9.1 x 5.4 x
1.6 (in)
Weight (excluding
batteries)
620 g / 1 lb, 6 oz

16
— TASCAM CD-GT1
16 — TASCAM CD-GT116
Français
Français
CONSIGNES DE SÉCURITÉ IMPORTANTES
1
Lisez ces instructions.
2
Gardez ces instructions en lieu sûr, pour
référence ultérieure.
3
Tenez compte de tous les avertissements.
4
Suivez toutes les instructions.
5
N’utilisez pas cet appareil près de l’eau.
6) Ne nettoyez l’appareil qu’avec un chiffon
sec.
7
N’obstruez pas les ouïes de ventilation. Ins-
tallez l’appareil conformément aux instructions
du constructeur.
8
N’installez pas l’appareil à proximité de
sources de chaleur, telles que radiateur, four
ou tout autre appareil dissipant des calories
(ampli cateur de puissance, par exemple).
9
Ne désactivez pas les dispositifs de
sécurité (détrompeurs) des prises polarisées
ou avec mise à la terre. Une prise polarisée
possède un contact plus grand que l’autre ; une
prise avec mise à la terre possède une troisième
broche, prévue pour votre sécurité. Si la prise se
trouvant à l’extrémité du cordon secteur fourni
avec votre appareil ne correspond pas à votre
prise murale, consultez un électricien pour son
remplacement.
10
Évitez de marcher sur le cordon secteur, de
le coincer ou de le pincer, ainsi que de couder
le cordon au niveau de l’appareil ou de la prise
secteur.
11
N’utilisez que les dispositifs optionnels ou
les accessoires recommandés par le construc-
teur.
12
N’utilisez l’appareil qu’avec des
supports ou dispositifs de xation four-
nis ou recommandés par le constructeur.
13
Débranchez le cordon d’alimentation de
l’appareil en cas d’orage ou s’il doit rester
inutilisé pendant une longue période.
14
)
Pour toute maintenance, adressez-vous à
des techniciens professionnels quali és. Un re-
tour en SAV est indispensable dès que l’appareil
a été endommagé d’une façon ou d’une autre
: cordon secteur ou alimentation défaillante,
pénétration de liquide ou introduction d’objets
dans l’appareil, exposition à la pluie ou à l’hu-
midité, et bien sûr dès qu’il ne fonctionne pas
normalement, suite à une chute ou à un choc
par exemple.
•
N’exposez pas l’appareil à des éclaboussu-
res ou à des gouttes d’eau.
•
Ne posez pas d’objets contenant du liquide
(vase, tasse, cannette...) sur l’appareil.
•
N’installez pas cet appareil dans un espace
con né, dépourvu de ventilation , comme par
exemple une bibliothèque.
•
Même si son interrupteur se trouve en
position OFF, l’appareil consomme du courant
électrique, par l’intermédiaire de son adapta-
teur secteur.
AVERTISSEMENT
Le CD-GT1 ne peut pas lire les disques CD-
R/RW non nalisés. Il se peut que certains
CD-R/RW nalisés ne puissent être lus par
le CD-GT1.

Français
TASCAM CD-GT1 —
17
Français
Sommaire
CONSIGNES DE SÉCURITÉ IMPORTANTES
........................
16
Sommaire
...............................................................
.........
17
Prise en main du CD-GT1
.................................................
18
Branchements
...............................................................
...
19
Réglage de la balance
.....................................................
20
Le système de menus
......................................................
21
Utilisation du lecteur CD
.................................................
22
Modi cations de hauteur et de tempo
...........................
23
Effets (types et paramètres)
............................................
24
Eftfets (types et paramètres)
..........................................
25
Utilisation de l’accordeur
................................................
26
Caractéristiques
..............................................................
27

18
— TASCAM CD-GT1
18 — TASCAM CD-GT118
Français
Français
Prise en main du CD-GT1
À propos de ce manuel
es touches et contrôles du
sont indiqués dans le manuel dans cette
typographie
PLAY
et les textes apa
raissant à lécran ainsi
MENU
Mise en place des piles
e utilise quatre piles
non fournies ous conseillons
lutilisation de piles rechargeables i
mais vous pouvez aussi utiliser
des piles alcalines
utilisez que des piles dun même
type
emplacezles simultanément
n cas dinutilisation prolongée
de lappareil retirez les piles de
leur logement
nsérezles en tenant compte de
la polarité
+
et
–
indiquée dans le
–
indiquée dans le
–
fond du compartiment
e rendement maximum des piles
sera obtenu pour une température
ambiante de ° à °
ecyclez vos piles en suivant la
lière prévue dans votre région
uand le niveau de charge devient
insu sant lappareil séteint automa
tiquement et devra être rallumé avec
linterrupteur
POWER
après rem
placement par des piles neuves ou
rechargées
a chage du niveau des piles à lécran
ne donne quune estimation glo
bale ans certaines circonstances leur
charge réelle peut se révéler insu sante
à la mise sous tension du en
dépit des indications de lécran
Utilisation d’un adaptateur secteur
tilisez exclusivement un adaptateur
non fourni dispo
nible chez les revendeurs
out autre modèle pourait endomma
ger le
éri ez avant tout branchement que la
tension secteur correspond aux indica
tions portées sur ladaptateur
Mise sous tension de l’appareil
e dispose de deux inter
rupteurs tilisez le premier
POWER
interrupteur à glissière pour mettre
globalement lappareil soushors
tension
e second
GUITAR
contrôle lacti
vation du jack
GUITAR/INPUT
et de
lunité de et n position o vous
ne pouvez pas utiliser cette entrée ni
aucun des menus systèmes qui lui sont
liés e ets et accordeur
otez également la présence du bou
ton
HOLD
destiné à verrouiller tous
les contrôles et boutons du
quand il est en position
ON
Mise en veille automatique
uand lappareil fonctionne sur piles
sil reste plus de minutes allumé en
mode stop ou sans disque chargé ou
encore ouvert le lecteur séteint
la partie correspondante disparaît de
lécran mais la section guitare reste
opérationnelle
a réactivation du lecteur se fait
par la touche
PLAY
ou par linter
PLAY
ou par linter
PLAY
rupteur
POWER
si les sections et
guitare sont toutes deux éteintes

Français
TASCAM CD-GT1 —
19
Français
Branchements
Entrées
Branchement d’une guitare
ne guitare ou une basse se branchent sur
lappareil simplement en reliant leur jack à
lentrée
GUITAR/MIC IN
du
i vous utilisez des pédales de ets vous
pouvez aussi les brancher sur cette entrée
en tenant compte du fait que le
dispose de ses propres e ets
ettez le sélecteur
GUITAR/MIC
en posi
tion
GUITAR
éri ez que le bouton
GUITAR
est bien
enfoncé
AVERTISSEMENT
NE branchez en AUCUN CAS la sortie d’un ampli
guitare sur l’entrée
GUITAR/MIC
du CD-GT1
sous peine de l’endommager gravement.
Branchement d’un micro
ranchez un micro du modèle adapté
en cas de doute adressezvous à vo
tre revendeur sur lentrée
GUITAR/MIC IN
du
ettez le sélecteur
GUITAR/MIC
en
position
MIC
Branchement d’une source à
niveau ligne
ous pouvez aussi brancher un synthé
un préampli guitare un magnétocas
sette ou toute autre source à niveau
ligne sur le mini jack
LINE IN
situé à
côté du jack
GUITAR/MIC IN
AVERTISSEMENT
Ne branchez JAMAIS les sorties haut-parleur
d’un ampli guitare sur quoi que ce soit
d’autre que des enceintes de diffusion. En
cas de doute sur le type de signal susceptible
d’être reçu par le CD-GT1, adressez-vous à
une personne compétente.
Branchement d’une pédale
ous pouvez brancher une pédale sur
le soit pour appeler les pro
grammes de ets soit pour commander
le lecteur au pied voir plus loin
our éviter tout problème utilisez ex
clusivement une pédale de type
ou équivalente de type non
verrouillable à action de fermeture et
branchezla dans le connecteur
FOOT
Sorties
eliez lappareil aux entrées
dun système de di usion ou dune
console de mixage à laide dun câble
stéréo adapté non fourni branché sur
le minijack stéréo
LINE OUT
otre casque découte non fourni
peut également se brancher sur le
minijack
PHONES
pour une écoute
discrète

20
— TASCAM CD-GT1
Français
Français
Réglage de la balance
Entrées
e peut gérer simultanément
trois types de sources
le en lecture
la guitare ou le micro branchés sur
lentrée
GUITAR/MIC IN.
une source stéréo branchée sur lentrée
LINE IN
e niveau du premier et de la dernière
nest pas modi able sur le mais
la balance de la source avec lentrée
guitarmic se fait comme suit
églez le niveau de lappareil branché en
LINE IN
par son contrôle de volume ce
signal ne peut être traité par les e ets du
tilisez le contrôle
INPUT
du
pour régler le niveau de la guitare
ou du micro avant envoi vers le et
i un menu nest pas sélectionné les
touches
5
et
b
permettent de régler
la balance entre la source guitare
micro mais pas
LINE IN
et le lecteur
ette valeur de
MIX
se règle de
–5
à
+5
ela nest possible que si vous
nêtes pas en mode menu
tilisez le système de menus du
pour régler le niveau de
sortie nal de le et
Sorties
appareil dispose de deux sorties prise
casque et sortie ligne eurs niveaux
ne peuvent pas être réglés séparément
— tilisez le contrôle
OUTPUT
pour
ajuster globalement ce niveau
5b
Table of contents
Languages:
Other Tascam Music Equipment manuals

Tascam
Tascam HS-4000 Owner's manual

Tascam
Tascam CD-GT2 User manual

Tascam
Tascam GT-R1 User manual

Tascam
Tascam CD-GT1mkII User manual

Tascam
Tascam MP-GT1 User manual

Tascam
Tascam TM-AM1 User manual

Tascam
Tascam CD-VT2 User manual

Tascam
Tascam MP-GT1 User manual

Tascam
Tascam US-16X08 User manual

Tascam
Tascam CD-BT1 mkII User manual
Popular Music Equipment manuals by other brands

Alesis
Alesis Vocal Zapper quick start

Alesis
Alesis qs6.1 Instruction and Program Chart

Noise Engineering
Noise Engineering Imitor instruction manual

Bose
Bose ControlSpace AMS-8 Safety instructions & installation guide

HEADRUSH
HEADRUSH MX5 quick start guide

Tiptop Audio
Tiptop Audio Forbidden Planet user manual