tau TCODE-W User manual

GUIDA ALL’INSTALLAZIONE
INSTALLATION GUIDE
IT - Istruzioni originali
EN - Original instructions
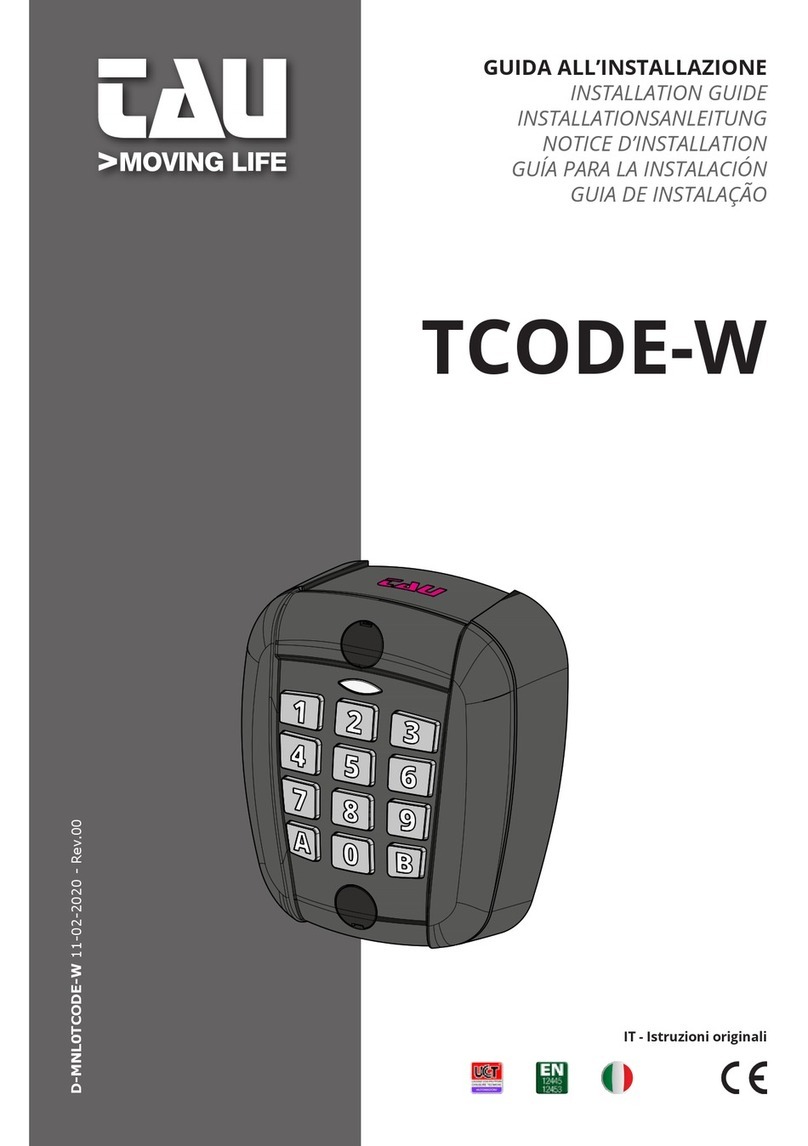
TCODE-W
73.95 40
86.71
D-MNL0TCODE-W 25-05-2020 - Rev.02
ITALIANO
73.95 40
86.71
+
+
+
+
+
+
+
+
Fig. 1
Fig. 2
Fig. 3
Fig. 4 Fig. 5 Fig. 6
Via Enrico Fermi, 43 - 36066 Sandrigo (VI) - Italy
Tel +39 0444 750190 - Fax +39 0444 750376
SOSTITUZIONE DELLA BATTERIA (g. 4-5-6)
La tastiera digitale TCODE-W funziona utilizzando due
batterie a litio 3V della serie CR 2032.
La durata delle stesse dipende dal numero di aziona-
menti giornalieri, in un contesto residenziale è supe-
riore ai due anni, in un contesto condominiale dipend-
erà dal numero degli utilizzatori.
Per sostituirle si renderà necessario aprire la tastiera
come da gura 4-5.
REPLACING THE BATTERY (g. 4-5-6)
The TCODE-W digital keypad works using two 3V
lithium batteries of the CR 2032 series.
The duration of the same depends on the number of
daily activations, in a residential context it exceeds
two years, in a condominium context it will depend
on the number of users.
To replace them, it will be necessary to open the
keypad as shown in gure 4-5.
ENGLISH
DICHIARAZIONE DI CONFORMITA’
(ai sensi della Direttiva Europea 2006/42/CE AlI. II.A)
DECLARATION OF CONFORMITY
(European Directive 2006/42/CE All. Il.A)
Fabbricante / Manufacturer: TAU s.r.l.
Indirizzo / Address: Via E. Fermi, 43 - Sandrigo
VICENZA - ITALY
Dichiara sotto la propria responsabilità che i prodotti: /
Declares under its own responsibility that the following
products: Tastiera digitale / Digital keypad:300TCODE-W
è conforme ai requisiti essenziali di sicurezza della direttiva:
/ comply with the main safety requirements of the follwing
Directive:
APPARECCHIATURE RADIO / RADIO SETS 1999/5/CE
(ETSI EN 301 489-3 with ETSI EN 301 489-3 v1.4.1; ETSI EN
301 489-1 with ETSI EN 301 489-1 v1.8.1; ETSI EN 300 220-2
with ETSI EN 300 220-2 v2.1.2)
Sandrigo, 11/02/2020 Il Rappresentante Legale /
The legal Representative
___________________________________
Loris Virgilio Danieli
Nome e indirizzo della persona autorizzata a costituire la
documentazione tecnica pertinente / Name and address of
person authorised to draw up all pertinent technical docu-
mentation:
Loris Virgilio Danieli - via E. Fermi, 43 - 36066 Sandrigo (Vi) Italia

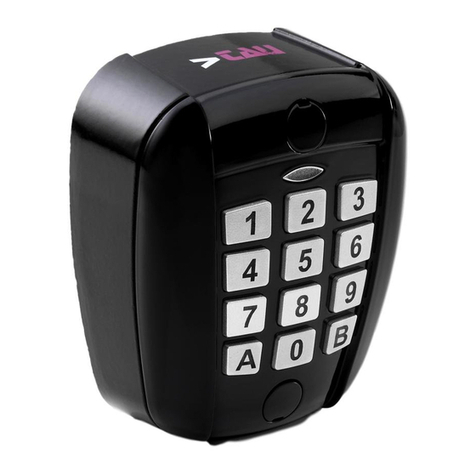
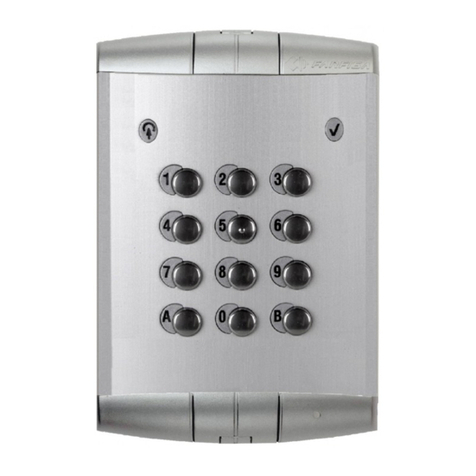
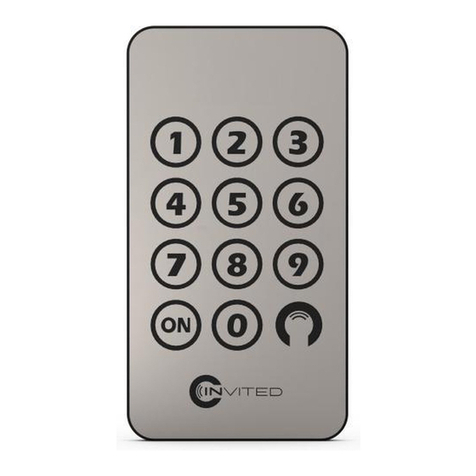
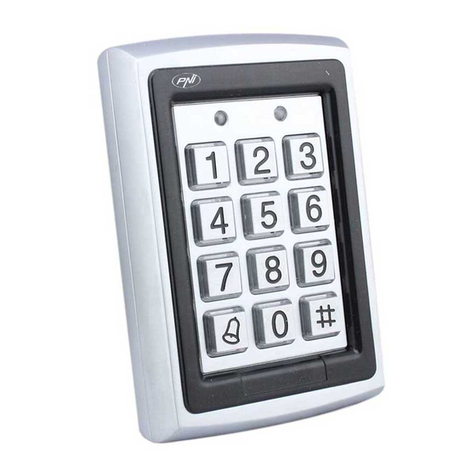
TCODE-W DIGITAL KEYPAD
Digital radio keypad with ROLLING CODE program-
mable codes, operating with all TAU control units
with integrated receiver or with RXDC / RXSM series
receivers. Degree of protection: IP 54
It is possible to manage up to a max. of 4 codes (2 ÷
8 digits) with 2 selectable channels A or B each.
Each keypad is supplied with a factory Master code =
0000 (possibly customizable) to delete the codes.
The keypad will be installed in the immediate prox-
imity of the controllable automation control panel
to allow the radio signal to reach the receiver. It is
therefore recommended to test the operating dis-
tance before xing the keypad to the wall/column.
(g. 2)
If it is necessary to control the automation at long
distances, the version of the digital cable keypad
with BUS signal transmission can be used.
1. KEYPAD INSTALLATION (g. 2)
•Divide the keypad front from the housing base;
•Properly fasten the housing base to the wall or
column (use the Ø 6 mm expansion plugs if the
ENGLISH
keypad is xed to the wall, or Ø 4 mm self-drilling
screws for iron or steel supports, or Ø 4 mm self-
tapping screws for wood and similar supports)
•Once the housing base has been xed to the wall
or column, t the keypad front panel (g. 3).
2. ENTERING CODES (2 ÷ 8 digits)
To insert a new personalized code, follow the proce-
dure:
1_ Press button Afor 4 sec. until you hear a “beep”
and the green led starts to ash;
2_ While the green LED is ashing, enter the new
code (2 ÷ 8 digits);
3_ Then press button B briey, a “beep” will be
heard and the green LED will remain on for a second
conrming that the new code has been entered.
To allow the gate to open/close via the keypad, the
code transmitted by the control unit must be stored
in the receiver.
Before proceeding with the transmission of the code,
make sure you have entered programming mode on
the receiver (see the procedures indicated in the
instruction manual of the specic control unit
used),
then proceed as follows:
- enter the code followed by button Aor B.
- to conrm the transmission, the red LED on the
control unit or receiver will go out.
For each code entered, we can combine the com-
mand of two automations by choosing Aand B.
3. DELETING ONLY ONE ENTERED CODE
To delete only one code, follow the procedure:
1_ Press button Afor 4 sec. until you hear a “beep”
and the green led starts to ash;
2_ While the green LED is ashing, enter the code
you want to delete (2 ÷ 8 digits);
3_ Then press button Bfor 4 sec. until you hear a
“beep” and the LED starts ashing red and green
together and then briey press button Bagain.
At this point, to conrm code deletion, the red and
green LED will stop ashing.
4. DELETING ALL CODES
If you wish to return the keypad to factory condi-
tions without any code entered, proceed as follows:
1_ Press button Afor 4 sec. until you hear a “beep”
and the green led starts to ash;
2_ While the green LED is ashing, enter the Master
code (if factory = 0000; or the one created by you).
3_ Then press button Bfor 4 sec. until you hear a
“beep” and the LED starts ashing red and green
together and then briey press button Bagain. At
this point, to conrm codes deletion, the red and
green LED will stop ashing.
5. CHANGING THE MASTER CODE
To change the Master code, follow these steps:
1_ Press button Afor 4 sec. until you hear a
“beep” and the green led starts to ash;
2_ While the green LED is ashing, enter the Master
code (if factory = 0000; or the one created by you).
3_ Press button Aagain for 4 sec. until you hear a
“beep” and the green LED starts ashing quickly;
4_ While the green LED is ashing quickly enter the
new Master code;
5_ Then press button B briey, a “beep” will be
heard and the green LED will remain on for a
second conrming that the new code has been
entered.
nel manuale di istruzioni dell’apposita centrale di
comando utilizzata),
quindi procedere come segue:
- digitare il codice seguito dal tasto
A
o
B
.
- a conferma dell’avvenuta trasmissione si spegnerà
il led rosso sulla centrale o ricevente.
Per ogni codice inserito possiamo abbinare il coman-
do di due automazioni mediante la scelta di
A
e
B
.
3. CANCELLAZIONE DI UN SOLO CODICE INSERITO
Per la cancellazione di un solo codice, seguire la
procedura:
1_ Premere il tasto Aper 4 sec. no a quando non si sen-
tirà un “beep” ed il led verde inizierà a lampeggiare;
2_ Mentre il led verde lampeggia inserire il codice che vuoi
cancellare (2
÷ 8 cifre)
;
3_ Premere quindi il tasto B per 4 sec. no a quando
non si sentirà un “beep” ed il led inizierà a lampeggiare
rosso e verde insieme e quindi ripremere brevemente
il tasto B. A questo punto per confermare l’avvenuta
cancellazione del codice il led rosso e verde smetterà
di lampeggiare.
4. CANCELLAZIONE DI TUTTI I CODICI
Nel caso si rendesse recessario riportare la tastiera
alle condizioni di fabbrica senza nessun codice in-
serito, procedere come riportato di seguito:
1_ Premere il tasto Aper 4 sec. no a quando non
si sentirà un “beep” ed il led verde inizierà a lam-
peggiare;
2_ Mentre il led verde lampeggia inserire il codice Mas-
ter
(se di fabbrica = 0000; oppure quello creato da voi).
3_
Premere quindi il tasto B per 4 sec. no a quan-
do non si sentirà un “beep” ed il led inizierà a lam-
peggiare rosso e verde insieme e quindi ripreme-
re brevemente il tasto B. A questo punto per con-
fermare l’avvenuta cancellazione di tutti i codici il
led rosso e verde smetterà di lampeggiare.
5. MODIFICA DEL CODICE MASTER (MASTERCODE)
Per modicare il codice Master, attenersi alla seg-
uente procedura:
1_ Premere il tasto Aper 4 sec. no a quando non si sen-
tirà un “beep” ed il led verde inizierà a lampeggiare;
2_ Mentre il led verde lampeggia inserire il codice Master
(se di fabbrica = 0000; oppure quello creato da voi).
3_ Premere di nuovo il tasto Aper 4 sec. no a
quando non si sentirà un “beep” ed il led verde
inizierà a lampeggiare velocemente;
4_ Mentre il led verde lampeggia velocemente in-
serire il nuovo codice Master
;
5_
Premere quindi brevemente il tasto B, si sentirà
un “beep” ed il led verde resterà acceso per un
secondo confermando l’avvenuto inserimento
del nuovo codice.
TASTIERA DIGITALE TCODE-W
Tastiera digitale via radio con codici programmabili
ROLLING CODE, funzionante con tutte le centrali
TAU con ricevente integrata o con ricevitori della se-
rie RXDC / RXSM. Grado di protezione IP: IP 54
È possibile gestire no ad un max. di 4 codici (2 ÷ 8
cifre) con ognuno 2 canali selezionabili A o B.
Ogni tastiera viene fornita di un codice Master di fab-
brica = 0000 (eventualmente personalizzabile) per
cancellare i codici.
La tastiera andrà installata nelle immediate vici-
nanze della centrale dell’automazione comandabile
per permettere al segnale radio di raggiungere il
ricevitore. Si consiglia quindi di provare la distanza
di azionamento prima di ssare la tastiera al muro/
colonna. (g. 2)
Nel caso in cui si rendesse necessario coman-
dare l’automazione a lunghe distanze si potrà
utilizzare la versione della tastiera digitale via
cavo con trasmissione del segnale in BUS.
1. INSTALLAZIONE TASTIERA (g. 2)
•Dividere il frontalino tastiera dalla base alloggia-
ITALIANO
mento;
•Fissare opportunamente la base alloggiamento
alla parete o alla colonna (adoperare i tasselli ad
espansione Ø 6 mm se si ssa la tastiera a muro,
oppure viti autoperforanti Ø 4 mm per supporti in
ferro o acciaio, oppure viti autolettanti Ø 4 mm
per supporti in legno e similari)
• Una volta ssata la base alloggiamento alla parete
o alla colonna, montare il frontalino tastiera (g. 3).
2. INSERIMENTO CODICI (2 ÷ 8 cifre)
Per inserire un nuovo codice personalizzato, se-
guire la procedura:
1_ Premere il tasto Aper 4 sec. no a quando non si
sentirà un “beep” ed il led verde inizierà a lampeggiare;
2_ Mentre il led verde lampeggia inserire il nuovo
codice a piacere (2
÷ 8 cifre)
;
3_ Premere quindi brevemente il tasto B, si sen-
tirà un “beep” ed il led verde resterà acceso per un
secondo confermando l’avvenuto inserimento del
nuovo codice.
Per consentire il comando di apertura/chiusura del
cancello mediante la tastiera sarà necessario memo-
rizzare nel ricevitore della centrale il codice trasmes-
so dalla stessa.
Prima di procedere con la trasmissione del codice,
assicurarsi di essere entrati in modalità program-
mazione sul ricevitore (vedi le procedure indicate

INSTALLATIONSANLEITUNG
NOTICE D’INSTALLATION
DE - Originalanweisungen
FR - Instructions originales
TCODE-W
73.95 40
86.71
D-MNL0TCODE-W 25-05-2020 - Rev.02
Via Enrico Fermi, 43 - 36066 Sandrigo (VI) - Italy
Tel +39 0444 750190 - Fax +39 0444 750376
DEUTSCH
73.95 40
86.71
+
+
+
+
+
+
+
+
Fig. 1
Fig. 2
Fig. 3
Fig. 4 Fig. 5 Fig. 6
KONFORMITÄTSERKLÄRUNG
(gemäß der Europäischen Richtlinie 2006/42/CE Anl. Il.A)
DECLARATlON DE CONFORMITY
(aux termes de la Directive européenne 2006/42/CE All. II.A)
Hersteller / Fabricant: TAU s.r.l.
Adresse / Adresse: Via E. Fermi, 43 - Sandrigo
VICENZA - ITALY
Erklärt auf eigene Verantwortung, daß das Produkte: /
Déclare sous sa propre responsabilté que les produits:
Digitales Codeschloss / Clavier numérique: 300TCODE-W
entsprechen den grundlegenden Sicherheitsbedingungen
der Direktiven: / ils sont conformes aux exigences
essentielles de sécurité de la Directive:
RADIOAPPARATE / INSTALLATIONS RADIO 1999/5/CE
(ETSI EN 301 489-3 with ETSI EN 301 489-3 v1.4.1; ETSI EN
301 489-1 with ETSI EN 301 489-1 v1.8.1; ETSI EN 300 220-2
with ETSI EN 300 220-2 v2.1.2)
Sandrigo, 11/02/2020 Der gesetzliche Vertreter /
Le Représentant Légal
___________________________________
Loris Virgilio Danieli
Name und Adresse der beauftragten Person zur Vorlegung
der zugehörigen technischen Unterlagen / Nom et adresse
de la personne autorisée à constituer la documentation
technique pertinente:
Loris Virgilio Danieli - via E. Fermi, 43 - 36066 Sandrigo (Vi) Italia
ERSATZ DER BATTERIE (Abb. 4-5-6)
Die digitale Tastatur TCODE-W funktioniert bei An-
wendung von zwei 3V Lithium-Batterien der Serie CR
2032.
Die Dauer dieser hängt von der täglichen Anwendung
ab, im Rahmen einer Wohnumgebung über zwei Jahre,
während diese in einer Wohnanlage von der Anzahl
der Anwender abhängt.
Zum Austausch muss die Tastatur nach Abb. 4-5 geö-
net werden.
REMPLACEMENT DE LA BATTERIE
Le clavier TCODE-W est équipé de deux batteries au
lithium 3V (CR 2032).
La durée de vie de la batterie est liée à l’usage du
clavier.
En conditions normales et pour un usage résidenti-
elle la capacité de la batterie est au moins 24 mois,
dans un contexte de copropriété la durée de vie est
aléatoire selon le nombre des utilisateurs.
Pour les remplacer, il sera nécessaire d’ouvrir le
clavier comme indiqué sur la gure 4-5.
FRANÇAIS

sein (siehe Vorgehensweisen laut Gebrauchsan-
leitung der verwendeten Steuerung).
Dann und wie folgt vorgehen:
- Den Code eingeben, danach die Taste
A
oder
B
.
- Zur Bestätigung der erfolgten Übertragung erlischt
die rote Led in der Steuerung oder im Empfänger.
Für jeden eingegebenen Code können wir die
Steuerung der beiden Automatisierungen mithilfe
der Wahl
A
und
B
verbinden.
3. LÖSCHEN NUR EINES EINGEGEBENEN CODES
Für die Löschung eines Codes das folgende Ver-
fahren befolgen:
1_ Die Taste A4 Sek. drücken, bis ein “Beep” ge-
hört wird und die grüne Led zu blinken beginnt;
2_ Während die grüne Led blinkt, den Code einge-
ben, den Sie löschen möchten (2 ÷ 8 Ziern);
3_ Die Taste B4 Sek. drücken, bis ein “Beep” gehört
wird und die rote und grüne Led gemeinsam zu
blinken beginnen, dann kurz die Taste B. drück-
en. Zur erfolgten Löschung des Codes werden die
roten und grünen Leds nicht mehr blinken.
4. LÖSCHEN ALLER CODES
Wenn es notwendig ist, die Tastatur in die Werksstel-
lung ohne einen eingefügten Code zu bringen, wie
folgt vorgehen:
1_ Die Taste A4 Sek. drücken, bis ein “Beep” gehört
wird und die grüne Led zu blinken beginnt;
2_ Während die grüne Led blinkt, den Master-Code
einfügen (werkseitig 0000, oder der von Ihnen
erstellte).
3_
Die Taste B4 Sek. drücken, bis ein “Beep” gehört
wird und die rote und grüne Led gemeinsam zu
blinken beginnen, dann kurz die Taste B. drück-
en. Zur erfolgten Löschung des Codes werden
die roten und grünen Leds nicht mehr blinken.
5. ÄNDERUNG DES MASTER-CODES (MASTERCODE)
Zur Änderung des Master-Codes hält man sich an
die folgenden Vorgehensweisen:
1_ Die Taste A4 Sek. drücken, bis ein “Beep” gehört
wird und die grüne Led zu blinken beginnt;
2_ Während die grüne Led blinkt, den Master-Code
einfügen (werkseitig 0000, oder der von Ihnen
erstellte).
3_ Erneut die Taste A4 Sek. drücken, bis ein “Beep”
gehört wird und die grüne Led zu blinken beginnt;
4_ Während die grüne Led schnell blinkt, den neuen
Master-Code eingeben;
5_ Dann kurz die Taste
B, drücken, es kann ein “Beep”
gehört werden, wobei die grüne Led eine Sekunde
eingeschaltet bleibt und die erfolgte Eingabe des
neuen Codes bestätigt.
CLAVIER CODE TCODE-W
Clavier Code radio ROLLING CODE, il est compatible
avec les centrales de commande TAU équipées du
récepteur radio intégré ou avec les récepteurs de la
gamme RXDC / RXSM.
Degré de protection IP: IP 54
Il gère jusqu’à 4 codes (2 ÷ 8 chires) et chaque code
a 2 canaux paramétrables: Aou B.
Le clavier est livré avec un code Master = 0000
(possibilité de le paramétrer) pour eacer les codes
esclaves
Il est conseillé d’installer le clavier le plus proche de
la centrale de commande an d’obtenir le meilleur
résultat en therme de réception radio. Il serait bien
d’essayer le clavier avant le xage au mur/pilier
(g.2).
Dans le cas où le clavier est à une distance consi-
dérable du récepteur, il est conseillé d’installer la
version câblée avec une technologie BUS.
1. INSTALLATION DU CLAVIER (g. 2)
•Détacher la façade du socle
FRANÇAIS
•Fixer le socle au mur ou au pilier (utiliser les
chevilles de Ø 6 mm pour le xage au mur et les
vis autoporteuses Ø 4 mm pour le xage sur les
métaux ou bois).
•Ensuite, remettre la façade sur le socle (g.3)
2. PARAMETRAGE DES CODES (2 ÷ 8 chires)
Pour insérer un nouveau code personnalisé, suivez
la procédure:
1_ Appuyer sur la touche Apendant environs 4
seconds, ensuite, il y aura le son du «buzzer» et la
led verte qui clignote;
2_ Rentrer le nouveau code (2 ÷ 8 chires);
3_ Appuyer brièvement sur la touche B, le «buzz-
er» à travers un avertissement sonore et la led
verte xe conrment la réussite de la procédure de
mémorisation du nouveau code.
Pour la commande d’ouverture/fermeture du portail
à travers le clavier, il est nécessaire de mémoriser ce
dernier dans le récepteur radio de la centrale.
Avant d’avancer, vérier d’être dans les paramètres
de mémorisation du récepteur radio (voir la procé-
dure dans la notice de la centrale),
Ensuite poursuivre la procédure ci-dessous:
- faire le code et appuyer sur la touche Aou B.
- si la procédure a abouti dans le bon sens, la led
s’éteint.
Pour chaque code saisi, on peut combiner la com-
mande de deux automatisations en choisissant A
et B.
3. EFFACEMENT D’UN SEUL CODE
Pour l’eacement d’un seul code poursuivre la
procédure ci-dessous:
1_ Appuyer sur la touche Apendant environs 4
seconds, ensuite, il y aura le son du «buzzer» et la
led verte qui clignote;
2_Rentrer le code à eacer
3_ Appuyer sur la touche Bpendant environs 4
seconds, le «buzzer» fera un avertissement sonore
et la led clignote en verte et rouge, ensuite appuyer
encore une fois brièvement sur la touche B.
Si la procédure a abouti dans le bon sens, la led ne
clignotera plus.
4. EFFACEMENT DE LA MEMOIRE DES CODES
Pour la remise à zéro de la mémoire du clavier
poursuivre la procédure ci-dessous:
1_ Appuyer sur la touche Apendant environs 4
seconds, ensuite, il y aura le son du «buzzer» et la
led verte qui clignote;
2_Rentrer le code Master (code usine = 0000; ou le
nouveau code Master crée)
3_ Appuyer sur la touche Bpendant environs
4 seconds, le «buzzer» fera un avertissement
sonore et la led clignote en verte et rouge, ensuite
appuyer encore une fois brièvement sur la touche
B.
Si la procédure a abouti dans le bon sens, la led ne
clignotera plus.
5. MODIFICATION DU CODE MASTER
Pour changer le code Master poursuivre la procé-
dure ci-dessous:
1_ Appuyer sur la touche Apendant environs 4
seconds, ensuite, il y aura le son du «buzzer» et la
led verte qui clignote;
2_ Rentrer le code Master (code usine = 0000; ou
le nouveau code Master crée)
3_ Appuyer encore sur la touche Apendant envi-
rons 4 seconds jusqu’à l’avertissement sonore du
«buzzer» et la led verte clignoterarapidement ;
4_Rentrer le nouveau code Master
5_ Appuyer brièvement sur la touche B, le «buzz-
er» fera un avertissement sonore et la led verte
est xe pendant 1 second en conrmant la réussite
de la procédure.
DIGITALE TASTATUR TCODE-W
Digitale Tastatur per Funk mit programmierbaren
Codes ROLLING CODE, mit allen TAU-Steuerungen
mit integriertem Empfänger oder mit Empfängern
der Serie RXDC / RXSM. Schutzart: IP 54
Es ist möglich, bis zu max. 4 Codes zu verwalten (2 ÷ 8
Ziern), mit jeweils 2 auswählbaren Kanälen A oder B.
Jede Tastatur wird mit einem Werksmastercode =
0000 geliefert (eventuell individuell gestaltbar), um
die Codes zu löschen.
Die Tastatur muss in der Nähe der Steuerung der
Automatisierung installiert werden, um dem Funksig-
nal zu ermöglichen, den Empfänger zu erreichen. Wir
empfehlen somit, die Betätigungsdistanz zu prüfen,
bevor die Tastatur an die Mauer/Säule befestigt wird.
(Abb. 2)
Falls es notwendig sein sollte, die Automatisier-
ung auf lange Entfernungen zu steuern, kann
die Version der digitalen Tastatur über Kabel mit
Übersendung des BUS-Signals genützt werden.
1. INSTALLATION TASTATUR (Abb. 2)
•Die Frontplatte der Tastatur von der Einsatzbasis tren-
DEUTSCH
nen;
•Die Einsetzbasis korrekt an die Wand oder Säule
befestigen (Spreizdübel Ø 6 mm verwenden, wenn
die Tastatur an die Wand befestigt wird, oder selbst-
schneidende Schrauben Ø 4 mm für Holzhalterungen
oder ähnliche.
•Wenn die Einsetzbasis an die Wand oder Säule befes-
tigt wurde, die Tastaturfrontplatte montieren (Abb. 3).
2. EINFÜGEN CODES (2 ÷ 8 Ziern)
Um einen neuen individuell gestalteten Code
einzufügen, wird die folgende Vorgehensweise be-
folgt:
1_ Die Taste A4 Sek. drücken, bis ein “Beep” gehört
wird und die grüne Led zu blinken beginnt;
2_ Während die grüne Led blinkt, den neuen Code
nach Wunsch eingeben (2 ÷ 8 Ziern);
3_ Dann kurz die Taste B, drücken, es kann ein
“Beep” gehört werden, wobei die grüne Led eine
Sekunde eingeschaltet bleibt und die erfolgte Eing-
abe des neuen Codes bestätigt.
Um die Önungs-/Schließsteuerung des Tors mit der
Tastatur zu ermöglichen, ist es notwendig, im Emp-
fänger der Steuerung den übertragenen Code zu
speichern.
Vor der Übertragung des Codes sicherstellen, in die
Programmierung des Empfängers eingetreten zu
Other tau Keypad manuals
