Tavool TH250 User manual

Stud Center Finder, Metal and
AC Live Wire Detector (TH250)
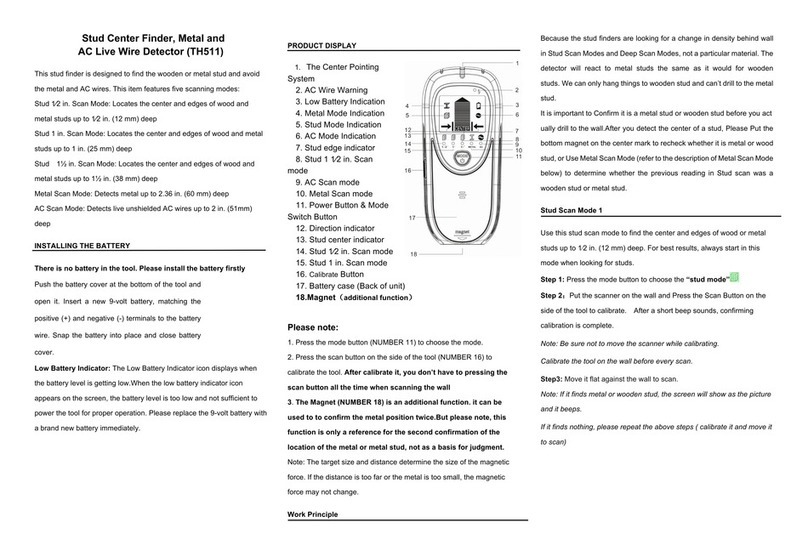
This stud finder is designed to find the wooden or metal stud and avoid
the metal and AC wires. This item features four scanning modes:
• Stud scan: Locates the center and edges of wood and metal studs up
to 0.75 in. (19 mm) deep.
• Deep mode: Locates the center and edges of wood and metal studs up
to 1.5 in. (38 mm) deep.
• Metal scan: Detects metal (such as 1⁄2 inch rebar) up to 2.36 in. (60
mm) deep.
•AC scan: Detects live unshielded AC wires up to 2 in. (51 mm) deep.
INSTALLING THE BATTERY
There is no battery in the tool. Please install the battery firstly
Push the battery cover at the bottom of the tool and open it. Insert a new
9-volt battery. Snap the battery into place and close battery cover.
Low Battery Indicator: The Low Battery Indicator icon displays when the
battery level is getting low.When the low battery indicator icon appears on
the screen, the battery level is too low and not sufficient to power the tool
for proper operation. Please replace the 9-volt battery with a brand new
battery immediately.
PRODUCT DISPLAY
1. The Marking Point
2. AC Wire Warning
3. Stud Mode Indicator
4. Low battery Indicator
5. Metal Mode Indicator
6. AC Mode Indicator
7. Stud Deep Mode Indicator
8. Moving Direction Indicator
9. Stud Edge Indicator
10. Stud Center Indicator
11. Power Button/Mode Switch Button
12. Scan Button
13. Battery (Back of Unit
Please note:
1. Press the mode button (NUMBER 11) to choose the mode.
2. Press the scan button on the side of the tool (NUMBER 12) to calibrate
the tool. After calibrate it, you don’t have to pressing the scan button
all the time when scanning the wall
Stud Scan Mode
Use this stud scan mode to find the center and edges of wood or metal
studs up to 3/4 inches (19 millimeters) deep. For best results, always start
in this mode when looking for studs.
Step 1: Press the mode button to choose the “stud mode”
Step 2:Put the scanner on the wall and Press the Scan Button on the
side of the tool to calibrate. After a short beep sounds, confirming
calibration is complete.
Note: Be sure not to move the scanner while calibrating.
Calibrate the tool on the wall before every scan.
Step3: Move it flat against the wall to scan.
Note: If it finds metal or wooden stud, the screen will show as the picture
and it beeps.
If it finds nothing, please repeat the above steps ( calibrate it and move it
to scan)
Step4: Find the edge and center of the stud and mark it.
Note:
1. WireWarning detection works in all modes. The indicator flashes on
the screen when detecting a live, unshielded wire.
2. Factors like humidity, temperature, and even the minor electric
readings from your hand, which all have an impact on the readings from
the wall.
3. If Stud Scan Mode provides irregular readings, the wood or studs
might be behind deeper than 0.75 in. (19 mm). Slide the Mode Selector
Switch to Deep Scan Mode.
Deep Scan Mode
Deep scan mode doubles the scanning depth of wood stud and metal
stud to 1.5 in. (38 mm) deep and allows for increased accuracy on deeper
targets.
Step 1: Press the mode button to choose the “Deep mode”
Step 2: Put the scanner on the wall and Press the Scan Button on the
side of the tool to calibrate. After a short beep sounds, confirming
calibration is complete.
Note: Be sure not to move the scanner while calibrating.
Calibrate the tool on the wall before every scan.
Step 3: Move it flat against the wall to scan.
Note: If it finds metal or wooden stud, the screen will show as the picture
and it beeps .If it finds nothing, please repeat the above steps ( calibrate it
on a new place on the wall and move it to scan)
Step4: Find the edge and center of the stud and mark it.
Note:
1. WireWarning detection works in all modes. The indicator flashes on the
screen when detecting a live, unshielded wire.

2. Factors like humidity, temperature, and even the minor electric
readings from your hand, which all have an impact on the readings from
the wall.
Important: Confirm it is a metal stud or wooden stud
Because the stud finders are looking for a change in density behind wall
in Stud Scan Modes and Deep Scan Modes, not a particular material.
The detector will react to metal studs the same as it would for wooden
studs. We can only hang things to wooden stud and can’t drill to the metal
stud.
After you detect the center of a stud, Please Use Metal Scan Mode to
determine whether the previous reading in Stud scan was a wooden stud
or metal stud.
Step 1: Press the mode button to choose the “Metal mode”
Step 2:Calibrate the tool in the air
Step 3: Put it close to the stud center mark(you made in the previously
steps) to test whether the tool will has a reaction. If the signal bar on the
screen grows and the tool beeps, it means it is a metal stud, be sure not
to drill to it. It is dangerous. If not, it means it is a wooden stud. You can
drill it to hang your pictures, cabinet, TV, etc.
Frequently Questions and Answers
1. I do all the steps as the instructions said, but the screen shows nothing.
No readings at all
2. It gives a different center of stud position every time on the same stud
3. It was not consistent
4. It works for one stud and not the next
5. It rarely find the same center or edge twice, it is wrong 3 out of 5 times.
If you encounters the above issues in stud mode or deep mode, It may be
caused by the position you do the calibration.
Tavool electronic stud finder looks for a change in density behind wall to
locate the wooden stud and metal studs in Stud Scan Mode and Deep
Scan Mode. When you calibrate it at a position on the wall, the stud
finder gets an initial density sample. When it gets to the section with dif
ferent density, the stud finder will create different circuitry inside and
trigger its internal program to locate the center of the objects exactly.
If you calibrate it exactly on the wooden stud, the initial density
sample is not reliable, so the tool may has no readings at all or has
different results, or is not consistent.
Similarly, if you calibrate it very close to the wooden stud, the initial
density sample is not reliable,too. And it may cause that you didn’t find
the exact center or Works for one stud and not the next.
Above all, calibration before every scan is very important. And where you
calibrate the tool is important, too.
If any other expected questions,or if the tool beeps all the time,
replacement or refund. We always stand behind our products to
offer proper solutions and won’t let you suffer any loss.
If any problems, your contacting us before an review is highly
appreciated!
Metal Scan Mode
Use this mode to locate metal material and avoid hazards such as pipes
behind wall up to 2.36 in.
Metal scan mode has Maximum metal sensitivity and is ideal for quickly
finding the approximate location of metal. However, sensitivity can be
reduced by calibrating the tool closer to metal.For maximum metal
sensitivity, calibrate it in the air by pressing and holding the Power
button.
Step 1: Press the mode button to choose the “Metal mode”
Step 2: Calibrate it in the air or on the wall (when you need to reduce the
metal sensitive) before every scan
Step 3: Move it flat against the wall to scan.
Step 4: When the signal bar is full, mark the spot. Then move it in the
same direction, you will get another spot where the signal bar is full.
The metal is at the center of the 2 spots.
Step 5: If the distance between the 2 spots is very long than actual size,
please reduce the metal sensitivity by calibrating it on the wall and exactly
on the spot, then repeat the step 4 to find the 2 spot. The metal is at the
center of the 2 spots.
Note:
1. WireWarning detection works in all modes. The indicator flashes on the
screen when detecting a live, unshielded wire.
2. Factors like humidity, temperature, and even the minor electric
readings from your hand, which all have an impact on the readings from
the wall.
Ac wire Scan Mode
Ac wire mode finds live, unshielded, electrical wires up to 2 inches (51
millimeters) deep.It works by sensing the magnetic field changes of live
AC wire. It indicator where the ac wire is bu not the exact center. And it
needed to calibrate in the air, too.
Step 1: Press the mode button to choose the “Ac wire mode”
Step 2: Calibrate it in the air or on the wall before every scan
Step 3: Move it flat against the wall to scan.

Step 4: Mark where the strongest signal appears.
Note:
1. AC Scan will only detect live (hot) unshielded AC wiring.
2. Factors like humidity, temperature, and even the minor electric
readings from your hand, which all have an impact on the readings from
the wall.
SCANNING DIFFERENT SURFACES
Press MODE button switch to the desired mode: Stud mode for finding
wood or metal studs for 3/4 in.(19mm); Deep Mode for scanning walls for
3/2 in. (38 mm) thick; Metal Scan for locating metal; or AC Scan for
locating live AC wiring.Unit will remain off if Power button is not pressed.
Wallpaper: TH250 that functions normally on walls covered with
wallpaper or fabric, unless the materials are metallic foil, contain metallic
fibers, or are still wet after application. Wallpaper may need to dry for
several weeks after application.
Freshly painted walls: May take one week or longer to dry after
application.
Lath & plaster: Due to irregularities in plaster thickness, it is difficult for
MultiScannerTH250 to locate studs in Stud modes. Change to Metal
Scan mode to locate the nail heads holding wood lath to the studs. If the
plaster has metal mesh reinforcement, TH250 may be unable to detect
through that material.
Extremely textured walls or acoustic ceilings:
When scanning a ceiling or wall with an uneven surface, place thin
cardboard on the surface to be scanned and scan over the cardboard in
Deep mode. If irregular scanning results are received, switch to Metal
Scan mode to locate nails or drywall screws that line up vertically where a
stud or joist is positioned.
Wood flooring, subflooring, or gypsum drywall over plywood
sheathing: Use Deep mode and move the tool slowly. The Signal
Strength Indicator may only display 1 or 2 bars when the tool locates a
stud through thick surfaces.
TH250 cannot scan for wood studs and joists through concrete or
carpet and padding. In problematic situations, try using Metal Scan to
locate nails or screws that may line up vertically where a stud or joist is
positioned.
Note: Sensing depth and accuracy can vary due to moisture, content of
materials, wall texture, and paint.
WARNING
1. Electrical field locators may not detect live AC wires if wires are more
than 2 in. (51 mm) from the scanned surface, in concrete, encased in
conduit, present behind a plywood shear wall or metallic wall covering, or
if moisture is present in the environment or scanned surface.Always turn
off power when working near electrical wires.
2. Do not assume there are no live electrical wires in the wall. do not take
actions that could be dangerous if the wall contains a live electrical wire.
always turn off the electrical power, gas, and water supplies before
penetrating a surface. failure to follow these instructions may result in
electric shock, fire, and/or serious injury or property damage.always turn
off power when working near electrical wires.
3. Do not rely exclusively on the detector to locate items behind the
scanned surface. Use other information sources to help locate items
before penetrating the surface. Such additional sources include
construction plans, visible points of entry of pipes and wiring into walls,
such as in a basement, and in standard 16 and 24 in. (41 and 61 cm) stud
spacing practices.
If you have any problems, please feel free to contact us at
Table of contents
Other Tavool Security Sensor manuals
Popular Security Sensor manuals by other brands
Lince
Lince OBLO'/E Installation, operation and maintenance manual
Panasonic
Panasonic CX-44 Series instruction manual

Servodan
Servodan Foto Gong user guide
SAFETY SYSTEMS TECHNOLOGY
SAFETY SYSTEMS TECHNOLOGY NOVA-Sensor GIR901 Design manual
Wavetronix
Wavetronix SmartSensor Matrix user guide

Hama
Hama 186434 operating instructions
