manuals.online logo
Brands
  1. Home
  2. •
  3. Brands
  4. •
  5. Team Durango
  6. •
  7. Motorized Toy Car
  8. •
  9. Team Durango DEX410 User manual

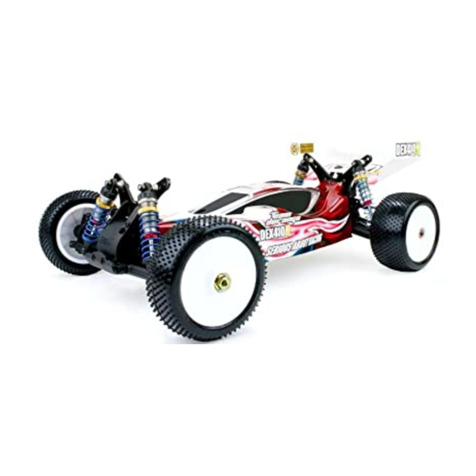
Team Durango DEX410 User manual

D
ESC410R/DEX410 Gearbox Pro-Build. | Team Durango Blog
h
ttp://www.team-durango.com/blog/2011/03/09/desc410rdex410-gearbox-pro-build/[11/10/2011 4:34:19 PM]
Part Search: 0 Items E-mail: Password:
March 9, 2011
DESC410R/DEX410 Gearbox Pro-Build.
Filed under: News, Tricks and Tips — Team Durango @ 5:10 pm
DEX410 / DESC410R Gearbox Build Guide
Getting the gearboxes built
correctly on the
DESC410R/DEX410 vehicles
is critical for long-life and
handling the rigors of
racing. The metal gears are
strong but nothing can cope
with the combination of a
poory built drivetrain,
extreme power and on-track
abuse. So please take a
look at this guide to help
protect your drivetrain and
keep you on the race track.
With the differential built and
filled with oil, attach the
crown gear half of the
differential and fasten the
screws down in a cross
fashion. Back off all the
screws a turn or two before repeating the cross pattern tightening again – this is to ensure the crown
gear is sat fully in place and aligned correctly.
search the blog
categories
Select Category
race calendar
«feb apr »
march 2011
MTWT F SS
123456
7 8 9 10111213
14 15 16 17 18 19 20
21 22 23 24 25 26 27
28 29 30 31
post archive
october 2011
september 2011
august 2011
july 2011
june 2011
may 2011
april 2011
march 2011
february 2011
january 2011
december 2010
november 2010
october 2010
september 2010
august 2010
july 2010
june 2010
may 2010
april 2010
march 2010
february 2010
january 2010
december 2009
dex410
dex410 overview
option parts
spare parts
Country: Please select...
Go Login
Search
Select Category
Please select... Go
D
ESC410R/DEX410 Gearbox Pro-Build. | Team Durango Blog
h
ttp://www.team-durango.com/blog/2011/03/09/desc410rdex410-gearbox-pro-build/[11/10/2011 4:34:19 PM]
Tighten the gears in a cross pattern. After the crown gear is attached – loosen the screws a little and
tighten cross-pattern again.
Shimming the differential correctly is an important
step and this is the next stage of building the perfect
gearbox. The DESC410R/DEX410 come with two types
of shim for this purpose, a 0.2mm which is silver in
colour and a 0.1mm copper-coloured shim.Firstly you
need to know how many shims will get the diff sitting
correctly so press down the bearing on the moulded
diff-body side so it’s fully in place as we’ll use the
crown gear side of the diff to play with shim settings –
this is purely because it’s much easier to remove /
replace the bearings on this side whilst we find the
perfect setting.
Start with one 0.2mm silver shim on the crown gear side and slide the bearing over the top. Place the diff
with shims and bearings installed into the empty differential case and clamp the case tight between your
fingers. Next you need to clamp the outdrives with your other hand, squeezing them inward whilst trying
to ‘rock’ the diff side to side in the case.
One silver shim in position. Test the end-float in the case by trying to shift the diff sideways.
If you can feel a slight movement then you can maybe add a 0.1mm copper coloured shim to the same
side, next to the previously installed shim and try again. If on the other hand your diff is hard to install
or feels to be binding then you can remove / add to find your perfect balance. The shimming in this
guide is for the parts we used – your shimming could be different so be aware.
One silver shim wasn’t enough in this case, so I’ve added a
second copper shim. Silver and copper shims together were the right setting – now it’s
time to position them.
Once you’ve found the
setting that feels right
you need to test against
the input pinion gear –
this will define where
D
ESC410R/DEX410 Gearbox Pro-Build. | Team Durango Blog
h
ttp://www.team-durango.com/blog/2011/03/09/desc410rdex410-gearbox-pro-build/[11/10/2011 4:34:19 PM]
you need to place the
shims you’ve just
decided upon. Place the
input shaft / pinion gear
into the gearbox housing
along with the diff
you’ve just shimmed
correctly and clamp the
case halves together
with the provided screws
and spin the input
shaft. With all shims on
the crown-gear side
(where you should have
been test-fitting them)
you might find the gears
are loud and have
excess friction – so next comes choosing which side you place your shims.
You want the crown gear as close to the pinion gear as you can to get a good mesh – but you don’t want it
so close that the gearbox is notchy or excessively loud. With the example differential in the photos needing
one of each shim, you could leave the 0.2mm silver shim on the crown gear side and place the smaller
copper-coloured 0.1mm shim behind the bearing on the opposite side. This will shift the diff over by
0.1mm and effectively seperate the crown gear and pinion by the same amount. Re-assemble the gearbox
and test as before to check how smooth the gears are – a slight roughness to the action is fine but if
there’s still excessive noise and friction you can continue adjusting the shims to suit.
Above: In the example above, the perfect setting ended up with one silver shim on the Crown-gear side and one copper shim on
the moulded side.
With the differential shimming complete the last point to look
at when building your DESC410R/DEX410 is the input shaft
itself. Simply tightening the CVD-shaft onto the input shaft
and placing it into the gearbox housing could result in some
degree of movement. You can check this by clamping the
gearbox together very tightly with your fingers or screwing
the halves together – then with the unassembled CVD
attached to the input shaft, try to rock the shaft vertically up
and down (see photo). The movement, if any, will be slight –
but this is amplified inside the gearbox and will result in the
teeth of the gears having an improper contact patch which will
place excess strain on the gears.
D
ESC410R/DEX410 Gearbox Pro-Build. | Team Durango Blog
h
ttp://www.team-durango.com/blog/2011/03/09/desc410rdex410-gearbox-pro-build/[11/10/2011 4:34:19 PM]
Input shaft with bearings in place. Tighten the grub screw whilst applying pressure to squeeze the
two halves together.
To get the perfect setting and eliminate any play in this vital area you need to loosely join the CVD shaft to
the input-shaft and place them into one half of the gearbox housing. Clamp the two metal parts together
so you’re pushing the CVD and input shaft together and squeezing the bearings against the plastic divider.
Carefully tighten the grub screw on the CVD part of the assembly whilst applying the pressure and test the
input shaft for movement again.
Tighten the gearbox screws TIGHT to help clamp the bearings. With an improper setting the input shaft will be able to rock up
& down slightly – it’s hard to detect with the full driveshaft in
place.
Adjusting the amount of pressure applied during tightening will vary the
setting – when you get it right the shaft should be firmly set and free
from any play. If you apply too much pressure you might find the
bearings binding slightly, so try again. The perfect setting should see
minimal binding of the bearings but a totally rock-steady shaft.
Your gearbox should now be ready for the track – time to build the
other one the same!
Comments (11)
11 Comments »
1. You guys ROCK! Never before have I had a RC company offer this much support for there products – keep
up the GREAT work! Oh yea, you build nice stuff too!
Comment by AWDPete — March 9, 2011 @ 6:48 pm
2. What an awesome build review, good skillz TD
Comment by BooBoo — March 9, 2011 @ 11:18 pm
3. [...] Check the detailed guide here! [...]
Pingback by Durango DEX410 DESC410R Diff Tech Tips | Buggy | Radio Control News — March 10, 2011 @ 4:11 pm
4. I will just add a picture of the inside.
How much oil you put in.
To see the exact level because on the manual it s not really clear.
D
ESC410R/DEX410 Gearbox Pro-Build. | Team Durango Blog
h
ttp://www.team-durango.com/blog/2011/03/09/desc410rdex410-gearbox-pro-build/[11/10/2011 4:34:19 PM]
Comment by Philippe Bonet — March 14, 2011 @ 1:52 am
5. Need to put this in the manual.I have gone though 2 gear sets so far. And a little upset about it.When you
build it to how the manual says and its not right gets people little upset.The truck handles great but if goes
though diff gears like this( 7 batterys ran though)its no use to me.I am up to .50 shims on the gear side
and .20 on the other side.Its the only way to get all of the play out of it. Sorry if being blunt but am alittle upset when I
only get about a day out of it and rip 2 sets of gears out of it.Thanks Dwayne
Comment by dwayne walter — March 22, 2011 @ 1:25 am
6. Hallo
Where are the copper shims in the kit?
I can´t find them
Thanks
Tony
Comment by Tony Miller — March 24, 2011 @ 6:04 am
7. Thanks for your guidance, really helpful guide to build the perfect DESC410R and DEX410 gearbox. Every
step to take in order to perfect.
Comment by Power Take Offs for Trucks — March 24, 2011 @ 6:40 am
8. I just finished my build, but have not mounted electronics etc.
I’m going to tear out my diffs and make these adjustments.
I totally get it now, but didnt even think of it during the build.
Thanks..!!
Comment by Joe — March 25, 2011 @ 3:39 am
9. “Box Stock” – using manual to build – DESC401R and racing it on high traction carpet. Have gone through
four rear crown gears, even with these instructions the crown still blows. Die-cast materials Vs. a hardened
pinion just cant hold up against extreme stress… also wondering if the diff case is flexing at startup…..
solution!? and hardened crown gear and/or stiffer rasin Diff Case.
Ive shimmed two new diff assemblies slighly different then these instructions, upgraded to a Center Slipperential, installed
a 4mm rear carbon chassis brace and problem solved. The truck is so much easier to drive and very smooth! Now, I
llove the truck but wish the instruction manual was more accurate during the built process… would have saved me over a
hundred dollars in damaged parts.
Comment by Calvin Mercer — April 2, 2011 @ 7:48 am
10. Its very helpfull to indicate the points that has to be taken carefully during the assemply. I also broke two
teeths from the diff crown after 3 batteries but that was before reading carefully this manual. I hope it will
help the next time …in any case put a big drop of thread lock to the setting screw that secures the outdrive
in the small pinion axle and check after each race if there is any play. I would be pleased if you can think about a milled
and hardend crown gear made out of rock solid steel. Having steel gears normally should enlarge the maintainance
interval.
By the way on my truck a dog bone axle broke on the rear after 3 batteries directly in half around the pin, but Durango
send me two spare ones within a week so I am ready to run the next race. I am very pleased with the service, and I am
very confident that they will solve material problems in the future. For me the contact with them is great and very
professional, I hope that they are taking the issues to improve the products.
Comment by mobilow — April 8, 2011 @ 3:44 pm
11. [...] DESC410R/DEX410 Gearbox Pro-Build [...]
Pingback by Team Durango 410 Series Diff Seal mod — June 5, 2011 @ 11:35 am
RSS feed for comments on this post. TrackBack URL
Leave a comment
Name (required)

Other manuals for DEX410

2

This manual suits for next models

1

Other Team Durango Motorized Toy Car manuals

Team Durango DEX210v2 User manual

Team Durango

Team Durango DEX210v2 User manual

Team Durango DEX210V3 Configuration guide

Team Durango

Team Durango DEX210V3 Configuration guide

Team Durango DEX410R User manual

Team Durango

Team Durango DEX410R User manual

Team Durango DEX410R User manual

Team Durango

Team Durango DEX410R User manual

Team Durango DESC410Rv2 User manual

Team Durango

Team Durango DESC410Rv2 User manual

Team Durango DEX408 User manual

Team Durango

Team Durango DEX408 User manual

Team Durango DESC410 Assembly instructions

Team Durango

Team Durango DESC410 Assembly instructions

Team Durango dex210f User manual

Team Durango

Team Durango dex210f User manual

Team Durango DNX408T User manual

Team Durango

Team Durango DNX408T User manual

Team Durango DEX210 RTR User manual

Team Durango

Team Durango DEX210 RTR User manual

Team Durango DEX410v5 User manual

Team Durango

Team Durango DEX410v5 User manual

Team Durango Dex8 User manual

Team Durango

Team Durango Dex8 User manual

Team Durango DEX410 User manual

Team Durango

Team Durango DEX410 User manual

Team Durango dnx8 User manual

Team Durango

Team Durango dnx8 User manual

Team Durango DETC410 User manual

Team Durango

Team Durango DETC410 User manual

Team Durango DEX410 User manual

Team Durango

Team Durango DEX410 User manual

Team Durango DESC410 User manual

Team Durango

Team Durango DESC410 User manual

Team Durango DESC210R User manual

Team Durango

Team Durango DESC210R User manual

Team Durango DEX210 User manual

Team Durango

Team Durango DEX210 User manual

Team Durango DESC410Rv2 User manual

Team Durango

Team Durango DESC410Rv2 User manual

Team Durango DEX210v2 User manual

Team Durango

Team Durango DEX210v2 User manual

Popular Motorized Toy Car manuals by other brands

Yokomo YZ-2 DT manual

Yokomo

Yokomo YZ-2 DT manual

Contixo SC5 user manual

Contixo

Contixo SC5 user manual

REVELL PINEWOOD DERBY TROPHY Series instructions

REVELL

REVELL PINEWOOD DERBY TROPHY Series instructions

Carrera RC RC Power 4WD Truck Buggy Assembly and operating instructions

Carrera RC

Carrera RC RC Power 4WD Truck Buggy Assembly and operating instructions

INJUSA aprilia 64900 user manual

INJUSA

INJUSA aprilia 64900 user manual

Nerf TERRASCOUT manual

Nerf

Nerf TERRASCOUT manual

Spec-R R2 instruction manual

Spec-R

Spec-R R2 instruction manual

Yokomo B-Max 2 manual

Yokomo

Yokomo B-Max 2 manual

Serpent Model Racing Cars BV f110 SF3 instruction manual

Serpent Model Racing Cars BV

Serpent Model Racing Cars BV f110 SF3 instruction manual

JIN YOW COLT 10 instruction manual

JIN YOW

JIN YOW COLT 10 instruction manual

Duratrax Nitro Evader BX Assembly and operation manual

Duratrax

Duratrax Nitro Evader BX Assembly and operation manual

Magom DUMPER AUSA manual

Magom

Magom DUMPER AUSA manual

Mega Bloks PROBUILDER RACING Tantalus Ti SRA 3722 instruction manual

Mega Bloks

Mega Bloks PROBUILDER RACING Tantalus Ti SRA 3722 instruction manual

Team Losi XXX-NT Sport owner's manual

Team Losi

Team Losi XXX-NT Sport owner's manual

Power Wheels FRC34 owner's manual

Power Wheels

Power Wheels FRC34 owner's manual

GM-Racing Flash 3.0 Nitro instruction manual

GM-Racing

GM-Racing Flash 3.0 Nitro instruction manual

Dorel PACIFIC CYCLE KT1246 owner's manual

Dorel

Dorel PACIFIC CYCLE KT1246 owner's manual

Arrma 1/10th Scale 2WD BLX Brushless instruction manual

Arrma

Arrma 1/10th Scale 2WD BLX Brushless instruction manual

manuals.online logo
manuals.online logoBrands
  • About & Mission
  • Contact us
  • Privacy Policy
  • Terms and Conditions

Copyright 2025 Manuals.Online. All Rights Reserved.