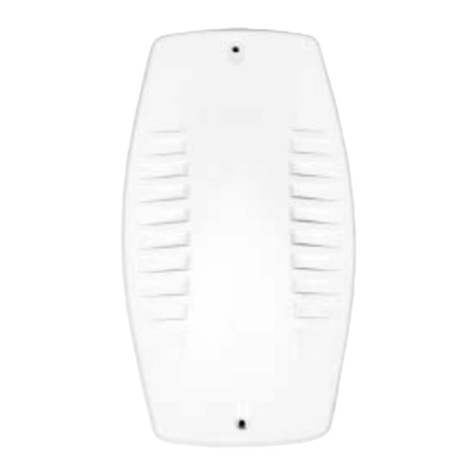
Tecnoalarm LCD300 User manual

LCD300/S - Ver. 2.1 - 04/2014Ver. 2.1 - 04/2014 - LCD300/S 1
LCD300/S
1. DESCRIZIONE
La LCD300/S è un organo di comando con display LCD
retroilluminato che visualizza 2 righe con max. 16 caratteri
alfanumerici ciascuna. La console è dotata di una tastiera
in gomma a 16 tasti, 36 LED di segnalazione e un
altoparlante per segnalazioni vocali. La tastiera è protetta
da uno sportello ribaltabile in plastica.
2. DIAGNOSTICA
In caso di malfunzionamento della linea seriale, guasto
della console, o stati operativi particolari, sul display
possono comparire i seguenti messaggi di diagnostica:
• "LINEA ASSENTE"
La console è guasta o la linea seriale manca. Tutti i LED
lampeggiano.
• "!! STAND BY !!"
La console e temporaneamente disabilitata. Un accesso
alla centrale è stato effettuato con un'altra console.
• "LINEA DISTURBATA"
La linea seriale è disturbata o mal collegata.
I messaggi diagnostici sono ripetuti circa ogni 10 secondi.
3. SEGNALAZIONI DI LED
Console con display LCD e altoparlante
Console avec afficheur LCD et haut-parleur
Console with LCD display and speaker
Consola con display LCD y altavoz
Bedienteil mit LCD-Display und Lautsprecher
8
Le prestazioni del prodotto possono essere soggette a modifiche senza alcun preavviso. È vietata la copia, la distribuzione e la
pubblicazione del presente manuale o di parti dello stesso, su qualunque tipo di supporto e in qualunque forma, senza previa
autorizzazione. Il suo contenuto può essere modificato senza alcun preavviso.
Les caractéristiques de ce produit peuvent être sujettes à modifications sans préavis. Toute reproduction ou distribution non
autorisée de ce manuel, complète ou partielle, sur n’importe quel support de données est interdite. Nous nous réservons le droit
d’y apporter sans préavis les modifications jugées nécessaires.
The product features can be subject to change without notice. Unauthorized reproduction or distribution of this manual, or any
portion of it, on any device and in any form, is prohibited. The contents of this manual may be subject to change without notice.
Las funciones del producto pueden ser modificadas en cualquier momento sin previo aviso. La reproducción o distribución sin
autorización de este manual, o de una parte del mismo, en cualquier tipo de soporte y forma, está prohibida. El contenido de este
manual puede ser modificado sin previo aviso.
Die Charakteristika des Produktes können jederzeit ohne vorherige Ankündigung geändert werden. Die unerlaubte vollständige
oder teilweise Vervielfältigung und Verbreitung dieses Handbuches in jeglicher Form ist verboten. Der Inhalt dieses Handbuches
kann jederzeit ohne vorherige Ankündigung geändert werden.
21ISTR05127
DATI TECNICI / CARACTERISTIQUES TECHNIQUES / TECHNICAL SPECIFICATIONS
CARACTERÍSTICAS TÉCNICAS / TECHNISCHE DATEN
Collegamento/Raccordement/Connection/Conexión/Verbindung RS485
Tensione nominale/Tension nominale/Rated voltage
Tensión nominal/Nennspannung 12V DC
Tensione di lavoro/Tension d'alimentation/Operating voltage
Tensión de trabajo/Betriebsspannung 10...14V DC
Consumo/Consommation/Consumption/Consumo/Stromaufnahme
A riposo/au repos/in stand-by/en reposo/im Ruhezustand 14mA @ 12V DC
In allarme/en alarme/Alarm consumption/en alarma/im Alarmzustand 85mA @ 12V DC
Retroilluminazione sempre accesa/Éclairage toujours actif
Backlit always on/Iluminación siempre activa/Beleuchtung immer an 120mA @ 12V DC
Contenitore/Boîtier/Casing/Carcasa/Gehäuse ABS
Dimensioni (L x A x P)/Dimensions (L x H x P)/Dimensions (L x H x D)
Dimensiones (L x A x P)/Abmessungen (L x H x B) 120 x 175 x 46mm
Grado di protezione contenitore/Indice de protection/Case protection class
Clase de protección/Schutzklasse IP31
Temperatura di funzionamento/Température de fonctionnement
Operating temperature/Temperatura de funcionamiento/Betriebstemperatur +5°C...+40°C
Protezione contro l'apertura e la rimozione
Auto-protection à l'ouverture et l'arrachement/Anti-tamper protection against
opening and detachement/Protección de tamper antiapertura y antiarrastre
Öffnungs- und Abhebeschutz Micro-switch
CONFORMITÀ / CONFORMITÉ / CONFORMITY / CONFORMIDAD / KONFORMITÄT
Con la presente Tecnoalarm srl dichiara che il presente apparecchio è conforme ai requisiti essenziali
ed alle altre disposizioni pertinenti stabilite dalle direttive LVD 2006/95/EC e EMC 2004/108/EC.
L’apparecchio è inoltre conforme alla norma EN50131-1 nonché la EN50131-3. La dichiarazione di
conformità è disponibile sul sito: www.tecnoalarm.com.
Par la présente la Tecnoalarm srl déclare que le présent appareil est conforme aux exigences
essentielles et aux autres dispositions pertinentes des directives LVD 2006/95/EC et EMC 2004/108/
EC. L’appareil est de même conforme à la norme EN50131-1 ainsi que la EN50131-3. La déclaration
de conformité est disponible sur le site web: www.tecnoalarm.com.
Hereby, Tecnoalarm srl declares that the present equipment is in compliance with the essential
requirements and other relevant provisions of the LVD 2006/95/EC and EMC 2004/108/EC directives.
The equipment is also in compliance with the standard EN50131-1 as well as the EN50131-3. The
declaration of conformity is available on the website: www.tecnoalarm.com.
Por medio de la presente Tecnoalarm srl declara que el presente equipo cumple con los requisitos
esenciales y cualesquiera otras disposiciones aplicables o exigibles de las directivas LVD 2006/95/EC
y EMC 2004/108/EC. El equipo cumple también con la norma EN50131-1 así como la EN50131-3. La
declaración de conformidad está disponible a la página web: www.tecnoalarm.com.
Hiermit erklärt Tecnoalarm srl, daß sich das vorliegende Gerät in Übereinstimmung mit den
grundlegenden Anforderungen und den übrigen einschlägigen Bestimmungen der Richtlinien LVD
2006/95/EC und EMC 2004/108/EC befindet. Das Gerät entspricht außerdem der Norm EN50131-1
sowie der EN50131-3. Die Konformitätserklärung steht auf folgender Webseite zur Verfügung:
www.tecnoalarm.com.
Approvato per
sistemi omologati
N° B-501-0007/a

LCD300/S - Ver. 2.1 - 04/2014Ver. 2.1 - 04/2014 - LCD300/S2
1. DESCRIPTION
La LCD300/S est une unité de contrôle avec afficheur LCD éclairé qui visualise 2 lignes avec un
total de 16 caractères alphanumériques chacune. La console est dotée d'un clavier en caoutchouc
de 16 touches, 36 LED de signalisation et un haut-parleur pour les signalisations vocaux. Le
clavier est protégé par un couvercle rabattable en plastique.
2. DIAGNOSTIQUES
En cas de mauvais fonctionnement de la ligne sérielle RS485, panne de la console ou modes de
fonctionnement especiaux, la console peut afficher les messages diagnostiques suivants:
• "LIGNE ABSENTE"
La console est défectueuse ou la ligne sérielle est absente. Tous les LED clignotent.
• "!! STAND BY !!"
La console est temporairement déshabilitée. Un accès a été effectué sur une autre console.
• "LIGNE PERTURB."
Sur la ligne sérielle il y a des interférences ou la ligne n'est pas bien raccordée.
Les messages diagnostiques se repètent toutes les 10 secondes environ.
3. SEGNALISATIONS DE LED
7
SCHEDA / CARTE ÉLECTRONIQUE / ELECTRONIC BOARD / PLACA / PLATINE

LCD300/S - Ver. 2.1 - 04/2014Ver. 2.1 - 04/2014 - LCD300/S 3
1. DESCRIPTION
The LCD300/S is a control unit with backlit LCD display which views 2 lines of maximum 16
alphanumeric characters each. The console is equipped with a rubber keypad with 16 keys, 36
signaling LED and a loudspeaker for voice signaling. The keypad is protected by a tiltable plastic
cover.
2. DIAGNOSTICS
In case of bad functioning of the serial bus, failure of the console or special operating modes, the
console can display the following diagnostics:
• "LINE ABSENT"
The console is defective or the serial bus is missing. All LEDs are blinking.
• "!! STAND BY !!"
The console is temporarily disabled. Access has been made from another console.
• "LINE DISTURBED"
There are interferences on the serial bus or the bus is is badly connected.
The messages are repeated approximately every 10 seconds.
3. LED SIGNALING
6
AA
AA
ARimuovere il coperchietto e svitare le viti sulla parte frontale, poi aprire il contenitore e rimuovere la
scheda.
Enlevez le petit couvercle e dévissez les vis sur le face avant, ensuite ouvrez le boîtier et enlevez la
carte électronique.
Remove the cover and loosen the screws on the front panel, then open the casing and remove the
electronic board.
Saque la tapa y destornille los tornillos en la parte frontal, después abra la caja y saque la placa
electrónica.
Entfernen Sie die Abdeckung und lösen Sie die Schrauben auf der Vorderseite, danach öffnen Sie
das Gehäuse und entnehmen Sie die Platine.
BB
BB
BFissare la console al muro sfruttando i fori posti sul fondello della console (A). Utilizzando la vite in
dotazione fissare il rettangolo di plastica (B) per il contatto antistrappo alla parete senza staccarlo dal
fondo del contenitore. Inserire la scheda nel contenitore facendo coincidere il contatto tamper
con il rettangolo.
Fixez la console au mur en utilisant les trous dans le fond du boîtier (A). Fixez le rectangle en
plastique (B) du contact d'auto-protection à l'arrachement au moyen de la vis incluse, sans l'enlever
du fond du boîtier. Introduisez la carte électronique d'une façon que le contact d'auto-protection soit
positionné exactement sur le rectangle.
Fix the console to the wall using the mounting holes in the base of the casing (A). Using the screw
included, fix the plastic rectangle (B) for the anti-tamper protection against detachment without
breaking it off the base of the casing. Insert the electronic board making sure that the tamper switch is
placed exactly over the rectangle.
Fije la consola en la pared disfrutando de los agujeros en la base de la caja (A). Fije el rectángulo de
plástico (B) para la protección de tamper antiarranque mediante el tornillo incluido, sin sacarlo de la
base de la caja. Inserte la placa de manera que el contacto de tamper esté posicionado exactamente
sobre el rectángulo.
Befestigen Sie das Bedienteil mit Hilfe der Montageöffnungen (A) an der Wand. Befestigen Sie das
Plastikrechteck (B) für den Abhebeschutz mit Hilfe der beigefügten Schraube, ohne es aus dem
Gehäuseboden herauszubrechen. Setzen Sie die Platine so ein, daß sich der Sabotagekontakt genau
über dem Rechteck befindet.
CC
CC
CInserire l'etichetta trasparente per l'identificazione dei programmi nell'apposita fessura presente nella
parte inferiore della console vicino allo sportello di chiusura.
Insérez l'étiquette avec les noms des programmes par la fente en bas du boîtier, au-dessus des
charnières du couvercle en plastique.
Insert the label with the program descriptions by the slit in the lower part of the casing, above the
hinges of the plastic lid.
Inserte la etiqueta con los nombres de los programas por la ranura en la parte baja de la caja, encima
de las bisagras de la tapa de plástico.
Führen Sie das Etikett mit den Programmbeschreibungen in den Schlitz im unteren Teil des
Gehäuses, über den Scharnieren des Plastikdeckels, ein.
INSTALLAZIONE / INSTALLATION / INSTALLATION / INSTALACIÓN / INSTALLATION
23
1

LCD300/S - Ver. 2.1 - 04/2014Ver. 2.1 - 04/2014 - LCD300/S4
1. DESCRIPCIÓN
La LCD300/S es una unidad de control con display LCD retroiluminado que visualiza 2 líneas de
máx. 16 caracteres alfanuméricos cada una. La consola está dotada de un teclado de caucho de
16 teclas, 36 LED de señalización y un altavoz para las señalizaciones vocales. El teclado está
protegido por una tapa abatible de plástico.
2. DIAGNÓSTICOS
En caso de mal funcionamiento de la línea serial, avería de la consola o estados operativos
particulares, la consola puede visualizar los mensajes diagnósticos siguientes:
• "LINEA AUSENTE"
La consola está estropeada o la línea serial falta. Todos los LED parpadean.
• "!! STAND BY !!"
La consola está temporaneamente deshabilitada. Se ha efectuado un acceso desde otra
consola.
• "LINEA PERTURB."
En la línea serial hay interferencias o la línea serial está mal conectada
Los mensajes diagnósticos se repiten aproximadamente cada 10 segundos.
3. SEÑALIZACIONES DE LED
5
1. BESCHREIBUNG
Das LCD300/S ist ein Bedienteil mit beleuchtetem LCD-Display, das 2 Zeilen mit je bis zu 16
alphanumerischen Zeichen anzeigt. Das Bedienteil besitzt eine Gummitastatur mit 16 Tasten, 36
Signal-LED und einen Lautsprecher für die Sprachmeldungen. Die Tastatur ist durch eine
Plastikklappe geschützt.
2. DIAGNOSEMELDUNG
Bei Funktionsstörungen der Schnittstelle oder des Bedienteils oder bei besonderen
Betriebszuständen können auf dem Display folgende Diagnosemeldungen angezeigt werden:
• "LINIE FEHLT"
Das Bedienteil ist defekt oder die Schnittstelle fehlt. Alle LED blinken.
• "!! STAND BY !!"
Das Bedienteil ist vorübergehend gesperrt. Von einem anderen Bedienteil wurde auf das
System zugegriffen.
• "LINEA DISTURBATA"
Die Schnittstelle ist gestört oder nicht korrekt verbunden.
Die Diagnosemeldungen werden ungefähr alle 10 Sekunden wiederholt.
3. LED-SIGNALE
This manual suits for next models
1
Other Tecnoalarm Control Unit manuals
