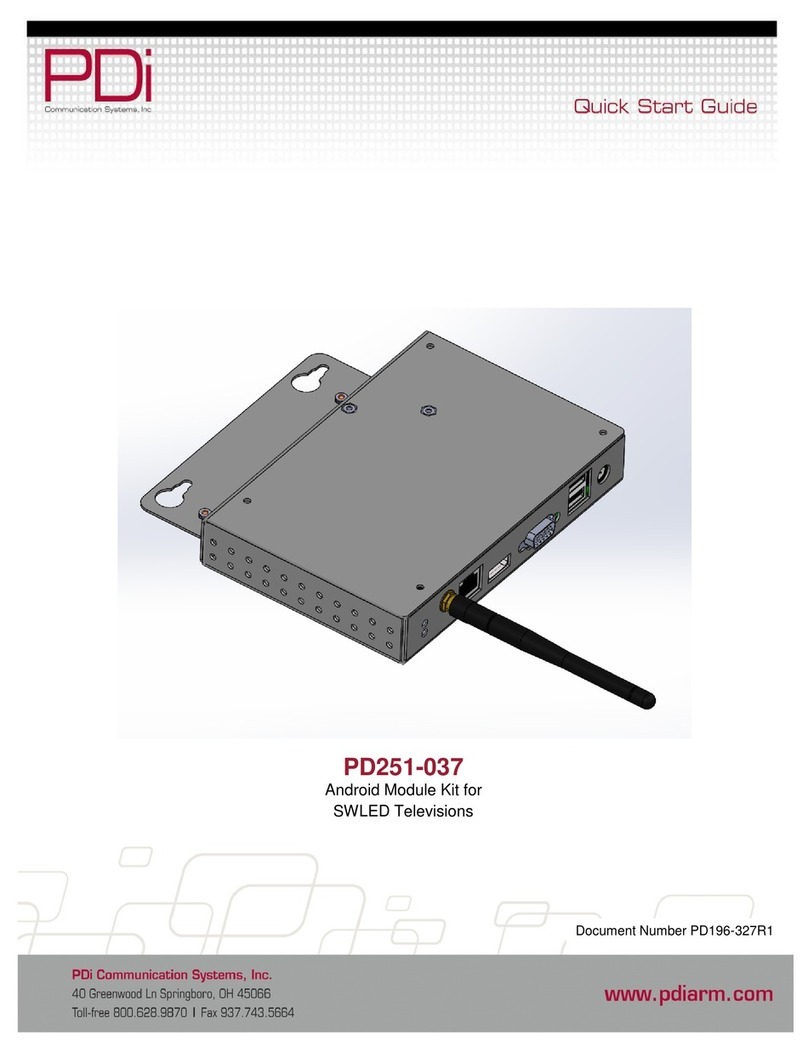
PDi PD251-031 User manual

PDi Communication Systems, Inc. 40 Greenwood Lane Springboro, Ohio 45066 USA PH 1-800-628-9870 FX 937-743-5664
Document Number: PD196-293R1 PD251-031 Android Based Module Page 1 of 35
PD251-031
Android Based Module for ELED Televisions
Document Number: PD196-293R1

PDi Communication Systems, Inc. 40 Greenwood Lane Springboro, Ohio 45066 USA PH 1-800-628-9870 FX 937-743-5664
Document Number: PD196-293R1 PD251-031 Android Based Module Page 2 of 35
I
MPORTANT SAFETY INSTRUCTIONS
THIS INSTALLATION SHOULD BE MADE BY A QUALIFIED SERVICE PERSON AND SHOULD CONFORM TO
ALL
LOCAL CODES. READ AND FOLLOW THE SAFETY INSTRUCTIONSBEFORE ATTEMPTING THIS
INSTALLATION.
1. Read Instructions – All the safety and operating
instructions should be read before the product is
operated.
2. Keep these Instructions – The safety and
operating instructions should be retained for
future reference.
3. Heed all Warnings – All warnings on the product
and in the operating instructions should be
adhered to.
4. Follow all Instructions – All warnings on the
product and in the operating instructions should
be followed.
5. Water and Moisture – Do not expose this product
to rain or moisture. Do not use this product near
water – for example, near a bath tub, wash bowl,
kitchen sink, or laundry tub; in a wet basement; or
near a swimming pool; and the like.
6. Cleaning – Unplug this product from the wall
outlet before cleaning. Do not use liquid cleaners
or aerosol cleaners. Clean only with a dry cloth.
7. Ventilation – Slots and openings in the cabinet
are provided for ventilation to ensure reliable
operation of the product and to protect it from
overheating. These openings must not be blocked
or covered. The openings should never be
blocked by placing the product on a bed, sofa,
rug, or other similar surface. This product should
not be placed in a built-in installation such as a
bookcase or rack unless proper ventilation is
provided or the manufacturer’s instructions have
been adhered to.
8. Heat – The product should be situated away from
heat sources such as radiators, heat registers,
stoves, or other products (including amplifiers)
that produce heat.
9. Power-Cord Protection – Protect the power cord
from being walked on or pinched, particularly at
plugs, convenience receptacles, and the point
where they exit from the product.
10. Attachments – Only use attachments/accessories
specified by the manufacturer.
11. Use only with cart, stand, tripod,
bracket, or table specified by the
manufacturer, or sold with the
apparatus. When a cart is used,
use caution when moving the cart/apparatus
combination to avoid injury from tip-over.
12. Lightning – For added protection for this product
during a lightning storm, or when it is left
unattended and unused for long periods of time,
unplug it from the wall outlet and disconnect the
antenna or cable system. This will prevent
damage to the product due to lightning and
power-line surges.
13. Servicing –Refer all servicing to qualified service
personnel. Servicing is required when the
apparatus has been damaged in any way, such
as power cord or plug is damaged, liquid has
been spilled or objects have fallen into the
apparatus, the apparatus has been exposed to
rain or moisture, does not operate normally, or
has been dropped.
14. Oxygen Environment – Do not use in an oxygen
tent or oxygen chamber. Such use may cause a
fire hazard.
15. To prevent injury, this apparatus must be securely
attached to the wall in accordance with the
installation instructions. TV’s can pose a striking
hazard when mounted at an elevated level.
16. Power Sources – This product should be
operated only from the type of power source
indicated on the marking label. If you are not
sure of the type of power supply to your home,
consult your product dealer or local power
company. For products intended to operate from
battery power, or other sources, refer to the
operating instructions.

PDi Communication Systems, Inc. 40 Greenwood Lane Springboro, Ohio 45066 USA PH 1-800-628-9870 FX 937-743-5664
Document Number: PD196-293R1 PD251-031 Android Based Module Page 3 of 35
Table of Contents
Android Based Module Setup and Usage Instructions...............................................................................................................4
Android Source........................................................................................................................................................................ 4
Enabling............................................................................................................................................................................... 4
Waking/Selecting................................................................................................................................................................. 4
Unlocking............................................................................................................................................................................. 4
Rebooting ............................................................................................................................................................................4
Keyboard.............................................................................................................................................................................. 4
Home Screen........................................................................................................................................................................... 6
Pull Down Panels................................................................................................................................................................. 8
Installing Android Applications..................................................................................................................................................10
Media formats supported by Android........................................................................................................................................10
Applications for the Administrator............................................................................................................................................. 11
Settings..................................................................................................................................................................................11
Wireless and Networks......................................................................................................................................................12
Device................................................................................................................................................................................16
Personal.............................................................................................................................................................................17
Accounts............................................................................................................................................................................18
System...............................................................................................................................................................................21
Android Cloning..................................................................................................................................................................... 23
Copy Settings from Android – Master Configuration......................................................................................................... 24
Restore Settings to Android – Slave Configuration...........................................................................................................27
FAQ........................................................................................................................................................................................... 28
Android Troubleshooting Tips...................................................................................................................................................32
Specs ........................................................................................................................................................................................34
Firmware...................................................................................................................................................................................34
Micro USB Cable.......................................................................................................................................................................34
Limited Warranty.......................................................................................................................................................................35

PDi Communication Systems, Inc. 40 Greenwood Lane Springboro, Ohio 45066 USA PH 1-800-628-9870 FX 937-743-5664
Document Number: PD196-293R1 PD251-031 Android Based Module Page 4 of 35
Android Based Module Setup and Usage Instructions
Android Source
Enabling
Before using the module, make sure:
•In the TV’s SETUP MODE/Sources/Source Enable menu, the Android Module is set to “Enabled”.
•Confirm the TV set is at Enabled/No APO in the Source Enable menu.
Waking/Selecting
•Provided Android is set as the Power on Source, and the Android is sleeping, a short touch of the power button will
turn on the Android based module. (The power indicator light should change from red to green).
•If Android is not the source displayed, change to the Android source by using the TV/AV or the channel up button to
the highest channel and switching the source to “Android”.
Unlocking
•Unlock the Android by entering the user password. (See Lock Screen section below for entering password or
selecting a new user)
Rebooting
To reboot the module, press and hold the “Power” button for more than 8 seconds.
Keyboard
You should have the PD161-004 PDi wireless keyboard (purchased separately) or other compatible keyboard to use this
module. If you are using the PDi wireless keyboard PD161-004, it will function as any 83 key QWERTY keyboard with
several “Hot” keys.
Hot Keys
Function
Fn/Pair
Pair with Module
Esc
Back one screen
Fn/Home
Home screen
Lock Screen
The starting point for almost all users would be the lock screen (except when turning on the device the first time or after a
factory reset – in which case the device will open to the welcome screen).
On the lock screen, existing users would need to enter their
password to continue.
A new user would start by touching the “I’m a new user”
button.

PDi Communication Systems, Inc. 40 Greenwood Lane Springboro, Ohio 45066 USA PH 1-800-628-9870 FX 937-743-5664
Document Number: PD196-293R1 PD251-031 Android Based Module Page 5 of 35
Signing On as a New User
*Administrative information like Wi-Fi and clone file configuration is retained
In the initial patient setup, the patient needs to touch the
I am a new user button.
Enter the new user name (you may use the default name
Patient) and touch Done.
At this point, you may cancel or touch Continue (new user).
Welcome Screen – Sign In
After cleaning up the device you will enter the
“WELCOME” screen.
Select Continue.
Choose a pin number and select Next.

PDi Communication Systems, Inc. 40 Greenwood Lane Springboro, Ohio 45066 USA PH 1-800-628-9870 FX 937-743-5664
Document Number: PD196-293R1 PD251-031 Android Based Module Page 6 of 35
Confirm your pin, select OK or Next.
Select OK to take you to your home screen.
Home Screen
*The following is a screenshot of a sample home screen. Your screen will show icons based on your facility/administrator
settings.
At the top of the screen you’ll find Google Search, which lets you search your tablet or the internet. Select Google to type
your search terms.

PDi Communication Systems, Inc. 40 Greenwood Lane Springboro, Ohio 45066 USA PH 1-800-628-9870 FX 937-743-5664
Document Number: PD196-293R1 PD251-031 Android Based Module Page 7 of 35
The On-Screen keyboard when using the Google Search Bar;
At the bottom center of every screen, no matter what you’re doing, you will always find these three navigation
buttons;
Back
Opens the previous screen you were working in, even if it was in a different app. Once you back up to the Home
screen, you can’t go back any further in your history.
Home
Opens the home screen. If you’re viewing a left or right Home screen, opens the central Home screen.
Recent Apps
Opens a list of thumbnail images of apps you’ve worked with recently. To open an app, touch it. To stop
running an app from the list, swipe it left or right.
Android Keyboard
Settings
Emoticons
Numbers and
Symbols

PDi Communication Systems, Inc. 40 Greenwood Lane Springboro, Ohio 45066 USA PH 1-800-628-9870 FX 937-743-5664
Document Number: PD196-293R1 PD251-031 Android Based Module Page 8 of 35
Note: Android will automatically stop running an app when the system runs low on remaining available memory, therefore, it
is not always necessary to quit an app.
These are a few of the apps installed on the Android based module. Some app icons will be shown, but not intended for
patient use.
App/Widget
Description
Clock (widget)
Display time and date
Browser
Provides access to the Would Wide Web (WWW)
Gallery
Provides access to pictures and video stored on the device by apps
Music
Provides access to music stored on the device by apps
Search
Allows the user to search the web, apps, and/or people for useful information
OpenSudoku
A puzzle game where the goal is to fill each row, column, and sub-grid with the
digits from one to nine
Frozen Bubble
Match the color of the launch bubble to the frozen bubbles to make them go away
before time expires or the stacked bubbles cross the foul line
DroidFish
A standard chess game
Sokoban
A maze game
Clock
Display the date and time on the full screen and/or set an alarm
Calculator
Perform arithmetic, scientific, and trigonometric operations
Wiktionary
A dictionary
Zeebox
Provides a program guide of television programming and social sharing of the
shows the user will be watching on the TV side of the P14T
Google, Picasa, Yahoo, MSN,
Twitter, Facebook, etc
Bookmark widgets to social sharing websites
Wi-fi Connection (Widget)
Connect to a pre-configured or open Wi-fi network with a single tap
Adobe Reader
Used for opening PDF files
FB Reader
Used for reading digital books
K-9 Mail
User level email app
Pull Down Panels
There are two different information panels that you can see at any time by pulling down the left or right side top of the
screen.
Notification Panel
Notifications alert you to the arrival of new messages, calendar events, and alarms, as well as ongoing events, such as
video downloads.
To open the notification shade, swipe down from the top left of the screen. Certain notifications can be expanded to show
more information, such as email previews or calendar events. The one at the top is always expanded when possible.
When you are finished with a notification, remove it by touching and holding the notification and swiping to the right.
Notifications that are still running will not swipe away.
Quick Settings Panel
This is on the right side of a screen and gives you direct entry into different areas of the settings app, depending on which
icon you choose.

PDi Communication Systems, Inc. 40 Greenwood Lane Springboro, Ohio 45066 USA PH 1-800-628-9870 FX 937-743-5664
Document Number: PD196-293R1 PD251-031 Android Based Module Page 9 of 35
Application Drawer
At the bottom center is the Application Drawer Icon . Selecting this icon will open up a screen that contains the full list
of all installed applications and widgets. Please note that some applications and/or widgets listed here are for use by the
patient, some are intended for use by those with administrative privileges, and some are intended for use by service
personnel. The desktop, by default, will always show user accessible apps.
The user accessible apps not previously discussed include the following:
App
Description
Adobe Reader
Provides access to documents download onto the device by the user and/or
apps that are in the Portable Document Format (PDF)
Calendar
Shows dates in day, week, month, or agenda format.
Please note that it takes administrative access to add events to the calendar as it requires
the addition of an Exchange account.
DigiClock Settings
Change the appearance of the clock widget on the desktop (home) screen
System Profile
Change between performance, power saving, and normal mode.
Timer
Allows the user to see and add clocks from around the world, to use a stopwatch, and
to use a timer countdown.
WipeUserData
Permits the user to reset the device and start a new session with all their personal
information removed and the device reset to institution default settings
The administrative apps that are to be used by the administrator are:
App
Description
WSO2/PDi agent
This is the agent application for the PDi Store™. Administrators will need to sign into this
application to be able to remotely manage
this device. For more details see the
documentation related to the PDi Store™
Clone
Allows the administrator to transfer device/institutional settings from one Android based
module to another Android based module
File Explorer
Provide access to files on the device that are not accessible from the Downloads app and
also allow the administrator to install 3
rd
party apps
Ghost Commander
An enhanced File Explorer app for administrative use that permits transferring of files not only
locally, but also from FTP, SFTP, Windows shares, and productions installed SD Card
Settings
Allows the administrator to modify the setup of the Android based module
The service apps (e.g., apps PDi service personnel would use or would direct the administrator to use at their instruction)
App
Description
aLogcat
Provides access to the Android logcat, which is Android’s logging system for messages from
the apps and services installed on the device. This is a useful app in helping to troubleshoot
problems that may occur with the Android based module when used in conjunction with
support from PDi service department personnel
Terminal Emulator
Provides a command line shell for running diagnostic applications and scripts

PDi Communication Systems, Inc. 40 Greenwood Lane Springboro, Ohio 45066 USA PH 1-800-628-9870 FX 937-743-5664
Document Number: PD196-293R1 PD251-031 Android Based Module Page 10 of 35
Installing Android Applications
Android applications (packaged as.apk files) that are compatible with the Android based module can be installed. Depending
on where the applications are stored, the following are the steps to install the application:
Application Installable (.apk files) from third party publishers (Non PDi store apps)
•Download the .apk from the internet site to your device
•Connect the Android Service Port to your device
•Transfer the .apk file to the Android sd card (under Downloads)
•Select or click the File Explorer app
•Select or click the .apk file to install.
•If you get an Install block warning, select or click on the Settings button then:
1. Select the Enter button or click on the first line to allow installation of unknown applications.
2. Select the OK button in the warning box that appears.
The box on the right side of the Unknown sources line should be checked.
3. Select the Install button at the bottom of the screen.
•When the installation is finished, select the Open or Done button at the bottom of the screen.
•Right click or select the Back button to exit.
Application from the PDi app store
Applications can also be installed from the PDi Store™ at www.pdistore.com.
Media formats supported by Android
Image Formats
Format
Details
JPEG
Encoding/Decoding (Base & Progressive)
GIF
Decoding
PNG
Encoding/Decoding
BMP
Decoding
Android Native Audio
MIDI/XMF/MXMF
Type 0 and 1, DLS Version 1 and 2. XMF and Mobile
XMF
RTTTL/RTX
Ringtone formats
OTA
(The audio format, not an over the air update
archive, which has a zip extension)
IMY
iMelody
OGG
Vorbis
Multimedia Player
Video Decoder
MP4/MOV/F4V
Yes (MPEG4 SP/ASP except GMC, H.264/H263,
MJPEG) w/ AAC and MP3 for audio
3GP (MP4 Demux)
Yes (MPEG4 SP/ASP except GMC, H.264/H263) w/

PDi Communication Systems, Inc. 40 Greenwood Lane Springboro, Ohio 45066 USA PH 1-800-628-9870 FX 937-743-5664
Document Number: PD196-293R1 PD251-031 Android Based Module Page 11 of 35
AAC and AMR-N/WB for audio
M4A (MP4 Demux)
Yes( AAC LC/Plus)
AVI
Yes (MPEG4 SP/ASP except GMC, H.264/H263, Xvid,
MJPEG) w/ AAC and AMR-N/WB for audio
MPG/VOB/TS (MPEG2 PS/TS)
Yes (with MP3/AAC/LPCM)
Audio Decoder (Freescale
Enhanced)
MP3
Yes
AAC
Yes (LC/Plus)
Vorbis
Yes
FLAC
Yes (Sorenson H263)
WAV
Yes
Multimedia Platform
Flash
NO
HTML5
Yes
Applications for the Administrator
Administrators can personalize the device through the settings menu.
Settings
To enter the Settings menu, go into the All Apps screen
and select the Settings app. After confirming your security
code, you will enter the Settings screen where you can
adjust network, sound, and account settings, among many
others. Follow the screen instructions to personalize this
device.

PDi Communication Systems, Inc. 40 Greenwood Lane Springboro, Ohio 45066 USA PH 1-800-628-9870 FX 937-743-5664
Document Number: PD196-293R1 PD251-031 Android Based Module Page 12 of 35
Wireless and Networks
From this screen, you can maintain Wi-Fi access points, view Data Usage, set up Virtual Private Network (VPN) access, and
maintain Ethernet settings.
Wi-Fi
Connect to Wi-Fi Networks Dynamically
1. Slide the Wi-Fi switch to the ON position (if
not already set to ON).
2. The module scans for available Wi-Fi
networks and displays the names of those
it finds. Secured networks are indicated
with a .
3. If the module finds a network that you
connected to previously, it connects to it.
4. Select a network name to see more details
or connect to it, and type a security code
(password) if necessary. You can select
the Show Password checkbox to see the
password characters as you type them
instead of an asterisk mask.
5. If necessary, select the Show advanced
options checkbox to modify the Proxy and
internet protocol (IP) settings. A proxy
server facilitates access to other network
resources and may be needed in some
environments. If you are unsure whether
or not a proxy setup is required, please
contact your information technology (IT)
department. If they indicate such a setup
is required, have them provide the proxy
hostname, proxy port, and any addresses
that the proxy should not be used for when
servicing requests. To enter the information, select each field and enter the appropriate information. In the
Bypass proxy field, the addresses should be separated with commas. If the IP settings need modification,
refer to the Connect to Wi-Fi Network Statically section.

PDi Communication Systems, Inc. 40 Greenwood Lane Springboro, Ohio 45066 USA PH 1-800-628-9870 FX 937-743-5664
Document Number: PD196-293R1 PD251-031 Android Based Module Page 13 of 35
Connect to Wi-Fi Networks Statically
The previous process to connect to a Wi-Fi network requires the presence of a router on the network supporting dynamic
host configuration protocol (DHCP) for automatically assigning internet protocol (IP) addresses to Android units on the
networks. If the network does not support this protocol and/or the Android based module requires the use of a fixed IP
address for a dedicated purpose (for example, to act as a cloning server), it will be necessary to configure the Wi-fi access
using a static IP address. The IP address that is chosen must not already be allocated to another IP capable device on the
network (note: this includes not only other Android based modules on the network, but any device capable of communicating
to the module or other units on the network). The IP address will need to be in IPV4 format (e.g., a set of four octets
separated by periods, for example 192.168.1.10). The IP address, gateway IP address, network prefix length, and domain
name server IP addresses must be known before starting this process. If you do not have this information, please consult
your information technology (IT) department.
To configure the device, perform the following steps:
1. Access the Settings app and provide the administrative password.
2. Select the Wi-Fi menu item under the Wireless & Networks section
3. Select a Wi-Fi network to connect to from the list of Wi-fi networks on the right side of the app
4. Select the Show Advanced Options checkbox
5. Select IP settings dropdown list box and tap on the Static entry
6. Select the IP address field and enter the desired IP address
7. Select the gateway field and provide the network’s gateway IP address. The gateway facilitates access to outside
network resources such as the Internet.
8. Select the network prefix length and enter a value
9. Select the DNS 1 entry and enter a value. If you enter the value 8.8.8.8 you are asking for access to the Google
Public DNS service, which may or may not be
suitable or allowed for the network where the
Android based module is operating
10. Select the DNS 2 entry and enter a value. If you
enter the value 4.4.4.4 you are asking for access
to the Google Public DNS service, which may or
may not be suitable or allowed for the network
where the Android based module is operating
11. Provide a password if not already done and if
required. The Connect button should now be
enabled.
12. Select Connect.
Bluetooth
This option is not enabled at this time.
Data Usage
Your data usage is measured by your device. Access
this under Wireless & Networks and touch Data Usage.

PDi Communication Systems, Inc. 40 Greenwood Lane Springboro, Ohio 45066 USA PH 1-800-628-9870 FX 937-743-5664
Document Number: PD196-293R1 PD251-031 Android Based Module Page 14 of 35
VPN (Virtual Private Network)
To configure VPN access, you must first obtain configuration information from your administrator.
The VPN screen allows you to add VPN networks and adjust their settings. To view this screen and perform the tasks
described here, go to Settings > /Wireless & Networks > More …> VPN.
1. From the VPN screen, touch + in the upper right
corner of the screen.
2. In the form that appears, fill in the
information provided by your network
administrator. It maybe necessaryto
select the Show Advanced Options
checkbox and provide more detailed
information for the VPN network, such as
the DNS servers to use and applicable
forwarding routes. Select each field to
enter the appropriate information.
3. Select Save
4. Select the newly created entry and provide a
username and password. Select the Save
information to retain the information in the future.
Select Cancel to stop the logon process
5. Once connected, the following notification and system tray icon will be visible:
6. If you were to conduct a web search asking for your current IP address, assuming you were in the United States and
connected to a United Kingdom (UK) based VPN service, you should see the following result returned by the search
engine:
Note: The IP address will vary depending on the service and on time of connection.
Note: If you would like the
VPN to always be active,
select the Always-on VPN
option in the overflow menu of
the VPN section.

PDi Communication Systems, Inc. 40 Greenwood Lane Springboro, Ohio 45066 USA PH 1-800-628-9870 FX 937-743-5664
Document Number: PD196-293R1 PD251-031 Android Based Module Page 15 of 35
Ethernet Configuration
The Android based module is capable of providing wired
internet access provided the unit was configured with this
option at production time. If it was, there will be a CAT 6,
RJ-45 (8P8C modular connector) twisted pair cable
accessible from the neck of the unit. This cable (PD106-559)
must be plugged into an accessible Ethernet port.
The Ethernet menu item allows for configuration or check of
the wired network connection. By default, the device is
enabled for dynamic (e.g., DHCP) connection. However, if
static access is required, tap on the Ethernet Configuration
button then tap the Static IP button and provide the following
information after obtaining the required IP address,
netmask, DNS IP addresses, and gateway IP address from
your information technology department personnel:
1. Leave the Ethernet Devices selection as is. The Android based module only supports a single Ethernet connection,
which is automatically named eth0 by the Android operating system.
2. Select the radio button that says Static IP under Connection Type
3. Select the IP address field and enter four octets (do not forget to enter the periods—they are not automatically
added as they are for Wi-Fi static connections)
4. Select the DNS address field and enter the primary DNS IP server address (the use of a secondary DNS IP
5. server address is not supported with this connection type).
6. Select Confirm to save value or discard to cancel the process.

PDi Communication Systems, Inc. 40 Greenwood Lane Springboro, Ohio 45066 USA PH 1-800-628-9870 FX 937-743-5664
Document Number: PD196-293R1 PD251-031 Android Based Module Page 16 of 35
Device
Manage the Sound, Display, Storage, and Apps on the device
Sound
•Modify Android sound volumes
•Change notification sound
•Enable/disable touch sounds and screen lock
sound
Display
•Change Wallpaper
•Change sleep timeout
•Enable/disable Daydream and select type of
Daydream (screen saver)
•Change font size for user interface elements
Storage
•View internal storage allocation for PDi apps and
media for the owner
•View internal storage allocation for the user
installable apps and media for the owner.
•View internal storage allocations of other users
•Mount SD cards (pre-installed option on some
models supported in a future version of the Android
based module) and USB storage devices
Note: To optimize your storage on memory usage, uninstall apps you don’t use from main storage on SD card. Remove
any problematic apps or services that are running.

PDi Communication Systems, Inc. 40 Greenwood Lane Springboro, Ohio 45066 USA PH 1-800-628-9870 FX 937-743-5664
Document Number: PD196-293R1 PD251-031 Android Based Module Page 17 of 35
Apps
•Manage downloaded and installed apps
•Manage currently running apps and services
•Manage all apps and services
Users
•Access your profile and add or delete a user profile
•Non-admin users can delete their account
•Administrators can delete patient accounts
*Since a patient account is automatically created upon
touching the I am a new user button, administrators should
not create a new user account using this option.
Personal
Set your personal preferences for Accounts Location,
Security, and Language, Backup & Reset information.
Follow screen instructions to complete preferences.
Location access
From this menu, you can choose your location sources and
give permission to access location.
Security
From this location, you will be able to set up screen security,
encryption requirements, password visibility, device
administration, and credential storage.

PDi Communication Systems, Inc. 40 Greenwood Lane Springboro, Ohio 45066 USA PH 1-800-628-9870 FX 937-743-5664
Document Number: PD196-293R1 PD251-031 Android Based Module Page 18 of 35
Language & Input
Note: The active keyboard layouts are English (US) and
Chinese (Pinyin). Not all labels will display translated labels
when a non-English language is selected.
Warning: Not all translations will be exact when a non-
English language is selected.
•Spell checker
•Personal dictionary
•Pointer speed
Backup & Reset
•Remove all user accounts and their associated data
from device
•Restore devices to original factory settings
Accounts
From the Accounts & sync screen, select Add Account.
Follow the screen instructions for setting up your account.
•Enable and disable its use
•Add a corporate (Exchange) email/calendar
account
•Add a POP3 email account
Note: This requires an email app to utilize. Some apps may
independently set up and maintain email accounts
without the need for administrative involvement in
setting up system level email accounts (for example, K9
Mail or Mail Droid – Note: this does not constitute an
endorsement of these apps on the part of PDi Communication Systems, Inc.).

PDi Communication Systems, Inc. 40 Greenwood Lane Springboro, Ohio 45066 USA PH 1-800-628-9870 FX 937-743-5664
Document Number: PD196-293R1 PD251-031 Android Based Module Page 19 of 35
Adding POP3 account
1. Enter email address and password on the first
screen
2. If an IMAP or Exchange account is needed instead,
tap the Manual setup button and make the
necessary adjustments. Otherwise, tap the Next
button.
3. On the Account options screen, there are a variety of options that can be tapped to enable/disable and/or select,
which include:
•Inbox checking frequency dropdown to
select how often to check for new
messages
•Whether or not to use this account as the
email default
•Whether or not to receive email
notifications
•Whether or not to sync email for this
account
•Whether or not to automatically download
attachments.
Tap Next once the adjustments are made or the
defaults are accepted
4. On the “Your account is set up, and email is on the
way!” screen, provide a name for this account
(email address is used as a default) and the name
to use for outgoing messages by tapping on each
field and entering the required information. Tap
Next after this information is entered or the default
is accepted

PDi Communication Systems, Inc. 40 Greenwood Lane Springboro, Ohio 45066 USA PH 1-800-628-9870 FX 937-743-5664
Document Number: PD196-293R1 PD251-031 Android Based Module Page 20 of 35
Adding Exchange account
1. Enter email address and password on the
first screen and tap whether or not to use this
account as the default email sending
account. Tap Next.
2. If the Server settings screen appears, tap the
Domain\Usernameand Server fields to
provide domain and server values for your
Exchange account. If you are unsure of these
values, please contact your information
technology department personnel.
3. If a pop-up screen is displayed asking you for
permission to remotelycontrol some security
features of Android, decide whether or not to
allow such management. It is required to be
able to finish setting up the account. If
desired, tap OK to complete setup or tap
Cancel to stop the account creation process.
4. In the Account options screen there are a
variety of options controlling inbox
checking frequency, number of days to
sync email, whether to sync other forms of
personal information (e.g., contacts and
calendar), whether to download
attachments when connected to Wi-Fi, and
whether or not to receive notifications. Tap
Next once down making any desired
modifications.
5. On the “Your account is set up, and email is on
the way!” screen, provide a name for this
account (email address is used as a default)
and the name to use for outgoing messages by
tapping on each field and entering the required
information. Tap Next after this information is
entered or the default is accepted.
Table of contents
Other PDi Control Unit manuals
Popular Control Unit manuals by other brands

Pacific Recorders & Engineering Corporation
Pacific Recorders & Engineering Corporation LSM-10 Technical manual

Wigersma & Sikkema
Wigersma & Sikkema UNIGAS 300 Installation, operating and maintenance manual
ADTRAN
ADTRAN IMUX-56 user manual
Delta Electronics
Delta Electronics Network Device IFD9506 Operation manual
KING
KING MP48 installation manual

HAC
HAC HAC-LBee/S manual


