Tefcold BLC3 User manual

BLAST CHILLER/FREEZER
User Manual
PT
SL
49
61
EN
FR
IT
ES
3
13
25
37

2

CONTENTS
1.
2.
3.
Important safety instructions .................................................................................. 4
Unpacking and installation ..................................................................................... 4
Electrical connection .............................................................................................. 5
Start-up of the cabinet ........................................................................................... 5
Capacity ................................................................................................................. 5
Recommendations for use ..................................................................................... 5
Blast chilling cycle ................................................................................................. 6
Shock freezing cycle .............................................................................................. 6
Cleaning and maintenance .................................................................................... 6
Service ................................................................................................................... 7
Disposal ................................................................................................................. 7
Technical manual ................................................................................................. 73
Daily quick guide ................................................................................................... 9
General information
Thermostat XB570L / XB590L
Quick guide
3

IMPORTANT SAFETY INSTRUCTIONS
Important !
1. To obtain full use of the cabinet, we recommend reading this instruction manual.
2. It is the user’s responsibility to operate the appliance in accordance with the instructions given.
3. Contact your dealer immediately in case of any malfunctions.
4. Place the cabinet in a dry and ventilated place.
5. Keep the cabinet away from strongly heat-emitting sources and do not expose it to direct sunlight.
6. Always keep in mind that all electrical devices are sources of potential danger.
7. Do not store inammable material such as thinner, gasoline etc. in the cabinet.
8. We declare that no asbestos nor any CFC are used in the construction.
9. The oil in the compressor does not contain PCB
1. Do not block the ventilation holes.
2. Make sure that there is at least 15 cm. free space between the cabinet and the wall.
4
UNPACKING AND INSTALLATION
Remove the wooden pallet and the packing. External surfaces are supplied with a protection foil,
which must be removed before installation.
To ensure correct function it is important that the cabinet is level. If the cabinet is supplied with legs,
these can be adjusted.
ONLY FOR APPLIANCES WITH REFRIGERANT R290/R600a!
This appliance contains a ammable refrigerant, so make sure of good ventilation
around the appliance. Do not use mechanical devices when defrosting, this can cause
leakage of the cooling system. Do not use electrical appliances inside the refrigerated
storage compartment.
Any repair of the appliance should be carried out by a skilled technician (EN 60335-2-
89: 2010).

ELECTRICAL CONNECTION
Important !
BLC3, BLC5 and BLC10 cabinets operates on 230 V/50 Hz.
BLC14 operates on 3x400 V/50 Hz.
Make sure that the cabinet is connected to a separate electrical group to avoid overload.
The wall socket should be easily accessible.
All earthing requirements stipulated by the local electricity authorities must be observed. The cabinet
plug and wall socket should then give correct earthing. If in doubt, contact your local supplier or
authorized electrician.
The main electrical connections must be done by skilled electricians.
If the cabinet has been horizontally placed during transport, please wait 2 hours before starting up
the cabinet.
5
START-UP OF THE CABINET
Before use, we recommend that the cabinet is cleaned, see the section on maintenance and
cleaning.
CAPACITY
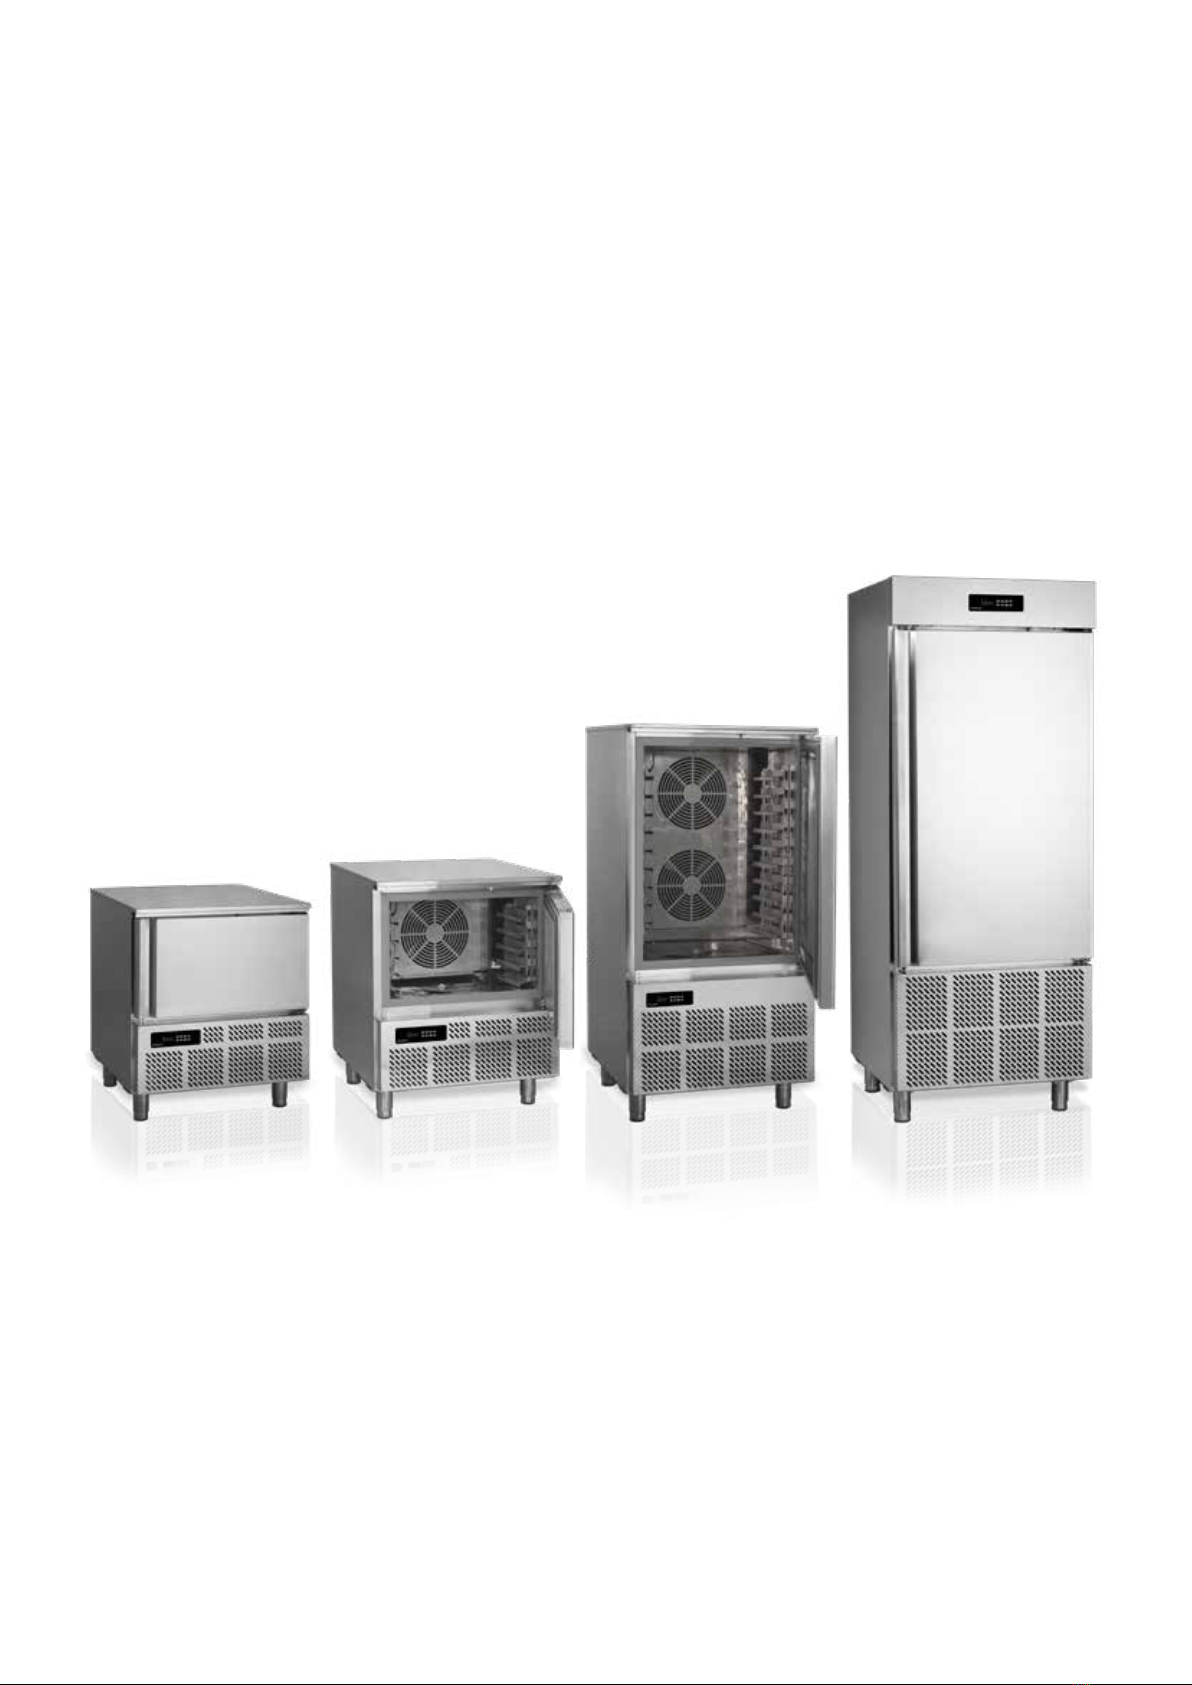
BLC3 BLAST CHILLER/FREEZER
Model suitable to contain 3 trays with blast chilling capacity of 12kg and 8 kg in shock freezing.
BLC5 BLAST CHILLER/FREEZER
Model suitable to contain 5 trays with blast chilling capacity of 18kg and 14kg in shock freezing.
BLC10 BLAST CHILLER/FREEZER
Model suitable to contain 10 trays with blast chilling capacity of 40kg and 28 kg in shock freezing.
BLC14 BLAST CHILLER/FREEZER
Model suitable to contain 14 trays with blast chilling capacity of 55kg and 38kg in shock freezing.

RECOMMENDATIONS FOR USE
If the appliance remains inactive for a long period, proceed as follows
1. Use the automatic isolating switch to deactivate connection to the main electrical line.
2. Clean the appliance and surrounding areas thoroughly.
3. Spread a thin layer of cooking oil onto the stainless steel surfaces
4. Carry out all maintenance operations
5. Leave the door ajar to prevent the formation of mould and / or unpleasant odour.
Do not insert foodstus that are above the temperature of 90 °C.
Do not stack the materials to be preserved in contact with the internal walls so blocking the circulation
of air.
There must be a sucient space between the trays used in order to guarantee a sucient ow of
cold air on the entire product.
Never obstruct the inlet of the evaporator fans.
Products that are more dicult to chill because of their size should be placed in the centre.
Limit the number of times and the duration of time the door are opened.
After blast chilling/shock freezing the product, it can be stored in a preservation cabinet after having
been duly protected .A tag should be applied describing the contents of the product, blast chilling/
shock freezing date and expiry date. When the product has been blast chilled it must be preserved at
a constant temperature of +2 °C while if it has been shock frozen it must be preserved at a constant
temperature of -20 °C.
The chiller should be used for storage for short periods only.
To prevent bacterial contamination or contamination of any other biological
nature, the needle probe must be disinfected after use.
6

BLAST CHILLING CYCLE
7
With this operating modality the chiller keeps the temperature of the refrigerating compartment close
to zero during the entire chilling process in order to ensure a gradual drop in the temperature of the
product to +3 °C.In this way, ice crystals do not form on the surface of the product .This blast chilling
method should be used preferably for products that are not packed and whose physical/organoleptic
characteristics could be damaged by the formation of supercial ice (e.g. sh)
SHOCK FREEZING CYCLE
With this blast chilling modality the blast chiller maintains the temperature at a negative value below
-18 °C which is the end temperature of shock freezing .For shock freezing to be successful and fast,
food should be in small pieces, especially if it has a high fat content. The largest pieces should be
placed in central trays .If it takes longer than standard time to shock freeze and the sizes cannot
be reduced, decrease the quantity and precool the chiller compartment by starting an empty shock
freezing cycle before shock freezing the product.
CLEANING AND MAINTENANCE
Switch o the electrical connection at the socket.
The cabinet must be periodically cleaned. Clean the external and internal surfaces of the cabinet with
a light soap solution and subsequently wipe dry. External surfaces can be maintained using steel oil.
Do not spray the appliance with direct jets of water or using high pressure appliances.
Do not use iron wool. brushes or scrapers to clean the stainless steel as ferrous particles could be
deposited which ,on oxidizing, could lead to rust.
To remove hardened residues, use wooden or plastic spatulas or abrasive rubber pads.
Clean the condenser
Clean the condenser periodically.
As the ns of the condenser are very sharp, always wear protective gloves for the next phases.
Use protective masks and glasses in the presence of dust.
Whenever the condenser has a deposit of dust in correspondence with the ns, this can be
removed using a suction device or with a brush applied, using a vertical movement along the
direction of the ns.
No other instruments must be used, which may deform the ns and therefore the eciency of the
appliance.

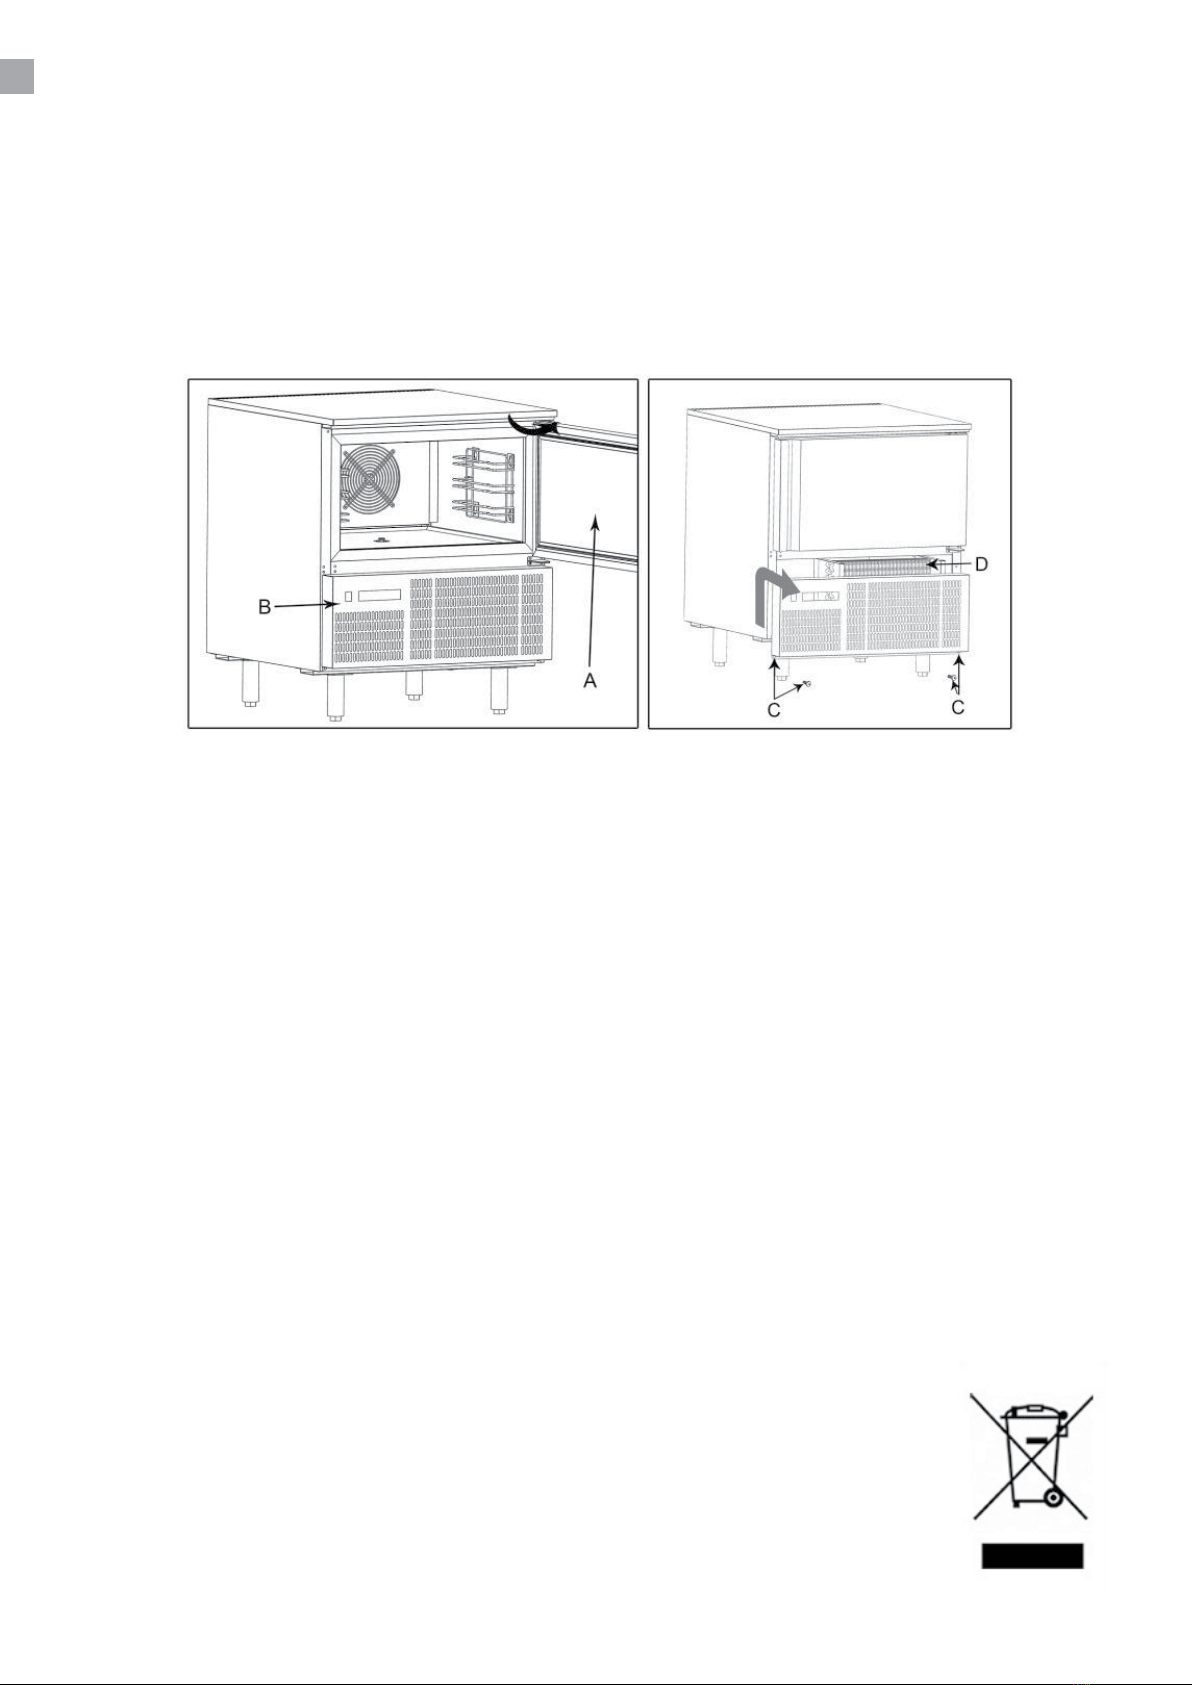
To clean, proceed as follows:
1. Open the door (A) of the appliances.
2. Remove the lower panel(B) from the technical compartment: to do this, remove the screw
fasteners(C)
3. It is now possible to clean the nned part of the condenser (D) using suitable tools and
protection devices.
4. After cleaning, close the control panel and x it with the screws removed beforehand.
SERVICE
The cooling system is a hermetically sealed system and does not require supervision, only cleaning.
If the cabinet fails to cool, check if the reason is a power cut.
If you cannot locate the reason to the failure of the cabinet, please contact your supplier. Please
inform model and serial number of the cabinet. You can nd this information on the rating label which
is placed inside the cabinet in the top right hand side.
DISPOSAL
Disposal of the cabinet must take place in an environmentally correct way. Please note existing
regulation on disposal. There may be special requirements and conditions which must be observed.
8

9
QUICK GUIDE
For the daily use

10
How to select a cycle
Push the to move among the cycles CY1 , CY2 , CY3 , CY4 and the holding
cycle .
The 5 programs have the default values shown in the diagrams next page.
CY1: Fast chilling and conservation. (Hard + soft chilling and holding)
CY2: Chilling and fast freezing. (Hard + soft chilling, freezing and holding)
CY3: Fast freezing. (Fast freezing and holding)
CY4: Fast freezing with alarm and stop. (Only fast freezing)
H: Hold mode function. (Hard chill or freezing)
dEF: For starting a manual defrost.
1.
2.
3.
4.
5.
6.
How to display the holding SET point.
While the Holding cycle is running (H-icon
lighted), push the key.
The Holding set point is displayed on the
upper display and the SETH labels is
displayed on the bottom display.
How to modify the holding SET point.
While the SETH is displayed, hold the
key pressed until the SETH label starts
ashing.
Use the arrow keys to modify the value and
press the key to conrm.
To conrm and exit, push the key again.
How to start a cycle.
Push the key and the selected cycle starts.
The yellow display is switched on.
Compressor is delayed by 3 min.
How to pause a cycle.
Push the key and the compressor and fan
will stop.
Stb will ash in the display during the pause.
Push the key to restart the cycle from the
point of interruption.
In any case the cycle automatically restarts
after the PAU time. (See manual)
How to stop a cycle.
Hold the key pressed untill the yellow
display switch o and the cycle is stopped.

11
CY1: Hard chill + soft chill + holding CY3: Freezing cycle + holding
CY2: Hard chill + soft chill + freezing + holding CY4: Freezing cycle then stop
H: Holding mode

© TEFCOLD A/S 2019
rfj_191013
Blast Chillers
+70 °C to +3 °C
The blast chilling cycle reduce the product temperature from
+70 °C to +3 °C in 90 minuttes.
Bacterial generation is accelerating in the gap between +60 °C
and +10 °C, therefore it is essential to cool the product as fast
as possible.
Furthermore vitamins, taste and odour are preserved.
Should then be stored in normally chiller at +2 °C.
Bacterials in general
Bacterials destroyed
Bacterial acceleration
Bacterial reduction/
stop
Chill Freeze
Blast Freezers
+70 °C to -18 °C
The blast freezing cycle reduce the product temperature from
+70 °C to -18 °C in 240 minuttes.
The fast reduction of the product temperature increases the
lifetime of the product.
Furthermore the quality is preserved without major loss of
weight, liquid and taste.
Should then be stored in normally freezer at -20 °C.

REFROIDISSEURS /
CONGÉLATEURS RAPIDES
Manuel d’utilisation
PT
SL
49
61
FR
IT
ES
13
25
37

14

SOMMAIRE
1.
2.
3.
Consignes de sécurité importantes ..................................................................... 16
Déballage et installation ...................................................................................... 16
Raccordement électrique ..................................................................................... 17
Démarrage du congélateur .................................................................................. 17
Capacité .............................................................................................................. 17
Consignes d’utilisation ......................................................................................... 18
Cycle de refroidissement rapide .......................................................................... 19
Cycle de congélation rapide ................................................................................ 19
Nettoyage et maintenance ................................................................................... 19
Entretien .............................................................................................................. 20
Mise au rebut ....................................................................................................... 20
Manuel technique ................................................................................................ 73
Guide rapide quotidien ........................................................................................ 21
Informations générales
Thermostat XB570L / XB590L
Guide rapide
15

CONSIGNES DE SÉCURITÉ IMPORTANTES
Important !
1. Pour tirer le meilleur parti du congélateur, nous vous recommandons de lire de manuel d’utilisation.
2. L’utilisateur est responsable d’utiliser l’appareil conformément aux instructions données.
3. Contactez votre revendeur immédiatement en cas de dysfonctionnements.
4. Placez le congélateur dans un endroit sec et ventilé.
5. Conservez le congélateur à l’abri de sources de chaleur importante et ne l’exposez pas à la
lumière directe du soleil.
6. N’oubliez jamais que tous les appareils électriques sont des sources de danger potentiel.
7. Ne stockez pas de matériaux inammables tels que du diluant, de l’essence, etc. dans le
congélateur.
8. Nous déclarons n’avoir pas utilisé d’amiante ou de CFC lors de la construction.
9. L’huile dans le compresseur ne contient pas de PCB.
1. Ne bloquez pas les trous de ventilation.
2. Assurez-vous qu’il y a un espace d’au moins 15 cm entre le core et le mur.
16
DÉBALLAGE ET INSTALLATION
Retirez la palette en bois et l’emballage. Les surfaces externes sont recouvertes d’un lm de
protection que vous devez retirer avant l’installation.
Pour garantir un bon fonctionnement, il est important que le core soit horizontal. Si le core est doté
de pieds, vous pouvez les régler.
POUR LES ARMOIRES AVEC RÉFRIGÉRANT R290/R600a!
Ce refroissseur contient un réfrigérant inammable; assurez un endroit bien ventilé
autour de l’armoire. N’utilisez pas des outils mécaniques pour le dégivrage; cela peut
causer des fuites dans le système de refroidissement interne. N’utilisez pas des outils
électrique á l’intérieur de l’armoire.
Chaque réparation de ce réfroidisseur doit être eectué par un réparateur professionel.
(EN 60335-2-89: 2010)

RACCORDEMENT ÉLECTRIQUE
Important !
Les cores BLC3-BLC5 et BLC10 fonctionnent avec 230 V/50 Hz.
Le BLC14 fonctionne avec 3x400 V/50 Hz.
Assurez-vous que le core est connecté à un groupe électrique distinct pour éviter les surcharges.
La prise murale doit être facile d’accès.
Toutes les exigences de mise à la terre stipulées par les autorités locales doivent être respectées. La
prise du congélateur et la prise murale doivent alors fournir la mise à la terre appropriée. En cas de
doute, contactez votre fournisseur local ou électricien autorisé.
Les principaux raccordements électriques doivent être eectués par un électricien professionnel.
Si le congélateur a été placé horizontalement pendant le transport, attendez 2 heures avant de le
mettre en marche.
DÉMARRAGE DU CONGÉLATEUR
Avant l’utilisation, nous vous recommandons de nettoyer le congélateur (voir la section sur la
maintenance et le nettoyage).
CAPACITÉ
REFROIDISSEURS/CONGÉLATEURS RAPIDES BLC3
Ce modèle peut contenir 3 plateaux avec une capacité de refroidissement rapide de 12 kg et de
congélation rapide de 8 kg.
REFROIDISSEURS/CONGÉLATEURS RAPIDES BLC5
Ce modèle peut contenir 5 plateaux avec une capacité de refroidissement rapide de 18kg et de
congélation rapide de 14kg.
REFROIDISSEURS/CONGÉLATEURS RAPIDES BLC10
Ce modèle peut contenir 10 plateaux avec une capacité de refroidissement rapide de 40kg et de
congélation rapide de 28 kg.
REFROIDISSEURS/CONGÉLATEURS RAPIDES BLC14
Ce modèle peut contenir 14 plateaux avec une capacité de refroidissement rapide de 55kg et de
congélation rapide de 38kg.
17

CONSIGNES D’UTILISATION
Si l’appareil reste inactif pendant une période prolongée, procédez de la manière suivante
1. Utilisez le sectionneur automatique pour désactiver la connexion à l’alimentation électrique
principale.
2. Nettoyez bien l’appareil et les zones environnantes.
3. Étalez une ne couche d’huile de cuisine sur les surfaces en acier inoxydable
4. Réalisez toutes les opérations de maintenance
5. Laissez la porte entrebâillée pour empêcher la formation de moisissure et/ou les mauvaises
odeurs.
N’insérez pas d’aliments dont la température est supérieure à 90 °C.
N’empilez pas les éléments à préserver en contact avec les parois internes, ce qui risquerait de
bloquer la circulation de l’air.
Il doit y avoir un espace susant entre les plateaux utilisés an de garantir un débit susant d’air
froid sur tout le produit.
Ne bouchez jamais l’entrée des ventilateurs d’évaporateurs.
Les produits plus diciles à refroidir en raison de leur taille doivent être placés au centre.
Limitez le nombre et la durée d’ouverture de la porte.
Après un refroidissement/une congélation rapides du produit, vous pouvez le stocker dans un core
de préservation après l’avoir correctement protégé. Nous vous conseillons d’appliquer une étiquette
décrivant le contenu du produit, la date de refroidissement/congélation rapide et la date d’expiration.
Une fois le produit refroidi rapidement, préservez-le à une température constante de +2°C alors que
s’il il a été congelé rapidement, préservez-le à une température constante de -20°C. Le refroidisseur
doit être utilisé pour un stockage de courte durée uniquement.
Pour empêcher la contamination bactérienne ou toute autre contamination
de nature biologique, la sonde à aiguille doit être désinfectée après
utilisation.
18

CYCLE DE REFROIDISSEMENT RAPIDE
19
Avec ce mode de fonctionnement, le refroidisseur maintient la température du compartiment de
réfrigération proche de zéro pendant tout le processus de refroidissement an de garantir une baisse
progressive de la température du produit jusqu’à +3°C. Ainsi, aucun cristal de glace ne se forme à
la surface du produit. Cette méthode de refroidissement rapide doit être utilisée de préférence pour
les produits non emballés et dont les caractéristiques physiques/organoleptiques pourraient être
aectées par la formation de glace supercielle (par ex. le poisson)
CYCLE DE CONGÉLATION RAPIDE
Avec ce mode de refroidissement rapide, le refroidisseur rapide maintient la température à une
valeur négative inférieure à -18°C ce qui correspond à la température nale de la congélation rapide.
Pour que la congélation rapide soit réussie et rapide, les aliments doivent être en petits morceaux,
en particulier si sa teneur en graisse est élevée. Les plus gros morceaux doivent être placés sur
les plateaux centraux. S’il faut plus de temps que le temps habituel pour la congélation rapide et
que la taille des morceaux ne peut être réduite, réduisez la quantité et refroidissez préalablement
le compartiment du refroidisseur en démarrant un cycle de congélation rapide à vide avant la
congélation rapide du produit.
NETTOYAGE ET MAINTENANCE
Coupez le raccordement électrique au niveau de la prise.
Le congélateur doit être nettoyé régulièrement. Nettoyez les surfaces externes et internes du
congélateur à l’aide d’une solution savonneuse douce puis séchez. Les surfaces externes peuvent
être entretenues à l’aide d’huile pour l’acier.
Ne pulvérisez pas l’appareil avec des jets d’eau directs ou à l’aide d’appareils haute pression.
N’utilisez pas de laine de fer, de brosses ou de racloirs pour nettoyer l’acier étant donné que des
particules ferreuses risquent de se déposer et, lors de leur oxydation, de former de la rouille.
Pour éliminer les résidus secs, utilisez des spatules en bois ou en plastique ou des tampons abrasifs
en caoutchouc.
Nettoyage du condensateur
Nettoyez le condensateur régulièrement
Comme les ailettes du condensateur sont très tranchantes, portez toujours des gants de protection
pour réaliser les étapes suivantes. Utilisez des masques et des lunettes de protection s’il y a de la
poussière
Lorsque le condensateur présente un dépôt de poussière correspondant aux ailettes, vous pouvez
l’éliminer à l’aide d’un appareil d’aspiration ou avec une brosse, en exerçant un mouvement vertical
dans le sens des ailettes.
N’utilisez aucun autre instrument susceptible de déformer les ailettes et, par conséquent, d’aecter
l’ecacité de l’appareil.

Pour le nettoyage, procédez comme suit :
1. Ouvrez la porte (A) des appareils.
2. Retirez le panneau inférieur (B) du compartiment technique : pour cela, retirez les vis (C)
3. Vous pouvez maintenant nettoyer les ailettes du condensateur (D) à l’aide des outils et des
dispositifs de protection adaptés.
4. Une fois le nettoyage terminé, fermez le panneau de commande et xez-le à l’aide des vis que
vous avez retirées.
ENTRETIEN
Le système de refroidissement est un système fermé hermétiquement qui ne nécessite pas d’être
surveillé, mais uniquement d’être nettoyé.
Si le congélateur ne refroidit pas, vériez si la raison est une panne de courant.
Si vous ne pouvez pas détecter la raison de la défaillance du congélateur, veuillez contacter votre
fournisseur. Veuillez indiquer le modèle et le numéro de série du congélateur. Vous pourrez trouver
ces informations sur l’étiquette de cote énergétique placée à l’intérieur du congélateur en haut à
droite.
MISE AU REBUT
La mise au rebut du congélateur doit être eectuée dans le respect de l’environnement. Veuillez
consulter la réglementation existante sur la mise au rebut. Il peut y avoir des exigences et conditions
spéciales à respecter.
20
Other manuals for BLC3
3
This manual suits for next models
3
Table of contents
Languages:
Other Tefcold Freezer manuals

Tefcold
Tefcold UFFS370SD User manual

Tefcold
Tefcold CC45-I Operation instructions

Tefcold
Tefcold CF77 User manual

Tefcold
Tefcold USS300SD Dual User manual

Tefcold
Tefcold CF110 User manual

Tefcold
Tefcold UFSC370SD User manual

Tefcold
Tefcold SE10-45 User manual

Tefcold
Tefcold G-line GUC70-P User manual

Tefcold
Tefcold IC-SC Series User manual

Tefcold
Tefcold FR205-I User manual