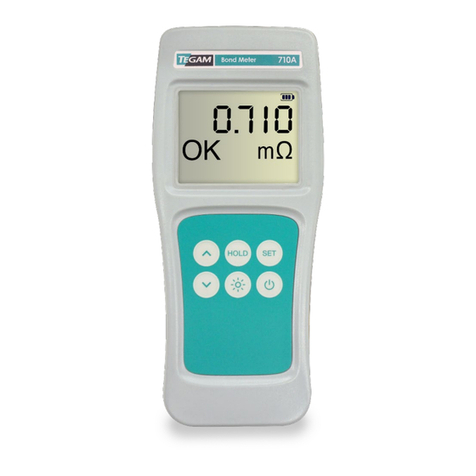
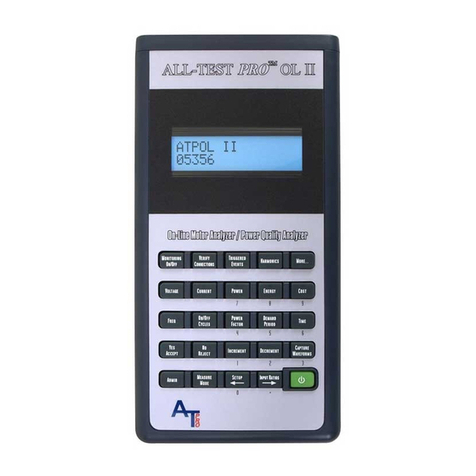
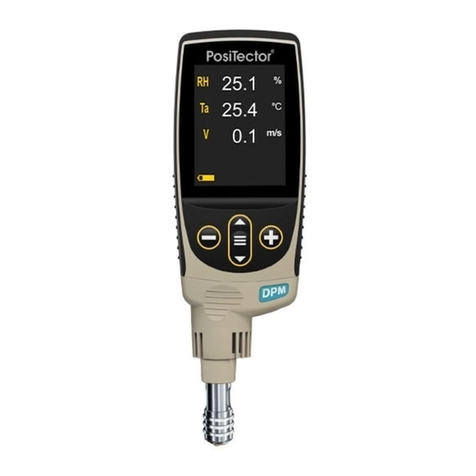
Tegam 710A User manual

710A
10 TEGAM WAY ● GENEVA, OHIO 44041 ● 440-466-6100 ● FAX 440-466-6110 ●
H
ANDHELD
B
OND
M
ETER
Models:
710A
Handheld Bond Meter
Operation
Manual
rev A
Manual Part Number: 710A-900, Rev. A
Published December 2019, Geneva, OH

Notices
ii
10 TEGAM WAY ● GENEVA, OHIO 44041 ● 440-466-6100 ● FAX 440-466-6110 ●
NOTICES
Copyright Notice
© TEGAM, Inc., 2019
No part of this manual may be reproduced in
any form or by any means (including electronic
storage and retrieval or translation into a
foreign language) without prior agreement and
written consent from TEGAM, Inc. as governed
by United States and international copyright
laws.
This Manual
Part Number:710-900
Revision A, December 2019
Supersedes: None
Published by:
TEGAM, Inc.
10 TEGAM Way
Geneva, OH 44041
Disclaimer and Manual Revisions:
THE MATERIAL CONTAINED IN THIS USER
MANUAL, AND ANY COMPUTER
SOFTWARE ASSOCIATED WITH THIS
USER MANUAL OR THE PRODUCTS
COVERED BY IT, ARE PROVIDED AS IS,
AND ARE SUBJECT TO CHANGE, WITHOUT
NOTICE, IN FUTURE REVISIONS.
This User Manual was current at the time of
publication. However, TEGAM is dedicated to a
process of continual product improvement, and
the products covered by this User Manual, and
any associated computer software, are subject
to periodic functional and design updates.
Please visit tegam.com for the most current
product documentation.
U.S. Government Rights
This computer software and/or technical data is
TEGAM proprietary information developed
exclusively at private expense. Computer
software and technical data rights granted to
the federal government include only those
rights customarily provided to the public,
pursuant to FAR 12.211 (Technical data) and
FAR 12.212 (Computer software) for the federal
government, and DFARS 252.227-7015
(Technical data – Commercial items) and
DFARS 227-7202-3 (Rights in commercial
computer software or commercial computer
software documentation) for the Department of
Defense. Except as explicitly permitted by the
foregoing, reproduction for non-governmental
use of the information or illustrations contained
in this computer software and technical data is
not permitted.
Compliance
FCC Notice: This equipment has been
tested and found to comply with the
limits for a Class A digital device, pursuant to
part 15 of the FCC Rules. These limits are
designed to provide reasonable protection
against harmful interference when the
equipment is operated in a commercial
environment. This equipment generates, uses,
and can radiate radio frequency energy and, if
not installed and used in accordance with the
instruction manual, may cause harmful
interference to radio communications.
Operation of this equipment in a residential
area is likely to cause harmful interference in
which case the user will be required to correct
the interference at his own expense.
Safety Notice Symbols and Terms
Safety Notices denote hazards. They indicate an
operating procedure, instruction, or practice
that, if not correctly performed or followed,
could result in damage to equipment, or injury
or death to personnel. Do not proceed beyond a
Safety Notice until all conditions and
instructions are fully understood and complied
with.
Safety Notices Symbols:
WARNING
WARNING denotes an
imminent hazard that could
result in injury to personnel or
death.
CAUTION
CAUTION denotes a hazard
that could result in damage to
the unit or other equipment.
REMINDER denotes important
information about instrument
functions, menus, and
measurements.

Table of Contents
iii
10 TEGAM WAY ● GENEVA, OHIO 44041 ● 440-466-6100 ● FAX 440-466-6110 ●
TABLE OF CONTENTS
1. Instrument Description.........................................................................................1-1
Specifications ................................................................................................1-1
Optional Accessories and Ordering Information....................................1-3
TEGAM Family of Handheld Bond Meters ................................................1-4
2. Preparation for Use ..............................................................................................2-1
General Information.....................................................................................2-1
Feature Overview .........................................................................................2-1
Safety Notices and Information .................................................................2-2
Unpacking and Inspection .........................................................................2-4
Battery Installation and Replacement......................................................2-4
Making Your First Resistance Measurement.............................................2-5
3. Operating Instructions .........................................................................................3-1
Keypad Functions .........................................................................................3-1
LCD Display....................................................................................................3-1
Test Limit Menu ..............................................................................................3-3
Auto-Power Off .............................................................................................3-3
Backlight and Backlight Timeout ...............................................................3-3
Hold Function ................................................................................................3-3
Auto-Hold Function ......................................................................................3-4
Battery Indicator ...........................................................................................3-5
Invalid Measurement Indications...............................................................3-6
4. Service Information ..............................................................................................4-1
Inspection and Cleaning ............................................................................4-1
Calibration .....................................................................................................4-1
Troubleshooting.............................................................................................4-7
Diagnostic Routines and Error Codes........................................................4-8
Preparation for Calibration or Repair Service..........................................4-9
Expedite Repair & Calibration Form........................................................4-10
Warranty.......................................................................................................4-11
Warranty Limitations ...................................................................................4-11
Statement of Calibration...........................................................................4-12
A. Required Alignment and Verification Equipment ...........................................A-i
B. Instrument Verification Data Sheet.................................................................... B-i

Instrument Description
1-1
10 TEGAM WAY ● GENEVA, OHIO 44041 ● 440-466-6100 ● FAX 440-466-6110 ●
1. INSTRUMENT DESCRIPTION
Specifications
G
ENERAL
S
PECIFICATIONS
:
Uncertainty1
±(0.2% Reading + 0.02% Range) -10 to 55 °C
Resistance Ranges and Test Currents:
Full Scale
Resolution
Test Current
10.000 mΩ
1 μΩ
100 mA
100.00 mΩ
10 μΩ
10 mA
1.0000 Ω
100 μΩ
1 mA
10.000 Ω
1 mΩ
100 μA
100.00 Ω
10 mΩ
10 μA
Connector Type
M12
Display
Five (5) digit LCD, with Range, Units, Function, Battery, and
Decimal Indicators
Display Backlight
Four (4) LED Backlight with 30-second timeout
Reading Rate
3 / Second for Readings
Battery Type
3 AA (IEC LR6, ANSI 15) Alkaline
Battery Life
100 hours standby, 50 hours in 10 mΩ range
Battery Indicator
Four (4) Stage Battery Charge Indicator
Keypad Six (6) momentary switches with audible and tactile
feedback
Power Cycle
Configuration
Retention
Instrument retains:
-
Range -
Test Limit
Maximum Common
Mode Voltage 30 V
Compliance
CE (2014/30/EU) / RoHS (EU 2015/863) / EU REACH (EC)
No. 1907/2006
ESD
IEC 61000-4 2:2009, Class B
EMC
EN
55022:2010+A1:2015,
Class A; EN 61000-4
3:2006+A2:2010, 10
V/m (80 MHz to 1 GHz)
MIL-PRF-28800F, Class 2
195% confidence interval, approximately 2σ

Instrument Description
1-2
10 TEGAM WAY ● GENEVA, OHIO 44041 ● 440-466-6100 ● FAX 440-466-6110 ●
E
NVIRONMENT
:
Standards
MIL-PRF-28800F, Class
2
Operating Temp -10 to 55 °C -14 to 131 °F
Humidity
5 to 95%, 10 to 30 °C
5 to 95%, 50 to 86 °F
Altitude
0 to 4600 m
0 to 15,092 ft
Vibration
Random 10 – 500 Hz, 0.03 g2/Hz
Shock
30g Half Sine
Drop
4 drops from 1 m to concrete
Storage Temp
-51 to 71 °C
-60 to 160 °F
P
HYSICAL
C
HARACTERISTICS
:
Dimensions
193 x 84 x 28 mm
7.6 x 3.3 x 1.1 in
Weight (incl. batteries)
303.2 g
10.7 oz

Instrument Description
1-3
10 TEGAM WAY ● GENEVA, OHIO 44041 ● 440-466-6100 ● FAX 440-466-6110 ●
Optional Accessories and Ordering Information2
P
RODUCT
M
ODEL
D
ESCRIPTION
Probes
BKDP-M2
Big Kelvin Display Probe, 700 Series
BKP-M2
Big Kelvin Probe, 700 Series
BKDP-
M2S
Big Kelvin Display Probe, 700 Series, Intrinsically Safe
BKP-M2S
Big Kelvin Probe, 700 Series, Intrinsically Safe
BKP-B
Pin Kit, Spear Tip, 4 Pins per Pack
BKP-F
Pin Kit, Flat Tip, 4 Pins per Pack
BKP-H
Pin Kit, Serrated Tip, 4 Pins per Pack
BKP-J
Pin Kit, Round Tip, 4 Pins per Pack
MCDP-M2
Miniature Coaxial Display Probe, 700 Series
MCP-M2
Miniature Coaxial Probe, 700 Series
MCDP-
M2S
Miniature Coaxial Display Probe, 700 Series,
Intrinsically Safe
MCP-M2S
Miniature Coaxial Probe, 700 Series, Intrinsically Safe
MCP-A
Replacement Pins for the MCP Series Probe
MKDP-M2
Miniature Kelvin Display Probe, 700 Series
MKP-M2
Miniature Kelvin Probe, 700 Series
MKDP-
M2S
Miniature Kelvin Display Probe, 700 Series, Intrinsically
Safe
MKP-M2S
Miniature Kelvin Probe, 700 Series, Intrinsically Safe
MKP-F
Flat Tip Pin Kit, 4 Per Pack
MKP-H
Serrated Tip Pin Kit, 4 Per Pack
MKP-J
Round Tip Pin Kit, 4 Per Pack
MKP-LM
Serrated Rotating Tip Pin Kit, 4 Per Pack
KC-M2
Kelvin Clip, 700 Series, Regular Length
KC-M5
Kelvin Clip, 700 Series, Long Length
KC-M2S
Kelvin Clip, 700 Series, Regular Length, Intrinsically
Safe
KC-M5S
Kelvin Clip, 700 Series, Long Length, Intrinsically Safe
2Some accessories may not be available at time of printing

Instrument Description
1-4
10 TEGAM WAY ● GENEVA, OHIO 44041 ● 440-466-6100 ● FAX 440-466-6110 ●
Case
Accessories
700-910
Tilt Stand/Magnetic/Hanger (Factory Installed)
700-912
Tilt Stand/Magnetic/Hanger (User Installed)
700-911
Hard Carry Case
700-915
Sure Grip Cover
720-911
Hard Carry Case, Intrinsically Safe
Printed Manual
710A-900
Operation Manual
Manual
Translations
Chinese, Dutch, French, German, Japanese, Korean,
and Spanish (download at tegam.com)
Service Options
710-CAL
Standard Calibration
710-17025
17025 Calibration with Report
TEGAM Family of Handheld Bond Meters
Bond Meters
710A
Handheld Bond Meter
720A
Intrinsically Safe, Handheld Bond Meter

Preparation for Use
2-1
10 TEGAM WAY ● GENEVA, OHIO 44041 ● 440-466-6100 ● FAX 440-466-6110 ● [email protected]
2. PREPARATION FOR USE
General Information
The TEGAM 710A and 720A Handheld Bond Meters are high-accuracy micro-ohmmeters that
provide accurate resistance readings in a wide range of manufacturing and service
applications. These full-featured, durable, and versatile instruments simplify the process of
resistance measurement through the intuitive user-interface.
Feature Overview
•Battery life of 100 hours in standby, 50 hours in 10 mΩ range 3
•Five (5) digit LCD with LED Backlight
•Easy to clean
•Automatic and manual HOLD modes
•Programmable test limits with OK and FAIL annunciators
•OVER and UNDER annunciators
•Open lead and DUT detection
•Durable: Meets MIL-PRF-28800F, Class 2 requirements
•Optional Tilt Stand/Magnet/Hanger
3Typical battery life under normal use conditions in laboratory environment. Continuous or repeated use of
features such as the backlight or use or storage at high or low temperature extremes may reduce battery life.

Preparation for Use
2-2
10 TEGAM WAY ● GENEVA, OHIO 44041 ● 440-466-6100 ● FAX 440-466-6110 ● [email protected]
Safety Notices and Information
Read this Operation Manual thoroughly before using the instrument to become familiar with its
operations and capabilities.
Visually inspect instrument before using. Do not use if unit appears damaged or with any part of the
case removed.
WARNING
MAINTENANCE INSTRUCTIONS WITHIN THIS MANUAL ARE FOR USE BY QUALIFIED SERVICE
PERSONNEL ONLY. DO NOT ATTEMPT TO SERVICE THIS UNIT UNLESS YOU ARE QUALIFIED TO DO
SO.
SHOCK HAZARD
Disconnect probes from DUT and turn the unit off before removing the battery cover.
Always disconnect probes from DUT before opening the instrument housing. Internal circuits
can present a shock hazard if leads are connected to a source of elevated potential.
Do not use this instrument if the housing, probe wiring, probe, or probe handles are damaged
or distorted. Housings and wire insulation are part of the personnel protection system, and if damaged
could expose users to elevated potentials.
EXPLOSION HAZARD
Never use or store this product with batteries installed, or change batteries, in an
environment where explosive or flammable vapors or dust suspensions may exist.
Do not attempt to recharge alkaline batteries.
Do not put batteries into bags designed to protect parts from electrostatic discharge (ESD).
These bags are specially designed with metal shielding which can short circuit a battery.
Do not expose batteries to extreme heat or fire. Observe all regional laws and regulations when
disposing batteries.
BURN HAZARD
Do not touch a probe that has been exposed to toxic substances or extremely high or low
temperatures.
Safety Notices and Information continued on next page . . .

Preparation for Use
2-3
10 TEGAM WAY ● GENEVA, OHIO 44041 ● 440-466-6100 ● FAX 440-466-6110 ● [email protected]
CAUTION
RISK OF INCORRECT READING
Do not use when AC or DC voltages exist. Excessive voltage could result in an incorrect reading, or
in more extreme cases, a blown fuse that will result in incorrect readings and need for repair.
Do not use on reactive loads exceeding 2mH or 100uF. Measurements may also be impacted when
a large inductive load is measuredin the presence of high 50/60 Hz power. Polarized capacitors should
be avoided.
RISK OF INSTRUMENT DAMAGE
Only replace batteries with size AA (IEC LR6, ANSI 15). Observe proper polarity when installing
batteries. Do not mix old and new batteries.
Do not apply voltages across leads. Excessive input voltage could result in blown fuse, component
damage, or fire. Application of excessive voltage is not covered by the warranty.
Avoid making sharp bends in probe or sensor lead wires. Bending lead wires at sharp angles can
damage the wire and cause probe failure.
Static discharge through a connected probe may cause instrument damage. Use care to avoid
static discharge when handling the instrument or connected probes.

Preparation for Use
2-4
10 TEGAM WAY ● GENEVA, OHIO 44041 ● 440-466-6100 ● FAX 440-466-6110 ● [email protected]
Unpacking and Inspection
Each instrument is electrically and mechanically inspected before shipment. Upon receiving
your new TEGAM Handheld Bond Meter, unpack all items from the shipping container and
check for any obvious damage that may have occurred during transit. Use the original
packing materials if reshipment is necessary.
If any dents, broken, or loose parts are seen, do not use the equipment. Notify TEGAM
immediately.
Check that all items are present. If any items are missing, notify TEGAM immediately.
The following items are included with every new instrument:
•One (1) Handheld Bond Meter;
•One (1) Quick Start Guide;
•Statement of Traceability;
•Three (3) AA, 1.5 V batteries; and
•Optional accessories (if purchased).
Battery Installation and Replacement
Three (3) AA 1.5 V batteries are supplied with the instrument, but not installed. Read the
following battery replacement instructions before attempting to install or remove the
batteries.
CAUTION
Always turn the instrument off and disconnect any connections to DUT before
replacing the batteries. Re-install the battery compartment cover before resuming
use of the instrument.
CAUTION The battery compartment is sealed with a rubber gasket. Use care to not damage the
gasket when removing or installing the battery compartment cover.
CAUTION
Remove the batteries when storing the instrument for an extended period of time or
in a high temperature environment to prevent battery leakage and possible damage
to the instrument.
All measurement parameters may be reset to factory default if batteries are removed while
the instrument is powered on. Always turn the instrument off before changing batteries.
To install or replace batteries:
Required Tools: Phillips Head Screwdriver
1. Identify the battery compartment located on the back of the instrument (see
Figure 1: Battery Installation);
2. Remove the two (2) battery compartment retaining screws;
3. Remove the battery compartment cover;
4. If present, carefully remove old batteries being careful to not damage the battery
contacts;

Preparation for Use
2-5
10 TEGAM WAY ● GENEVA, OHIO 44041 ● 440-466-6100 ● FAX 440-466-6110 ● [email protected]
5. Observing proper polarity, install three (3) new, AA alkaline (IEC LR6, ANSI 15)
batteries;
6. Re-install the battery cover and two (2) retaining screws;
7. At initial power on after battery replacement, allow approximately 30 seconds for
instrument to stabilize.
Figure 1: Battery Installation
Making Your First Resistance Measurement
TEGAM’s 700 Series Handheld Bond Meters are designed for easy operation, while still
providing a feature-rich experience via the intuitive user interface.
To get started making resistance measurements right away, follow these steps:
1. Perform Section 2.5, Battery Installation and Replacement;
2. Connect probes to unit;
3. Press to turn unit on;
4. The unit will light all segments of the display as it performs a power on self-test;
5. The instrument will display a resistance if connected to a device or “nodut” if not
connected;
6. Press to change ranges or to put unit in Auto-Range mode.
Congratulations! You’re now ready to make accurate and reliable resistance measurements,
wherever and whenever you may need to.
We know you are eager to begin using your new bond meter, but this overview is just the
beginning. Please take a moment to familiarize yourself with this Operation Manual to learn
about all the features and benefits of your new TEGAM Handheld Bond Meter.
Retaining
Screws
Battery
Compartment
Gasket

Operating Instructions
3-1
10 TEGAM WAY ● GENEVA, OHIO 44041 ● 440-466-6100 ● FAX 440-466-6110 ● [email protected]
3. OPERATING INSTRUCTIONS
Keypad Functions
The instrument keypad is a six (6)key, sealed membrane keypad. Each key provides audible
and tactile user feedback when pressed. Key functions are described in Figure 2below.
Power instrument ON or OFF
(1.5s)
Disable auto-power OFF while instrument is
on.
(1.5s)
Enter Test Limit Menu (See Section 3.3)
While in Test Limit Menu, save current value
and advance to next parameter
Toggle display backlight
(1.5s)
Disable backlight 30-second timeout
Hold currently displayed measurement and
OK/FAIL result
(1.5s)
Enter/Exit Auto Hold mode (See Section 3.7)
Increment/Decrement through ranges, including AUTO
While in Test Limit Menu, advance or reverse selected parameter
Figure 2: Keypad Button Functional Description
The , , ,and keys have multiple functions which can be accessed by
momentarily pressing the key, or alternatively, by pressing and holding the key for
approximately 1.5 seconds. Throughout this Operation Manual, the press and hold sequence
is indicated by the key designator followed by the subscript (1.5s). For instance, (1.5s)
indicates that the key should be pressed and held for 1.5 seconds, then released to
access the desired function.
LCD Display
The display is a large, easy to read, LCD display, with an LED backlight for clear viewing in
low-light conditions. It can simultaneously display the resistance reading, range, PASS/FAIL
status, open lead detection,over/under indication and the battery level.

Operating Instructions
3-2
10 TEGAM WAY ● GENEVA, OHIO 44041 ● 440-466-6100 ● FAX 440-466-6110 ● [email protected]
See Figure 3below for further description of each display indicator.
1 Measurement is overrange
2 Measurement is 10% or less
of range
3
Solid: Hold function is active
Flashing: Auto Hold function
is active
4
One or both probes are not
electrically connected (See
Section 3.8, Broken Lead
Detection)
5
If a probe is not electrically
connected, the open channel
is indicated (See Section 3.8,
Broken Lead Detection)
6Remaining battery life
7 Resistance measurement
8AUTO range is active
9 Currently selected range
10 The measurement is less than the test limit
11 The measurement is greater than the test limit
12 Reserved for future use
13 Reserved for future use
Figure 3: LCD Display Description

Operating Instructions
3-3
10 TEGAM WAY ● GENEVA, OHIO 44041 ● 440-466-6100 ● FAX 440-466-6110 ● [email protected]
Test Limit Menu
Key designators followed by (1.5s), e.g.
(1.5s)
, indicate that the key should be
pressed and held for 1.5 seconds, then released to access the desired function.
Test limits are available for the customer to easily identify if a measurement is above or
below a resistance value. Press (1.5s) to access the Test Limit Menu. From within the Test
Limit Menu, press to step through the digits, decimal point, and resistance range. Press
the keys to advance or reverse the selected value for the active parameter. The active
parameter value will flash on the display.
To enter the Test Limit Menu, press (1.5s).The active parameter value will flash on the
display.
Press to save a setting and step to the next parameter. If no key is pressed for 10
seconds, the current configuration is saved and the instrument will exit the Test Limit Menu.
Auto-Power Off
Key designators followed by (1.5s), e.g.
(1.5s)
, indicate that the key should be
pressed and held for 1.5 seconds, then released to access the desired function.
To conserve battery life, the instrument automatically turns off if no key is pressed for 20
minutes. To disable this feature, press (1.5s). The remaining battery life indicator will flash
once, indicating auto-power off is disabled.
Auto-power off will remain disabled until instrument power is cycled. At next power on,
auto-power off returns to the default enabled condition.
Backlight and Backlight Timeout
The instrument includes an LED backlight feature to ensure measurement data can be easily
read in low-light conditions. To activate the backlight, press .
Once the backlight is activated, it will automatically turn off to preserve battery life if no key
is pressed within 30 seconds. To disable the backlight timeout feature, press (1.5s). The
backlight will flash to indicate the timeout feature has been disabled. To re-enable the
backlight timeout feature, turn the backlight off then on by pressing twice.
Hold Function
Press to hold the current reading. HOLD is displayed at the top-center of the LCD
display. New measurements are not displayed while the hold function is active. If test limits
are active, the OK or FAIL annunciators will also be held. To disable the hold function and
resume normal operation, press again.

Operating Instructions
3-4
10 TEGAM WAY ● GENEVA, OHIO 44041 ● 440-466-6100 ● FAX 440-466-6110 ● [email protected]
Auto-Hold Function
The Auto Hold function allows the user to take a measurement,have the unit determine a
stable reading,and hold that value. Once the user is ready to make the next measurement,
is pressed momentarily to clear the last reading from the display and re-initiate Auto-
Hold mode.
To use the Auto-Hold Function:
1. Press (1.5s) to initiate Auto-Hold mode.
The unit will not initiate Auto-Hold mode if it is already in Hold mode. If the HOLD
indicator is solid, simply press to exit Hold mode and try initiating Auto-Hold
mode again.
2. The HOLD indicator will begin to flash.
3. If the unit is not connected to a Device Under Test (DUT):
a. “nodut” will appear on the display.
b. Connect leads to DUT.
4. When the unit detects a connection, the display of the unit will blank and begin to
cycle, indicating that the unit is taking a measurement.
5. Once a stable value has been determined and the measurement is completed, the
unit will display the reading of the DUT along with PASS/FAIL status (if enabled).
6. The determined reading and status are temporarily saved and will stay displayed
unless is pressed or the unit is power-cycled.
7. Press to re-arm Auto-Hold mode.
8. The HOLD indicator will begin to flash.
9. If the unit has been disconnected from the DUT, “nodut” will appear on the
display.
10. The unit is ready to take another measurement.
To exit Auto-Hold mode, press (1.5s). The HOLD annunciator will turn off. The unit
is now in normal operating mode.
For best results, put unit in Auto-Range when using Auto-Hold.

Operating Instructions
3-5
10 TEGAM WAY ● GENEVA, OHIO 44041 ● 440-466-6100 ● FAX 440-466-6110 ● [email protected]
Broken Lead Detection
The 700 Series Handheld Bond Meters feature broken lead detection for all ranges. This
feature monitors the test current across the leads on each channel. A small current is
sourced between the Kelvin connection of each channel’s test leads. This detection is
independent of whether a DUT is or is not connected.
If the unit detects anopen circuit in either channel it will illuminate the OPEN annunciator
along with the channel(s) the unit has detected anopen circuit in.
When using the unit with MKP, BKP, and MCP probes, the OPEN and channel
annunciators will be illuminated when not connected to a DUT.
Battery Indicator
Battery depletion or battery replacement will reset all measurement parameters to
their default values. After battery replacement, set measurement parameters as
required.
The battery voltage indicator provides a visual representation of approximate remaining
battery life. It is located at the top-right of the
display.
The battery voltage indicator uses three bars
to represent remaining battery life. Figure 4
shows the approximate battery life for each
bar.
At zero (0) bars, the instrument will
momentarily display bATT and initiate a
shutdown sequence. To prevent disruption of
the measurement process and statistics and
data collection, the batteries should be
replaced before the battery voltage indicator reaches zero (0) bars. See Section 2.5, Battery
Installation and Replacement.
BARS APPROX.BATTERY LIFE
3 100% - 50%
2 50% - 20%
1 20% - 5%
0 0% - Shutdown Initiated
Figure 4: Battery Voltage Indicator

Operating Instructions
3-6
10 TEGAM WAY ● GENEVA, OHIO 44041 ● 440-466-6100 ● FAX 440-466-6110 ● [email protected]
Invalid Measurement Indications
The LCD display indicates when a measurement is invalid, as shown in Figure 5 below.
INDICATION DESCRIPTION
————— The device is auto ranging.
OVER and ----- Reading is 110% of full scale or higher. If possible, switch to a higher
range.
UNDER Reading is 10% of full scale or less. If possible, switch to a lower
range.
OPEN, 1, 2
If the leads become electrically disconnected, the OPEN segment will
illuminate along with segment 1, 2, or both to indicate the
disconnected channel.
“nodut”
The device does not detect a DUT. (no device under test) This
message will appear when Kelvin Clips are connected and closed or in
Auto-Hold Mode between measurements.
Figure 5: Invalid Measurement Indications

Service Information
4-1
10 TEGAM WAY ● GENEVA, OHIO 44041 ● 440-466-6100 ● FAX 440-466-6110 ● [email protected]
4. SERVICE INFORMATION
Inspection and Cleaning
To extend the life of the instrument, inspect and clean the instrument regularly. Inspect the
instrument for any significant abrasions, cuts, cracks, dents, or other signs of damage on
the case, keypad, and display lens. Inspect the connectors for breaks, dirt, or corrosion.
Ensure all screws are securely fastened, and if equipped, that the tilt stand/magnet/hanger
is in good condition and locks into position properly.
With all screws securely fastened and the battery compartment cover in place, use a damp
cloth or towel to wipe down the instrument. Use care to avoid scratching the display lens.
Mild, non-abrasive detergents may be used providing the instrument is then wiped down
with a clean damp cloth or towel.
Calibration
4.2.1 Verification Procedure
1. This procedure shall be performed within environmental conditions of 23 ±1.5 °C
and 5% to 95% RH.
2. The unit under test (“UUT”) shall be acclimated to the controlled environment for a
minimum of four (4) hours.
3. The equipment listed in Appendix A is required to fully verify the UUT.
4. Refer to Appendix B for standard measurement points and tolerances for each
710A resistance range.
5. Record standard resistance values on the Instrument Verification Data Sheet in
Appendix B.
6. Calculate high and low limits using tolerances noted in Appendix B.
7. If not already, connect the M12 connectors of the bond meter probes.
8. Press until UUT is in 100 Ω range. If UUT is in AUTORANGE, press once.
9. Connect the UUT leads to the 100 Ω resistance standard.
10. Note value in “Reading” column of Appendix B.
11. Indicate if the value exceeds the high limit or low limit calculated in Step 6 using
“Pass/Fail” column of Appendix B.
12. Staying in the 100 Ω range, connect UUT leads to 10 Ω standard and record value.
13. Indicate if the value exceeds the high limit or low limit calculated in Step 6 using
“Pass/Fail” column of Appendix B.
14. Press the to put UUT into 10 Ω range and record value.
15. Indicate if the value exceeds the high limit or low limit calculated in Step 6 using
“Pass/Fail” column of Appendix B.
16. Staying in the 10 Ω range, connect UUT leads to 1 Ω standard and record value.

Service Information
4-2
10 TEGAM WAY ● GENEVA, OHIO 44041 ● 440-466-6100 ● FAX 440-466-6110 ● [email protected]
17. Indicate if the value exceeds the high limit or low limit calculated in Step 6 using
“Pass/Fail” column of Appendix B.
18. Press to put UUT into 1 Ω range and record value.
19. Indicate if the value exceeds the high limit or low limit calculated in Step 6 using
“Pass/Fail” column of Appendix B.
20. Staying in the 1 Ω range, connect UUT leads to 100 mΩstandard and record
value.
21. Indicate if the value exceeds the high limit or low limit calculated in Step 6 using
“Pass/Fail” column of Appendix B.
22. Press to put UUT into 100 mΩ range and record value.
23. Indicate if the value exceeds the high limit or low limit calculated in Step 6 using
“Pass/Fail” column of Appendix B.
24. Staying in the 100 mΩ range, connect UUT leads to 10 mΩ standard and record
value.
25. Indicate if the value exceeds the high limit or low limit calculated in Step 6 using
“Pass/Fail” column of Appendix B.
26. Press to put UUT into 10 mΩ range and record value.
27. Indicate if the value exceeds the high limit or low limit calculated in Step 6 using
“Pass/Fail” column of Appendix B.
28. Staying in the 10 mΩ range, connect UUT leads to 1 mΩ standard and record
value.
29. Indicate if the value exceeds the high limit or low limit calculated in Step 6 using
“Pass/Fail” column of Appendix B.
30. Connect UUT leads to 100 µΩ standard and record value.
31. Indicate if the value exceeds the high limit or low limit calculated in Step 6 using
“Pass/Fail” column of Appendix B.
32. Short the leads of the unit in the following order: +I to -I, -I to +E, and +E to -E.
The unit should display 0.000 (±0.002)
33. Indicate if the value exceeds the high limit or low limit calculated in Step 6 using
“Pass/Fail” column of Appendix B.
Other manuals for 710A
2
Table of contents
Other Tegam Measuring Instrument manuals
Tegam
Tegam 710A User manual
Tegam
Tegam 1316A User manual

Tegam
Tegam R1L-D1 User manual
Tegam
Tegam AVM-2000 Troubleshooting guide
Tegam
Tegam 253 User manual

Tegam
Tegam 3525 User manual

Tegam
Tegam GEMINI 5541A User manual
Tegam
Tegam R1L-BIR1 User manual
Tegam
Tegam GEMINI 5540A User manual
Tegam
Tegam 730A User manual
Popular Measuring Instrument manuals by other brands

SEW
SEW PT-30 instruction manual

Emerson
Emerson Micro Motion installation manual

GLI International
GLI International GLI-93711 operating manual
Keysight
Keysight EXA X-Series N9010A Configuration guide

Endress+Hauser
Endress+Hauser Levelflex M FMP40 Brief operating instructions

Tempo Communications
Tempo Communications TV220E Quick reference card
