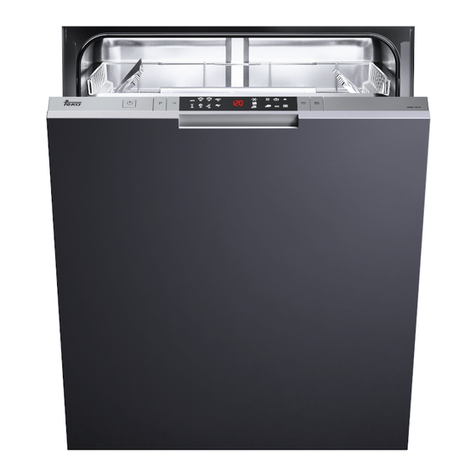
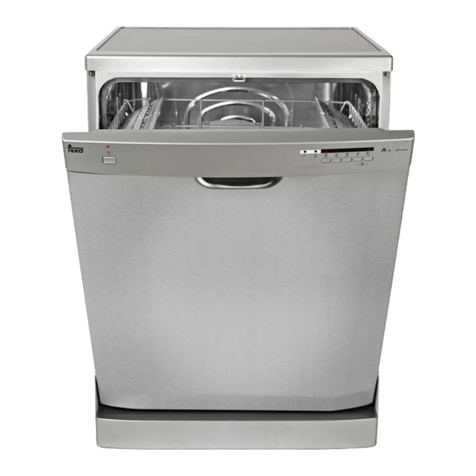
Teka LP8835W User manual

Instruction
Manual
60cm
Freestanding
Dishwasher
LP8835W
LP8835X
English
www.teka.com


03
Instruction Manual
Peace
of Mind
Customer
Care
Instruction Manual Contents
Safety Notes 04
Your Appliance 07
Operating Instructions 08
Installation Instructions 13
Cleaning and Maintenance 14
Troubleshooting 16
Warranty 18
Congratulations and thank you for purchasing a Teka appliance. You’ve chosen a product
that features over 90 years of innovation and the very best of European engineering, with
Teka founded in Germany in 1924. Intuitive and stylish, your Teka appliance has been
designed with you in mind meaning that you’ll get great results every time.
Welcome to the world of Teka.
Visit our website for our full range of Appliance solutions, product brochures and service
information.
Teka is proudly distributed and represented by Residentia Group in Australia.
www.teka.com/au
Teka recommends the use of original spare parts.
When contacting our customer service team, please ensure that you have the following
information at hand (which can be found on your appliances’ rating plate.
— Model Number; and,
— Serial Number.
P . 1300 11 4357
E. support@residentiagroup.com.au

04
LP8835
1. Conditions of use
This appliance is intended to be used in household and similar applications such as farm
houses or by clients in serviced apartments, holiday apartments and other residential
type environments.
2. Safety instructions
Before the installation and use of the appliance, carefully read the supplied instructions.
The manufacturer is not responsible if an incorrect installation and use causes injuries
and damages. Always keep the instructions with your appliance for future reference.
Warning! To prevent any damages to your and others’ life or property, you have to follow
the safety notes.
Warning! Caution, risk of electricution!
2.1 Children & vulnerable people safety
Warning! Risk of suffocation, injury or permanent disability.
— This appliance can be used by children aged from 8 years and above and persons with
reduced physical, sensory or mental capabilities or lack of experience and knowledge if
they have been given supervision or instruction for the operation of the appliance by a
person who is responsible for their safety.
— Do not let children play with the appliance.
— Keep all packaging away from children.
— Keep all detergents away from children.
— Keep children and pets away from the appliance door when it is open.
— Cleaning and user maintenance shall not be made by children without supervision.
— Dishwasher detergents are strongly alkaline and they can be extremely dangerous if
swallowed. Avoid contact with skin and eyes and always keep children away from the
dishwasher when the door is open.
2.2 Installation
— Remove all the packaging.
— Do not install or use a damaged appliance.
— Obey the installation instruction supplied with the appliance.
— Make sure that the floor where you install the appliance is flat, stable, heat resistant and
clean.
— Do not install or use the appliance where the temperature is less than 5°C or higher
than 35°C.
— Do not install the appliance behind a lockable door, a sliding door or a door with a hinge
on the opposite side, where the appliance door can not be fully opened.
— Always be careful when you move the appliance because it is heavy. Always wear safety
gloves.
— Always move the appliance vertically.
— The rear surface of the appliance must be put against the wall.
— The appliance can be installed as freestanding or below the kitchen counter with
correct space (Refer to the Installation leaflet).
— When the appliance is put in its permanent position, check if it is fully level with the aid
of a spirit level. If it is not, adjust the feet until it is.
Electrical Connection
— Make sure that the electrical information on the rating plate agrees with the power
supply. If not, contact an electrician.
— Do not use multi-plug adapters and extension cables.
— Make sure not to cause damage to the mains plug and to the mains cable. Should the
appliance power supply cable need to be replaced, this must be carried out by our
Service Centre.
— Connect the mains plug to the mains socket only at the end of the installation. Make
sure that there is access to the mains plug after the installation. Do not connect the
appliance plug with a power connection board.
— Do not touch the mains cable or the mains plug with wet hands.
Safety Notes

05
Instruction Manual
Grounding Instructions
Warning! Risk of fire and electrical shock.
— The appliance must be earthed (grounded). In the event of a malfunction or
breakdown, grounding will reduce the risk of an electric shock by providing a path of
least resistance of electric current. This appliance is equipped with a cord having an
equipment grounding conductor and a grounding plug.
— The plug must be plugged into an appropriate outlet that is installed and grounded in
accordance with all local codes and ordinances.
Warning! Improper connection of the equipment-grounding conductor can result in the
risk of electric shock.
Warning! Check with a qualified electrician or service representative if you are in doubt
whether the appliance is properly grounded. Do not modify the plug supplied
with the appliance, even if it does not fit the outlet. Have a qualified electrician
install the correct power outlet for use.
2.3 Appliance use
Warning! Risk of fire, explosion, electric shock or damage to the appliance.
— Do not abuse, sit on, or stand on the door or dish racks of the dishwasher.
— Do not touch the heating element during or immediately after use.
— Do not operate your dishwasher unless all enclosure panels are properly in place. Open
the door very carefully (and slowly) if the dishwasher is operating, as there is a risk of
water spraying out.
— Do not place any heavy objects on the or stand on the door when it is open. Aside from
potential damage to the appliance, the appliance could tip forward.
— When loading items to be washed:
1) Locate sharp items so that the are not likely to damage the door seals;
2) Warning: Knives and other utensils with sharp points/edges, must be loaded into
the cutlery drawer with their sharp points facing down, or placed in a horizontal
position.
— When using your dishwasher, you should prevent plastic items from coming into
contact with the heating element.
— Check that the detergent compatment is empty after the completion of the wash cycle.
— Do not wash plastic items within the dishwasher unless thay are marked as
dishwasher safe (or equivalent). For plastic items without markings, always refer to the
manufacturer’s recommendations.
— Use only detergent and rinse additives designed for an automatic dishwasher.
— Never use soap, laundry detergent or hand washing detergent in your dishwasher. Keep
these products out of the reach of children.
— Keep children away from detergent and rinse aid, keep children away from the open
door of the dishwasher, as there could still be residual detergent left inside.
— Never leave the dishwasher door open as this creates a tripping hazzard.
— The appliance is to be connected to the water mains using the new hose sets supplied
(never use old or existing hoses).
— The maximum place settings to be washed is 14.
— The maximum permissible inlet water pressure is 1Mpa, whilst the minimum is
0.04Mpa.
— It is dangerous to open the dishwasher door whilst in operation, as the hot water may
scald you.
2.4 Care and Cleaning
Warning! Risk of injury or damage to the appliance.
— Before maintenance, deactivate the appliance and disconnect the mains plug from the
mains socket.
— Do not use water spray and steam to clean the appliance.
— Clean the appliance with a moist soft cloth. Only use neutral detergents. Do not use
abrasive products, abrasive cleaning pads, solvents or metal objects.

06
LP8835
2.5 Product Disposal
Warning! Risk of injury or suffocation.
— Disconnect the appliance from the mains supply.
— Cut off the mains cable and discard it.
— Remove the door catch to prevent children and pets to get closed in the appliance.
— Speak with your local council as to where best to discard the appliance, with most
councils offering an appliance recycling serivce.
— Please dispose of packaging materials properly and recycle where possible.
2.6 Transport
Always move the appliance cautiously. Avoid using the appliance door or handle to lift the
appliance.
2.7 Installation Positioning
— Ensure that your appliance is installed on solid and flat ground, in a level position.
— Please do not place the appliance on a slope, soft carpet or wooden floor.
— Your appliance should only be installed within an internal environment. Do not install
the appliance outdoors.
Level Adjusting
— If the floor is obviously uneven, your appliance feet need to be adjusted. If your
appliance isn’t level, it will cause your appliance to vibrate, and potentially move from its
position.
— Adjust the appliance legs to ensure your appliance is level.

07
Instruction Manual
3. Product Components
1 Top Spray Arm 5 Lower Basket 9 Filter Assembly
2 Cutlery Rack 6 Dispenser 10 Inlet Pipe Connector
3 Upper Basket 7 Cup Shelf 11 Drain Pipe
4 Inner Pipe 8 Spray Arms
4. Control Panel
1 On/Off Button 7 Child Lock Indicator 13 Start/Pause Button
2 Child Lock 8 Water Supply Indicator 14 Function Button
3 Delay Button 9 Express Wash Indicator 15 Program Button
4 Alt Function Button 10 Rinse Aid Indicator 16 Program Display
5 Alt Function Indicator 11 Extra Drying Indicator 17 Time Display
6 Alt Function Indicator 12 Strong Wash Indicator
Your
Appliance
1
2
3
4
8 9 11
13
14
15
17
6
710 12165

08
LP8835
5. Quick Start
Follow the procedure below to operate your dishwasher.
Operating
Instructions

09
Instruction Manual
6. Wash Cycle Table
Program Running
Time
Description of Cycle Detergent
pre/main
Energy
(Kw/h)
Water
(L)
Rinse Aid
required?
Auto This wash cycle provides an auto-sensing wash, lightly, normally or heavily soiled crockery, with or with out dried on
food.
150 mins 1. Pre-wash (45° C)
2. Auto-wash (45-55° C)
3. Rinse
4. Rinse (65° C)
5. Drying
5/27.5g or
‘All in One’
0.9~1.3 11-15 Y
Intensive This wash cycle is ideal for the heaviest soiled loads, such as pots/pans, casserole dishes and dishes that have been
sitting with dried food.
170 mins 1. Pre-wash (50° C)
2. Wash (60° C)
3. Rinse
4. Rinse
5. Rinse (65° C)
6. Drying
5/27.5g or
‘All in One’
1.5 17.5 Y
Heavy This wash cycle is ideal for heavily soiled loads such as plates, glasses and lightly soiled pots/pans.
160 mins 1. Pre-wash (45° C)
2. Wash (55° C)
3. Rinse
4. Rinse (65° C)
5. Drying
5/27.5g or
‘All in One’
1.3 13.5 Y
Normal* This wash cycle is ideal for normally soiled loads such as plates, glasses, etc. Ideal for your everyday cycle.
170 mins 1. Pre-wash
2. Wash (45° C)
3. Rinse (48° C)
4. Drying
5/27.5g or
‘All in One’
0.71 12.5 Y
Glass This wash cycle is ideal for lightly soiled loads, such as glasses, crystal and fine china.
125 mins 1. Pre-wash
2. Wash (42° C)
3. Rinse
4. Rinse (60° C)
5. Drying
5/27.5g or
‘All in One’
0.8 13 Y
90 min This wash cycle is ideal for lightly soiled crockery and glassware.
90 mins 1. Wash (65° C)
2. Rinse
3. Rinse (65° C)
4. Drying
25g or
‘All in One’
1.2 11.5 Y
Rapid This wash cycle provides a quick wash program for lightly soiled loads that do not require drying.
30 mins 1. Wash (40° C)
2. Rinse
3. Rinse (45° C)
25g 0.6 11.5 N
* AS/NZS 2007.1: This program is the test cycle. The information for comparability test in accordance with AS/NZS 2007.1, as follows:
— Capacity: 14 Place Settings
— Position Upper basket: upper wheels on rails
— Rinse Aid Setting: 6
— Open the the door slightly (50mm) to assist in drying of the dishes at the completion of each wash cycle

10
LP8835
7. Operating the Dishwasher
7.1 Turning on the Appliance
Starting a wash cycle:
— Draw out the lower and upper baskets, load the dishes and push the baskets back into
the dishwasher. It is recommended to load the lower basket first, followed by the upper
basket (refer to the loading instructions within this user manual).
— Add the detergent into the dispenser and close (refer to the Detergent and Rinse Aid
section of this user manual).
— Insert the plug into the power outlet. The power supply should be 220-240 VAC/50Hz
and the power outlet should be 10A, 250VAC. Ensure that the water supply is on and
allowing full pressure.
— Close the door and press the On/Off button to switch on the machine.
— Press the Program button to select your desired wash program. These will cycle in the
following direction: Normal > Glass > 90 mins > Rapid > Auto > Intensive > Heavy.
— Once you’ve selected your wash program, press the Start/Pause button to begin your
cycle.
— Should you wish to improve the drying performance, you can press the Extra Drying
button before starting the cycle.
Note: When you press the Start/Pause button during operation, the cycle will pause.
When in it’s paused state, the LED display will stop blinking and the dishwasher
will beep every minute until you press the Start/Pause button once again to
continue the cycle.
7.2 Changing the Wash Program
— A cycle that is underway can only be modified if it has been running for a short time.
Otherwise the detergent may have already been released and/or drained the wash
water. In this case, the detergent dispenser would need to be refilled.
— Press the Start/Pause button and the dishwasher will enter it’s standby state.
— Press and hold the Program button for 3 seconds and you can then change the
program to your desired option.
Note: The dishwasher LED time display indicate the state of the dishwasher. If the display
is flashing, the dishwasher is operating. If the display is not flashing, then the the
dishwasher is in standby mode (Paused).
Note: If the dishwasher door is opening during a wash cycle, the dishwasher will pause.
Once the door is closed, the dishwasher will resume its’ cycle after 10 seconds.
7.3 At the Completion of a Wash Cycle
When the wash cycle has completed, your dishwasher will make an audible tone for 8
seconds, before stopping.
— Turn off the dishwasher using the On/Off button.
— Close the water supply off at the isolation tap.
— Open the door slightly (50mm) being careful to avoid the hot steam. This will assist the
drying performance of your dishes.
— Leave the dishwasher for approximately 15 minutes, allowing the dishes and utensils to
cool down. Hot dishes are also more susceptible to breakage and best left to cool.
— Empty the dishwasher, starting with the lower basket first, then the upper basket,
followed by the cutlery rack last of all. This will avoid water dripping from the upper
baskets onto your lower racks.
Note: It is normal for the inside of the dishwasher to remain wet at the completion of a
cycle.
7.4 Child Lock
Your dishwasher features a child lock, preventing children from pressing keys or changing
the dishwashers operation.

11
Instruction Manual
To activate the child lock:
— When the appliance is in operation, press and hold the “Delay” and “Alt Function” buttons
simultaneously for 3 seconds. Once activated, the display will show the Child Lock icon.
— Whilst the Child Lock is activated, pressing of buttons won’t effect the dishwasher.
— To deactivate the Child Lock, simply press and hold the “Delay” and “Alt Function”
buttons simultaneously for 3 seconds. The Child Lock indicator icon will switch off the
display.
7.5 Rinse Aid Dispenser
The rinse aid is released during the final rinse to prevent water from forming droplets on
your dishes, which can leave spots and streaks. It also improves drying by allowing water
to roll off the dishes. Your dishwasher is designed to use liquid rinse aids. The rinse aid
dispenser is located inside the door next to the detergent dispenser. To fill the dispenser,
open the cap and pour the rinse aid into the dispenser until the level indicator turns
completely black. The volume of the rinse aid container is about 110ml.
Note: Only use branded Rinse Aid with your dishwasher. Never fill with other substances
cush as liquid detergent, as these will damage your dishwasher.
When to refill the Rinse Aid Dispenser
If there is no Rinse Aid warning indicator on the control panel, you can judge the amount
of rinse aid within the dispenser using the optical level indicator (C) located next to the
cap. You should never allow the dispenser to fall below 1/4 full.
Note: The size of the black dot indicates the Rinse Aid level.
How to refill the Rinse Aid Dispenser
— To open the dispenser, turn the cap to the open arrow (anti-clockwise) and lift out.
— Pour the Rinse Aid in to the dispenser, being careful not to overfill.
— Replace the cap by inserting it aligned with the “Open” arrow and turn in a clockwise
direction to lock in place.
— Wipe up any Rinse Aid spillage to avoid excess foaming during your next wash cycle.
Adjusting the Rinse Aid Dispenser
The rinse aid dispenser has six settings. Always start with the dispenser
set on “4”. If spots and poor drying are a problem, increase the amount of rinse
aid dispensed by removing the dispenser lid and rotating the dial to “5”. If the
dishes still are not drying properly or showing spots, adjust the dial to the next
higher lever until your dishes are spot-free. The recommended setting is “4”.
7.6 Detergent
Only use branded dishwasher detergents that are aviailable from your local supermarket.
The detergent dispenser must be re-filled before the start of each wash cycle. Your
dishwasher utilises the latest technology and uses less detergent and Rinse Aid than
conventional dishwashers.
Detergent Dispanser
The dispenser is divided into two compartments.
— A: Location of the main wash cycle detergent
— B: Location of the pre-wash cycle detergent

12
LP8835
Adding Detergent to the Dispenser
Always refer to the detergent manufacturer’s guidelines for dosage.
— Once you’ve filled your detergent compartment, close the lid and press until it locks into
place.
7.7 Loading the Baskets and Racks
Note: Always ensure your items are suitable for use within a dishwasher and are labelled
as “dishwasher safe”.
Warning! Very small items shouldn’t be washed in the dishwasher as they could easily
fall through the racks/baskets.
Loading Normal Dishware

13
Instruction Manual
It’s important to carefully read the following installation instructions before beginning the
installation of your dishwasher.
Important! The installation of the pipes and electrical outlets should be completed by
suitably licensed and qualified persons.
Positioning
— The installation position of the dishwasher should be near the existing inlet, drainage
wastepipe and power outlet.
— Choose a position near your sink to facilitate the installation of inlet and drain hoses
(refer to figure one).
— If the dishwasher is installed in the corner of your kitchen cabinetry, make sure an
allowance is made to ensure your dishwasher door can freely open without obstruction
from other cabinetry/door handles.
Cold Water Connection
— Connect the cold water supply hose to a threaded 3/4(inch) connector and make sure
that it is fastened tightly in place.
— If the water pipes are new or have not been used for an extended period of time, let the
water run to make sure that the water is clear. This precaution is needed to avoid the
risk of the water inlet to be blocked and damage the appliance.
Connection of the drain hose
— Insert the drain hose into a drain pipe with a minimum diameter of 40mm, or connect it
onto the trap of your sink where a dishwasher connection is present.
Important! The top of the hose must be less than
1000mm, as illustrated below.
Note: If you require a longer drain hose, make
sure you use a similar drain hose. It must
be no longer than 4 metres; otherwise the
performance of the dishwasher will be
effected.
Installation
Instructions
48mm
85mm
598mm
Min.602mm
600mm(Wit h l id)
570mm(Wit h out lid )
845mm(Wit h l id)
815mm(Without lid)
0~20mm
Adjustment
(30mm)
848-868mm(Wi t h l id)
818-838mm(Without lid)
Min.5 80mm(W ith o ut li d )
Min.600mm(With l i d)

14
LP8835
8. Maintenance and Cleaning Procedures
8.1 Filter System
The filter system prevents larger remnants of food or other objects from entering the
dishwasher pump. Residues may block the filter and in this case they should be removed.
The filter system consists of a coarse filter, a flat main filter and a micro-filter.
1. Main Filter: Food and soil particles trapped within this filter and pulverised by a
special jet on the lower spray arm and washed down the drain.
2. Coarse Filter: Larger items such as pieces of bones or glass are trapped in the coarse
filter. To remove the items caught in this filter, gently squeeze the top of
this filter and lift out.
3. Fine Filter: This filter holds soil and food residues in the sump area and prevents it
from being re-deposited on to dishes during the wash cycle.
Note: For best wash results, the filter system should be cleaned regularly.
Cleaning the Filter
Warning! Never operate the dishwasher without the filters in place. Improver
replacement of the filter may reduce the wash performance and/or damage
dishes and utensils.
1. Turn the filter in an anti-clockwise direction.
2. Lift the filter assembly upwards.
— Wash the filter components under running water.
— Be careful not to damage the filters in any way.
— To re-install the filter assembly, follow the above two steps in reverse.
Note: Inspect the filters for blockage after each dishwasher use.
8.2 Cleaning the Door
To clean the edge around the dishwasher door, you should only use a soft warm damp
cloth. Never use a spray cleaner of any kind, as these can penetrate sealed components.
Never use abrasives.
8.3 Cleaning the Spray Arms
It is necessary to clean the spray arms regularly for water chemicals, as these will clog the
spray arm jets and bearings.
— To remove the upper spray arm, hold the nut and rotate the arm clockwise to remove it.
— To remove the lower spray arm, pull the spray arm upward.
— Wash the spray arms in warm soapy water and use a soft bristle brush to clean the jets.
— Replace the spray arms after rinsing them thoroughly.
Cleaning
& Maintenance

15
Instruction Manual
8.4 Error Alarms
When a malfuction occurs, the dishwasher will display an error code to warn you. These
are outlined below.
Warning! If an overflow occurs, immediately turn off the main water supply before
calling our service department. If there is water in the base pan becuase of
an overflow or small leak, the water should be removed before re-starting the
dishwasher.
8.5 Technical Information
Height x Width x Depth 845mm x 598mm x 610mm (door closed)
Water pressure 0.04-1.00 MPa
Power Supply Refer to the rating label
Capacity 14 Place Settings
Net Weight 42kg

16
LP8835
9. Troubleshooting
Warning! Only authorised technicians can carry out repairs.
Before contacting our customer service team, please refer to the table below to see if your
fault can be fixed by yourself. Should a service technician visit be arranged and its found
there are no faults with the appliance, a call out charge will apply.
Problem Solutions
The dishwasher won’t start or
turn on
— Check that the mains plug is inserted and switched on
at the power point.
— Check that the relevant fuse hasn’t blown.
— Ensure that the dishwasher isn’t over-loaded and the
door is closed completely.
— Error code E1 indicates that the water pressure is low.
Ensure that the water supply is on and fully open.
Water isn’t being drained
from the dishwasher
— Check that the drain hose isn’t kinked .
— Check that the filter isn’t clogged. Follow the filter
cleaning process within this user manual.
— Check that your waste outlet isn’t clogged.
Residual soap suds in the
dishwasher after a wash cycle
— Ensure that you are only using dishwasher detergents
and the correct dosage.
— Open the dishwasher and allow suds to evapourate.
Then add 1 litre of cold water into the base of the dish-
washer, close the door, select any wash cycle and allow
the dishwasher to drain the water. Repeat if necessary.
Stained interior — Avoid using detergents with colourants, as they can
lead to staining.
White film on internal
dishwasher surface
— This can be caused where the water quality is poor
and contains hard water minerals. To clean the interi-
or, simply use a damp sponge with some dishwasher
detergent. Never use harsh abrasives.
There are rust stains on
cutlery
— The cutlery may not be corrosion resistant and
shouldn’t be used within the dishwasher.
Banging or knocking noise
within the dishwasher cabinet
during cycle
— A spray arm is knocking against an item within a
basket. Pause the dishwasher and re-arrange the items
to ensure the spray arms are free to rotate.
The dishes are not clean after
a wash cycle has completed
or residual detergent left on
dishes
— Ensure that you are loading the baskets and racks cor-
rectly, as per the recommendations.
— Try using a different wash program (i.e. a more
intensive option).
— Try using a different detergent or different dosage.
The dishess are not drying — Ensure that the diswasher is loaded correctly.
— Ensure that you have Rinse Aid loaded in the Rinse Aid
dispenser and try adjusting the Rinse Aid Dispenser to
a higher level.
— Remember to slightly open the dishwasher door at the
completion of its cycle.
Knocking noise within the
water pipes
— This has no influence on the dishwasher function and
relates to the household plumbing.
— Speak to a qualified plumber to discuss your options.
Note:
If the above steps don’t resolve your issue or you cannot resolve the fault by yourself:
— Press the “On/Off” button,
— Switch off the appliance at the power outlet and remove the plug,
— Call our customer service team.
Troubleshooting

17
Instruction Manual

18
LP8835
11. WARRANTY TERMS & CONDITIONS
—TEKA DISHWASHERS
This document sets out the terms and conditions of the product warranties for Residentia
Group Appliances. It is an important document. Please keep it with your proof of purchase
documents in a safe place for future reference should you require service for your
Appliance.
1. IN THIS WARRANTY
a) ‘acceptable quality’ as referred to in clause 10 of this warranty has the same
meaning referred to in the ACL;
b) ‘ACL’ means Trade Practices Amendment (Australian Consumer Law) Act (No.2)
2010;
c) ‘Appliance’ means any Residentia Group product purchased by you accompanied
by this document;
d) ‘ASR’ means Residentia Group authorised service representative;
e) ‘Residentia Group’ means Residentia Group Pty Ltd of 7/32 Wangaratta Street,
Richmond, Victoria 3121, ACN 600 546 656 in respect of Appliances purchased in
Australia;
f ) ‘major failure’ as referred to in clause 10 of this warranty has the same meaning
referred to in the ACL and includes a situation when an Appliance cannot be
repaired or it is uneconomic for Residentia Group, at its discretion, to repair an
Appliance during the Warranty Period;
g) ‘Warranty Period’ means:
i) where the Appliance is used for personal, domestic or household use (i.e. normal
single family use) as set out in the instruction manual, the Appliance is warranted
against manufacturing defects for 24 months, following the date of original
purchase of the Appliance;
h) ‘you’ means the purchaser of the Appliance not having purchased the Appliance
for re-sale, and ‘your’ has a corresponding meaning.
2. This warranty only applies to Appliances purchased and used in Australia and is in
addition to (and does not exclude, restrict, or modify in any way) any non excludable
statutory warranties in Australia.
3. During the Warranty Period Residentia Group or its ASR will, at no extra charge if your
Appliance is readily accessible for service, without special equipment and subject
to these terms and conditions, repair or replace any parts which it considers to be
defective. Residentia Group or its ASR may use remanufactured parts to repair your
Appliance. You agree that any replaced Appliances or parts become the property of
Residentia Group. This warranty does not apply to light globes, batteries, filters or
similar perishable parts.
4. Parts and Appliances not supplied by Residentia Group are not covered by this
warranty.
5. You will bear the cost of transportation, travel and delivery of the Appliance to and
from Residentia Group or its ASR. If you reside outside of the service area, you will
bear the cost of:
a) travel of an authorised representative;
b) transportation and delivery of the Appliance to and from Residentia Group or its
ASR, in all instances, unless the Appliance is transported by Residentia Group or
its ASR, the Appliance is transported at the owner’s cost and risk while in transit to
and from Residentia Group or its ASR.
6. Proof of purchase is required before you can make a claim under this warranty.
Warranty

19
Instruction Manual
7. You may not make a claim under this warranty unless the defect claimed is due
to faulty or defective parts or workmanship. Residentia Group is not liable in the
following situations (which are not exhaustive):
a) the Appliance is damaged by:
i) accident
ii) misuse or abuse, including failure to properly maintain or service
iii) normal wear and tear
iv) power surges, electrical storm damage or incorrect power supply
v) incomplete or improper installation
vi) incorrect, improper or inappropriate operation
vii) insect or vermin infestation
viii) failure to comply with any additional instructions supplied with the Appliance;
b) the Appliance is modified without authority from Residentia Group in writing;
c) the Appliance’s serial number or warranty seal has been removed or defaced;
d) the Appliance was serviced or repaired by anyone other than Residentia Group, an
authorised repairer or ASR.
8. This warranty, the contract to which it relates and the relationship between you
and Residentia Group are governed by the law applicable where the Appliance was
purchased.
9. To the extent permitted by law, Residentia Group excludes all warranties and liabilities
(other than as contained in this document) including liability for any loss or damage
whether direct or indirect arising from your purchase, use or non use of the Appliance.
10. For Appliances and services provided by Residentia Group in Australia, the
Appliances come with a guarantee by Residentia Group that cannot be excluded
under the Australian Consumer Law. You are entitled to a replacement or refund
for a major failure and for compensation for any other reasonably foreseeable loss
or damage. You are also entitled to have the Appliance repaired or replaced if the
Appliance fails to be of acceptable quality and the failure does not amount to a major
failure. The benefits to you given by this warranty are in addition to your other rights
and remedies under a law in relation to the Appliances or services to which the
warranty relates.
11. At all times during the Warranty Period, Residentia Group shall, at its discretion,
determine whether repair, replacement or refund will apply if an Appliance has a valid
warranty claim applicable to it.
12. To enquire about claiming under this warranty, please follow these steps:
a) carefully check the operating instructions, user manual and the terms of this
warranty;
b) have the model and serial number of the Appliance available;
c) have the proof of purchase (e.g. an invoice) available;
d) telephone the numbers shown below.
13. You accept that if you make a warranty claim, Residentia Group and its ASR may
exchange information in relation to you to enable Residentia Group to meet its
obligations under this warranty.
IMPORTANT! Before calling for service, please ensure that the steps in point 12 have
been followed.
Telephone contacts: Service Centre: 1300 11 HELP (4357)
Spare Parts: 1300 11 SPARE (7277)
The Australian Consumer Law requires the inclusion of the following statement with this warranty:
Our goods come with guarantees that cannot be excluded under the Australian Consumer Law. You are
entitled to a replacement or refund for a major failure and for compensation for any other reasonably
foreseeable loss or damage. You are also entitled to have the goods repaired or replaced if the goods fail to
be of acceptable quality and the failure does not amount to a major failure.

This manual suits for next models
1
Table of contents
Other Teka Dishwasher manuals

Teka
Teka LP8 840 VR03 User manual

Teka
Teka LP8 810 VR02 User manual

Teka
Teka LP2 400 User manual

Teka
Teka LP2 140 User manual

Teka
Teka LX710 User manual

Teka
Teka LP8 440 VR02 User manual

Teka
Teka Dishwasher User manual

Teka
Teka DW9 70 FI User manual

Teka
Teka LP8 400 VR01 User manual

Teka
Teka Dishwasher User manual

Teka
Teka LP 400 User manual

Teka
Teka DW8 41 FI User manual

Teka
Teka LX821 User manual

Teka
Teka DW7 56 FI User manual

Teka
Teka LP 800 S User manual

Teka
Teka LP9 440 WHITE VR02 User manual

Teka
Teka DW6 42 FI User manual

Teka
Teka LP2 140 User manual

Teka
Teka LP8 410 VR01 User manual

Teka
Teka LP8 818 BLANCO VR01 User manual