manuals.online logo
Brands
  1. Home
  2. •
  3. Brands
  4. •
  5. teko
  6. •
  7. Accessories
  8. •
  9. teko ASTRA-942 User manual

teko ASTRA-942 User manual

Other teko Accessories manuals

teko Astra-8731 User manual

teko

teko Astra-8731 User manual

teko Astra-6 User manual

teko

teko Astra-6 User manual

Popular Accessories manuals by other brands

Quincy lab 140AE-1 operating manual

Quincy lab

Quincy lab 140AE-1 operating manual

HomePro ZIR000 user manual

HomePro

HomePro ZIR000 user manual

DOL 20SCR Technical user guide

DOL

DOL 20SCR Technical user guide

RAB Smart Task installation manual

RAB

RAB Smart Task installation manual

Kemppi KMS 300 quick guide

Kemppi

Kemppi KMS 300 quick guide

Stearns 57,500 Series Installation and service instructions

Stearns

Stearns 57,500 Series Installation and service instructions

iGuzzini TWILIGHT COPENAGHEN manual

iGuzzini

iGuzzini TWILIGHT COPENAGHEN manual

Adelaide Annexe & Canvas Avan Deluxe installation guide

Adelaide Annexe & Canvas

Adelaide Annexe & Canvas Avan Deluxe installation guide

OHAUS 5000 instruction manual

OHAUS

OHAUS 5000 instruction manual

HOME8 WLS1300 quick start guide

HOME8

HOME8 WLS1300 quick start guide

MAXBOTIX MaxSonar quick start guide

MAXBOTIX

MAXBOTIX MaxSonar quick start guide

ioSmart iSmart56 Installation and user guide

ioSmart

ioSmart iSmart56 Installation and user guide

Focusrite Scarlett 18i8 user guide

Focusrite

Focusrite Scarlett 18i8 user guide

Velleman ED38105 user manual

Velleman

Velleman ED38105 user manual

JumpSport SkyBounce user manual

JumpSport

JumpSport SkyBounce user manual

Prima-Temp PRIYA Instructions for use

Prima-Temp

Prima-Temp PRIYA Instructions for use

Tefcold BC85I-BC85I W user manual

Tefcold

Tefcold BC85I-BC85I W user manual

Vaisala WMS302 user guide

Vaisala

Vaisala WMS302 user guide

manuals.online logo
manuals.online logoBrands
  • About & Mission
  • Contact us
  • Privacy Policy
  • Terms and Conditions

Copyright 2025 Manuals.Online. All Rights Reserved.

ASTRA-942
Laser Pointer
User Guide
Manufacturer:
ZAO NTC TEKO
420108, Russia, Kazan,
Gafuri str., 71
Tel.:+7(843) 528-03-69
[email protected]
www.teko.biz
Made in Russia
Rev. 942-v1_1_instr_en
1 FUNCTION
The Laser Pointer is designed for:
–remote launching of the registration proce-
dure on 433 MHz wireless system and on As-
tra-A addressable wired devices,
–remote testing of wireless devices of the fire
detectors of 433 MHz and Astra-A systems,
2 SPECIFICATION
Range, m, not more:
- for fire smoke and heat detectors.................10
- for other addressable devices....................... 5
Output power
radiation, mW, no more................................... 5
Supply voltage, V........................from 2,2 to 3,0
Current consumption in mode
transmission, mA, no more.............................10
Radiation wavelength, nm.........from 630 to 680
Overall dimensions, mm.................77 × 40 × 15
Operating conditions
Temperature range, °С.............from -10 to + 55
Relative Humidity air, % ..........up to 95 at + 40 °С
Without moisture condensation
3 DELIVERY SET
The Pointer delivery set includes battery
CR2430 (installed) - 2 pcs.
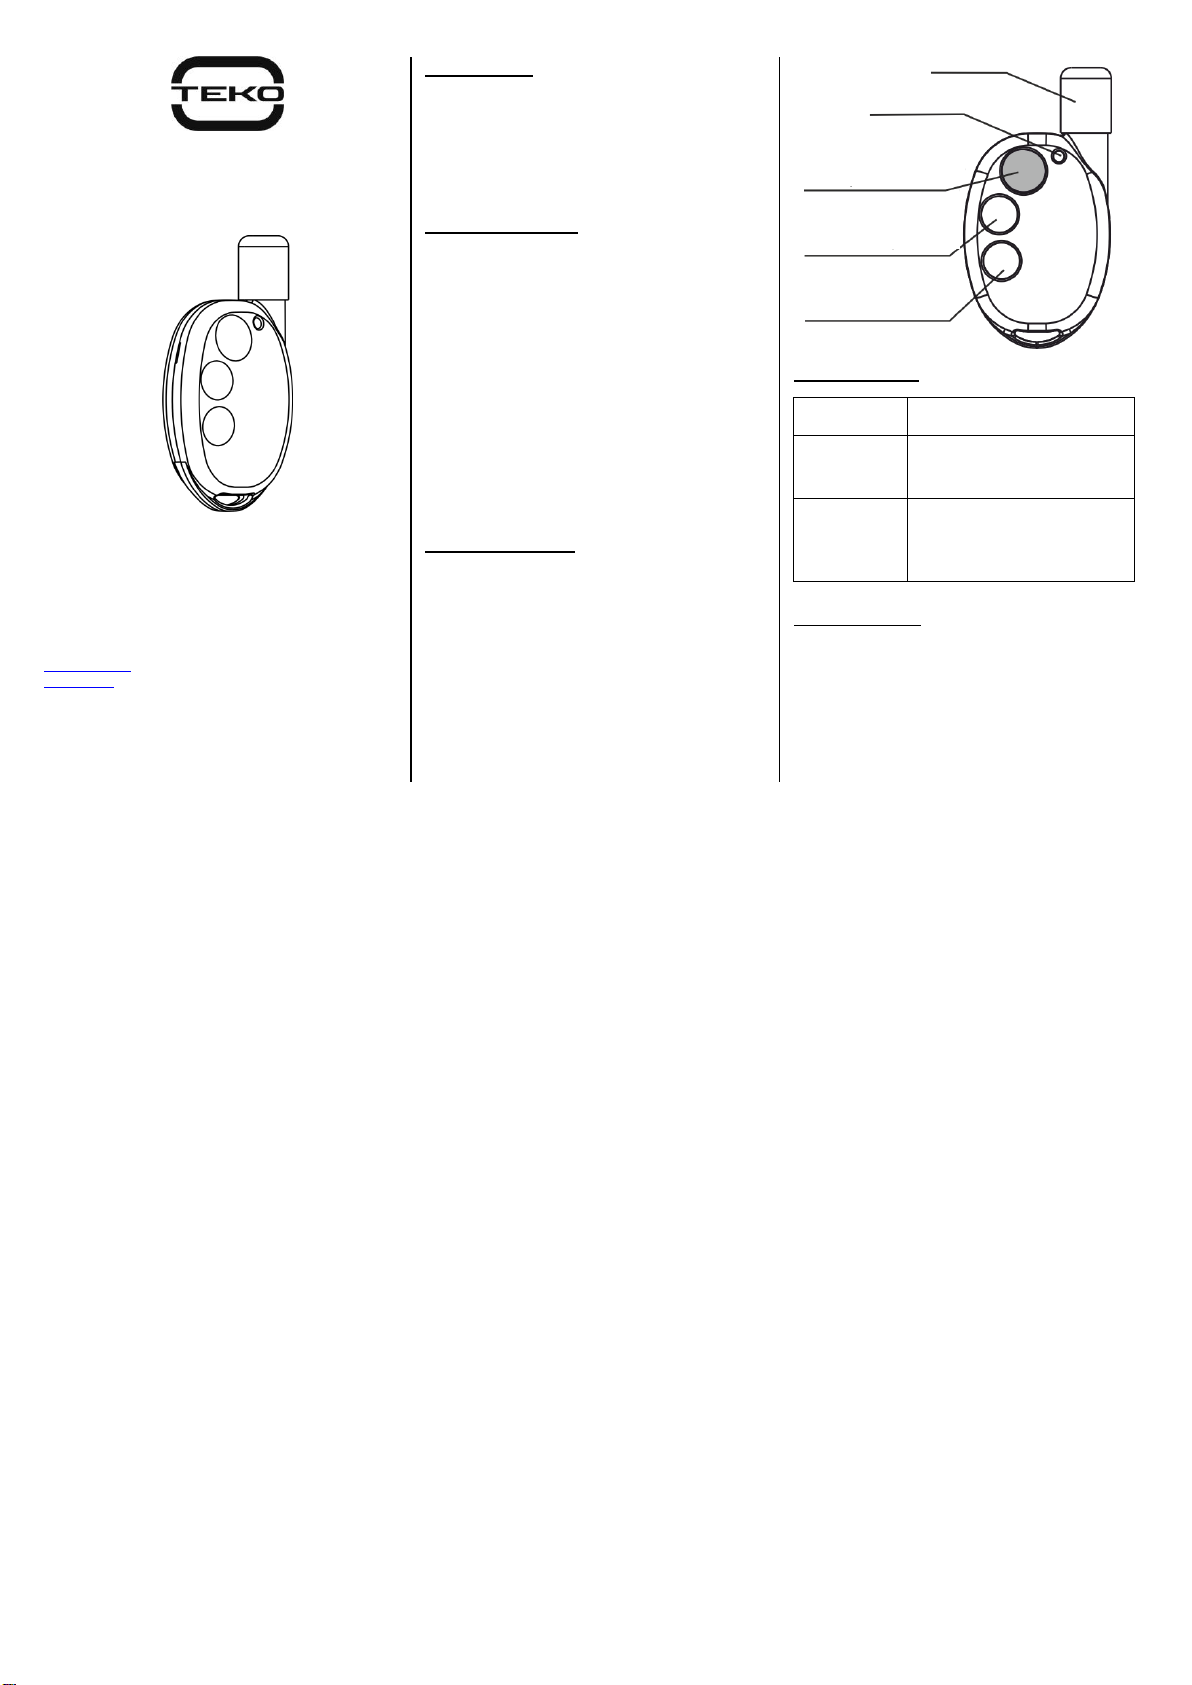
4INDICATION
Status
LED
Norm
1x short flash for 0.1 sec.
when any button is pressed
Battery
discharge
Flashes continuously when
any button is pressed and
the power supply voltage is
below 2.7 V
5OPERATION
ATTENTION! Laser radiation!
Avoid direct eye contact!
5.1 Focusing the laser beam
1) Press and hold any button on the laser
pointer until the laser beam appears.
Cap
LED
Test button
Optimize button
Register button
2) Aim the laser beam at
a hard surface. By moving
the pointer cap up and
down, achieve the mini-
mum diameter of the radi-
ation spot on the selected
surface at the testing dis-
tance.
5.2 Operation
Press the corresponding button and hold until
the laser beam appears, direct the laser beam
to the indicator of the addressable device. Irra-
diate the indicator of the addressable device for
1 sec.
1) Irridiate the button.
Within no more than 5 sec, the addressable
device must give an indication corresponding to
its current state.
6BATTERY REPLACEMENT
a) Remove the cap.
b) Unscrew the screw.
c) Remove the base by inserting the blade of a
screwdriver alternately into the slots on the
Pointer case.
d) Replace batteries, observing polarity.
e) Assemble the laser pointer.
7WARRANTY
The operation warranty period is 2 years from
the date of operation start-up, but no longer
than 2 years 6 months from the date of manu-
facturing subject to the requirements of User
guide