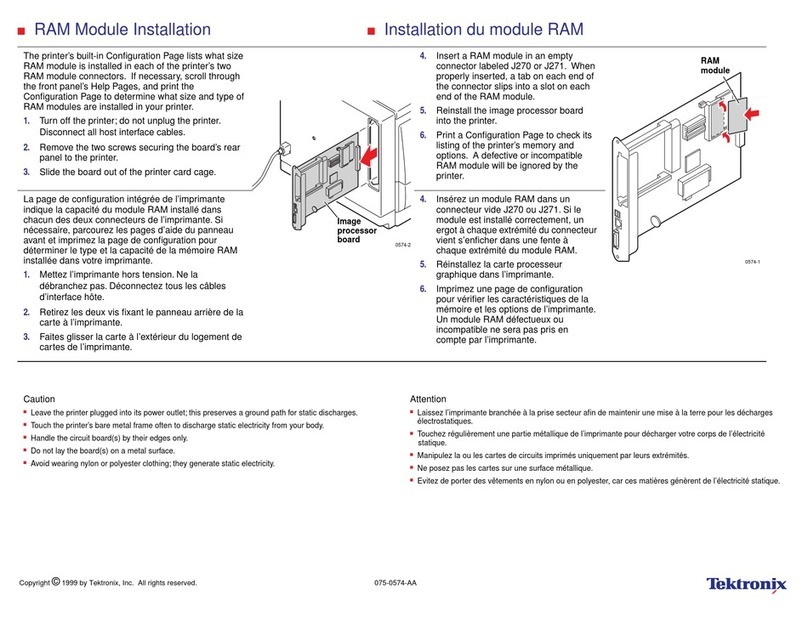
manuals.online logo
Brands
  1. Home
  2. •
  3. Brands
  4. •
  5. Tektronix
  6. •
  7. Printer
  8. •
  9. Tektronix TDS3PRT User manual

Tektronix TDS3PRT User manual

Tektrontjx
TDS3PRT THERMAL PRINTER
(for
TDS3000 &
TDS3000B
Series only)
Instruction Manual
070-A831-01
www.tektronix.com
Safety Summary
The TDSJPRT thermal printer is designed for
exclusive use with TDS3000 and TDS3000B
Series oscilloscopes. When you use this printer,
consult the oscilloscope user manual as well as
this manual.
Review the following safety precautions to avoid
personal injury and prevent damage to this
product or any products connected to it.
Symbols and Terms
The following symbol may appear on the
product.
A
Indicates Caution, Warning or Danger.
Refer to the manual.
The following term may appear in this manual.
Caution statements identify
or practices that could result
m
damage to this product or other
property.
TDS3PRT power
For TDS3000 Series oscilloscopes, power is
supplied to the TDS3PRT printer even if the
front-panel stand-by switch is in the Off position.
To power off the printer, disconnect the power
cord from the oscilloscope, or disconnect the
mini-plug cable from the
15VDC
Out terminal on
the back panel.
For TDS3000B Series oscilloscopes. the
front-panel stand-by switch also powers off the
TDS3PRT.
Do not remove the cover
Do not remove the cover from this printer. There
are no user-servicable components inside the
printer.
Do not operate in an explosive or corrosive
atmosphere
Do not use this printer in an explosive gas
environment. To prevent equipment failure
caused by erosion or corrosion of metal
components, do not use this printer in a
corrosive gas environment.
Operating environment
Do not operate this printer in extremely high or
low temperatures or humidity, in direct sunshine,
in a strong electromagnetic field, or in a dusty
environment.
Operating in an automobile
Do not leave this printer in an automobile.
Doing so may result in printer failure due to high
temperatures.
Caution:
The TDS3PRT is a
Adedicated printer for the TDS3000 and
TDS3000B Series oscilloscopes. Do
not connect the TDSJPRT printer to any
equipment or device other than a TDS3000 or
TDS3000B Series oscilloscope.
Caution: To avoid personal injury
A
and/or unexpected equipment failure,
disconnect the power cord from the
rear panel of the oscilloscope before installing or
removing the printer from the oscilloscope.
Thermal Paper
The
TDS3PRT
uses thermal paper, which
creates images through a thermo-chemical
reaction process.
Because the paper is
affected by temperature, humidity, and chemical
agents, read the following instructions carefully
before handling and storing the paper.
Handling Thermal Paper
.Use only
TDS3PRT-specific
thermal paper
(Tektronix part number 016-A323-00).
.Touch the paper as little as possible with
your hands. Fingerprints and skin oils can
cause paper discoloration.
.Do not scratch the paper with a hard object.
.Exposing the paper to chemical agents,
organic solvents, or oil can cause paper
discoloration or darken already printed
paper.
.Liquid or paste glues cause the paper to
discolor where the glue contacts the paper.
Storing Thermal Paper
.Store thermal paper in a dry, cool, and dark
place. The paper can gradually darken at
temperatures above 70 degrees C.
.Use thermal printer paper as soon as
possible after removing the printer paper
from the package.
.Avoid placing thermal paper in long-term
contact with vinyl chloride films, pencil
erasers, or adhesive tapes.
.Do not place thermal paper on top of or
between just-copied diazo-process or
wet-process copy paper.
Firmware Update (TDS3000
Series only)
(If
your oscilloscope is a
TDS3000B
Series, ignore this section)
If your current oscilloscope firmware version is
earlier than 2.24, you need to update your
firmware in order to use the TDS3PRT thermal
printer. To update the oscilloscope firmware, use
the floppy disks provided with the software
package. You do not need to update your
firmware if your current firmware version is 2.24
or greater.
Note:
The following procedure applies to
TDS3000 Series oscilloscopes with firmware
ver.l.10 or greater. If your TDS3000 Series
firmware
is ver. 1
.OO,
contact your local Tektronix
dealer or sales representative, or visit the
Tektronix web site for specific ver. 1
.OO
update
procedures. You can see your oscilloscope’s
firmware version number on the power-up
display screen, or by pushing UTILITY
>
System:
Config
>
Version on the oscilloscope.
To update firmware, do the following steps:
1.
2.
3.
4.
9.
Power off the oscilloscope.
Insert Disk 1 into the floppy disk drive of
the oscilloscope.
Power on the oscilloscope.
Press the OK Install menu button; the
oscilloscope starts the firmware update
process.
Wait until Disk 1 is done
loading.
When prompted, remove Disk 1 and insert
Disk 2.
Press the OK Install menu button to
continue the firmware update.
When Disk 2 is done loading,
the
oscilloscope reboots itself.
The display language returns to English
after the firmware update is done.
To
reset the oscilloscope to your local
language, push UTILITY
>
System:
Config
and select the appropriate
language from the side menu.
Push UTILITY
>
System: Hard Copy z
Format and select Tektronix
TDSBPRT
Thermal Printer from the side menu.
Figure 1 shows the Hard Copy Format
screen.
Figure
I.
Utility
>
System: Hard Copy screen with
new
TDS3PRT
format menu item
Product Overview
The
TDS3PRT
thermal printer features include:
.Ease of operate.
.Automatic or manual paper loading
mechanism.
.Small size and light weight to maintain
oscilloscope portability.
Figure 2 shows the TDS3PRT thermal printer.
Figure 2. Parts of the
TDS3PRT
thermal printer
Status Indicator LED -The status indicator
LED turns on during printer power-up, when
the thermal paper is used up, when the
paper release lever is open, or if there is an
error condition in the
TDS3PRT.
Release Button
-
Disconnects the printer
from the oscilloscope when pressed down.
Paper Holder Latch buttons
-
Slide these
latch buttons towards the center of the
printer to open the paper holder.
Paper Holder-A swing-down cover that
contains the thermal printer paper roll.
Mini-plug cable -Connect this cable to
ILVDC
Out terminal located on the rear
panel of the oscilloscope.
Paper Release Lever -The lever to hold
the print paper down (refer to Figure 6).
Paper Feed Knob -The knob for paper
feeding (refer to Figure 6).
Accessories
Standard Accessories
Thermal paper (1 roll)
Instruction Manual (this document)
Software package (1 set)
Optional Accessories/Parts
Thermal paper (IOm) 10 rolls
(Tektronix Part number 016-A323-00)
Paper holder
(Tektronix Part number 200-A516-00)
Before Installinn the Printer
Do not use the TDS3PRT printer to carry,
or help carry, the oscilloscope.
Because the TDSJPRT is installed in the
same opening as a communication module,
you cannot use the TDS3PRT printer and a
communication module (such as
TDS3GV)
simultaneously.
You cannot operate the TDS3PRT printer
from the rechargeable battery pack in a
TDS3000 Series oscilloscope. This printer
requires AC power to operate when
installed in a TDS3000 Series oscilloscope.
You can operate the
TDSBPRT
from the
rechargeable battery pack in TDS3000B
Series oscilloscopes.
You cannot use the TDSJPRT printer with a
TDS3000 or TDS3000B Series oscilloscope
that is installed in the optional rackmount.
Installing the
TDS3PRT
Printer
Do the following steps to install the TDSJPRT
printer in your oscilloscope:
1.
Disconnect the power cord from the
oscilloscope rear panel.
2.
(If present) Press down on the blank panel
latch tab to remove the blank panel
3.
Attach the front cover to the oscilloscope.
4.
Place the oscilloscope so that its front side
faces downward.
5.
Insert the printer into the oscilloscope as
shown in Figure 3.
Make sure that the
Centronics connectors snugly mate and
correctly align with each other while
observing the printer insertion from the
side (refer to Figure 4).
Figure 3. Direction of Printer Insertion
Figure 4. Position adjustment of connectors
6.
Insert the printer until release button
comes to its raised position.
7.
Place the oscilloscope to its upright
position, then remove the front cover.
Caution:
Do not hold the oscilloscope’s
A
carrying handle during printer installation
or removal. Your hand may be caught
by the carrying handle and result in personal
injury.
Hold the oscilloscope instead of the
carrying handle. After installing the printer into
the TDS3000 or TDS3000B Series oscilloscope,
adjust the oscilloscope carrying handle if
necessary to prevent the handle from contacting
or interfering with the TDSJPRT operation.
6.
Connect the mini-plug cable to the ISVDC
Out terminal on the right side of the rear
panel.
9.
Connect the power cord to the rear panel
of the oscilloscope.
(.
Figure 5. Installed printer
Removing the TDS3PRT Printer
To remove the
TDSBPRT,
do the following steps:
1.
After turning the power off, disconnect the
power cord from the rear panel of the
oscilloscope.
2.
Disconnect the mini-plug cable from the
IWDC Out terminal located on the rear of
the oscilloscope.
3.
Press the release button at the top of the
printer while pulling the printer out of the
oscilloscope. Use a gentle side-to-side
rocking motion while pulling on the printer.
Caution:
To reduce the potential of personal
injury and/or unexpected equipment
A
failure,
Install the blank panel on the
oscilloscope when the printer is not installed.
Loading the Printer Paper
You
can load the thermal printer paper using an
automatic method or a manual method.
Automatic Paper Loading
To load the thermal printer paper automatically,
do the following steps:
1.
Check that the oscilloscope is providing
power to the printer (AC or battery for the
TDS3000B Series, AC only for the
TDS3000 Series).
2.
Slide the pair of paper holder latch buttons
towards the center of the printer to open
the paper holder. The paper holder will
swing down.
3.
If you are removing paper from the printer
before installing new paper, push the paper
release lever until it clicks in the released
(open) position and remove the old paper
roll. Refer to Figure 6.
Figure 6. Paper release lever and paper feed knob
4.
Push the paper release lever to its locked
(closed) position.
Note:
The automatic loading mechanism
does not work if you do not return the paper
release lever to its locked position.
5.
Align the edge of the new roll paper strip
with the direction shown in Figure 7, and
insert it into the paper feed port. The paper
is automatically fed until the tip of roll
paper is visible on the paper cutter.
Figure 7. Inserting paper into the printer feed slot
6.
If the paper is not feeding straight. raise
the paper release lever, adjust the paper
position, and then close the release lever.
7.
Close the paper holder. This completes the
automatic paper loading process.
Note:
The print paper has a printing side
and a non-printing (back) side. If the paper
is loaded incorrectly, no image is printed.
Load the paper as shown in Figure 7 so that
it is pulled out of the downside of the paper
roll.
Manual Paper Loading
To load the thermal printer paper manually, do
the following steps. You can do the following
procedure with the printer installed in the
oscilloscooe
or with the orinter not installed.
1.
2.
3.
4.
5.
6.
(If installed in the &cilloscope) Remove
power from the printer (unplug the
mini-plug cable).
Slide the pair of paper holder latch buttons
towards the center of the printer to open
the paper holder. The paper holder will
swing down.
If you are removing paper from the printer
before installing new paper, push the paper
release lever until it clicks in the released
(open) position and remove the old paper
roll. Refer to Figure 6. Keep the release
lever in the released (opened) position.
Align the edge of the new roll paper strip
with the direction shown in Figure 7, and
insert it into the paper feed port.
Move the paper release lever to its
intermediate position.
Turn the paper feed knob so that the tip of
the paper comes out of the paper cutter
slot at the top of the printer (refer to Figure
6).
,__
__
_’
__,
.’
,
,I,
_’
I
Figure
8.
Turn the paper feed knob in arrow
direction
If the paper is not feeding straight, raise
the paper release lever, adjust the paper
position, and then close the release lever.
Close the paper holder. This completes
the manual paper loading process.
Connect the mini-plug power cord to the
15VDC
Out terminal on the rear panel of
the oscilloscope (or install the printer into
the oscilloscope).
Before Printing a Document
Before starting to print with the
TDS3PRT,
be
sure to check that:
1.
The printer is installed properly in the
oscilloscope.
2.
The mini-plug cable is connected to the
ISVDC Out terminal on the rear of the
oscilloscope.
3.
The print paper does not slant relative to
the paper feed direction. If the paper is
slanted, raise the paper release lever to its
released (open), align the paper, and then
close the paper release lever. Refer to
Figure 6.
4.
The paper is loaded in the correct
direction.
5.
Select
Tektronix
TDS3PRT Thermal
Printer in the oscilloscope UTILITY
>
System: Hard Copy
>
iormat
menu.
Printing a Document
To print a document, do the following steps:
1.
Set the printer format to
TDSBPRT
Thermal Printer (UTILITY
>
System:
Hard Copy
>
Format
menu).
2.
Set the printer port to
Centronics
(UTILITY
>
System: Hard Copy
>
Port
menu).
3.
Push the front panel Hardcopy button.
About the Power Supply
Power is supplied to the TDSJPRT through the
mini-plug cable from the ISVDC Out terminal
located on the rear panel of the oscilloscope.
For TDS3000B Series oscilloscopes, there is
printer power when operating from either AC
power or the optional rechargeable battery pack.
For TDS3000 Series oscilloscopes, there is
printer power only when operating from AC
power.
A
cauTion
:
Applying any voltage other
than that supplied by the ISVDC Out
termmal
may result in failure of the
printer.
Do not connect the mini-plug cable to
any terminal other than the
15VDC
Out terminal.
About the Status Indicator LED
The status indicator LED is lit in any of the
following three cases:
1.
When the paper release lever is in its
released (open) position, regardless of
presence or absence of paper.
2.
When the paper release lever is in the
locked position and there is no paper in the
printer.
3.
When any printer errors occur.
About Hardcopy options in the
oscilloscope SYSTEM menu
.The
TDS3PRT
always uses Landscape
print mode regardless of the setting in the
Hard Copy menu.
.The TDSJPRT always uses ink Saver
mode regardless of the setting in the Hard
Copy menu.
Troubleshooting
If the printer does not operate correctly or any
trouble occurred, check the following list. If the
trouble persisted after such checking, contact
your local Tektronix dealer or sales
representative.
Failed to power on from AC:
Possible Causes Solution
No
power to the
Make sure that the
oscilloscope. oscilloscope power cord
is connected to an AC
outlet.
(TDS3000B Only) If
operating from the
battery pack, make sure
the
b&y
is charged.
Printer is being used Use the printer within the
outside of the allowed specified temperature
temperature range. range (5
to 40
).
Printer failed to operate:
Possible
Causes
No power to the
oscilloscope.
Solution
Make sure that the
oscilloscope power cord
is connected to an AC
No power to the
printer.
The printer is not
ready.
outlet.
(TDS3000B Only) If
operating from the
battery pack, make sure
the battery is charged.
Make sure that the
mini-cable connector is
plugged into the
15VDC
Out connector on the
rear panel.
(TDS3000 Only) The
printer cannot be
powered from the
rechargeable battery in a
TDS3000 Series
oscilloscope.
Check that the printer is
installed correctly and
has a good connection
with the Centronics
printer port.
Error message “Hard copy device not
responding” appears:
Possible Cause
Improper connection.
Solution
Correctly install the
printer.
Paper feed failed:
Possible Causes
Paper is incorrectly
set.
Paper feed port
jammed.
Solution
Correctly set the paper.
Check the paper feed
route and remove any
foreign obstacles or
Status indicator LEd
paper.
jammed
Attention is required. If
is on.
the paper is out, install a
new paper roll.
Print failed, or print is interrupted:
Possible Causes
Improper connection.
Status indicator LED
is on.
Incorrect thermal
paper installed.
Thermal paper
installed incorrectly.
Hard copy settings
incorrect.
Printer is being used
outside of the
allowed temperature
range.
Print buffer full.
Solution
Correctly install the
printer.
Attention is required. If
the indicator is on, an
error may have
occurred. Verify that the
printer is installed
correctly.
Use only specified roll
paper.
Correctly install the
paper.
Verify the UTILITY
>
System: Hard copy
settings are correct:
Format: Tektronix
TDSIPRT
Thermal
Printer
Port: Centronics
Use the printer within the
specified
temperature
range.
After the print is
completed, send the
data again. A print can
fail if the data is sent
while the print buffer is
full (i.e., the print was not
completed).
Print is too dark or too pale:
Possible Causes
Printer is being used
outside of the
allowed temperature
range.
Incorrect thermal
printer paper
installed.
Solution
Use the printer within the
specified temperature
range.
Use only specified roll
paper.
Thermal paper is old, If the roll paper quality is
or stored at too high poor, replace the paper
a temperature. with new one.
Incorrect characters:
Possible Cause
Selected wrong hard
copy format in the
oscilloscope menu.
Solution
Select Tektronix
TDSBPRT
Thermal
Printer in the
oscilloscope UTILITY
>
System: Hard Copy
>
Format menu.
Correct the error conditions
The TDSJPRT printer detects errors under the
following conditions and turns the status
indicator LED on (the indicator is not turned on if
any error occurs in the drive circuit of the
indicator, however):
.An error was detected during the self-test
sequence.
.Tried to print when temperatures were
extremely high or low.
If the indicator is turned on, do the following
procedure:
1.
Disconnect the printer’s mini-plug cable
from the rear panel of the oscilloscope.
2.
Resolve the cause of error such as “Paper
feed failed”.
3.
Connect the printer’s mini-plug cable to the
rear panel of the oscilloscope.
4.
Perform the print.
If this error correction procedure fails, repeat the
procedure several times.
User Maintenance
Clean the exterior surfaces of the printer with a
dry lint-free cloth. If any dirt remains, use a cloth
dipped in a solution of water and neutral
detergent; squeeze the excess moisture out of
the cloth so that it is only slightly damp.
Then
wipe the exterior surface with a dry soft cloth.
If any foreign objects, such as fragments of
paper or dust are stuck onto the paper holder,
the paper cutter, or the print head, remove the
foreign objects with a thin cotton swab (refer to
Figure 9).
Figure 9. Cleaning the printer
Note:
Note:
Note:
Note:
Do not use volatile chemicals such as
thinner, benzine. etc.
Do not soak inside of the printer with
water, etc.
Do not insert your finger into the
paper cutter.
Cotton swabs used for cleaning shall
be thin enough so that it can be
inserted into the paper ejection port.
Specifications
Print system
Number of dots
Resolution
Thermal line dot
system
832 dots
I
line
8 dots
I
mm
Paper feed pitch
0.125mm
/line
Printing width 104mm
Printing speed
Inversely proportional
to the number of
printed black dots.
Refer to the note
below.
Printing length 140mm
I
screen
approx.
Printing depth
Depends upon the
oscilloscope’s intensity.
Compatible print
112mm
(width)
paper
Life
>
30km,
or 5 x
IO’
pulses
Note on printing speed:
Common settings:
Input: Connect PROBE COMP signal to
CHl
8 CH2.
Vertical axis scale: 2 V
Vertical axis position:
CHl
= 0 div., CH2 = -3 div.
Coupling: DC
Acq. mode: Sample
Menu: Off
Printing speed:
21 set approx. (Horizontal
axes
scale: 40
S)
40 set approx. (Horizontal axis
scale:
40mS)
Paper width
Paper thickness
Outer diameter of
paper roll
Paper roll length
Thermal sensitive
surface
Source voltage
Power
connector’s
polarity
Dimensions
Weight
Temperature
(operating)
Temperature
(non-operating)
112
+/-I
mm
65 +I- 5 m
30mm
10m
Outer surface
15V DC,
1A
Center conductor
-
positive side
148mm (W) x 68mm
(H) x 148mm (D)
4509
approx. (without
roll paper)
5509
approx. (with roll
paper)
5 to
+40
-20 to
+60
Humidity
(operating)
Humidity
(non-operating)
Altitude
(operating/
20% to
80%,
noncondensing
5% to 90%.
noncondensing
3,000m/15,000m
non-operating)
Vibration
(operating)
Vibration
(non-operating)
EMC
Compliance:
European Union
EN 61326
3.04mls’, 5Hz to
500Hz,
10 minutes on
each of three major
orthogonal axes
24.1
m/s’,
5Hz to
500Hz,
10 minutes on
each of three major
orthogonal axes
Meets the intent of
Directive 89/336/EEC
for Electromagnetic
Compatibility when
installed in a Tektronix
product. Compliance
was demonstrated to
the following
specifications as listed
in the
Official
Journal of
the European
Communities:
EMC requirements for
Class A electrical
equipment for
measurement, control
and laboratory use
I EC 61000-4-Z
IEC 61000-4-3
IEC 61000-4-4
IEC 61000-4-5
IEC 61000-4-6
IEC 61000-4-11
EN 61000-3-Z
EMC
Compliance:
Australia /New
Zealand
EMC
Compliance:
U.S.A.
Electrostatic discharge
immunity
(Crit.B)
RF electromagnetic
field immunity
(CriLA)
Electrical fast transient
/burst immunity (Crit.B)
Power line surge
immunity (Crit.B)
Conducted RF
immunity
(0tt.A)
Voltage dips and
interruptions immunity
(Crit.C)
AC power line
harmonic emissions
Meets the intent of
Australian EMC
Framework as
demonstrated to the
followina
soecification:
AS/N%-2684.1/2
Emissions comply with
FCC Code of Federal
Regulations 47, Part
15, Subpart
B.
Class A
limits.
Warranty Summary
Tektronix warrants that the products that it
manufactures and sells will be free from defects in
materials and workmanship for a
period
of six (6)
months from the date of shipment from an
authorized Tektronix distributor. If a product proves
defective within the respective period, Tektronix will
provide repair or replacement as described in the
complete warranty statement. To arrange for
service or obtain a copy of the complete warranty
statement, please contact your nearest Tektronix
sales and service office.
EXCEPT AS PROVIDED IN THIS SUMMARY OR
THE APPLICABLE WARRANTY STATEMENT,
TEKTRONIX MAKES NO WARRANTY OF ANY
KIND, EXPRESS OR IMPLIED, INCLUDING
WITHOUT LIMITATION THE IMPLIED
WARRANTIES OF MERCHANTABILITY AND
FITNESS FOR A PARTICULAR PURPOSE. IN NO
EVENT SHALL TEKTRONIX BE LIABLE FOR
INDIRECT, SPECIAL OR CONSEQUENTIAL
DAMAGES.
Contacting Tektronix
Phone
Address
Web
Sue
vvwwtektronixcom
Sates
support
I-800-833-9200, select option 1’
Service
support
l-800-833-9200, select option 2”
Technical
support
Email:
techsupport@
tektronix.com
I-800-833-9200'
Tektronix, Inc.
Department or name (if known)
14200 SW Karl Braun Drive
Beaver-ton, OR 97077
USA
l-800-833-9200. select option
3*
l-503-627-2400
6:00 a.m.
-
5:00 p.m. Pacific time
*
This number is toll free in North America.
After office hours, please leave a voice mail
message.
Outside North America,
contact a
Tektronix sales office or distributor; see the
Tektronix web site for a list of
offices.

Other Tektronix Printer manuals

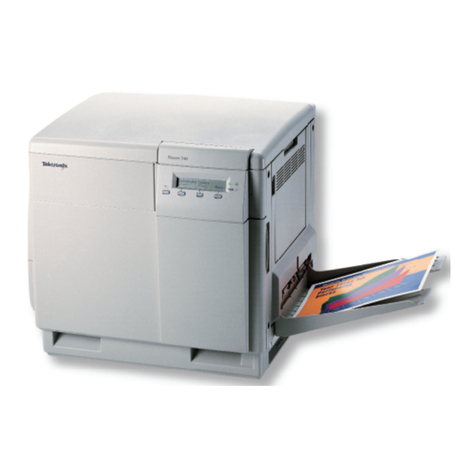
Tektronix PHASER 380 User manual

Tektronix

Tektronix PHASER 380 User manual

Tektronix Phaser 600 User manual

Tektronix

Tektronix Phaser 600 User manual

Tektronix Phaser 840 User manual

Tektronix

Tektronix Phaser 840 User manual

Tektronix Phaser 440 User manual

Tektronix

Tektronix Phaser 440 User manual

Tektronix Phaser 840 User manual

Tektronix

Tektronix Phaser 840 User manual

Tektronix Phaser 780 Color User manual

Tektronix

Tektronix Phaser 780 Color User manual

Tektronix Phaser 840 User manual

Tektronix

Tektronix Phaser 840 User manual

Tektronix Phaser 780 Color User manual

Tektronix

Tektronix Phaser 780 Color User manual

Tektronix Phaser 560 User manual

Tektronix

Tektronix Phaser 560 User manual

Tektronix Phaser 550 User manual

Tektronix

Tektronix Phaser 550 User manual

Tektronix Phaser 360 User manual

Tektronix

Tektronix Phaser 360 User manual

Tektronix Phaser 740 User manual

Tektronix

Tektronix Phaser 740 User manual

Tektronix Phaser 540 User manual

Tektronix

Tektronix Phaser 540 User manual

Tektronix 4643 User manual

Tektronix

Tektronix 4643 User manual

Tektronix Phaser 220e User manual

Tektronix

Tektronix Phaser 220e User manual

Tektronix Phaser 850 User manual

Tektronix

Tektronix Phaser 850 User manual

Tektronix Phaser 740 Parts list manual

Tektronix

Tektronix Phaser 740 Parts list manual

Tektronix Phaser 200E Manual

Tektronix

Tektronix Phaser 200E Manual

Tektronix Phaser 440 User manual

Tektronix

Tektronix Phaser 440 User manual

Tektronix Phaser 540 User manual

Tektronix

Tektronix Phaser 540 User manual

Tektronix Phaser 140 User manual

Tektronix

Tektronix Phaser 140 User manual

Tektronix PHASER 750 User manual

Tektronix

Tektronix PHASER 750 User manual

Tektronix Z780N - Phaser 780 Color Laser Printer User manual

Tektronix

Tektronix Z780N - Phaser 780 Color Laser Printer User manual

Tektronix Phaser 750DX Manual

Tektronix

Tektronix Phaser 750DX Manual

Popular Printer manuals by other brands

Wincor Nixdorf TH320 quick reference

Wincor Nixdorf

Wincor Nixdorf TH320 quick reference

Epson EPL-6200 Network guide

Epson

Epson EPL-6200 Network guide

Brady BMP 41 user manual

Brady

Brady BMP 41 user manual

Kyocera FS C5030N - Color LED Printer Product guide

Kyocera

Kyocera FS C5030N - Color LED Printer Product guide

Kyocera ECOSYS P4040dn Operation guide

Kyocera

Kyocera ECOSYS P4040dn Operation guide

KGK KGKJET CCS-R instruction manual

KGK

KGK KGKJET CCS-R instruction manual

Sharp JX-8200 Service manual

Sharp

Sharp JX-8200 Service manual

AGFA DRYSTAR AXYS user manual

AGFA

AGFA DRYSTAR AXYS user manual

Samsung ML-2545 Series Specifications

Samsung

Samsung ML-2545 Series Specifications

Rongta Technology RP325 user manual

Rongta Technology

Rongta Technology RP325 user manual

Brother P-touch 1750 user guide

Brother

Brother P-touch 1750 user guide

Seaory R600M operation instruction

Seaory

Seaory R600M operation instruction

Epson Small-in-One XP-960 quick guide

Epson

Epson Small-in-One XP-960 quick guide

Citizen CW-01 user manual

Citizen

Citizen CW-01 user manual

Citizen iDP-562 Series user manual

Citizen

Citizen iDP-562 Series user manual

Epson Stylus Photo 700 user guide

Epson

Epson Stylus Photo 700 user guide

GCC Technologies JF-240UV user manual

GCC Technologies

GCC Technologies JF-240UV user manual

Xerox 3117 - Phaser B/W Laser Printer Service manual

Xerox

Xerox 3117 - Phaser B/W Laser Printer Service manual

manuals.online logo
manuals.online logoBrands
  • About & Mission
  • Contact us
  • Privacy Policy
  • Terms and Conditions

Copyright 2025 Manuals.Online. All Rights Reserved.