manuals.online logo
Brands
  1. Home
  2. •
  3. Brands
  4. •
  5. Teletype
  6. •
  7. GPS
  8. •
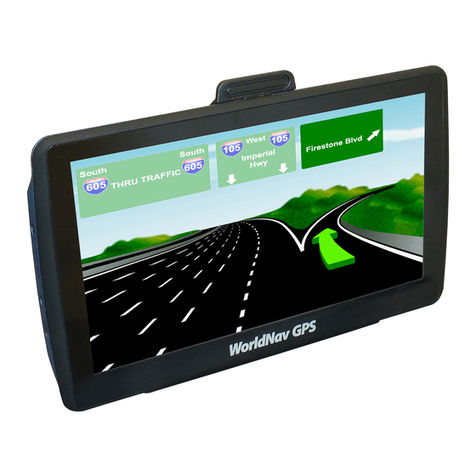
  9. Teletype WorldNav 7100 User manual

Teletype WorldNav 7100 User manual

1
Table of Contents
1 Product introduction .............................................................................. 2
2 Specification ........................................................................................ 2
3 Device illustration ................................................................................. 4
4 What’s in the box ..................................................................................
Operation ............................................................................................
.1 Power on / off operation ...................................................................
.2 How to play music ........................................................................... 6
.3 How to play moives ......................................................................... 8
.4 E-book function .............................................................................. 10
. Photo browsing ............................................................................. 11
.6 GPS status .................................................................................... 13
.7 Language choice ............................................................................ 13
.8 Backlight setting ........................................................................... 14
.9 Calibration adjustment .................................................................... 1
.10 Volume adjustment ....................................................................... 1
.11 Time set ...................................................................................... 16
.12 Run navigation software ................................................................ 17
.13 Bluetooth (option) ....................................................................... 17
6. FM transmitter (option) ....................................................................... 22
7. Rearview camera Viewing function (option) ............................................ 23
7.1 Setting Illustration .......................................................................... 24
7.2 Other Settings ............................................................................... 2
8. Important ........................................................................................ 2
9. Troubleshooting .................................................................................. 26
Features and specifications subject to change without notice.
2
1. Product introduction
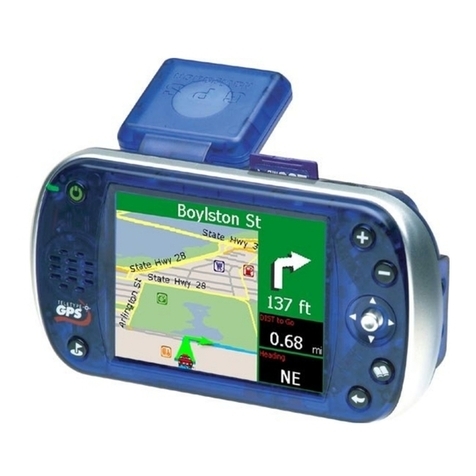
7 inch TFT touch screen, resolution: 480*234
Stereo earphone, built-in high quality 1. W speaker, and adjustable volume
Built-in highly sensitive SiRF STAR III GPS module
With both built-in GPS antenna, with option to connect external antenna.
WorldNav navigation software and maps stored on SD card accessible directly from
the Programs menu on the device. Supports low capacity SD cards. (High Capacity
“HDHC” are not supported.
Supports MP4/MP3 functions
FM Transmitter (Optional)
Bluetooth for hands free cellular phone connection (Optional)
Built-in lithium back up battery, supports 12V A/C and D/C chargers
AV function supports both NTSC and CVBS output
Video formats supported: asf, avi, mp4, wmv
Audio formats supported: mp3, wav, mid
Photo format supported: BMP, JPG, PNG, GIF;
Text format supported: TXT
LED power indicator
2. Specifications
Working Condition Specifications
Size 19 mm(L)*121mm(W)*24. mm(H)
Working
temperature
-10℃ to +70℃
Storing
temperature
-40℃ to +80℃
Working humidity 4 % to 80%RH
Storing humidity 30% to 90%RH
Air pressure 860MBar ~ 1060Mbar
System Specifications
CPU frequency 400MHZ
Chipset SAMSUNG S3C2440A-400
SDRAM 64MB
Memory size 64MB
Navigation storage SD card
Operating system WINCE 4.2 NET
Firmware editor ARMV4
3
Basic Specifications
Video output type CVBS, NTSC
Video output voltage
1.0Vpp/7 ohm
Screen size 7 inch (diagonal)
Screen resolution 480*234
AV Input Automatic Camera Detection
(camera sold separately)
Audio output Compound audio track, CD player effect
Sound power Stereo track: 0.2 W/CHANEL, single track ohm/1W
Average power 1. W
“Sleep” power <24mW
Dc input voltage 9-30V
Battery 7.4 V /6 0mAh
Battery time 1 -30 minutes (for backup purposes only)
Bluetooth* Hands Free Port for Cell Phone Use
GPS hardware Specifications
Receiving module SiRF Star III
Frequency 1. 7 GHZ
C/A CODE 1.023 MHZ chip rate
Signal channels 20 channels
Sensitivity -1 9dBm
Position accuracy 10m, 2D RMS
m, 2D RMS, WAAS enable
Speed rate 0.1m/s
Data upgrading rate
1HZ
Signal missing time 0.1s in average
Warm boot time 1s in average
Cool boot time 38s in average
Cold boot time 42s in average
Maximum position
altitude
18,000m
Maximum speed
rate
1 m/s
Acceleration < 4g
Built-in antenna
type
Built-in power porcelain antenna
Magnified effect of
the built-in antenna
27dB
Voltage of the
built-in antenna
3.3V± %
Current of the
built-in antenna
1 mA
4
Exterior antenna
port
MMCX
Exterior antenna
voltage
3.3V± %
Magnified effect of
the outside antenna
27dB
Current of the
outside antenna
1 mA
3. Device illustration
A SD card Slot K AV input port
B GPS external
antenna port L Earphone port
C “POWER” M DC port
D “MENU” N Battery case
E AV switch button O Charging indication
F “SET” P Speaker
G VOL + Q Microphone
H VOL - R Reset
I Screen S Stylus
J USB port
4. What’s in the Box
7” GPS System
5
Stereo earphone (optional)
Car lighter adaptor DC(¢4.0mm) or 100~~~220V to DC12V adaptor
3.3V MMCX outside antenna (optional)
AV cable (optional)
GPS mounting bracket
Manuals – Software guide, and Hardware guide (English)
5. Operation
5.1 Po er on / off operation:
::
:
Press and hold “POWER”(C)for 3 seconds or more. The LCD will display
this picture:
When the unit is On press “POWER”(C)and the machine will enter the
power saving condition (Sleep mode).
Press “POWER”(C) again,the GPS will operate.
Press “POWER”(C)for 3 seconds while the unit is on, and the machine will
enter power off condition:
6
When you turn on the GPS the navigator will display the start up screen. When the
main menu loads you will see the following screen:
5.2 Ho to Play Music:
Under the main menu, click“ ” and you will enter the music playing
menu, as the following:
Click“ ”, to choose the audio file track as the following:
7
Choose the audio file you want. Double click it to confirm your choice
Click“ ”can choose all the files, as the following:
Click“ ”go back to the music playing menu:
8
Click “ ” to continue adding audio files.
Click“ ” to go back to the music playing menu.
Double click the file name to play the music.
Other functions are as follows:
Click“ ” to pause;
Click“ ” to choose the next item;
Click“ ” to choose the last item;
Click“ ” to put repeat on. Click again to play randomly;
Click “ ” to put the speaker on. Click again to turn it off;
Click“ ” to delete the chosen file;
Click “ ” to delete all files;
Click“ ” to exit the music playing menu.
Click to increase the volume and to decrease the volume.
5.3 Ho to Play Movies:
::
:
Under the main menu, click “ ” to enter the movie playing menu, as the
following:
Double click the “Storage card” to the following menu
9
Choose the file you want, and double click to confirm your choice.
You can also click “ ” to choose all the files, as the following:
Click“ ”, then, to continue adding video files. Click “ ” to go back to the
video playing menu.
10
Under the movie playing menu, click “ ” or double click the screen to widen the
screen menu.
Other functions are as the following:
Click “ ” to turn the speaker on, and click again to turn it off;
Click “ ” to choose the next item;
Click “ ” to choose the last item;
Click “ ” to delete the file you chose;
Click “ ” to delete all files;
Click “ ” to exit the movie playing menu.
Click to increase the volume and to decrease the volume.
5.4 E-book function:
Use the E-Book function to read text files. Under the main menu, click
“” to enter the text viewing menu, as the following:
1. Click to choose the .TXT file you want in the following sub-menu
11
2. Double click the file you want to enjoy on the screen
3. Click to skip pages and to confirm your choice
5.5 Photo bro sing:
Under the main, click to enter the photo browsing menu, as the
12
following:
1. Click to the following menu, and confirm the photo you want by double
clicking.
2. Under the photo viewing menu, other buttons are as follows:
Click or to view pictures full screen
Click to change the angle of the photo
Click to view the pre-photo
Click to view the next photo
Click to enlarge the photo
Click to deflate the photo
Click to exit to the main menu
13
5.6 GPS Status:
Warning - Disregard the GPS Status screen in the main menu of the device.
Instead, use the GPS status function built-in to the WorldNav software
program. If you attempt to use the GPS status of the main menu most
likely will result in an error message display.
Warning: Do not attempt to use this GPS Status screen,
use the Navigation GPS Status screen instead.
5.7 Language choice:
Under the main menu, click to reach the following sub-menu and
choose the language you want. Please note that this setting applies only
to the hardware portion of the device, it does not apply to the navigation
software. To change language setting in the navigation portion of the
device, please see the software user guide.
14
Click “ ” to enter the language selection menu. Then, click and hold the
scroll bar to view the language list. Click the language you want and exit
to confirm.
5.8 Backlight setting:
Under the system setting menu, click to reach the relative
sub-menu
1. Click or to adjust the brightness. You can also do it by clicking
and holding the scroll bar.
2. Click or to choose the automatic backlight time. You can also do
it by clicking and holding the scroll bar.
3. Click to confirm your choice and exit to the last menu.
15
4. It is recommended that you leave the backlight on the brightest setting
and to keep it on at all times. The only reason to reduce the brightness is
to conserve battery power.
5.9 Calibration adjustment: (Click the “Calibrate” button).
If you should notice that when you press a character on the keyboard
within the navigation software, and a different character appears,
most likely you need to re-calibrate the screen.
Under the system setting menu, click “ ” to enter touch screen
calibration mode. Press the cursor (the middle point) according to the
displayed instruction until it disappears. Keep pressing until the word
“OK” is displayed on the screen, press the “OK” word to keep the
setting. The need to use Calibration is relatively rare.
5.10 Volume adjustment:
Under the system setting menu, click “ ” to enter the volume adjusting
menu, as the following:
16
1. Click or to adjust the speaker the volume. You can also do it by
clicking and holding the scroll bar.
2. Click to turn the speaker off, and click again to turn it on.
3. Choose the Touch-Tone Options, and click to confirm your choice and
exit from the current menu.
5.11 Time set:
Warning - Disregard this screen as the time is taken automatically from the
Navigation software when it is connected to the GPS satellites. Refer to the
WorldNav Software User’s Guide for details.
17
5.12 Run navigation soft are:
While the unit is turned on, insert the SD card, and click and select
“Nav.Setup”:
1. Click to reach the following menu. Choose the “.exe” file, and double
click to confirm.
2. Click to go back to the main menu. Double click to enter the
navigation menu. For detailed instructions regarding the navigation
software, see the WorldNav Software User’s Guide.
5.13 Bluetooth (optional):
1. Enable “Bluetooth” on your cell phone (turn it on)
2. On the GPS device, activate Bluetooth settings.
18
Under the main menu, click to enter the following sub-menu:
Click to set PIN code
to keep the Bluetooth on when GPS is on.
to set Bluetooth to automatically answer incoming calls.
Click to enter the input sub-menu
19
After setting, click to exit.
Pair with Bluetooth phone
Under the Bluetooth menu, click to do the pairing
While other people with Bluetooth capability may be able to see your device,
you will be the only one able to access it due to password protection. The
default code is 1234. The device will remember the paired cell phone until
you change the setting. As long as the Bluetooth of the cell phone is on, the
Bluetooth on this device will automatically pair to the phone.
Phone setup
Your cell phone should pick up the Bluetooth signal and you can select the
device, it should come up on your cell phone as “GPS”, press “Connect”. Next,
select the icon that has a magnifying glass and an address book, double check
to see if your phone is paired with the device. The GPS device should display the
model of your phone, the word “connected” will appear at the bottom of the GPS
Bluetooth screen.
Bluetooth Management
Under the Bluetooth menu, click “ ”to check all the devices which
have been paired before.
20
Press to connect the chosen device, to cut off the chosen
connection, and delete all of the Bluetooth devices.
Under the Bluetooth connecting condition, click“ ”to enter the dialing
sub-menu.
backspace, pick up the phone, redial,
record the communication

This manual suits for next models

1

Other Teletype GPS manuals

Teletype 2151 Series User manual

Teletype

Teletype 2151 Series User manual

Teletype WorldNav 3000 XL User manual

Teletype

Teletype WorldNav 3000 XL User manual

Teletype WorldNav 5200 Installation manual

Teletype

Teletype WorldNav 5200 Installation manual

Teletype 1451 User manual

Teletype

Teletype 1451 User manual

Teletype 1351 User manual

Teletype

Teletype 1351 User manual

Teletype WorldNav 3300 User manual

Teletype

Teletype WorldNav 3300 User manual

Teletype WorldNav 7650 Installation instructions

Teletype

Teletype WorldNav 7650 Installation instructions

Teletype Bluetooth GPS Receiver User manual

Teletype

Teletype Bluetooth GPS Receiver User manual

Teletype WorldNav 7300 Installation manual

Teletype

Teletype WorldNav 7300 Installation manual

Teletype 1240 User manual

Teletype

Teletype 1240 User manual

Teletype WorldNav 3500 Installation manual

Teletype

Teletype WorldNav 3500 Installation manual

Teletype WorldNav 4300 User manual

Teletype

Teletype WorldNav 4300 User manual

Teletype WorldNav Safety guide

Teletype

Teletype WorldNav Safety guide

Teletype 2151 Series User manual

Teletype

Teletype 2151 Series User manual

Teletype GPS Software User manual

Teletype

Teletype GPS Software User manual

Teletype WorldNav 7400 User manual

Teletype

Teletype WorldNav 7400 User manual

Teletype WorldNav 3100 User manual

Teletype

Teletype WorldNav 3100 User manual

Teletype 1390 User manual

Teletype

Teletype 1390 User manual

Teletype 2951 Series User manual

Teletype

Teletype 2951 Series User manual

Teletype WorldNav 3100 User manual

Teletype

Teletype WorldNav 3100 User manual

Teletype SatelliteTracker 1405 Installation and operating instructions

Teletype

Teletype SatelliteTracker 1405 Installation and operating instructions

Teletype WorldNav 3300 User manual

Teletype

Teletype WorldNav 3300 User manual

Teletype PocketTracker 1442 Installation and operating instructions

Teletype

Teletype PocketTracker 1442 Installation and operating instructions

Teletype 2151 Series User manual

Teletype

Teletype 2151 Series User manual

Popular GPS manuals by other brands

Omniscout LT200 quick start guide

Omniscout

Omniscout LT200 quick start guide

NorthStar 961X Operation and reference manual

NorthStar

NorthStar 961X Operation and reference manual

Teltonika FMB122 Getting started

Teltonika

Teltonika FMB122 Getting started

Callaway Golf uPro quick start guide

Callaway Golf

Callaway Golf uPro quick start guide

Aptos Design Lab Gtrackr ADSG001-0 user guide

Aptos Design Lab

Aptos Design Lab Gtrackr ADSG001-0 user guide

Nextar HGPS35 Software guide

Nextar

Nextar HGPS35 Software guide

gtt systems GTTS-2000B installation manual

gtt systems

gtt systems GTTS-2000B installation manual

Prestigio GeoVisison 5066 quick start guide

Prestigio

Prestigio GeoVisison 5066 quick start guide

C-Nav C-NaviGator III user manual

C-Nav

C-Nav C-NaviGator III user manual

Ercogener GenLoc 41e user guide

Ercogener

Ercogener GenLoc 41e user guide

PNI L808 EVO user manual

PNI

PNI L808 EVO user manual

iTrac GTLT2 user manual

iTrac

iTrac GTLT2 user manual

CalAmp LMU-3050 Hardware and installation guide

CalAmp

CalAmp LMU-3050 Hardware and installation guide

Garmin STREETPILOT 2610 Features

Garmin

Garmin STREETPILOT 2610 Features

PC*Miler 440 quick start guide

PC*Miler

PC*Miler 440 quick start guide

Peiying PY-GPS9000 owner's manual

Peiying

Peiying PY-GPS9000 owner's manual

PowerTap Joule GPS user guide

PowerTap

PowerTap Joule GPS user guide

Garmin GPSMAP 76S owner's manual

Garmin

Garmin GPSMAP 76S owner's manual

manuals.online logo
manuals.online logoBrands
  • About & Mission
  • Contact us
  • Privacy Policy
  • Terms and Conditions

Copyright 2025 Manuals.Online. All Rights Reserved.