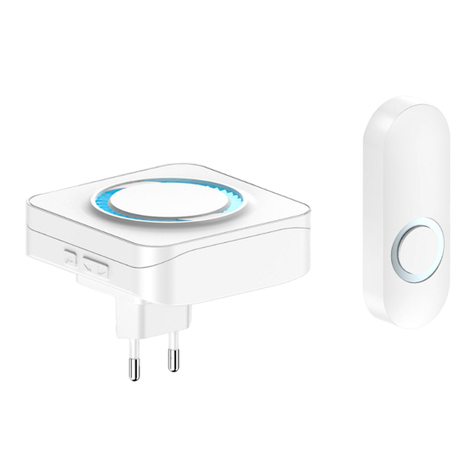
Telldus 14450 User manual

1. CONNECT A PUSH BUTTON
KOPPLA IHOP MED EN TRYCKKNAPP
KOBLE TIL EN FJERNKONTROL EINE FERNBEDIENUNG
ANSCHLIESSEN
LIITÄ KAUKOSÄÄDIN
1.1 1.2
1.3
1.5
1.4
1.6
Manual version 1.0
Size (WxH): 148x260 mm
The receiver comes pre-congured with the push button and the standard
ringtone. If you don’t wish to change this you can skip this guide.
Mottagaren är förkonfigurerad med tryckknappen och standard-ringsignalen.
Om du inte vill ändra detta kan du hoppa över den här guiden.
230V~ 50Hz
1 2 3 4
1-10
Press/tryck/trykk/paina/drücken 5 sec Within/inom/innen/uluessa/drinnen 5 sec
2. CONNECT DOOR BELL TO TELLDUS LIVE!
KOPPLA DÖRRKLOCKA TILL TELLDUS LIVE!
KOBLE MOTTAKERE TIL TELLDUS LIVE!
LIITTÄÄ VASTAANOTTIMEN TELLDUS LIVE!
EMPFÄNGER MIT TELLDUS LIVE! VERBINDEN
Requires a TellStick and a Telldus Live! account
Control
Devices
live.telldus.com
live.telldus.com
2.1 live.telldus.com
2.2
Add a new device
live.telldus.com live.telldus.com
2.3 2.4
Select your device type:
Add new device wizard
Secure
Group433,92 MHz receivers
Select your device brand:
Add new device wizard
live.telldus.com
2.5
Select your device model:
Add new device wizard
Door bell
live.telldus.com
2.6
* Any name may be used/Valfritt namn/Valgfritt namn/
Nimi on vapaa valinta/Jeder Name kann verwendet werden
Enter name:
Add new device wizard
Name: Door bell
Next
live.telldus.com
2.7 FOLLOW US ON SOCIAL MEDIA FOR
EVENTS, OFFERS AND INSPIRATION!
Press the push button several times until the progress bar
reaches 100%.
75% done

www.telldus.com
Before installation
• The push button supplied with this kit is already paired with the
receiver and set to the default ringtone. If not, please follow the
steps below to pair the push button with the receiver and set the
desired ringtone.
• It is not advisable to mount the push button onto metal surfaces
as the material can block signals between the push button and the
receiver. However, if this is the only option then we recommend that
you use the adhesive pad provided as opposed to using the provided
screws.
• Operating range will decrease if the battery in the push button is low.
• It is not advisable to mount the transmitter in the outdoor directly
without any shelter which could accelerate aging of plastic materials.
Pairing a transmitter with a receiver
There are 10 ringtones to choose from. Dierent ringtones can be set for
dierent push buttons/transmitters.
1. Press Forward button or Back button on the receiver to choose your
favorite ringtone, the receiver is playing the selected ringtone.
2. Press the Volume button on the receiver to toggle between volume
levels 1-4.
3. Press and hold the Volume button on the receiver for 5 seconds,
a sound is played and the LED indicator starts ashing to conrm
entering pairing mode.
4. Within 5 seconds, press the push button to send a signal to the
receiver. When the pairing is successful the receiver will play the
selected ringtone as conrmation.
Pairing two or more transmitters with a receiver
Pairing is done with one transmitter at a time. Repeat steps 1-4 above to add
another transmitter.
Reset receiver
1. Press Forward button for 5 seconds to reset the receiver to default.
A sound is played and the LED indicator starts ashing to conrm
successful reset. Settings are now back to default and no transmitter
is paired with the receiver.
Specications
Push button:
Battery: ...................................................................... CR2032 (3V) (included)
Working temperature:....................................................................-20°C~50°C
Protection rating:......................................................................................IP55
Operating range:................................................Up to 30 m (free line of sight)
Frequency: .................................................................................. 433.92 MHz
Receiver:
Selectable ringtones:...................................................................................10
Memory slots on receiver:...........................................................................30
Volume range:...................................................................25~110dB, 4 levels
Power supply:............................................................................ 230 V~, 50 Hz
Power consumption:.............................................................................<0.5 W
Frequency: ................................................................................... 433.92 MHz
Före installation
• Tryckknappen som medföljer detta paket är redan inlärd i mottagaren
och inställd på standard-ringsignalen. Om inte, följ stegen nedan
för att lära upp mottagaren med tryckknappen och ställa in önskad
ringsignal.
• Det är inte rekommenderat att montera tryckknappen på metallytor
eersom materialet kan blockera signaler mellan tryckknappen
och mottagaren. Om detta är det enda alternativet rekommenderar
vi att du använder medföljande dubbelhäande tejp istället för de
medföljande skruvarna vid montering.
• Räckvidden minskar om tryckknappen har lågt batteri.
• Det är inte rekommenderat att montera tryckknappen utomhus direkt
utan skydd. Detta kan påskynda åldrandet av plastmaterialet.
Lär upp mottagaren med en sändare
Det nns 10 ringsignaler att välja mellan. Olika ringsignaler kan ställas in för
olika tryckknappar/sändare.
1. Tryck på Fram-knappen eller Tillbaka-knappen på mottagaren för att
välja ringsignal, mottagaren spelar den aktuella ringsignalen.
2. Tryck på Volym-knappen på mottagaren för att växla mellan
volymnivåerna 1-4.
3. Tryck och håll in Volym-knappen på mottagaren i 5 sekunder. Ett
ljud spelas upp och LED-indikatorn börjar blinka för att bekräa att
inlärningsläget aktiveras.
4. Inom 5 sekunder, tryck på tryckknappen för att skicka en signal till
mottagaren. När inlärningen lyckats spelar mottagaren upp den valda
ringsignalen som bekräelse.
Lär upp mottagaren med mer än en sändare
Inlärning sker med en tryckknapp/sändare i taget. Upprepa steg 1-4 ovan för
att lägga till ytterligare en sändare.
Återställ mottagaren
1. Tryck på Fram-knappen i 5 sekunder för att återställa mottagaren
till standard. Ett ljud spelas upp och LED-indikatorn blinkar för
att bekräa att återställningen har lyckats. Inställningarna är nu
återställda och ingen sändare är inlärd i mottagaren.
Specicationer
Tryckknapp:
Batteri: .....................................................................CR2032 (3V) (inkluderat)
Arbetstemperatur:.........................................................................-20°C~50°C
Kapsling:..................................................................................................IP55
Räckvidd: ...................................................................... Upp till 30 m (fri sikt)
Frekvens: ..................................................................................... 433,92 MHz
Mottagare:
Antal valbara ringsignaler: ..........................................................................10
Antal minnesplatser på mottagaren: ...........................................................30
Ljudvolym:.........................................................................25~110dB, 4 nivåer
Strömförsörjning: ...................................................................... 230 V~, 50 Hz
Strömförbrukning:................................................................................<0,5 W
Frekvens: ..................................................................................... 433,92 MHz
USER MANUAL FOR DOOR BELL
(PUSH BUTTON AND RECEIVER)
VOLUME/VOLYM
LED
BACK/TILLBAKA
PUSH BUTTON/TRYCKKNAPP
FORWARD/FRAM
OPEN HERE/ÖPPNA HÄR
ANVÄNDARMANUAL FÖR DÖRRKLOCKA
(TRYCKKNAPP OCH MOTTAGARE)
Telldus Technologies AB, Kabelvägen 7, 311 50 Falkenberg, Sweden
www.telldus.com • support.telldus.com
Within the European Union, this symbol indicates that the products must not be disposed in the household waste.
Devices contain valuable recyclable materials that should be recycled for reuse and uncontrolled waste disposal may
cause harm to the environment and human health. Please dispose the old products via suitable collection systems or
send the unit to the oce where you bought it. This will make the product recycling.
Correct disposal of the products
Other Telldus Accessories manuals
