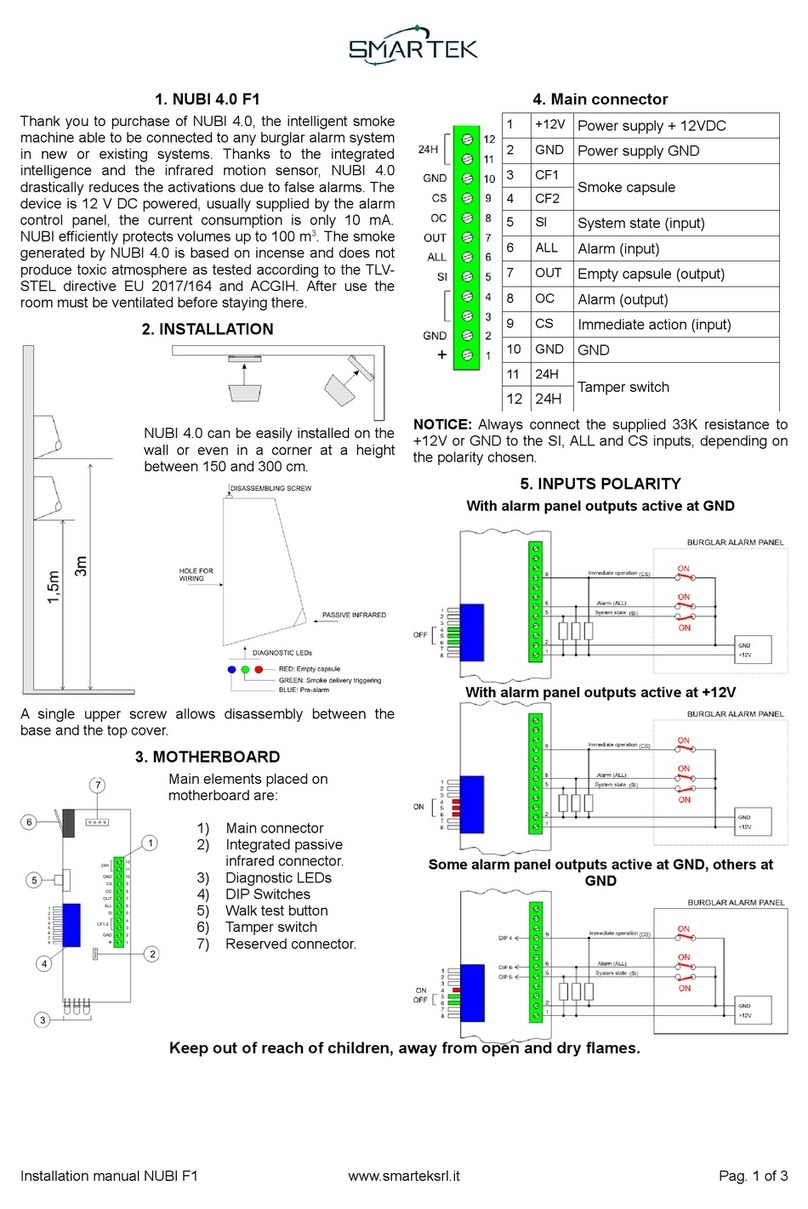
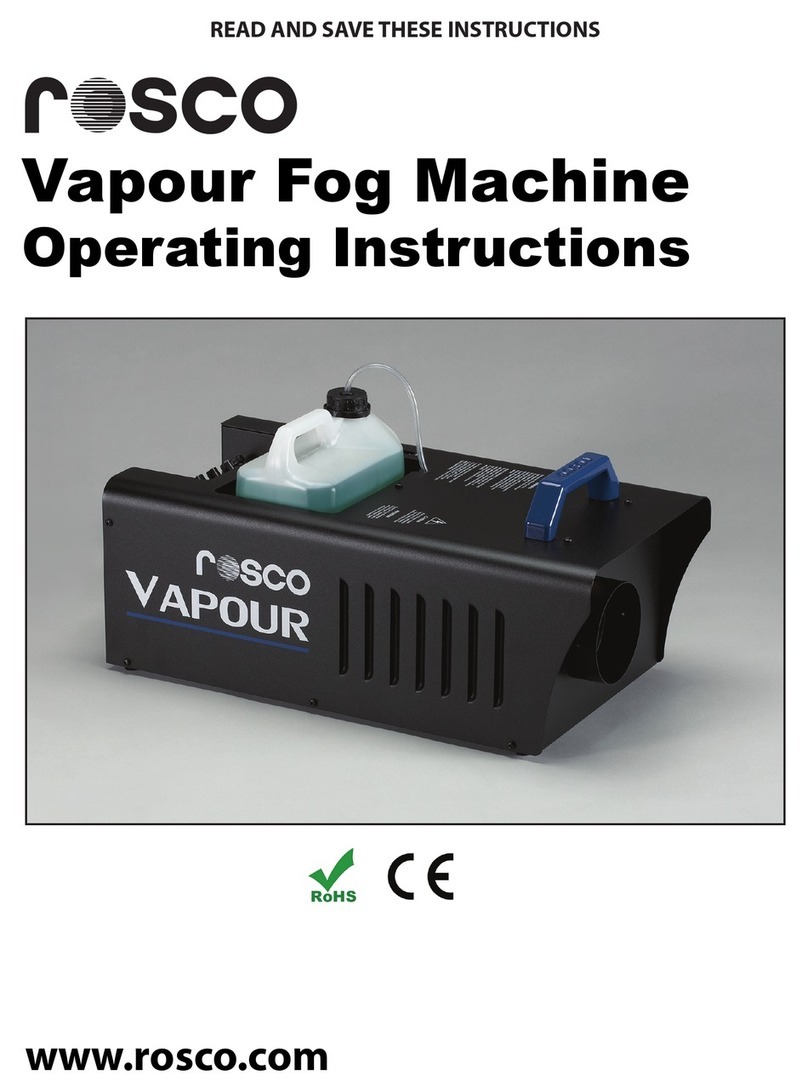
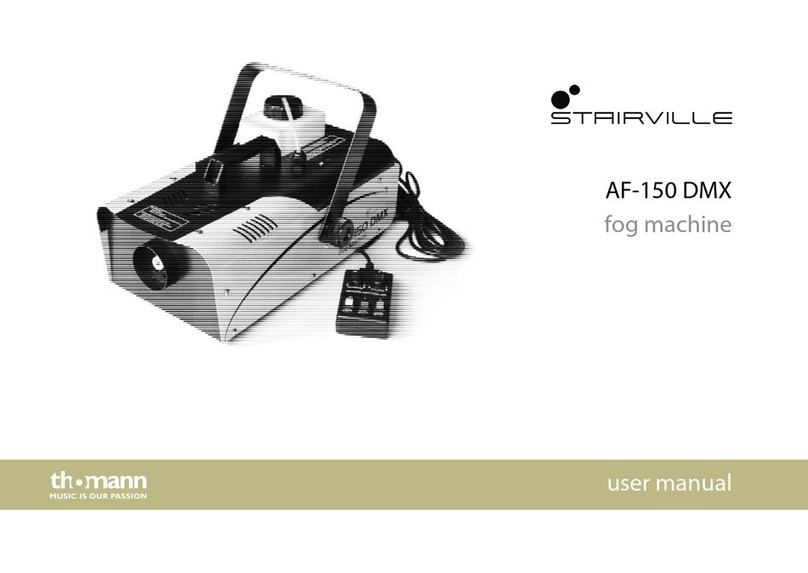
Tempest Shadow Nightfall User manual

Nightfall

- 1 -
TABLE OF CONTENTS
Introduction .................................................................................................................................................................................2
Important Safeguards...........................................................................................................................................................2-4
Unpacking.....................................................................................................................................................................................5
Controls......................................................................................................................................................................................5-6
Setting Up .....................................................................................................................................................................................7
Fluid Setup ........................................................................................................................................................................7
Power Connections ........................................................................................................................................................7
Operating the Machine..................................................................................................................................................... 8-11
Powering On.....................................................................................................................................................................8
Heating ...............................................................................................................................................................................8
Control Options...............................................................................................................................................................8
Manual Control via the Detachable Remote Control Panel...................................................................8
Multi-Link .................................................................................................................................................................8
Using the Remote Control Panel ...............................................................................................................................8
Using Timers........................................................................................................................................................8-9
Using Multi-Link ..............................................................................................................................................................9
Changing Fluid ................................................................................................................................................................9
Running Dry......................................................................................................................................................... 10
Priming the System ........................................................................................................................................... 10
Powering Down............................................................................................................................................................ 10
Ducting Smoke......................................................................................................................................................................... 10
Troubleshooting ...................................................................................................................................................................... 11
Maintenance ............................................................................................................................................................................. 12
Exterior Cleaning.......................................................................................................................................................... 12
Maintaining the Heat Exchanger ........................................................................................................................... 12
Using the Air-Input Connection.................................................................................................................... 12
Storage and Shipment ............................................................................................................................................... 13
Specifications......................................................................................................................................................................13-14
Warranty ..................................................................................................................................................................................... 15
CE Certificate of Conformity................................................................................................................................................ 16

- 2 -
INTRODUCTION
Congratulations on your purchase of the Shadow Nightfall Smoke Machine. The Nightfall offers the
perfect balance of performance, reliability and affordability.
To ensure efficient and safe operation, please take a few moments to read this manual completely.
The Shadow Nightfall is a thermal aerosol generator designed for continuous, variable smoke output.
This machine is one part of a system, the other component being Rosco’s Smoke Simulation fluid. ALL
ROSCO FOG AND HAZE FLUIDS ARE UNIQUE WATER-BASED FORMULATIONS THAT CONTAIN NO PETRO-
LEUM DISTILLATES AND ARE SAFE WHEN USED ACCORDING TO INSTRUCTIONS.The operating tempera-
ture,pump pressure,and output nozzle of the Nightfall have been specifically designed and engineered
together to maximize the aerosolization of Rosco fog fluids.
Do not use any fluids in the Nightfall other than genuine Rosco Smoke Simulation Fluids as they have not
been tested for optimal performance and safety considerations. Doing so may damage the machine and will
void the warranty.
Note: The terms“fog,”“haze” and“smoke” are used interchangeably throughout this manual.Tempest Shadow
Smoke machines do not produce actual smoke, only a mist or aerosol.
Danger! Hazardous
voltage. Contact will
cause electric shock.
Caution! Safety
hazard. Risk of
personal injury.
Caution! Burn
hazard. Hot surface.
Do not touch
Caution! Fire hazard.
IMPORTANT SAFEGUARDS
READ AND UNDERSTAND THESE SAFETY PRECAUTIONS BEFORE OPERATING THE
MACHINE. FAILURE TO PROPERLY FOLLOW THESE PRECAUTIONS MAY LEAD TO A
FIRE, ELECTRICAL SHOCK, OR BURNS.
The following symbols are used to identify important safety information:
FOG FLUID HEALTH CAUTION:VAPOR FROM THIS FLUID, LIKE ANY OTHER COM-
MON MATERIAL IN A VAPORIZED STATE, MAY BE IRRITATING TO OR CAUSE
ALLERGIC SYMPTOMS IN SOME PERSONS WITH ALLERGENIC SENSITIVITY. DO
NOT EXPOSE AT CLOSE RANGE TO KNOWN ASTHMATICS.

- 3 -
Danger! Hazardous
voltage. Contact will
cause electric shock.
Caution! Safety
hazard. Risk of
personal injury.
Caution! Burn
hazard. Hot surface.
Do not touch
Caution! Fire hazard.
Danger! Hazardous
voltage. Contact will
cause electric shock.
Caution! Safety
hazard. Risk of
personal injury.
Caution! Burn
hazard. Hot surface.
Do not touch
Caution! Fire hazard.
Danger! Hazardous
voltage. Contact will
cause electric shock.
Caution! Safety
hazard. Risk of
personal injury.
Caution! Burn
hazard. Hot surface.
Do not touch
Caution! Fire hazard.
Preventing Electric Shock
• This machine uses electrical power at common commercially available voltages.
When directly contacted, such voltages are hazardous to human life. All precautions
commonly applicable to the use of electric power generally are applicable to the
use of this machine.
• This machine is designed to operate from three-wire power systems where one of the
wires is a safety ground. DO NOT disconnect the safety ground or use extension cords
or“cheater” plugs to connect this machine to a two-wire system. Operation without a
safety ground may result in a hazardous electrical shock.
• Check the current and voltage rating of your machine. Extension cords must be prop-
erly sized and rated for voltage, current and length. Check your local electrical code for
the correct gauge extension cord. If an extension cord shows signs of wear or gets
warm to the touch, discontinue its use and obtain a cord with a higher current rating.
Improper extension cords are not only hazardous, but may result in poor machine
performance due to excessive voltage drop.
• Never use any machine that shows signs of improper use.Even slight damage may be
an indication of a major problem. If the machine looks questionable, use it only under
strict observation. If the machine shows any unusual behavior, disconnect machine
immediately from power and send machine to a Service Center for repair.
• Disconnect unit from power source before servicing and when not in use.
Preventing Burns and Fire
• During the warm-up phase and during operations, people should not stand within
three feet (one meter) of the front of the machine. Flammable material like paper,
fabric, etc., should never be placed directly on or around this equipment, or any other
electrical device with a heating element.
• The fog should be blown into an open space and should not be directed at people
or objects. Never blow fog on hot surfaces, into glowing heating elements or into open
flames. The normally non-flammable and non-toxic fog could react on very hot
surfaces and be burnt or decomposed.
• Do not operate the machine in a tightly confined space where the ambient tempera-
ture might exceed 135° F (57° C). A continuous flow of air is required to maintain
temperature within the machine housing. Sensitive electronic components deterio-
rate rapidly under high heat conditions. Operation of the machine in an enclosure of
less than ten cubic feet (one cubic meter) is dangerous, and automatically voids
the warranty.
• Enclosing any heating device so it is invisible to the operator creates a potential
fire hazard, no matter what the ambient temperature of the enclosure. To do
so with any high-amperage device is to assume substantial risk. Tempest
strongly recommends against it.

- 4 -
• Use of any fluid other than Rosco Smoke Simulation fluid or modification or attempted
unauthorized repair of the machine will immediately invalidate the warranty.
• Machines are designed for continuous use over an 8-hour day, but to protect components, it is wise
to turn off the machine when it is not in use. In permanent installations, it is advisable to equip
the circuit with a night cut-off device.
Additional Precautions: Do’s & Don’ts
• Do Read the entire manual before operating the machine and pay particular attention to all
CAUTIONS AND WARNINGS.
• Do Use an extension cord that is properly rated for voltage, current and length, and is free from
nicks, cuts or other signs of wear.
• Do Check to see that the machine is clean and free of foreign objects before each
operating period.
• Do Ensure that the machine is adequately ventilated.
• Do Use proper caution when handling hot surfaces.
• Do Use the minimum amount of fog required to achieve the desired effect.
• Do Not Use the machine near a person who has asthma or similar inhalation disorder.
• Do Not Use any foreign substances in the machine.
• Do Not Use a machine that is damaged or operating improperly in any way.
• Do Not Use a machine that leaks fluid from the housing.
• Do Not Leave the machine switched on for prolonged periods of time without producing fog.
• Do Not Enclose the machine.
• Do Not Install the machine in such a fashion that the operator cannot see the whole machine,
including the indicator lights.
• Do Not Touch the shielded nozzle of the machine. Allow sufficient cooling time after operation
before attempting to perform maintenance or storage.
• Do Not Direct the fog output continuously against nearby surfaces. This may eventually
cause fluid to re-condense.
Danger! Hazardous
voltage. Contact will
cause electric shock.
Caution! Safety
hazard. Risk of
personal injury.
Caution! Burn
hazard. Hot surface.
Do not touch
Caution! Fire hazard.
Danger! Hazardous
voltage. Contact will
cause electric shock.
Caution! Safety
hazard. Risk of
personal injury.
Caution! Burn
hazard. Hot surface.
Do not touch
Caution! Fire hazard.
Safety Precautions
• In any facility, the fog concentration should be controlled. The fog should never mask
emergency exits, safety signs, staircases or other safety constructions.
• After long use, or if the machine is not properly set, some liquid droplets or wet area
may appear in front of the machine’s outlet. This liquid should be wiped up to prevent
a condition where someone might slip and fall.
Preventing Improper Operation
• Unauthorized repair or alteration of any safety devices can lead to improper operation
and accidents. Repairs should be performed only by an authorized Service Center.

- 5 -
UNPACKING
Your Shadow Nightfall requires no assembly. Note: 230 volt machines are shipped with bare leads at the
end of the power cord. A proper electrical connector must be attached based on the local power require-
ments. Carefully remove the machine from the box. Ensure that no tape or packing materials are stuck
to the machine. Stray packing materials that remain attached to high temperature areas of the ma-
chine could melt or burn during operation. In particular, ensure that the area around the nozzle is free
of any materials or debris.
CONTROLS
Multi-Link Socket
3-Pin XLR socket that allows
for multiple machines to be
daisy chained together and
controlled from a single Remote
Control Panel.
Main Power Switch
Turns unit on or off by con-
trolling the flow of power
to the unit.
Air-Input / Purge Connection
This is a push-to-connect inlet that accepts ¼”OD
tubing and allows compressed air to blow through
the heat exchanger for cleaning
and maintenance.
Heat Indicator
A red indicator light that illuminates
when machine is heating in order to
achieve optimal temperature for
producing smoke.
Fluid Bottle
Ready Indicator
A green indicator light that illuminates when the
minimum temperature for producing smoke has
been achieved. Note: All indicator lights will switch
off if Standby mode is engaged.
Removable Remote
Remote Thumb Screws
Loosen to remove
Power Cable

- 6 -
Fog Button
Press and release to start
making smoke. Press and
release again to stop mak-
ing smoke. The Fog Button is
disabled if Standby mode
is engaged.
Standby Button
Press and release to suspend
heating and operation of the
machine without turning off
the Main Power Switch. The
Power Indicator light on the
Remote Control Panel will go
out when in Standby mode.
Press and release again to
disengage Standby mode.
Once Standby mode is disen-
gaged, the Power Indicator
light on the Remote Control
Panel will come back on.
Timer Button
Press and release to engage the timer
control functions. Timer Indicator
light will come on. Press and release
again to disengage timer functions.
Timer Indicator light will go out. Note:
The Timer Button disabled if Standby
mode is engaged.
Fog Level Knob
Rotate to set the desired
amount of smoke output.
Higher numbers indicate more
smoke. Output is controlled
by pump speed increasing and
sending more smoke fluid into
the heat exchanger.
Fog On Knob
Used only when timer control
is engaged. Rotate to set the
desired time interval that the
machine will produce
smoke
.
During
smoke
production, the
Power Indicator light will flash.
Fog Off Knob
Used only when timer control
is engaged. Rotate to set the
desired time interval that the
machine will wait while NOT
producing smoke.
Timer Indicator
A green indicator light that
illuminates when Timer mode
is engaged by pressing the
Timer Button. Turns off when
Timer mode is disengaged.
Power Indicator
A red indicator light
that illuminates when
the Main Power Switch
is in the“On”position to
indicate the machine is
properly receiving power
and Standby mode is
disengaged. The red
Power Indicator light
flashes while fog is
being produced.
CONTROLS

- 7 -
SETTING UP
The Shadow Nightfall should be located on a secure, solid surface such as the floor. The machine can
operate in any orientation from 45 degrees upwards to 45 degrees downwards. Take precautions to
avoid fluid spills if the machine is oriented at an angle.
Fluid Set Up
OnlyusegenuineRoscoSmokeSimulationfluidinyourNightfallmachine.Theuseofanyotherfluidwillvoidyour
warranty,may damage the equipment,and may cause health hazards.
For convenience, the Nightfall is designed with an integral compartment that will hold a 4-Litre or 5-Litre
bottle of smoke fluid. Place the fluid bottle into the compartment. Feed the fluid inlet hose into the bottle
of smoke fluid, ensuring that the filter, located at the end of the tube is fully submerged in fluid. Slide the
bottle cap along the tube and tighten the cap onto the bottle. Take precautions to avoid fluid spills.
All Shadow machines are primed at the factory with a small amount of fluid. No additional priming
should be necessary for proper smoke output. If smoke output is diminished or intermittent, see the
Priming the System section of this manual for instructions on how to re-prime the fluid path.
Power Connections
Ensure that the machine is plugged into an outlet rated for the proper voltage and amperage. The
Nightfall is a 1,200 watt device and will draw 5.2A at 230 VAC or 10.9A at 115 VAC. Note:230 volt machines
are shipped with bare leads at the end of the power cord. A proper electrical connector must be attached
based on the local power requirements. If unsure how to do this, please contact Tempest for assistance. An
example of properly wiring a UK 13A connector is shown below.
Earth Wire
Neutral Wire
Outer Insulation
Live Wire
Fuse
Cable grip

- 8 -
OPERATING THE MACHINE
Powering On
Make sure the unit is plugged in. Turn on the Main Power Switch that is located next to the power cord
on the rear of the machine. The red Power Indicator light on the Remote Control Panel will illuminate.
If the Power Indicator light does NOT illuminate, press and release the Standby Button on the Remote
Control Panel.
Heating
When switched on, the red Heat Indicator light will illuminate and the machine will begin to heat up to
its optimal temperature. The initial heating cycle will take 7-10 minutes. When the green Ready Indica-
tor light comes on, the machine is ready to make smoke.
Control Options
There are several methods of controlling the Nightfall, including: Manual Control via the Remote
Control Panel and Multi-Link control that allows multiple machines to be controlled from a single
Remote Control Panel.
Manual Control via the Detachable Remote Control Panel that is included with each machine. An oper-
ator can control the unit at the machine, or from a distance using the included 3-pin cable. The Remote
Control Panel can be used to set smoke output volume, power the machine on and off using Standby
mode, and set a repeating, timed cycle of on/off operation.
Multi-Link allows up to 4 machines to be linked together via 3pin XLR cables (not included) and con-
trolled by a single Remote Control Panel.
Using the Remote Control Panel
The Remote Control Panel can be operated directly on the machine or detached from the unit and used
at a distance. To detach the Remote Control Panel from the unit, loosen the thumb screws and lift the
panel from its recessed mount. A 15 foot (4.5m) cable is provided to allow the machine to be operated
at a distance. If needed, a longer 3-pin XLR cable can be used or joined to the existing cable. Do not
exceed a maximum distance of 165 feet (50 m) from remote to machine.
When the green Ready Indicator light is illuminated, the Nightfall is ready to make smoke. Press and
release the Fog Button to begin producing smoke. The red Power Indicator light will flash to indicate
the machine is operating.To stop making smoke, press and release the Fog Button again. Adjust the Fog
Level knob to increase or decrease the amount of smoke produced.
The Standby Button allows the machine to be“turned off”from the remote without using the Main Pow-
er Switch. In Standby mode,the machine will not reheat or make smoke,the pump remains unpowered
and all indicator lights will switch off. To engage Standby mode, press and release the Standby Button.
The red Power Indicator light will turn off. To disengage Standby mode, press and release the Standby
Button again and the red Power Indicator light will turn back on. Once Standby mode is disengaged,the
machine will immediately start heating in preparation to make smoke. Note: If no remote is connected
and no DMX signal is detected,the machine will not heat.
Using Timers
The timer controls allow you to set the machine to produce smoke in timed intervals without an
operator. To engage the timers,press and release the Timer Button. The green Timer Indicator light will
illuminate and the machine will begin to produce smoke at the level set by the Fog Level Knob, and the
red Power Indicator light will flash to indicate the machine is operating.

- 9 -
Using Multi-Link
In some instances, it may be preferable to control and synchronize multiple machines from a single
Remote Control Panel. This can be quickly and easily accomplished using the Nightfall’s built-in Multi-Link
capabilities. Up to four Shadow Nightfall Machines can be connected and controlled via a single controller.
Connect a 3-pin XLR cable (not included) to the Multi-Link port on the rear of the first machine in the
daisy chain. This unit becomes the “Head Machine” and its Remote Control Panel will control the other
units in the chain.
Remove and detach the Remote Control Panel and its 3-pin XLR cable from the second machine. Con-
nect the plug of the cable from the Head Machine into the remote port of the second machine where the
Remote Control Panel had previously been connected.
Repeat this process to connect a third and/or fourth machine. No additional set-up is required. The
Remote Control Panel attached to the head machine will operate all machines in the Multi-Link as if they
are the same.
Note:The maximum length
of the daisy chain, from
the remote of the Head
Machine to the final
machine is 165 feet (50 m).
Rotate the Fog Off Knob to adjust the period of time that the machine waits before starting to produce
smoke again. The numeric settings on the timer knobs are relative settings and do not correspond to
specific seconds or minutes. See the table below for an approximation of the time duration correspond-
ing to each tic on the knob.
The machine will cycle on and off indefinitely until the Timer Button is turned off. If the Fog Button is pressed
while in Timer mode,this will override any timer settings and the machine will produce smoke. When the Fog
Button is disengaged, the timer settings resume,continuing its On/Off cycle as if not interrupted.
1 - 4 1 to 4 seconds
4 - 5 4 to 16 seconds
KNOB SETTING TIMER SETTING
5 - 7 16 to 64 seconds
7 - 9 64 to 250 seconds
Changing Fluid
The Nightfall consumes 3.6 liters of fluid per hour at its maximum rate. When the fluid in the bottle has
been depleted enough that the tube can no longer stay submerged, it is time to change fluid bottles.
It is recommended that you stop making fog when changing fluid bottles. Once smoke production
has halted, simply unscrew the fluid tube cap from the empty bottle and remove the tube. Take care to
avoid dripping fluid onto the machine case or ground nearby, as it can be slippery. Replace the empty
bottle with a new bottle of Rosco Smoke Simulation fluid, insert the fluid tube insuring that the filter at
the end of the tube is fully submerged, and reattach the fluid cap. Resume making smoke.

- 10 -
Running Dry
Do not allow the machine to run dry of fluid. If the machine does run out of fluid it will stop producing
smoke and the green Ready Indicator light will indicate a Fluid Out condition with a fast double-flash.
In order to reset the Fluid Out condition, power cycle the machine by turning the Main Power Switch
off, wait 5 seconds, and then turn the Main Power Switch back on. After inserting the tube in a new
bottle of smoke fluid, you will need to prime the machine to remove airlocks in the fluid pipework of
the machine.
Priming the System
To prime the machine, turn the Fog Level Knob to Zero, then hold down the Fog Button and turn the
knob to maximum. Keep the button held until the smoke output is strong and steady. Then turn the
Fog Level knob back to the required output level and release the Fog Button.
Powering Down
After use, allow the machine to sit for several minutes before switching the Main Power Switch to off.
Turning off the power switch during smoke production can cause damage to the heat exchanger. Allow
machine to cool completely before packing or storing. Note: The nozzle of the machine may remain hot for
up to 10 hours after power is shut off.
If the machine will be unused for an extended period of time,follow the Storage and Shipment instructions
listed under Maintenance to prepare the machine for long-term storage.
DUCTING SMOKE
It is often desirable to duct smoke from the machine to another location.This can be accomplished using
flexible hose (“dryer hose”) or similar large diameter ducting such as 4in (100mm) PVC. Avoid sharp bends
in the duct, which can create turbulence or back flow.
The duct should be positioned no closer than 2in (50mm) to the nozzle. An open airflow between the
nozzle and opening of the duct is crucial to allow for aerosolization and create proper airflow. Placing
ductwork or tubing directly over the nozzle or nozzle guard will cause damage to the machine and will
void the warranty. Take all precautions to avoid fire hazards as the nozzle is extremely hot.
In some instances, it is desirable to use a fan to accelerate the smoke through the ductwork. Never
run smoke through the blades of a fan as the action of the impeller will cause condensation of fluid
particles. To properly use a fan, create a vent in the ducting system such as a and introduce a fan at the
vent point.This will create a low pressure point that“pulls or pushes”the smoke through the ductwork.
Contact Tempest for more advice on ducting smoke.
Squirrel Cage Fan
Ducting Hose
Hose Adaptor
Fog Machine

- 11 -
TROUBLESHOOTING
Problem Probable Cause(s) Suggested Remedy
Contact nearest Service Center
for repair
Ensure Main Power Switch is on
Press Standby Button on The Remote
Control Panel. Red Power Indicator
light on the Remote Control Panel
will illuminate.
Check to make sure machine is
plugged in properly. Check the cir-
cuit breaker.
Machine will not produce
smoke when Fog Button
is pressed
Smoke output is weak
Machine does not
heat up
Contact nearest Service Center
for repair
Ensure Main Power Switch is on
Wait 7-10 minutes until green
Ready Indicator light illuminates
Rotate Fog Level Knob clockwise
Rotate the Fog Level Knob clockwise
Ensure filter is submerged
See the Priming the System section
of the manual
Contact nearest Service Center
for repair
Machine produces smoke
intermittently when fog
button is not pressed
Turn timers off by pressing Timer
Button. Green Timer Indicator light
should not be illuminated.
Additional help and information can be found contacting Tempest.
Machine has overheated and
internal thermal fuse is blown
Machine is not turned on
Machine is in Standby mode
No power at AC cable inlet
Machine not turned on
Main fuse is blown
Machine not at
operating temperature
Fog level set to zero
Smoke output control is too low
Machine requires priming
Heat exchanger is clogged
Timer is engaged
Fluid filter above fluid line

- 12 -
MAINTENANCE
Before servicing the Shadow Nightfall, read and observe all the precautions listed in the Important
Safeguards section on pages 2-4 of this manual. Note: Any service that is NOT described in the section
below must be carried out by a Rosco service technician. Contact Tempest for more information on your
repair and service needs.
Exterior Cleaning
Excessive dust, fluid residue, and dirt build-up will degrade the performance of the machine and may
cause overheating to occur. To maintain adequate air flow and cooling, the outer casing and air vents
of the machine must be cleaned periodically. Damage caused by lack of cleaning is not covered by the
product warranty.
• Unplug the machine from power and allow the unit to cool completely before cleaning.
Note: The output nozzle may remain hot for up to 10 hours after use.
• Remove dust from the air vents with a soft brush, cotton swab, vacuum or compressed air.
• Clean any fluid residues from the fog output area of the machine using a damp cloth.
• Clean the outer casing with a damp cloth only.
Maintaining the Heat Exchanger
The heat exchanger is the core element in a fog or haze machine that transforms fluid into an aerosol-
ized fog/haze. This component operates under extreme temperatures and pressures and should be
cleaned periodically to ensure optimal performance. The Air-Input Connection was designed to pro-
vide a fast and efficient method of cleaning the heat exchanger by purging it of residual fluid and build
up using compressed air. For lasting performance, Tempest recommends purging the heat exchanger
once a week while in production,and before storing the machine for extended periods of time. Tempest
does not recommend the use of any purified waters, chemicals or fog machine cleaners. Use of these
materials will void the warranty.
Using the Air-Input Connection
You must have a source of compressed air from an air compressor or external air tank available.
Compressed air must be clean and dry.
Allow the machine to heat until the green Ready Indicator light has illuminated.
Using the push-to-connect fitting, connect a ¼”OD tube from your air source by inserting the tube into the
Air-Input Connection located on the rear panel of the machine. Alternately,you can use a blow gun attach-
ment, or similar device with a stepped nozzle, that is held against the orifice of the Air-Input Connection.
Set the air pressure to a maximum of 60 psi. Higher air pressure may damage the internal plumping
components. Blow air into the Air-Input Connection for 30 seconds, or until no additional haze or fluid
exits the nozzle.
CAUTION: Keep people and objects at least 3ft (1m) away from the nozzle of the machine during
air purging.
To release the tubing from the push-to-connect fitting,push back on the fitting collar and pull to release
the air line.

- 13 -
Storage & Shipment
Before storing the machine for an extended period of time, ensure the following:
• Fluid bottle has been removed and securely capped
• Proper cleaning of exterior as described above
• Proper purging of the heat exchanger as described above
• Machine is properly boxed or covered to avoid dust build up on internal components
• If shipping, use original packaging or comparable protection to avoid damaging the machine in transit
SPECIFICATIONS
Physical
Length ...........................................................................22.59”(573.8 mm)
Width ..............................................................................10.94”(278 mm)
Height............................................................................. 9.82” (249.5 mm)
Dry weight..........................................................................24.25 lbs (11 kg)
Performance
Operating time ..........................................................................continuous
Warm up time .........................................................................7-10 minutes
Control and programming
Control options . . . . . . . . . . . . . . . . . . . . . . . . . . . . . . . . . . . . . . . . . . . . . . . . . . . . . . . . . . . . . . . . . . . . . . . . timer remote
Fluid system
Capacity ................................................................120v - 4 liters / 240v - 5 litres
Fluid consumption ..................................................................3.6 liters / hour
Connections
Remote / Multi-Link ........................................................................3 pin XLR
AC power ........................................................................Fixed power cable
Electrical
AC voltage ....................................................................120V / 230V, 50/60Hz
Main fuse (120V US version) ....................................................................10AT
Main fuse (230V EU version) .....................................................................5AT
Thermal
Maximum ambient temperature.........................................................40°C (104°F)
Exterior surface temperature, steady state, at 20°C ambient...............................40°C (104°F)
Approvals
European EMC:.....................................EN61000-6-3,EN61000-3-2,EN61000-3-3,EN50366
European safety: ........................................................................EN 60 335-1
Immunity: ..................................................EN61000-6-1, EN61000-4-2,EN61000-4-3
ETL approvals (cETLus) pending ........................................... UL60335-1, CSA-E60335-1
Information in this document is subject to change without notice and does not represent a commitment on
the part of Tempest .

- 14 -
Dimensions
Dimensions are shown in [inches] and millimeters

- 15 -
1 YEAR LIMITED WARRANTY
Rosco Laboratories warrants to the first retail purchaser that this Product will be free from defects in
workmanship and material for a period of twelve (12) months from the date of original purchase. For
warranty service you must be able to provide proof of purchase.
Should this Product prove defective during the warranty period, please contact your local Rosco office
for return authorization. No warranty service will be performed without Return Authorization. At Ros-
co’s sole discretion, covered Products will be repaired or replaced with new or refurbished equipment
or a model of like kind and quality. Exchanged or replaced parts and Products assume the remaining
warranty period of the original Product covered by this limited warranty.
You are responsible for securely packaging the defective Product and returning it to Rosco as per the
instructions on the Return Authorization. Within North America, Rosco will ship the repaired or re-
placed Product to you freight prepaid.Shipments to other locations will be made freight collect. Do not
return fog machines with fog fluid.
This warranty is not transferable and does not extend beyond the first retail purchase of the Product.
This warranty does not cover damage to the Rosco product caused by parts not manufactured, distrib-
uted or certified by Rosco. Rosco is not obligated to provide warranty service should the product fail
to be properly maintained or fail to function properly as a result of misuse, abuse, improper installation,
neglect, improper shipping, damage caused by disasters such as flood, fire and lightning,improper elec-
trical current or connection or service other than by a Rosco Authorized Servicer. If a claimed defect
cannot be identified or reproduced, you will be held responsible for the costs incurred. Unless other-
wise stipulated by state law, all warranties expressed or implied are limited to the twelve (12) month
period of this warranty.
THE WARRANTY AND REMEDY PROVIDED ABOVE ARE EXCLUSIVE AND IN LIEU OF ALL OTHER EXPRESS
OR IMPLIED WARRANTIES INCLUDING BUT NOT LIMITED TO THE IMPLIED WARRANTIES OF MERCHANT-
ABILITY, NON-INFRINGEMENT OR FITNESS FOR A PARTICULAR PURPOSE. EXCEPT AS PROVIDED IN
THIS WRITTEN WARRANTY AND UNLESS EXCLUSIONS ARE SPECIFICALLY FORBIDDEN BY STATE LAW,
NEITHER ROSCO NOR ITS AFFILIATES WILL BE LIABLE FOR ANY LOSS, INCONVENIENCE, OR DAMAGE,
INCLUDING DIRECT, SPECIAL, INCIDENTAL OR CONSEQUENTIAL DAMAGES, INCLUDING INJURY TO PER-
SONS OR PROPERTY, RESULTING FROM THE USE OR INABILITY TO USE THE ROSCO PRODUCT,WHETHER
RESULTING FROM BREACH OF WARRANTY OR ANY OTHER LEGAL THEORY.
•NOTE: USE OF ANY FLUID OTHER THAN A ROSCO BRAND FLUID WILL VOID THE WARRANTY.


NOTES

NOTES

Tempest Technology Corporation
4708 N. Blythe Avenue, Fresno, CA 93722
www.tempest.us.com
Table of contents
Other Tempest Fog Machine manuals
