Tennant S680 User manual

S680
BATTERY SWEEPER
North America
To view, print or download
the parts manual, visit:
www.tennantco.com/manuals
www.tennantco.com PLDC04796
Rev. 02 (05-2023)
OPERATOR’S MANUAL (EN)
MANUAL DE INSTRUCCIONES (ES)
MANUEL D’INSTRUCTIONS (FR)

EN
TABLE OF CONTENTS
IMPORTANT SAFETY PRECAUTIONS.................................................................................................................................3
SAFETY SYMBOLS................................................................................................................................................................6
TECHNICAL SPECIFICATIONS.............................................................................................................................................7
MACHINE DIMENSIONS........................................................................................................................................................9
GENERAL INFORMATION....................................................................................................................................................10
Purpose of this manual ............................................................................................................................................................................................10
Identifying the machine............................................................................................................................................................................................10
Documentation provided with the machine..............................................................................................................................................................10
TECHNICAL INFORMATION.................................................................................................................................................11
General description..................................................................................................................................................................................................11
Main parts of the machine........................................................................................................................................................................................11
Control panel............................................................................................................................................................................................................12
Accessories..............................................................................................................................................................................................................12
HANDLING AND INSTALLATION.........................................................................................................................................13
Lifting and transporting the palletized machine........................................................................................................................................................13
Inspection on delivery ..............................................................................................................................................................................................13
Unpacking................................................................................................................................................................................................................13
If not retained, the packaging must be disposed of in compliance with current regulations....................................................................................13
Batteries...................................................................................................................................................................................................................14
Machine Battery Selection Setting...........................................................................................................................................................................14
WET batteries, preparation:.....................................................................................................................................................................................15
Batteries: installation and connection.......................................................................................................................................................................15
Selection of battery charger.....................................................................................................................................................................................16
Preparing the battery charger ..................................................................................................................................................................................16
Fitting the side brush ...............................................................................................................................................................................................16
PRACTICAL GUIDE FOR THE OPERATOR.........................................................................................................................17
Clothing and equipment...........................................................................................................................................................................................17
Before starting the machine.....................................................................................................................................................................................17
Preparing the machine for work...............................................................................................................................................................................17
Working....................................................................................................................................................................................................................17
Service brake and parking brake .............................................................................................................................................................................19
During operation of the machine..............................................................................................................................................................................20
Emergency stop button............................................................................................................................................................................................20
Safety thermostat.....................................................................................................................................................................................................20
Battery charge indicator...........................................................................................................................................................................................20
Emptying the debris bin............................................................................................................................................................................................21
Moving the machine when not in operation..............................................................................................................................................................21
MAINTENANCE INSTRUCTIONS.........................................................................................................................................22
Maintenance - General rules....................................................................................................................................................................................22
&OHDQLQJWKHVXFWLRQPRWRUDLU¿OWHU..........................................................................................................................................................................22
Fuses: ......................................................................................................................................................................................................................23
Battery maintenance................................................................................................................................................................................................23
Checking the electrolyte level of WET batteries.......................................................................................................................................................24
Recharging the batteries..........................................................................................................................................................................................24
Battery: removal.......................................................................................................................................................................................................25
REPLACING THE CENTRE BRUSH.......................................................................................................................................................................25
Adjusting the side brushes for wear.........................................................................................................................................................................26
Periodic checks........................................................................................................................................................................................................27
PERIODS OF INACTIVITY ....................................................................................................................................................27
TROUBLESHOOTING...........................................................................................................................................................28
ALARMS/WARNINGS DISPLAYED......................................................................................................................................29
DRIVE WHEEL PCB ALARMS..............................................................................................................................................30
USER MENU..........................................................................................................................................................................31
RECOMMENDED SPARE PARTS ........................................................................................................................................32
2

EN
IMPORTANT SAFETY
PRECAUTIONS
Parts of the text requiring special attention are printed in
boldandprecededbythesymbolsillustratedanddescribed
below.
! DANGER:
Indicates the need for care in order to avoid
serious consequences that could lead to
the death of personnel, or to situations
representing a possible health and safety
hazard.
! ATTENTION:
Indicates the need for care in order to avoid serious
consequences that could involve harm being done to
the machine or to the workplace, or lead to economic
losses.
! DANGER: If lead-acid (WET) batteries are
LQVWDOOHGLQWKHPDFKLQHNHHSVSDUNVÀDPHV
and smoking materials away from the batteries.
Explosive gases can escape during normal use,
particularly when recharging the batteries.
! DANGER: If lead-acid (WET) batteries are
installed in the machine, charging the batteries
produces highly explosive hydrogen gas. Keep
the seat cowling tilted toward the steering
wheel throughout the battery charging cycle
and carry out this procedure only in well-
YHQWLODWHGDUHDVDZD\IURPQDNHGÀDPHV
! DANGER: Do not operate the machine in the
SUHVHQFHRIÀDPPDEOHOLTXLGVRUYDSRXUVRU
combustible dusts.
! DANGER: Never pick up toxic materials.
! DANGER: Never pick up burning or
incandescent objects.
! DANGER: This machine must not be used on
ÀRRUVZKHUHWKHUHDUHKD]DUGRXVFRDWLQJV
¿QLVKHVPDWHULDOV
! ATTENTION: Never use the machine on wet
surfaces.
Do not use the machine:
-without having read the operating and
maintenance manual.
-without having been trained in its use.
-ZLWKRXW KDYLQJ EHHQ VSHFL¿FDOO\ HQWUXVWHG
with its use.
-if legally under age.
-ZLWKRXWWKHGHEULVELQDQGRU¿OWHULQSODFH
-if the machine is not working properly.
-in places without adequate lighting.
-in explosive environments.
-on public roads.
-where there is dirt that can be harmful to health
(dust, gas, etc.).
-where there is danger of falling objects, unless
the machine is equipped with an overhead
protective structure.
-In areas that are too dark to safely see the
controls or operate the machine.
Clothing and equipment:
-Wear safety shoes with non-slip soles.
-Wear protective eyewear or visor and safety
garments.
-Depending on the surface being cleaned
and on the environment, the protective
measures necessary for atomized sprays
include respiratory masks with class FFP2 or
equivalent or higher protection.
Before starting the machine:
-Check that the machine is not damaged.
-Check the operation of the brake.
-Check that all safety devices are in place and
operating correctly.
When using the machine:
-The machine must be operated by one person
only.
-3DUNWKHPDFKLQHRQDÀDWOHYHOVXUIDFH
-Do not allow children to play on or near the
machine.
-Do not use the machine to pick or suck up
liquids.
-Do not use the machine to pick up wires,
ropes, straps or similar materials.
-Evaluate the type of building the machine is
operating in (e.g: hospitals, pharmaceutical
or chemical industries, etc.) and scrupulously
comply with the safety regulations and
conditions in force in these facilities.
-The machine must not be used for purposes
other than those expressly intended.
-The machine is intended for commercial use,
for example in hotels, schools, hospitals,
IDFWRULHV VKRSV RႈFHV DQG EXVLQHVV
premises generally. Do not use for other
purposes.
-Keep all parts of body inside operator station
3

EN
while machine is moving.
-The machine must be stored only indoors.
-Do not allow the machine to be used as a toy.
-The machine is not designed for towing or
being towed.
-1HYHUUHVWREMHFWVRIDQ\VLJQL¿FDQWZHLJKWRQ
the machine, for whatever reason.
-Never obstruct the air inlet and release vents.
-Never remove, modify or circumvent safety
devices.
-During use, atomized spray may form. Inhaling
this atomized spray can be harmful to health.
-Work providers must conduct a risk
assessment in order to specify the necessary
protective measures relating to the formation
of atomized sprays, depending on the surface
being cleaned and the environment. Masks
with class FFP2 or equivalent or higher
protection are suitable for protecting against
the inhalation of atomized spray.
-Keep hands away from moving parts.
-In the case of malfunction and/or faulty
RSHUDWLRQ WXUQ WKH PDFKLQH Rႇ LPPHGLDWHO\
(disconnect from the batteries/mains power
supply) and do not tamper with it; contact a
service centre approved by the manufacturer.
-The machine is designed to operate in
temperatures between +4°C / 39.2°F and
+40°C / 104°F. It can be stored in temperatures
between +0°C / 32°F and +50°C / 122°F when
not in use.
-The machine is designed to operate at relative
humidity levels between 30% and 95%.
-The machine can operate at altitudes up to
2000 m / 6561.68 ft maximum.
-Use the brake to stop the machine.
-Do not use the machine to clean surfaces on
slopes or gradients steeper than indicated on
the data plate.
-Do not operate the machine on slopes or
gradients steeper than indicated on the data
plate.
-When using the machine on gentle gradients,
do not move transversely across the slope,
but keep the machine on a line parallel to the
direction of the incline, manoeuvring carefully
and without making U-turns.
-The machine must not be used by persons
(including children) with diminished physical,
sensory or mental capabilities, or lack of
experience and knowledge, unless they are
supervised by a person responsible for their
safety and have received instruction in the use
of the machine.
-Never use the machine to transport people or
goods or for towing.
-Do not wear jewellery, watches, ties or other
items.
-The operator must always use Personal
Protective Equipment: protective apron or
overalls, non-slip waterproof shoes, rubber
gloves, protective eyewear and ear defenders,
and mask for protection of the respiratory
airways.
Before leaving the machine or before maintenance:
-3DUNWKHPDFKLQHRQDÀDWOHYHOVXUIDFH
-7XUQRႇWKHPDFKLQHDQGUHPRYHWKHLJQLWLRQ
key.
-Apply the parking brake.
When performing maintenance:
-Alloperationsmustbecarriedoutinconditions
guaranteeing adequate visibility and lighting.
-Isolate the machine from its power source by
disconnecting the batteries.
-The operator must always use Personal
Protective Equipment: protective apron or
overalls, non-slip waterproof shoes, rubber
gloves, protective eyewear and ear defenders,
and mask for protection of the respiratory
airways.
-Do not wear jewellery, watches, ties or other
items.
-Do not push or tow the machine without an
operator sitting in the driving seat and able to
control the steering wheel.
-Protect the batteries from impurities such as
metal dust.
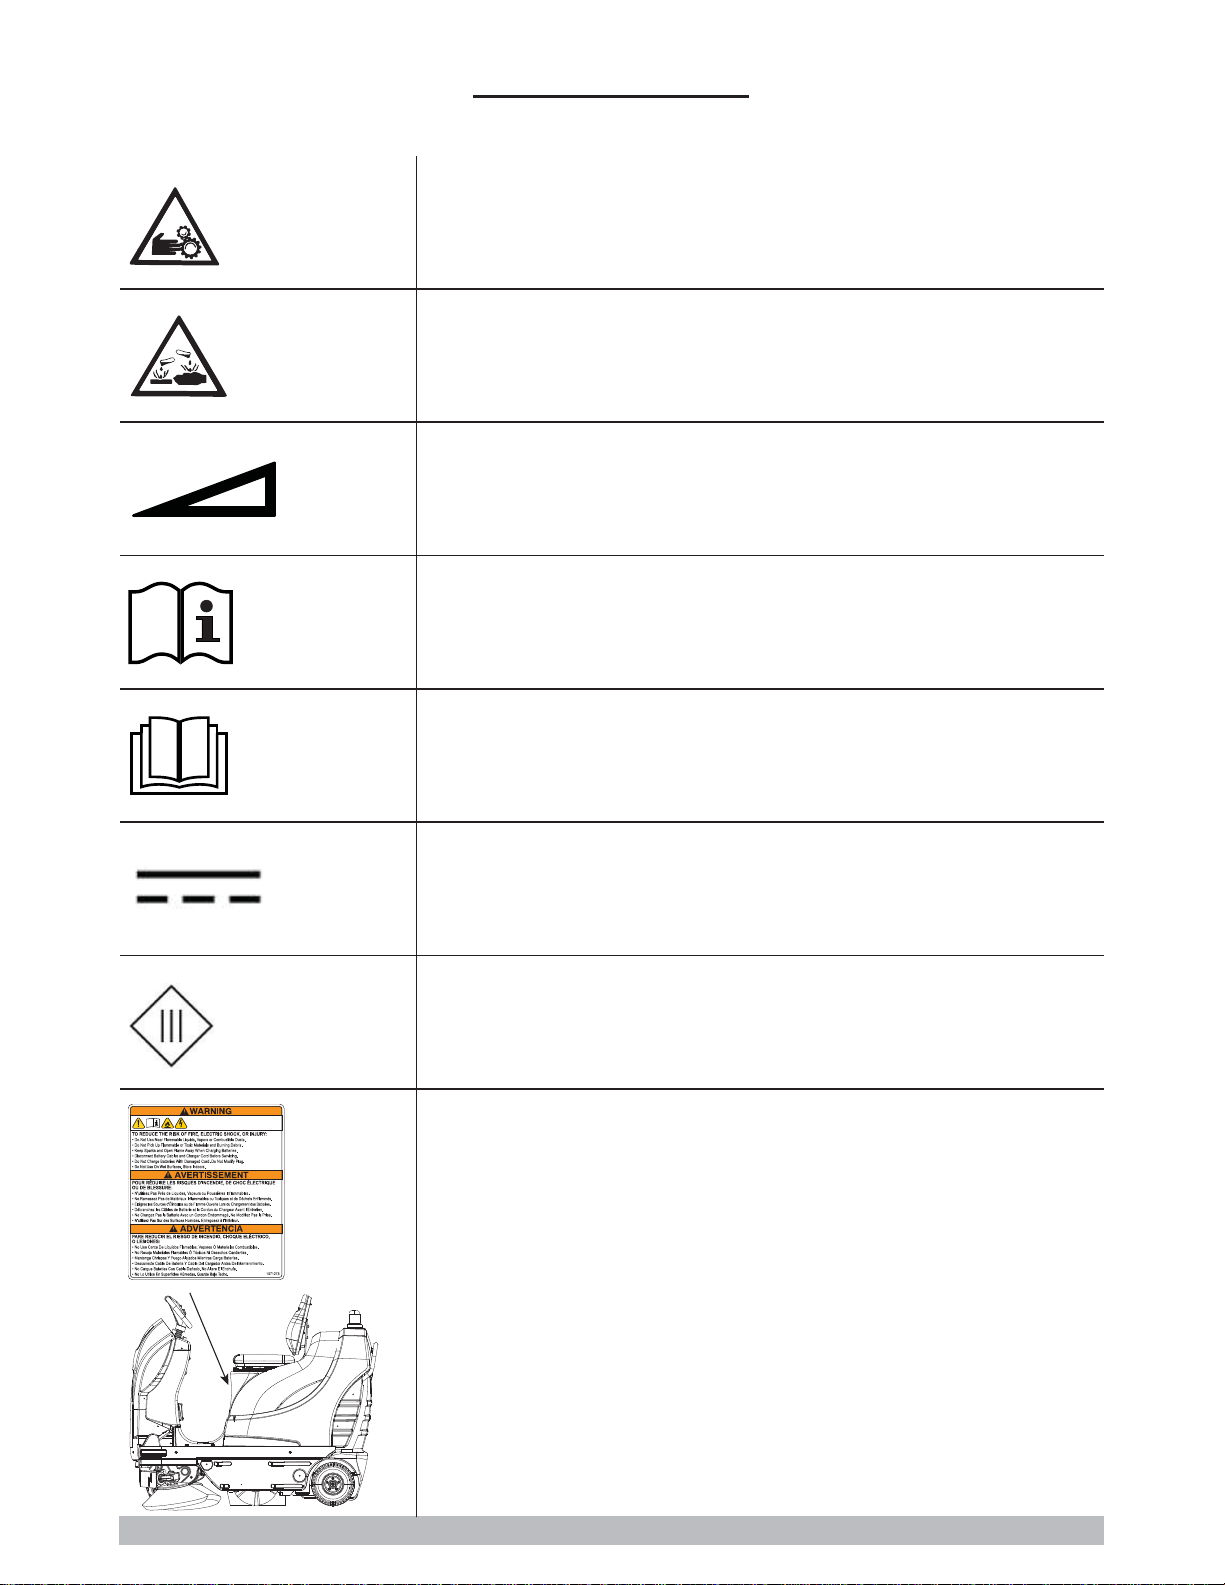
-Take care when handling battery acid, and
DYRLG FRQWDFW ,Q WKH HYHQW RI EDWWHU\ ÀXLG
OHDNDJHGRQRWWRXFKWKHÀXLGDQGREVHUYHWKH
following precautions: Contact with the skin
can cause irritation; wash with soap and water.
Inhalation of vapours can cause irritation
to the airways; stay out in the open air and
consult a doctor. Contact with the eyes can
cause irritation; wash the eyes immediately,
ÀRRGLQJZLWKZDWHUIRUDWOHDVWPLQXWHVDQG
consult a doctor.
-Never rest tools on the batteries as they could
cause short circuits leading to explosions.
-Always use the battery charger accompanying
the machine (if supplied), or if not, a product
ZLWK VSHFL¿FDWLRQV DV UHFRPPHQGHG LQ WKH
technical data.
-Installation of the battery should be entrusted
to a TENNANT approved service technician.
-Inspect the power cable of the battery charger
periodically to ensure that it is not damaged;
in the event of damage being discovered, the
appliance cannot be used. Replacement of
the cable should be entrusted to a TENNANT
approved service technician. Detach both
connections of the battery charger (AC side
and DC side).
-Do not tug at the battery charger cable to
disconnect it from the socket: grip the plug
4

EN
¿UPO\DQGSXOO
-Never wash the machine with water jets.
-Cleaning and maintenance operations that can
beperformedbytheusermustnotbeentrusted
to children unless under supervision.
-All repairs must be carried out by a TENNANT
approved service technician.
-Use only original accessories and spare parts
supplied exclusively by the manufacturer,
as only these are able to guarantee safe and
trouble-free operation of the machine.
-Never use parts removed from other machines
or from other kits.
When the machine is to be loaded onto or unloaded
from a vehicle:
-Empty the debris bin before loading the
machine.
-Do not drive the machine on a slippery ramp.
-Take particular care when operating the
machine on ramps.
-7XUQRႇWKHPDFKLQHDQGUHPRYHWKHLJQLWLRQ
key.
-Lock the wheels of the machine.
-Use straps to anchor the machine.
KEEP THESE INSTRUCTIONS SAFE.
5

EN
WARNING! RISK OF ENTANGLEMENT
WARNING! RISK OF ACID BURNS
MAXIMUM SLOPE
OPERATOR MANUAL, INSTRUCTIONS FOR USE
READ THE OPERATOR MANUAL
DIRECT CURRENT SYMBOL
INSULATION CLASS: THIS CLASSIFICATION ONLY APPLIES TO BATTERY
POWERED MACHINES.
SAFETY LABEL. THE SAFETY LABEL IS MOUNTED ON THE MACHINE
IN THE LOCATION INDICATED. REPLACE THE LABEL IF BECOMES
DAMAGED OR ILLEGIBLE.
SAFETY SYMBOLS
6

EN
TECHNICAL SPECIFICATIONS
Cleaning width mm 650
inches 25,6
Cleaning capacity per hour m2/h 4730 - 5860
ft2/h 50913.29 - 63076.51
Main brush diameter mm 280
inches 11.02
Side brush diameter mm 400
inches 15,74
Main brush motor power W 300
HP 0.4
Side brush motor power W60
HP 0.08
Drive motor power W 400
HP 0.53
Suction motor power W 180
HP 0.24
Filter shaker motor power W90
HP 0.12
Machine power (PM)W 1200
HP 1.6
Maximum speed km/h 6
mph 3.72
Debris bin capacity l70
galls. 18.49
3DQHO¿OWHUVXUIDFHDUHD m23,8
ft240.9
Front wheel diameter mm 250
inches 9.84
Rear wheel diameter mm 250
inches 9.84
Negotiable gradient 16% / 9°
Gross weight (GVW) kg 475
lbs 1047
Weight of the machine in transit without batteries kg 173
lbs 381.39
Weight of the machine in transit with batteries kg 309
lbs 681.22
Number of batteries no. 2
Machine voltage VMV 24Vdc
Individual battery capacity - Wet-Acid 12V Ah (20h) 225
Individual battery weight kg 58
lbs 128
Individual battery capacity - AGM 12V Ah (20h) 245
Individual battery weight kg 48
lbs 106
Supply voltage (battery recharge) Version
without on
board battery
charger
V 24Vdc
Max current (battery recharge) I23A
Machine dimensions mm X=1400 x Y=816 x Z=1142
inches X=55 x Y=32 x Z=45
Battery compartment dimensions (length, width, height) mm 480 x 370 x 360
inches 18.9 x 14.6 x 14.1
7

EN
Packed size (length, width, height) mm 1530 x 950 x 1460
inches 60.23 x 37,4 x 57.48
Sound pressure - Annex DD (Emission of acoustical noise) EN 60335-2-72: 2012 LpA
(dB) 72
Measurement uncertainty K
(dB) 3
Measured sound power Lwa
(dB) 74
Measurement uncertainty K
(dB) 3
Guaranteed sound power Lwa,g
(dB) 75
Measurement uncertainty K
(dB) 3
Vibration level (hand) - IEC 60335-2-72 HAV
m/sec21,1
Measurement uncertainty, k m/sec20,6
Vibration level (body) - IEC 60335-2-72 HBV
m/sec20,5
Measurement uncertainty, k m/sec20,2
IP degree IP IPX3
Gross weight (GVW): maximum permissible weight with the machine fully loaded and ready for use. The gross weight
of the machine includes the detergent solution tank full of clean water, empty dirty water tank (half full in the case of
UHF\FOLQJV\VWHPVHPSW\GXVWEDJVWKHKRSSHU¿OOHGWRLWVUDWHGFDSDFLW\WKHODUJHVWUHFRPPHQGHGEDWWHULHVDQGDOO
accessories such as cables, hoses, detergent, mops and brushes.
Transported weight: the weight of the machine including batteries, but excluding optionals (for example, the operator's
cabin, FOPS (Falling Object Protective Structure), second and third side brushes and front brush attachment), fresh
water (in the case of scrubbers or combination machines) and the weight of a standard operator (75 kg - 165.35 lbs).
Data subject to changes without prior warning
V, I: charging / supply values
VM, PM : machine in average operating conditions (all functions active)
8

EN
X-Y-Z: See "TECHNICAL SPECIFICATIONS" table
MACHINE DIMENSIONS
X
Y
Z
9

EN
GENERAL INFORMATION
Purpose of this manual
This manual has been written by the Manufacturer and is an integral part of the machine1.
,WGH¿QHVWKHSXUSRVHIRUZKLFKWKHPDFKLQHKDVEHHQGHVLJQHGDQGFRQVWUXFWHGDQGFRQWDLQVDOOWKHLQIRUPDWLRQUHTXLUHG
by operators2.
,QDGGLWLRQWRWKLVPDQXDOZKLFKFRQWDLQVLQIRUPDWLRQIRURSHUDWRUVRWKHUSXEOLFDWLRQVDUHDYDLODEOHSURYLGLQJVSHFL¿F
information for maintenance personnel3.
The terms “right” and “left”, “clockwise” and “anti-clockwise” refer to the forward movement of the machine.
Constant compliance with the instructions provided in this manual guarantees the safety of the operator and the machine,
ensures low running costs and high quality results and extends the working life of the machine. Failure to follow these
LQVWUXFWLRQVPD\OHDGWRLQMXU\WRWKHRSHUDWRURUGDPDJHWRWKHPDFKLQHÀRRUDQGHQYLURQPHQW
&RQVXOWWKHWDEOHRIFRQWHQWVDWWKHEHJLQQLQJRIWKHPDQXDOWR¿QGWKHVHFWLRQRILQWHUHVWZLWKRXWGHOD\
$OWKRXJK\RXUPDFKLQHPD\GLႇHUDSSUHFLDEO\IURPWKHLOOXVWUDWLRQVLQWKLVGRFXPHQWWKHFRUUHFWQHVVDQG
validity of the instructions contained in this manual are guaranteed.
Identifying the machine
The nameplate provides the following information:
- Name of manufacturer.
- Model.
- Serial number.
- Year of manufacture.
- Power supply voltage (charging/supply value).
- Current intensity (maximum charge level, in line as far as possible with the value indicated by the battery
manufacturer).
- Gross weight.
- IP degree of protection.
- Machine voltage (in average operating conditions).
- Machine power (in average operating conditions).
- Maximum negotiable gradient.
Documentation provided with the machine
- User manual;
- Instruction for setting the battery type on the machine;
- Quick Guide
- Battery Charger User Manual (included with charger).
7KHGH¿QLWLRQPDFKLQHUHSODFHVWKHWUDGHQDPHFRYHUHGE\WKLVPDQXDO
2 Persons responsible for using the machine without performing any operations requiring precise technical skills.
3 Persons with experience, technical training and a knowledge of legislation and standards, able to perform all the necessary operations and to
recognise and avoid possible risks in handling, installation, use and maintenance of this machine.
Model :
Vac :
W :
A :
Hz :
Ser.N :
Date :
IP :
Kg :
10

EN
TECHNICAL INFORMATION
General description
The machine described in this manual is a motorized
VZHHSHU GHVLJQHG WR VZHHS ÀRRUV LQ FLYLO DQG LQGXVWULDO
premises.
The motorized sweeper may be used to clean the residues
of industrial processes, dust and dirt in general on all
UHODWLYHO\HYHQÀDWDQGKDUGVXUIDFHVVXFKDVFRQFUHWH
asphalt, porcelain stoneware, ceramic tiles, sheet metal,
marble, embossed or smooth rubber or plastic mats.
Main parts of the machine
The main parts of the machine are listed below:
1. Debris bin.
2. Control panel.
3. Centre brush.
4. Side brush.
5. 6XFWLRQ¿OWHU
6. Filter shaker.
7. Driver seat.
8. Battery compartment.
9. Steering wheel.
10. Accelerator pedal.
11. Service and parking brake pedal.
12. Side brush operating lever.
13. ³/LIWÀDS´RSHUDWLQJSHGDODOORZVWKHFHQWUHEUXVK
to pick up bulky objects.
1
2
10
12
11
13
3
97
4
8
5-6
11

EN
Control panel
Themachinehasthefollowingcontrolsandindicatorlights:
14. Emergency stop button: acts as a safety device.
15. Speed potentiometer: regulates the maximum
speed of the machine forwards and backwards.
16. Direction selector switch, to set movement of the
machine to forwards or reverse.
17. Display, showing: Battery voltage (Volt), Alarm
codes and Hour counter.
18. Horn button.
19. Suction button: enables/disables the suction
motor.
20. Work program buttons (AUTOMATIC MACHINE
OPERATION): buttons used to set the machine’s
work program:
- P1, light duty cleaning program.
- P2, medium duty cleaning program.
- P3, heavy duty cleaning program.
21. Drive wheel LED status indicator.
22. Programming button: press this button to scroll
the parameters that can be set in the machine's
software.
23. Speed potentiometer, regulates the speed of
rotation of the side brushes.
24. Filter shake button, enables manual operation of
WKH¿OWHUVKDNHU
25. Main switch/Ignition switch: connects and
disconnects electrical power to and from all
functions of the machine.
26. Not used.
Accessories
See list of recommended spare parts
15
16
25
14
20
17
23
26
19
18 2122
24
12

EN
HANDLING AND INSTALLATION
Lifting and transporting the palletized
machine
! ATTENTION: during all lifting operations, make sure
WKHSDOOHWL]HGPDFKLQHLV¿UPO\VHFXUHGWRSUHYHQWLW
tipping over or being accidentally dropped.
The machine must be loaded onto/unloaded from
vehicles in areas with adequate lighting.
The machine is packaged on a wooden pallet by the
Manufacturer. It must be loaded on to the transporting
vehicle using suitable equipment (see Directive 2006/42/
EEC and subsequent amendments and/or additions). At
destination, it must be unloaded using similar means.
The palletized body of the machine can be lifted only with
the aid of a fork lift truck. Handle with care to avoid impact
and ensure the machine is not overturned.
Inspection on delivery
When the carrier delivers the machine, make sure the
packaging and machine are both whole and undamaged. If
the machine is damaged, make sure the carrier is aware of
the damage and before accepting the goods, reserve the
right (in writing) to request compensation for the damage.
Unpacking
! DANGER: when unpacking the machine, the
operator must wear suitable Personal Protection
Equipment (gloves, eyewear, etc.) to limit the risk of
injury.
When unpacking the machine, proceed as follows:
- Cut and remove the plastic straps using scissors
or nippers;
- Remove the cardboard packaging;
- Removetheside brushes placedinsidethebattery
compartment;
- Remove the bags placed inside the battery
compartment and check the contents: user
manual; quick guide; instructions for setting up
the battery type on the machine; battery bridges
with terminals; 1 x connector for battery charger;
2 x hex wrench;
- Remove the metal brackets securing the front/
rear wheels and the machine chassis to the pallet
base.
- Release the parking brake.
- Remove the brush from its packaging.
- Clean the outside of the machine, taking care to
observe safety regulations.
Once the machine is clear of the packaging, proceed to
install the batteries, referring to the section “Batteries:
installation and connection”.
The various items of packaging can be kept, if so desired,
as these can be reused to protect the machine in the event
RI LW EHLQJ PRYHG WR D GLႇHUHQW VLWH RU VHQW WR D UHSDLU
workshop.
If not retained, the packaging must be disposed of in
compliance with current regulations.
- 8VLQJDUDPSSXVKWKHPDFKLQHRႇWKHSDOOHWLQ
the reversing direction. The machine must not be
lifted.
13

EN
Batteries
! ATTENTION: do not use NON-rechargeable batteries
7ZR GLႇHUHQW W\SHV RI EDWWHU\ FDQ EH LQVWDOOHG RQ WKHVH
machines:
Leak-proof tubular batteries (WET): the electrolyte level
must be checked regularly.
Sealed batteries (GEL or AGM): this type of battery
requires no maintenance.
7KH WHFKQLFDO VSHFL¿FDWLRQV RI WKH EDWWHU\ PXVW
correspond to those listed in the section on the “Technical
VSHFL¿FDWLRQV´ of the machine. The use of heavier
batteries could seriously jeopardize manoeuvrability and
lead to the drive motor overheating. Lighter batteries of
lower capacity, on the other hand, will need to be charged
more frequently.
Machine Battery Selection Setting
! ATTENTION: where machines are shipped without
batteries, the machine is factory set for wet lead-acid
EDWWHULHVDVWKHGHIDXOWFRQ¿JXUDWLRQ
Depending on the type of battery selected (wet lead-
acid or sealed gel / AGM), the battery parameters of
WKHPDFKLQH0867EHDGMXVWHGLIGLႇHUHQWIURPWKH
factory setting.
! NOTICE
Enter the type of battery installed in the machine
software settings.
Follow the instructions below to adjust the machine logic
settings for the type of battery installed.
- 6ZLWFKWKHPDFKLQHRႇE\WXUQLQJWKHNH\
- 3UHVV EXWWRQV 3´ DQG ³3 DW WKH VDPH WLPH
then turn the key to switch the machine on.
- Press the programming button four times.
- 6HOHFWWKHW\SHRIEDWWHULHVLQVWDOOHGXVLQJWKH3´
or “P3” buttons: “battery ACID” or “battery GEL”.
- Store the parameter by pressing and holding the
programming button until the display shows the
software version installed.
14

EN
WET batteries, preparation:
! DANGER: The operations of preparing,
installing, connecting and removing the
batteries must be entrusted to a TENNANT-
approved service technician (referred to
hereinafter as skilled technician).
! DANGER: during installation of the batteries
or any type of battery maintenance, the skilled
technician must wear the Personal Protective
Equipment (gloves, eyewear, overalls, etc.)
needed to limit the risk of accidents. Keep away
IURPQDNHGÀDPHVGRQRWVKRUWFLUFXLWWKH
battery poles, do not generate sparks and do
not smoke.
!'$1*(5LQWKHHYHQWRIEDWWHU\ÀXLG
OHDNDJHGRQRWWRXFKWKHÀXLGDQGREVHUYHWKH
following precautions:
Contact with the skin can cause irritation; wash
with soap and water.
Inhalation of vapours can cause irritation to the
airways; stay out in the open air and consult a
doctor.
Contact with eyes can cause irritation, wash
eyes immediately and thoroughly with water for
at least 15 minutes; consult a doctor.
Batteries: installation and connection
! DANGER: during installation of the batteries
or any type of battery maintenance, the skilled
technician must wear the Personal Protective
Equipment (gloves, eyewear, overalls, etc.)
needed to limit the risk of accidents. Keep away
IURPQDNHGÀDPHVGRQRWVKRUWFLUFXLWWKH
battery poles, do not generate sparks and do
not smoke.
!'$1*(5LQWKHHYHQWRIEDWWHU\ÀXLG
OHDNDJHGRQRWWRXFKWKHÀXLGDQGREVHUYHWKH
following precautions:
Contact with the skin can cause irritation; wash
with soap and water.
Inhalation of vapours can cause irritation to the
airways; stay out in the open air and consult a
doctor.
Contact with eyes can cause irritation, wash
eyes immediately and thoroughly with water for
at least 15 minutes; consult a doctor.
! ATTENTION: the operation of installing and
connecting the batteries must be carried out by
TXDOL¿HGSHUVRQQHO
! ATTENTION: before carrying out the operations
GHVFULEHGEHORZVWRSRQDÀDWDQGOHYHOVXUIDFH
VZLWFKRႇWKHPDFKLQHUHPRYHWKHLJQLWLRQNH\DQG
apply the parking brake.
! DANGER: Make sure you connect the
terminals marked with a "+" to the positive
poles of the battery. Do not check the battery
charge by sparking.
Tilt the seat cowling toward the steering wheel, then place
the batteries in the compartment, positioning them as
indicated by the drawing.
Connect the wiring terminals to the battery poles, tighten
and cover with Vaseline.
ETET17886
15

EN
Return the seat cowling to the working position.
When using the machine, follow the instructions below.
Selection of battery charger
! ATTENTION: check that the battery charger is
compatible with the batteries being charged.
Tubular lead-acid (wet) batteries: an electronic battery
charger is recommended. In any event, contact the
PDQXIDFWXUHUDQGFRQVXOWWKHPDQXDOWRFRQ¿UPWKDWWKH
external battery charger is suitable.
*HORU$*0EDWWHULHVXVHDFKDUJHULQWHQGHGVSHFL¿FDOO\
for this type of battery.
Preparing the battery charger
! ATTENTION: authorized service technician required
to perform this procedure.
When using a battery charger not provided with the
PDFKLQHLWPXVWEH¿WWHGZLWKWKHFRQQHFWRULQFOXGHGLQ
the machine equipment package.
The connector supplied for the external battery charger is
suitable for cables with maximum cross-section 16 mm2
3URFHHGDVIROORZVWR¿WWKHFRQQHFWRU
remove around 13 mm of the protective sheath from the
red and black conductors of the battery charger cable;
attach the ends to the contacts of the connector and
squeeze forcibly with suitable crimping pliers;
make certain the polarity is correct (red + black –) when
attaching the wires to the connector.
Fitting the side brush
! ATTENTION: before carrying out the operations
GHVFULEHGEHORZVWRSRQDÀDWDQGOHYHOVXUIDFH
VZLWFKRႇWKHPDFKLQHUHPRYHWKHLJQLWLRQNH\DQG
apply the parking brake.
Assembly:
- Undo the screw on the motor shaft.
- Check that the drive key is located in the keyway
of the motor shaft.
-3RVLWLRQ WKH EUXVK FRPSOHWH ZLWK ÀDQJH RQ WKH
motor shaft.
- Retighten the clamp screw.
Plug the battery connector into the machine
Disassembly:
- Repeat the steps described above in reverse
order.
16

EN
PRACTICAL GUIDE FOR THE
OPERATOR
Clothing and equipment
Wear safety shoes with non-slip soles.
Wear protective eyewear or visor and safety garments.
Depending on the surface being cleaned and on the
environment, the protective measures necessary for
atomized sprays include respiratory masks with class
FFP2 or equivalent or higher protection.
Before starting the machine
Clear away larger items of refuse before sweeping. Pick
up any pieces of wire, tape, string and similar items that
could become entangled around the brushes.
Preparing the machine for work
Proceed as follows before starting work:
- Check that the batteries are fully charged, and
if not, carry out the recharging procedure: when
undertaking this operation, refer to the section
“Charging the batteries”.
- Make certain that the debris bin is empty and, if
not, empty it referring to the section “Emptying
WKHGHEULVELQ´.
! ATTENTION: When sweeping on carpet, it’s
UHFRPPHQGHGWRLQVWDOOWKHRSWLRQDO3UH¿OWHUSQ
FTDP00202).
! NOTICE
The operator seat can be adjusted for position, to
make the use of the machine more comfortable.
Working
$77(17,21GRQRWXVHWKHPDFKLQHZLWKRXW¿UVW
reading the operating and maintenance manual.
! ATTENTION: avoid sweeping up pieces of wire, tape,
string and similar items that could become entangled
around the brushes.
! NOTICE
Releasing the accelerator pedal, all of the functions
are stopped automatically within 5 seconds (Power
2ႇLQWKLVVWDQGE\FRQGLWLRQWKHLQGLFDWRUOLJKW
corresponding to the selected program will blink. To
reactivate the functions, simply move the machine
IRUZDUGZLWKRXWGHVHOHFWLQJWKHSURJUDP3RZHU2ႇ
On).
! NOTICE
7KH³3RZHU2ႇ´V\VWHPFDQEHHQDEOHGGLVDEOHG
by way of the machine software menu; refer to the
VHFWLRQ³86(50(18´
! DANGER: Never sweep up combustible
SRZGHUVÀDPPDEOHRUH[SORVLYHOLTXLGVHJ
petrol, fuel oil, etc.), acids and solvents (e.g.
paint thinners, acetone etc.) even if diluted.
- Sit on the seat.
- Turn the ignition key to switch the machine on.
- Use the drive selector to select the drive direction.
- From the three available programs, select the one
most suitable for the work being performed; by
pressing these buttons, all of the functions relating
to the selected program will be activated (brush
motor, suction motor):
17

EN
! NOTICE
$UHVHWWDEOHIXVHLV¿WWHGDERYHHDFKRIWKHVLGH
brush operating levers.
In the event that a side brush should stop working,
press the button to reset the fuse.
-P1, light duty cleaning program for quartz
FRQFUHWHÀRRUVVPRRWKÀRRUV
- 3PHGLXPGXW\ FOHDQLQJ SURJUDPIRU¿WWHG
carpet or other surfaces.
- P3, heavy duty cleaning program for asphalt
RUXQHYHQÀRRUVZLWKFRDUVHGHEULV
! NOTICE
7RFKDQJHIURPRQHSURJUDPWRDQRWKHU¿UVW
deselect the existing program, then select the new
program.
- Lower the side brushes by pulling the relative
levers out and easing them down.
- The maximum operating speed can be set by
turning the speed potentiometer.
- The maximum speed of rotation of the side
brushes can be set by the operator.
- Start cleaning, turning the steering wheel by hand
and depressing the accelerator pedal.
- If the machine has to be used on damp ground, it
LVHVVHQWLDOWRSURWHFWWKHSDSHU¿OWHUDFFRUGLQJO\
VKXWRႇWKHVXFWLRQPRWRUE\SUHVVLQJWKHVXFWLRQ
button.
18

EN
To stop the machine, release the accelerator pedal and
GHSUHVV WKH EUDNH SHGDO UHIHU WR WKH VHFWLRQ Service
brake and parking brake ".
%HIRUHOHDYLQJWKHPDFKLQHXQDWWHQGHGVWRSRQDÀDWDQG
OHYHOVXUIDFHVZLWFKRႇWKHPDFKLQHUHPRYHWKHLJQLWLRQ
key, make certain that the side brushes are raised clear of
the ground, and apply the parking brake.
Service brake and parking brake
To apply the service brake, depress the brake pedal and
at the same time operate the parking brake release lever.
To release the parking brake, press the release lever next
to the pedal.
To apply the parking brake, depress the brake pedal fully.- Press the “Lift Flap” pedal to pick up bulky items.
19

EN
During operation of the machine
- Keep the cleaning passes as straight as possible.
- Overlap successive cleaning passes by a few
centimetres.
- Adjust the speed of the machine according to the
type of cleaning. Use the minimum brush pressure
settings, as far as practically possible.
- Check the battery charge indicator to ensure
WKHUHZLOOEHVXႈFLHQWSRZHUIRUFRPSOHWLRQRIWKH
cleaning operation.
! ATTENTION: Do not operate the machine on slopes
or gradients steeper than indicated on the data plate.
! ATTENTION: When using the machine on gentle
gradients, do not move transversely across the
slope, but keep the machine on a line parallel to the
direction of the incline, manoeuvring carefully and
without making U-turns.
Emergency stop button
In the event of emergency, this button isolates the machine
from its power source.
7RFXWRႇWKHSRZHUVXSSO\SUHVVWKHEXWWRQ
To restart the machine, rotate the button.
Safety thermostat
The safety thermostat is located in the position shown.
6KRXOG D ¿UH KDSSHQ WR VWDUW XS LQVLGH WKH GHEULV ELQ
WKHWKHUPRVWDWZLOOFDXVHWKHWKHVXFWLRQIDQWR VKXWRႇ
Proceed as follows:
- Move the machine to a safe area.
- Remove the ignition key and apply the parking
brake.
- Open the debris bin and remove the source of the
heat.
Battery charge indicator
The display indicates the battery voltage: when the value
drops below a given level, all cleaning functions are
stopped, whereas the drive system remains enabled.
Refer to the section ³$ODUPVGLVSOD\PHVVDJHV´.
Proceed to recharge the batteries: for this operation, refer
to the section “Recharging the batteries”.
20
Table of contents
Languages:
Other Tennant Blower manuals

Tennant
Tennant 250 Product manual

Tennant
Tennant 6200 Training manual

Tennant
Tennant SweepSmart S20 ELECTRIC Training manual

Tennant
Tennant 6400 User manual

Tennant
Tennant 614214-Tennant 3610 Product manual

Tennant
Tennant 6600 User manual

Tennant
Tennant 6200 Training manual

Tennant
Tennant S20 Gas User manual

Tennant
Tennant S12 User manual

Tennant
Tennant 6500 User manual

Tennant
Tennant S6 User manual

Tennant
Tennant S6 User manual

Tennant
Tennant 6100 Training manual

Tennant
Tennant 810 LPG User manual

Tennant
Tennant 285 User manual

Tennant
Tennant 830 User manual

Tennant
Tennant 280 User manual

Tennant
Tennant 9014819 Product manual

Tennant
Tennant S7 User manual

Tennant
Tennant 6200 User manual