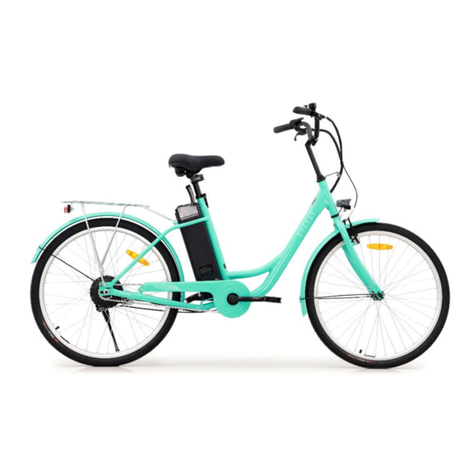
Tenways CGO800S User manual

Installation
Manual
CGO800S

Tool Box check list.
Bike box
Battery Pack Tool Box
(1) Take your bike, tool box, and battery pack out of the box.
(2) Remove and recycle all wrapping materials.
01
Unwrap your TENWAYS E-bike.
10mm
Wrench
15mm
Wrench
3mm
Hex Key
4mm
Hex Key
5mm
Hex Key
Charger
Bicycle Pedals
LR
Phillips Head
Screwdriver
Front & Rear
Cycling
Pump
Adapter
2

(1)
Remove
Plastic
Covers
Twist the head of the handlebar so that it faces forward. (1) Remove the front wheel and the plastic protective covers on
both sides of the wheel.
Hold your e-bike with the kickstand down to facilitate the
next installation steps.
02 03
Rotate the head of the handlebar. Remove the front wheel.
(2)
You must remove the front wheel in the direction of the spokes to avoid
scratching them.
4 5

(1) (1)
Loosen the nut and remove the quick release lever. Secure the nut behind the head light with the 10mm Wrench,
and then loosen the screw with the 5mm Hex Key.
Remove the protective sheet from the brake clamps.
Put the nut back, and then slightly tighten it.
Use the 4mm Hex Key to remove the pre-installed screws
on the front fork joints, install the two support rods on the
joints, and then slightly tighten the screws here.
Manually adjust the height of the mudguard to the top
position, and then tighten all screws.
(2)
(2)
(3)
(3)
(4)
(4)
(5)
Remove all wrapping material from the quick release.
Remove the nut, and then hook the middle of the front
mudguard to the screw.
There is no need for you to fully tighten the nut at this time.
The protective sheet on the brake should be removed only at this step, and kept for future use.
Removing it too early could damage the brake caliper.
When installing the quick release spring, you should ensure that the orientation is the same as
when it was removed.
05
Install the front wheel mudguard.
0
4
Remove quick release from the front
fork. Pre-install it on the front wheel.
10mm
Wrench
15mm
Wrench
3mm
Hex Key
4mm
Hex Key
5mm
Hex Key
Keep wrapping materials and
protective sheet for future use.
Install the quick release on the front wheel in the direction shown in
the gure, and then tighten the nut.
6 7

(1)
(2)
(3)
Adjust the quick release lever to the open position. Install the front
wheel; make sure that the brake disc is in the middle of the brake
clamps.
Tighten the quick release nut, and then turn it to the closed position
as shown in the gure.
Push the e-bike back and forth and press the brake to check if the
front wheel wobbles. If so, please repeat step 2 until you feel enough
resistance when closing the quick release lever.
(4)
(5)
Turn the front wheel by hand and check if there are any signs
of scraping.
If yes, please follow the steps below to make adjustments:
Install the front wheel.
06
-
-
-
-
-
-
Use the 5mm Hex Key to slightly loosen the mounting screws of the
brake clamps to make sure that they can move slightly.
Press the front brake 3 to 5 times.
Hold the front brake and tighten the mounting screws of the brake
clamps.
Turn the front wheel by hand and listen for the sound of friction.
If there is friction, loosen the mounting screws of the brake clamps.
Manually adjust the position of the brake clamps to center the disc,
and then re-tighten the screws.
This step is extremely important, so please read carefully. This step is extremely important, so please read carefully.
3mm
Hex Key
4mm
Hex Key
5mm
Hex Key
8 9

Install the battery.Install the pedals.
(1) (1)
Separate the left and right pedals.
The right and left pedals are marked by an R and an L respectively.
The right pedal is used for the side with the crankset, while the left
one is used for the other side.
Tilt and clip the lower end of the battery into the battery slot,
and then press the upper end.
(2) You will hear a click when the battery is rmly seated.
07 08
Left Right
Tighten the right pedal clockwise and the left pedal
counterclockwise.
Please stop tightening the pedals if you feel a lot of resistance. If
this happens, align and reinstall the pedals.
(2)
(3)
10mm
Wrench
15mm
Wrench
10 11

Open the seat post clamp, adjust the saddle cushion to a suitable
height, and then lock the clamp.
Distinguish between the front reector and the rear one. The
rear reector is red, while the front one is white.
The height of the seat post cannot exceed the marked safety line.
(1) (1)
(2)
Use the Phillips head screwdriver to install the rear reector
to the seat post and the front one to the handlebar.
Adjust the height of the saddle cushion.
09 10
Install the reectors.
Phillips Head
Screwdriver
Front
Reector
Rear
Reector
12 13

(1) (1)
(3)
(3)
(4)
You can press and hold the On/Off button to turn on the panel. The panel displays the real-time speed by default after it is
turned on.
The panel will be turned off if you long press the On/Off button again
when it is on.
The battery percentage is displayed at the top.
The e-bike will automatically shut down if it is not used for more than
ten minutes.
M Botton
Speed Up
Speed Down
ON / OFF
Left-turn Indicator
Right-turn Indicator
Display panel
(2)
(2)
The default passcode is 0000.
You can press the M button 5 times to enter the operation interface. The PAS level is shown at the lower right corner of the panel
display, while TRIP (a specic distance in kilometers your e-bike
has traveled) and ODO (the total number of kilometers your
e-bike has traveled) are shown at the middle position.
Panel operations
How to turn on the panel. Panel display interface
11
M
14 15

(1)
You can long press the M button to switch from the TRIP and ODO
interface to the AVG and MAX interface.
(2)
The AVG and MAX interface shows the average speed and the
maximum speed.
How to switch between the main interfaces.
(1)
(3)
You can use the Up and Down buttons to select from 5
assistance modes.
PAS 0 is the default when the panel is turned on.
(2)
The 1st and the 5th PAS represent the lowest and the highest
power respectively.
Adjust the assistance.
16 17

(1)
Short press the RIGHT/LEFT turn indicator button to turn on the rear
turn signal on the RIGHT/LEFT side.
(2)
(3)
Press and hold the LEFT-TURN Indicator button for 2 seconds to turn
on the head light and tail light.
Press and hold the RIGHT-TURN Indicator button for 2 seconds to turn
off the head light and tail light.
How to use the head light and the tail light.
The e-bike will enter Assisted Pushing if you press and hold the
DOWN button for 2 seconds.
Assisted pushing.
This feature can only be used when you’re walking and pushing the e-bike.
18 19

(1)
(1) The parameters can be set to show in metric or imperial units
after you select the display unit interface.
You can use the UP/DOWN buttons to set/cancel the passcode after
selecting the passcode setting interface.
(2)
(2)
(3)
(3)
By default, the panel displays parameters in metric units. You
can use the UP/DOWN buttons to change it into imperial units.
You can also use these buttons to change the passcode.
Long press the M button to exit and save the settings.
Long press the M button to save the settings and exit after you
change the passcode.
How to modify display units.How to change the passcode.
20 21

(1)
If an “ERROR” message appears on the screen, please refrain
from further use.
(2)
(3)
You need to contact TENWAYS customer service immediately
and provide the error code information.
We will help you solve the problem as soon as possible.
Error codes.
Error code Denition
21 Abnormal current
22 Handlebar abnormalities
23 Motor phase loss
24 Hall signals of the motor are abnormal
25 Brake abnormalities
30 Communication abnormalities
(1)
You can press and hold the M and DOWN buttons at the same time to
reset the trip distance in the TRIP/ODO interface.
(2)
The trip time will also be reset if you reset the distance.
How to reset the trip distance.
22 23

How to connect to the TENWAYS App.
12
(1)
(4)
(5)
(6)
(2)
Turn on the Bluetooth
feature of your phone.
Fill in the color of your
e-bike and give your
e-bike a name.
Turn on the panel of your
e-bike, and then enter the
passcode.
Your e-bike will be
connected to TENWAYS
App automatically after 10
seconds.
Open the TENWAYS App.
(3) Click "Register", and then
scan the QR code on the
frame.
QR code
24 25

Charge the battery to 100% before your rst ride.
When charging your e-bike: Before riding, check whether the screws in the following key parts are properly
tightened:
Use a rag or large brush to clean the dust when there is not much sludge on your
e-bike.
When there is a lot of sludge on your e-bike, use a brush and soapy water to wash
off the sludge, rinse it with clean water, and then dry it with a cloth.
Check the wear degree of the brake blocks after you have them cleaned to see if
they can ensure normal braking. Replace them promptly if they are seriously worn.
It is recommended to clean the e-bike after you ride it for about 200 km. You need
to clean the bike rst before you put it into storage if you plan to not ride for a long
period of time.
After all screws are properly tightened before the rst ride, check if they maintain
the same fastening performance when your e-bike reaches a 200 km riding
distance and at every 1,000 km after the initial 200 km.
It is recommended to check the fastening performance of screws at every 600 km
if you usually ride under complex road conditions.
Check the tire pressure by hand or with a tool and ensure the pressure is within
the range of 50-75 PSI/3.4-5.1 BAR.
Press the driving belt to check whether the belt tension is proper (you should
be able to press the middle part of the belt down 10-15 mm if the tension is
moderate).
If you want to use your e-bike on public roads, please make sure that you comply
with local riding regulations, for example those governing riding equipment,
control lights, and reectors.
Make sure that you wear the correct protective equipment. Always wear a helmet
and be visible.
When properly adjusted, the saddle should be at hip height.
Check and ensure that the front wheel quick release, handlebar, brakes, pedals,
and other related parts of the e-bike are properly fastened before you start to ride.
The brake settings vary by country/region. Check which brake lever acts on which
brake rst, and if it does not comply with your habits, we recommend that you
ask an expert to change the settings so that you can accurately brake the front
and rear wheels if an emergency occurs while you’re riding. If you encounter any
problems while riding, please brake rst (please brake the two wheels at the same
time to stop within the shortest possible distance).
Check the steering; the steering has a crucial impact on braking and riding safety.
We recommend that you purchase relevant insurance for bikes or e-bike riding in
your area so that you can contact your insurance company or agency promptly to
get adequate protection in the event of an accident.
i. Charge the bike indoors and keep it away from direct sunlight, rain or snow.
ii. Do not charge the bike with non-TENWAYS chargers.
iii. Ensure a proper ambient temperature. The best ambient temperature for the charger is 20℃
to 25. A lower temperature may lead to insufcient charging, while a higher temperature may
lead to overcharging.
iv. It is recommended to remove the charger immediately after the bike is fully charged to avoid
overcharging the battery.
i. Screws between the handlebar and the front fork stem.
ii. Screws between the brake lever and the handlebar.
iii. Screws between the brake clamps and front fork.
iv. Screws on the chainring
Before your rst ride. Routine maintenance
Daily inspections
Daily cleaning
Do not clean the bike with a high-pressure water gun, as this might damage the mechanical pivots
and related mechanical tting parts.
26 27

Routine maintenance
It is recommended to go to a professional store for maintenance 2-3 times a quarter,
or after every 1,000 km of riding. The following items should be checked during such
maintenance:
Operating and storage temperatures of the battery
Working temperature of the lithium battery is 0°C to 30°C.
It is recommended that the lithium battery be stored in an environment where
the temperature is 0°C to 25°C, and the humidity is 65 ± 20% RH.
The performance of lithium batteries is affected by the ambient temperature.
Don't worry if the performance of your battery degrades during cold weather. The
battery performance will resume when the temperature rises.
If possible, the battery should not be charged above 95% or discharged below 10%,
as this may decrease battery life. A reasonable charging and discharging scheme
can mitigate accelerated battery deterioration.
Keep the power at 50% to 70%, check the battery condition every 2 months to
avoid damage caused by over-discharging, charge and discharge the battery every
3 months if it is not used for a long time.
The new brake blocks and discs feature relatively smooth surfaces, so the braking
effect will improve after you ride 100 km or brake on long downhills 3 to 5 times,
when such surfaces are roughened.
Check screws between the brake lever and the handlebar, as well as screws
between the brake clamps and frame or front fork:
The wear degree of brake blocks should be checked after you’ve ridden on normal
roads for 1,000 km, or 600 km if the road conditions are complex. The blocks
should be replaced promptly when two thirds or more are worn.
Contact a professional store and ask technicians to replenish the lubricant after
you conrm that there is no sign of oil leakage on the brakes when you feel that
they are obviously softened even though their wear degrees are still acceptable.
Contact a professional store and ask technicians to find out the cause of any
abnormal noise and come up with a solution if you notice obvious abnormal noise
during riding and the problem persists after you clean the oil on the brake blocks
and discs.
Performance of the hydraulic brakes.
The fastening performance of screws, especially those between the discs and
bottom brackets, in key parts.
The wear degree of the head parts.
The wear degree of the front hub bearings.
The wear degree of the pedal pivots.
The professional store should lubricate the internal pivots to ensure the
smoothness of pivots in front fork parts, front hub bearings, bottom bracket, and
other parts.
The wear degree of the tires.
The fastening performance of the bottom bracket torque sensor, battery, controller,
motor, display, and other electronic control parts.
i. Check if these screws maintain the same fastening performance when your e-bike reaches a
200 km riding distance
ii. Check the fastening performance at every 1,000 km after the initial 200 km.
iii. It is recommended to check the fastening performance of screws at every 600 km if you
often ride under complex road conditions
Routine maintenance
Professional store maintenance
How to maintain the battery
How to maintain the brakes
28 29

Frame code
The frame code, which is in the form of a QR code, can be found near the bottom
bracket at the bottom of the frame down tube. You can scan the QR code with
your phone to see the 15-digit frame code. You can use the frame code to purchase
insurance. Please provide your frame code information when contacting us for
consultations.
This product has passed the relevant certification of EN15194-2017 electrically
powered assisted cycles regulations.
All original components are covered by warranty for a period of two years from the
date of delivery.
Claims under this warranty must be made directly to TENWAYS and proof of
purchase is required.
The warranty applies to original owners and is transferable to further owners.
The warranty does not cover:
Warranty
QR code
i. An incorrect assembly or installation of the product by the user.
ii. An improper or negligent use, operation, or transformation of the product.
iii. A maintenance contrary to the maintenance instructions of the product (e.g., lack of
maintenance of the brakes).
iv. Normal wear and tear.
v. Defects inherent to the normal useful life or service life of the product.
vi. Damages or defects due to accidents.
30 31

FAQ
What is the model of this e-bike? Which terrains is this e-bike targeted at?
It’s an urban commuter intended for urban pavement or slightly potholed roads.
Do not ride it on mountain roads. Otherwise, accidents may occur.
What is the weight of the whole bike including the battery?
It’s about 23 kg.
What should I do if any parts are damaged or any abnormality occurs during use?
Please contact TENWAYS customer service immediately, or turn to relevant
professionals for inspection and maintenance.
What is the overall noise level of this product while riding?
This product has passed the relevant certication of EN15194-2017, meaning the
rider will not hear any sound higher than 70 dB from this e-bike during riding.
What is the proper belt tension?
The tension value should stay within 45 to 60 Hz (35 to 45 lbs), which means the
middle part of the belt should sink for 10 to 15 mm when you press it down by
hand.
How long would it take to fully charge the battery?
About 4.5 hours
What is the riding distance of one battery charge?
70 to 100 km.
What are the tire pressure requirements?
The air pressure of the tires should stay within the range of 50-75 PSI/3.4-5.1 BAR.
Q
Q
Q
Q
Q
Q
Q
Q
A
A
A
A
A
A
A
A
This bike is designed for urban riding. Do not use it for racing, mountain biking, or
other non-urban usage scenarios. It is important to understand your e-bike and
its intended use, as personal safety incidents may occur when you use it in wrong
usage scenarios.
Inspection and maintenance is very important to the safety and service life of
your e-bike. You should check the brakes, tires, handlebar, and rims regularly. Any
unmaintained parts may break or perform poorly, possibly causing life-threatening
accidents.
If you choose to attach a spring-loaded child seat, please make sure it is installed
and tted correctly to avoid possible injury.
Your bike must comply with legal regulations for riding on public roads in all
conditions, including inclement weather, at night, early morning, or dusk. It is your
responsibility to familiarize yourself with and comply with all applicable laws in
your country, including properly equipping you and your bikes as required by law.
Improper tting, installation, operation and maintenance of any accessories and
parts may cause serious personal injuries or even death. Do not modify the frame
or original components in any way. Modifications may cause damages to your
e-bike and lead to life-threatening accidents. Mismatched accessories or incorrect
installation can affect product performance and make riding unsafe.
Like all mechanical parts, bikes are also subject to wear and stress. Different
materials and components may react to wear or stress fatigue in different ways.
Make sure you have spare parts ready for tires, brake blocks, and other fragile parts.
If the design life of a component has been exceeded, it may suddenly fail, causing
injuries to the rider. Any cracks, scratches, or color changes indicate that the life of
the component has been reached and it should be replaced.
Extra caution should be exercised when you install any third-party accessories on
your bike. Child seats and racks may increase the load and raise the overall center
of gravity for the bike. If the bike gets out of control, you and the child passenger
may be injured or even killed.
Do not touch the brake discs while the front and rear wheels are still turning, or
after you use the brakes. You may be injured or burned.
If you have any questions related to the battery, please feel free to contact
TENWAYS.
A great deal of concentration is required when you’re riding. Sudden braking or
steering may result in an accident.
Do not modify or tamper with the motor and built-in computer system of the bike.
Modication or tampering of any kind will void your warranty and may cause a life-
threatening accident.
The brake settings vary by country/region. Check which brake lever acts on which
brake rst. If it does not comply with your habits, we recommend that you ask an
expert to change the settings.
Urban cycling can be dangerous. Riding without a helmet can result in serious
injuries or even death.
Warnings
32 33

Warnings
Do not use a headset or talk on the phone while riding.
Do not ride when you don’t have full control of the bike.
The CGO800S is not designed to match any trailers.
Ride with extra caution on slippery surfaces. Ride slowly and brake lightly to allow
for longer braking distances.
Your riding speed should t the road conditions, your capabilities, and local laws
and regulations.
Featuring better braking ability, our disc brakes may perform differently from
other brake systems. Please familiarize yourself with their special feeling before
you ride for the rst time.
Ensure that all lights function properly and are not blocked. We recommend the
use of lights in all environments to ensure maximum visibility.
The max load of the rear rack is 5kg.
When adding third-party accessories to your e-bike, you need to ensure the
compatibility. Child seats and backpacks may raise your center of gravity, affect
your balance, and sabotage your control of the e-bike. If the bike gets out of
control, you and the child passenger may be injured or even killed.
Do not keep the motor running under high load for a long time.
Do not charge the bike with any non-TENWAYS chargers.
Do not place the bike in a strong magnetic eld, or put any magnetic objects near
the bottom bracket.
The bike is designed to withstand a maximum weight of 120 kg, exceeding this
weight may cause a life-threatening accident.
Do not hang bags, umbrellas, and other overly large or heavy items on the
handlebar.
Do not wear overly long clothes while riding, as they may get entangled in the
wheels or crankset.
Do not attempt to open or touch the internal components of the e-bike, as this
may cause permanent damage.
Do not break the motor violently, or immerse the motor in water.
Unless required for maintenance, do not attempt to remove the display.
Do not use components from other e-bike brands on TENWAYS e-bikes.
This manual cannot cover the installation and maintenance methods for each
e-bike part, and the technical details shown in texts and illustrations in the manual
may also change, so please contact TENWAYS if you cannot nd answers to your
technical problems.
3534

tenways.com
EPAC according to EN15194
Table of contents
Other Tenways Bicycle manuals
