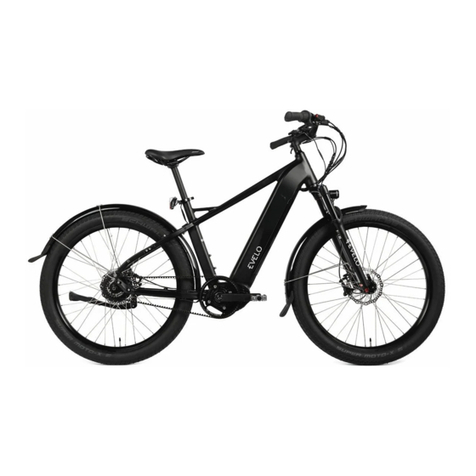
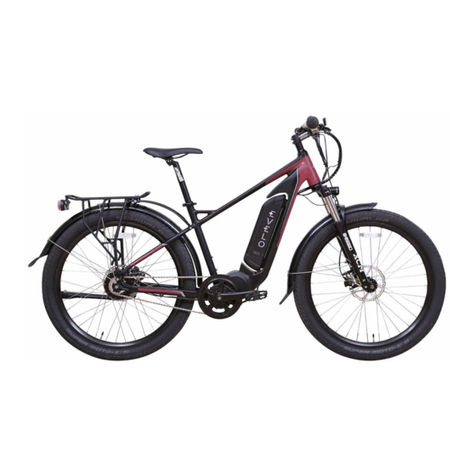
Evelo Compass User manual

COMPASS
OWNER’S MANUAL
Important Safety and Product Information

2
TABLE OF CONTENTS
quest_manual_final_single.indd 2 09/06/2017 19:55
Welcome! ........................................................................ 3
Contact Information ............................................................ 3
Unboxing ............................................................................. 4
Registration ......................................................................... 5
Warranty ............................................................................ 7
Battery care and Maintenance ......................................... 8
Assembly ........................................................................... 9
Riding and use of your Compass ....................................... 19
Best Performance .............................................................. 23
Safety ................................................................................. 24
Maintenance ....................................................................... 25
Troubleshooting ................................................................. 26

3
Congratulations on the purchase of your new
EVELO Electric Bicycle!
This manual is designed to give you an understanding of the basic operation and
maintenance of this bike. We believe that great customer service is part of your
purchase, so please reach out to us if you ever need guidance or assistance.
The latest version of this Owner’s Manual is always available at
http://support.evelo.com/support/solutions
We suggest that you read this manual in its entirety before using your bicycle.
Because Continuous Improvement is a key operational philosophy at EVELO Electric
Bicycles, some images and descriptions in this manual may differ slightly from the bike
you have.
Riding a bicycle is an inherently dangerous activity, and it is your responsibility to ride
safely and within your abilities. Proper assembly is vital to the safe operation of your
bicycle, so seek professional assistance if you are unable to complete the assembly of
your bicycle as outlined in this manual.
Our folding bicycles have been tested and recommended for use by riders weighing
250 pounds (113 kilograms) or less.
WELCOME!
Your enjoyment of — and satisfaction with — your new bike is important to us.
our toll-free tech support at 1-877-991-7272.
Many common service related issues are addressed in our online knowledgebase:
http://support.evelo.com/support/solutions
CONTACT INFORMATION
quest_manual_final_single.indd 3 09/06/2017 19:55

4
UNBOXING
It is recommended to retain the original packaging for a short period of
time and keep it as intact as possible. This original packaging is useful for
shipping, should you ever choose to.
Since the bikes are heavy, we have a couple of suggestions for removing the it
from the box: If you intend to lift the bike up and out of the box, a second person is
highly recommended. The Compass intentionally ships upside down (resting on the
basket) and assembly assumes this starting position.
There are some plastic pieces used as protective packaging. These are not needed for
the assembly of the bicycle.
Take your time cutting the zip ties used to hold packaging. There are some similar
looking zip ties that are used to secure wires to the frame—do not cut ties that are
holding wires in place.
Some smaller parts are shipped in the box containing the charger—be sure to open that
box prior to beginning assembly.
Included with your bike are the following:
• EVELO Owner’s Manual
• Keys for the battery
•3 Wheels
•Fendersand mounting bolt(s)
•Headlight
•Handlebar assembly
• Charger
• Assembly tools
• Front Quick Release Skewer
quest_manual_final_single.indd 4 09/06/2017 19:55

5
Please take a moment to write your serial number here and keep a record in a safe place:
BIKE SERIAL NUMBER
Please note that your keys are unique to your bicycle and EVELO cannot provide exact
replacements. We recommend using one key for day to day use, and storing the other.
................................................................
REGISTRATION
of YOUR EVELO ELECTRIC BICYCLE
Please ll out the warranty form located on our website at www.evelo.com/warranty/
to register your bicycle.
Registration is required before we can process a warranty claim.
Registration is also a great security feature. Serial numbers can be used to identify
your bike if it is stolen.
The frame’s serial number is located on the head tube, just above the front fork:
quest_manual_final_single.indd 5 09/06/2017 19:55

6
Warranty Overview
Every EVELO Electric Bicycle comes with a 4 year warranty against manufacturing
defects in materials or workmanship on its frame, battery, controller, and motor
assembly.
This warranty applies only to the original registered owner of the EVELO bicycle and
is not transferable. This limited warranty does not apply to normal wear and tear,
malfunctions, or failures due to abuse, neglect, improper repair, improper maintenance,
alteration, modication, accidents, or other improper use.
It is important that you register your new bicycle within 30 days after purchase in order
to activate the warranty.
Terms of the Warranty
For your reference, we’ve outlined the comprehensive terms of the warranty below:
• Frame, Display, Controller, and Motor Assembly – are warranted to be free from
defects in material or workmanship for a period of forty-eight (48) months or
20,000 miles (whichever comes rst) from purchase. After any warranty period
has elapsed, you may purchase spare and replacement parts by contacting us.
• Original Batteries – are warranted to be free from defects in material or
workmanship for a period of 48 months from the date of purchase as follows:
full replacement during the rst 24 months, while replacements needed during
months 25-48 are prorated as per our prorated schedule (details on website).
• Replacement Batteries (if provided) – are warranted to be free from defects in
material or workmanship for a period of six (6) months from delivery.
Please note that while every effort is made to provide our customers with a superb
shopping experience, issues sometimes can arise during shipping. If any parts happen
to be damaged during shipping, EVELO will send a replacement part at our expense
and will work with you or the bike shop of your choice to fix the issue.
WARRANTY
quest_manual_final_single.indd 6 09/06/2017 19:55

7
For warranty issues, EVELO will cover the cost of labor for service required within
the first 30-days of ownership. To receive this service, the customer should contact
EVELO directly, and we will make the necessary arrangements. If a part or component
is faulty, email contact is preferred, along with a video or photo of the faulty part.
After the 30-day free repair labor period, the owner will be responsible for labor costs
associated with warranty replacements.
For any parts under warranty that will need to be replaced within the 48-month time
frame, EVELO will cover the cost of regular ground freight to the customer.
Limited Remedy: Unless otherwise provided, the sole remedy under the above
warranty, or any implied warranty, is limited to the replacement of defective
components and parts with those of equal or greater value at the sole discretion of
EVELO. Unless this falls within the 30-day free labor repair period, the customer is
responsible for labor costs associated with warranty replacements.
In no event shall EVELO be responsible for direct, incidental or consequential damages,
including, without limitation, damages for personal injury, property damage, or
economic losses, whether based on contract, warranty, negligence, product liability, or
any other theory. Some states do not allow the exclusion or limitation of damages, so
the above limitation or exclusion may not apply to you.
Exclusions: The above warranty, or any implied warranty, does not cover normal wear
and tear. All warranties are void if the electric vehicle is used for other than normal
activities, including, but not limited to, failing to follow the owner’s manual or using the
electric vehicle for commercial activities or in competitive events, and training for such
activities or events.
EVELO makes no other warranties, express or implied. All implied warranties, including
the warranties of merchantability and fitness for a particular purpose, are limited in
duration to that of the express warranties stated above. Some states do not allow
limitations on how long an implied warranty lasts, so the above limitation may not apply
to you. This warranty gives you specific legal rights, and you may also have other rights
which vary from state to state.
quest_manual_final_single.indd 7 09/06/2017 19:55

8
The battery provided with your EVELO Electric Bicycle is a high-quality unit that
requires very little from the user in terms of care. However, a few things are worth
noting with respect to any Lithium Ion battery.
To maximize the lifespan of your battery, we suggest an initial conditioning
charge of 12 hours. After that, connect it to the charger as needed. While there is no
need to recharge the battery following short trips, we recommend not leaving a battery
partially discharged — and especially not completely discharged — for extended
periods of time.
A typical charge takes 4-6 hours (longer in very cold temperatures) to complete. The
battery will perform best if you do NOT leave it plugged in constantly, since charging/
discharging keeps the electrons in the unit moving, improving longevity.
Battery Storage
If you store your battery for 30 days or longer, it is critical that you keep it in a place that
is temperature controlled and give it a full 12-hour conditioning charge every 30 days.
Refer to “Environmental Conditions” section below for temperature ranges.
Using Your Charger
The charger that comes with your bike has internal controls that prevent overcharging
of the battery. First, plug the charger into the battery. Then connect the wire
connections at the charger block to and make sure the cord is fully seated. Lastly,
plug it into a 120v AC outlet. The lights on the charger will indicate when the battery is
fully charged. Do not leave the unit plugged in for extended periods of time.
In addition, do not use the charger unit in
poorly ventilated spaces such as closets
or drawers, as it may overheat.
Connect your battery to the charger as
shown in the photograph.
BATTERY CARE & MAINTENANCE
quest_manual_final_single.indd 8 09/06/2017 19:55

9
Of course, our Customer Service Team can help you with the process if needed. Tools
to complete the job are included, and some of the smaller pieces are packed inside the
charger box to prevent loss.
Proper assembly is extremely important for the safe and smooth operation of your
electric bicycle. Please read through the entire assembly instructions before beginning.
ASSEMBLY
OF YOUR EVELO ELECTRIC BICYCLE
NOTE If you do not have the ability or skill to assemble the bicycle yourself, please take it to a
local bike shop for professional assembly.
Environmental Conditions
Temperature extremes can affect your battery. Please keep it within the following
temperature ranges, as suggested by the battery manufacturer:
Charging: 32 degrees to 113 degrees F (0 degrees – 45 degrees C)
Discharging & Storage: -4 degrees to 140 degrees F (-20 degrees to 60 degrees C)
quest_manual_final_single.indd 9 09/06/2017 19:55

10
ASSEMBLY
quest_manual_final_single.indd 10 09/06/2017 19:55
Step 1 Attach Rear fenders
The Compass is intentionally shipped upside down to facilitate assembly. These instructions
proceed assuming the Compass is inverted, resting on the cargo basket.
1. Remove the six bolts from the frame
near the rear axle and set them aside:
2. Pass the tail light wire OVER the
axle as shown:
3. Loosely screw in one of the bolts:

EVELO.COM
quest_manual_final_single.indd 16 09/06/2017 19:55
11
4. Connect basket bolt using the
allen wrench and open ended
wrench as shown. Use the
rear portion of the slot in the
plate.
5. Install the remaining 5 bolts and
securely tighten all 6.
6. Repeat the above steps on the other side
of the Trike.

quest_manual_final_single.indd 16 09/06/2017 19:55
12
Step 2 Attach Front Fender
1. Rotate the front fork so that it faces forward.
The brake mount should be on the left side
(as viewed from the riding position if the
trike were right-side-up. The blades of the
fork should curve forward. The wires and
cables should not wrap around the frame.
2. Attach brake caliper using the two bolts as
shown. The caliper should be on the
inside of the fork leg, and the bolts should
be very tight.
3. Attach the headlight and front fender tab using the following sequence: insert the bolt
from the front through the headlight bracket, the fender tab, the fork, and install the nut.
Tighten securely.

13
quest_manual_final_single.indd 12 09/06/2017 19:55
4. Attach fender struts to both sides
using the 2 bolts provided. Tighten
securely.
Step 3 Attach Front Wheel
1. Install the front wheel into the front fork. Make sure the brake disc goes into the caliper.
The washers go on the outside adjacent to the nut. Tighten both nuts securely.
EVELO.COM

14
quest_manual_final_single.indd 13 09/06/2017 19:55
Step 4 Attach Rear Wheels
2. The left side wheel engages 3 pins on
the axle flange. Locate those pins and
slide one of the wheels on. Guide the
wheel so that the pins fit into the wheel's
holes.
1. Remove the axle caps and bolts:
IF THE WHEEL ONLY SLIDES ON A SHORT DISTANCE:
The bearing spacer may be interfering. It is in the hub to prevent the wheel bearings from moving.
It can be easily aligned with the axle with a finger, or an object like a pen. Just reposition it as you
move the wheel inward.

EVELO.COM
quest_manual_final_single.indd 16 09/06/2017 19:55
15
3. Replace the axle cap and securely tighten the bolt.
If you encounter tire / fender interference, simply deflate the tire by pressing
the valve core with a pen (or similar item) and squeeze the tire.
4. Repeat on the other side. Note: only one side has the 3 pins that engage the hub (as in Step 2
of this section)
5. Using a standard pump (not included) inflate all 3 tires to 35-65 psi.

quest_manual_final_single.indd 16 09/06/2017 19:55
16
Step 6 Install Stem and Handlebars
Ideally with the help of another person, turn the bike first onto its side, then onto its wheels.
Step 5 Flip Trike Onto Its Wheels
1. Slide the stem into the steerer tube.
Make sure that it is in at least as far
as the
"Minimum Insertion" line etched into
the side of the stem. Turn the stem/
handlebar assembly so that it aligns
properly with the front wheel, and
tighten the bolt in the stem from the
top:
2. Adjust the angle of the handlebars
so that they are comfortably reached
from the seat. Loosen the bolt shown
to adjust, then securely tighten:

17
STEP 7
Removing and Installing the Battery
DISC BRAKES
You can prevent brake squeal on a new bike by properly “bedding in” the brake pads.
It is also important to do this when brake pads are replaced.
1. Select an area in which to ride that allows you to reach a moderate speed safely.
2. Accelerate to a moderate speed and apply the brakes evenly, slowing the bike
to a walking pace. Do NOT come to a complete stop. Repeat this acceleration
andbraking sequence 20 times. Braking power will increase during this process.
3. Next, accelerate to a slightly higher speed and apply the brakes, slowing to a
walking pace. Again, do not come to a complete stop. Repeat this sequence 10
times.
4. Allow the brakes to fully cool before riding again.
quest_manual_final_single.indd 14 09/06/2017 19:55
1. At the forward area of the
basket is the battery lock.
Insert a key and turn to unlock.
2. Grasp the battery and slide rearward.
Installation is the reverse of removal.
Your Compass is equipped with a
parking brake for both the front and
rear. Squeeze the brake lever and pull
the black tab in to set either brake.
Squeeze the brake lever to release.
EVELO.COM

18
Many parts of your new EVELO Electric Bicycle can be customized for a personalized t.
Seat Adjustment
The seat is easily adjusted up or down by ipping the quick-release lever that clamps
the post into the bike. Note that there is a “minimum insertion line” stamped on the
seat post that must be adhered to for safety’s sake. (If you need your seat to be higher
than permitted with the stock seat post, please contact us.)
The seat can also be moved forward and backward by loosening the single bolt on the
underside of the seat. Since it slides on its rails, there is no need to remove the bolt —
just loosen it, adjust, and rmly re-tighten.
Loosening this bolt also lets you change the angle of the seat up or down a bit. Again,
be sure to re-tighten it firmly if you loosen it to change the seat position in any way.
Handlebar Adjustment
To adjust the handlebars to a customized position:
Loosen the bolt shown, tilt the
handlebars to the preferred position,
and retighten. You may need to
adjust the display angle and brake
levers also.
The tires have a range of recommended inflation indicated on the sidewall of the
tire. (35-65 psi) Lower pressure will give a softer ride. A higher pressure will provide
a firmer ride, but will give the best range per charge.
FIT ADJUSTMENTS
quest_manual_final_single.indd 15 09/06/2017 19:55
Tire Inflation

19
PRE-RIDE CHECKLIST
RIDING
YOUR EVELO ELECTRIC BICYCLE
Carry out this pre-ride checklist before EVERY RIDE!
Make sure the tires are properly inated. All bicycle tires gradually lose air over
time, and this can affect handling, range, and puncture-resistance.
Are all the “Quick Release” levers tight? Are the folding release levers secure
and locked?
Check both wheels for broken spokes. If you nd any, seek service before riding
the bike.
Are the handlebars tight? If there is any noticeable movement, tighten properly
before riding.
Visually inspect your tires for cuts, embedded glass, or other signs of possible
failure.
Make sure that the pedals are screwed in tightly, as damage is possible if they
come loose. Make sure the pedal folding mechanisms are fully engaged.
Are the brakes working properly? Squeeze the levers before riding to ensure
they apply the brakes, and then test them at a very low speed.
quest_manual_final_single.indd 18 09/06/2017 19:55
Make sure your battery
is switched on:
EVELO.COM

20
Initially, we recommend you take a ride on the bike with the motor turned off. The bike
handles differently than traditional bikes you may be used to riding, so it may take a
little getting accustomed to.
A ride or two without the motor engaged will help you adjust to the differences from a
traditional bike, making for an easier transition when you do use the electric assist.
When you rst use the bike with the motor on, please familiarize yourself with the
functions and performance of your bike by riding at slower speeds on at ground in a
safe area.
Make sure you are comfortable with the bike in these conditions before increasing
speed or riding in more difcult conditions such as bumpy or hilly ground, in trafc, or
in less-than-ideal weather.
YOUR FIRST RIDE
QUICK-START GUIDE TO OPERATING THE DISPLAY PANEL
Full instructions for your display panel can be found at http://support.evelo.com/
support/solutions , (Search for “Compass Manual”) but some of the most basic
functions are listed here for your convenience. Information in the complete manual
includes such topics as how to change settings, error code information and so forth.
The following images are useful reference.
quest_manual_final_single.indd 19 09/06/2017 19:55
Other manuals for Compass
2
Table of contents
Other Evelo Bicycle manuals
Popular Bicycle manuals by other brands
Fortis
Fortis FSBKE20FLDA quick start guide
Worksman
Worksman WTX Assembly instructions, parts list, and owners manual
Woom
Woom 4 Assembly instructions
TWD Bicycle Pte
TWD Bicycle Pte MARS owner's manual

Amcargobikes
Amcargobikes ELECTRIC LONG JOHN Assemble instructions
Currie tech
Currie tech IZIP owner's manual
