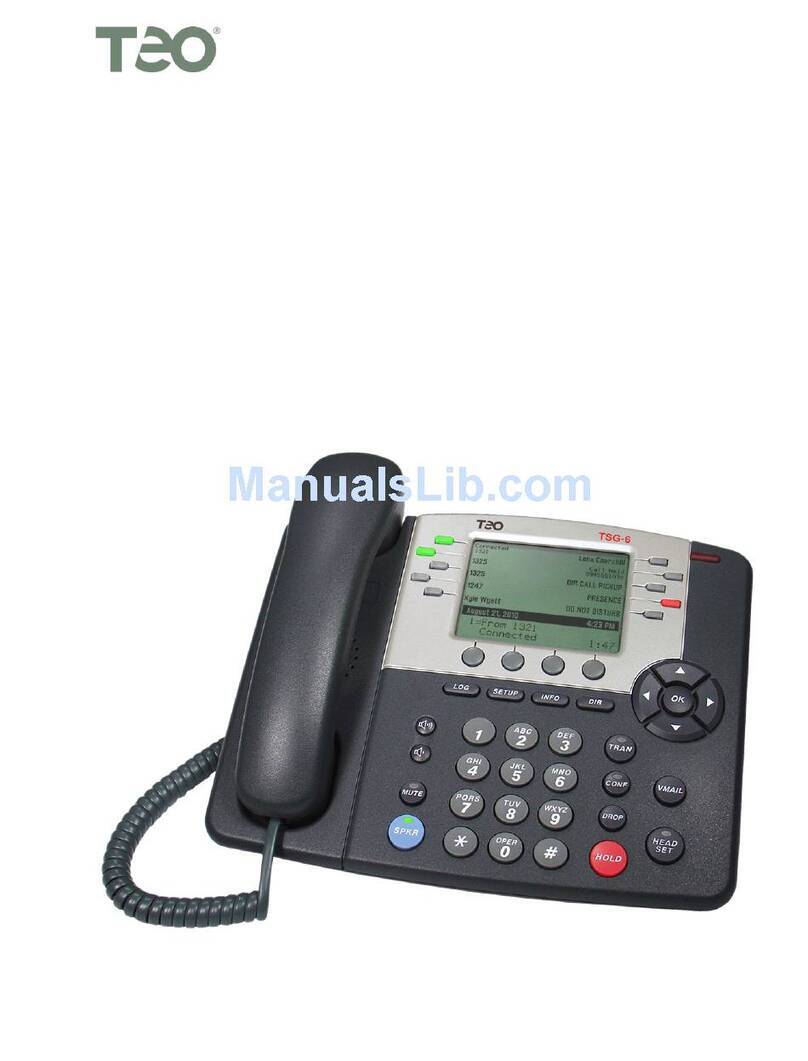
Teo 9160 User manual

13-280142 Rev. B
May 2017
Teo Technologies, Inc.
11609 49th Place West
Mukilteo, WA 98275-4255
(800) 524-0024 (425) 349-1000
Fax (425) 349-1010
www.teotech.com
I
IP
P
P
Ph
ho
on
ne
e
9
91
16
60
0
I
In
ns
st
ta
al
ll
la
at
ti
io
on
n
I
In
ns
st
tr
ru
uc
ct
ti
io
on
ns
s

Teo IP Phone 9160 Installation Instructions
Page 2 13-280142 Rev. B
© 2017 Teo Technologies Inc. All rights reserved.

13-280142 Rev. B Page 3
Introduction ................................................................................................................................. 5
General Features .................................................................................................................. 5
Controls and Indicators ........................................................................................................ 6
Installation ................................................................................................................................... 9
Desktop Installation.............................................................................................................. 9
Wall Mounting .................................................................................................................... 11
Handset Retainer Clip......................................................................................................... 13
Line and Power Connections ............................................................................................. 14
Configuration............................................................................................................................. 15
DHCP Server Configuration ............................................................................................... 15
Phone Configuration in Teo UCM...................................................................................... 17
Completing Configuration at the Phone............................................................................ 26
Appendix A Service and Warranty...................................................................................... 29
Appendix B Specifications................................................................................................... 31
Appendix C Regulatory Statements ................................................................................... 33
C
C
Co
o
on
n
nt
t
te
e
en
n
nt
t
ts
s
s

Teo IP Phone 9160 Installation Instructions
Page 4 13-280142 Rev. B

13-280142 Rev. B Page 5
G
Ge
en
ne
er
ra
al
l
F
Fe
ea
at
tu
ur
re
es
s
The Teo IP Phone 9160 is an HD video and audio desk phone with a large touchscreen
interface and gigabit Ethernet connection. It is ideal for communications technology power
users
The phone features a large 7-inch color touch screen, speakerphone, Busy Lamp Field (BLF)
and Direct Station Selection (DSS) for up to 140 stations, adjustable camera, built-in
Gigabit Ethernet switch, and many advanced call handling features.
Features of the 9160 include:
•
Call Forwarding
•Call Transfer (blind/attended)
•Conference
•Call Pickup
•Redial
•Pre-dial
•Message Waiting Indicator
•Email
•Calendar
•Web Browser
•Contacts
•140 Programmable Touchscreen
Feature Keys
•Local Presence
•
Direct Station Select with Presence
Monitoring
•Caller ID display
•Call Logs with Missed / Incoming /
Outgoing calls
•Handset, Headset, and Speakerphone
operation
•Dedicated Headset Port and control key
•Video calling
•Video conference
•Picture-in-Picture (PIP)
•Web-based configuration
•GigE Network and PC ports
•Local power or Power over Ethernet (PoE)
I
I
In
n
nt
t
tr
r
ro
o
od
d
du
u
uc
c
ct
t
ti
i
io
o
on
n
n
Various features may not be available with some SIP services.

Teo IP Phone 9160 Installation Instructions
Page 6 13-280142 Rev. B
C
Co
on
nt
tr
ro
ol
ls
s
a
an
nd
d
I
In
nd
di
ic
ca
at
to
or
rs
s
1) Display – color touchscreen shows call progress, line states, DSS/BLF, and icons for
apps.
The viewing angle is set by selecting the high or low base mounting position (page 9).
2) Headset Key – activates the optional headset.
3) Option Key – displays user options/actions.
4) Speaker Key – activates the speakerphone.

Introduction
13-280142 Rev. B Page 7
5) Back Key – cancels the current operation and returns to the previous screen.
6) Home Key – displays the Home screen.
7) Microphone – used for hands-free (speakerphone) calling.
8) Camera – used for video calling.
9) Camera Angle Adjustment – rotates the camera lens to change the video camera
angle.
10) Message Waiting Indicator – a red indicator flashes when messages are waiting,
controlled by the network.
11) Headset Jack – a jack on the left side of the telephone connects to an optional wired
headset. The phone is switched to headset mode when a headset is connected.
12) Handset Jack – a jack on the left side of the telephone connects to the included
handset.
13) HDMI Connector – connects to an external audio/video monitor (mirrors the phone
display).
14) USB and Memory Card Connectors
15) Network Jack – connects to the network LAN switch.
16) PC Jack – connects to a PC that will share the phone's network connection.
17) Power Jack – connects to a local power supply, if not using Power over Ethernet.

Teo IP Phone 9160 Installation Instructions
Page 8 13-280142 Rev. B

13-280142 Rev. B Page 9
D
De
es
sk
kt
to
op
p
I
In
ns
st
ta
al
ll
la
at
ti
io
on
n
The stand can be installed in two positions for desktop use. Select the position that
provides the best screen readability and easy control operation for the phone’s location.
•If you need to remove the stand, slide it down to disengage the snap tabs, and then lift
off the stand.
The low desktop stand position is shown; the removal procedure is the same for high
desktop and wall mount positions.
Stand Removal
I
I
In
n
ns
s
st
t
ta
a
al
l
ll
l
la
a
at
t
ti
i
io
o
on
n
n

Teo IP Phone 9160 Installation Instructions
Page 10 13-280142 Rev. B
•To install the stand, insert the four tabs on the stand into the slots on the telephone, and
then slide the stand toward the top of the telephone until it locks into place.
Low Desktop Position
High Desktop Position

Teo IP Phone 9160 Installation Instructions
Page 12 13-280142 Rev. B
•To install the stand, insert the tabs on the stand into the openings in the telephone's
upper slots, and then slide the stand toward the top of the telephone until it locks into
place.
M
Mo
ou
un
nt
ti
in
ng
g
D
Di
ir
re
ec
ct
tl
ly
y
o
on
n
a
a
W
Wa
al
ll
l
You will need three screws that will fit the keyhole slots. Use #8 or #10 flat or pan head
screws that are suitable for the wall material.
Note: Wall mounting screws are not supplied with the phone.
•On the wall or a wall plate, drill two holes with a distance of 6.04 inches apart. If
drilling into drywall only, make sure to install an anchor system for the screws.
•Drill a third hole 2.7 inches below the first two holes, and centered between them.
•Thread a screw into each hole with each head extending about 3/16 inch from the
wall.
•Connect the LAN and PC cords and optional local AC power adapter (page 14), and
route them between the base and the phone.
•Align the phone’s keyhole slots with the screws and slide the phone downward to
secure it.

Installation
13-280142 Rev. B Page 13
H
Ha
an
nd
ds
se
et
t
R
Re
et
ta
ai
in
ne
er
r
C
Cl
li
ip
p
R
Re
em
mo
ov
vi
in
ng
g
t
th
he
e
C
Cl
li
ip
p
To change the position of the handset retainer clip, pull out the clip as shown. Rotate the
clip 180°, and then re-insert the clip.
W
Wa
al
ll
l
M
Mo
ou
un
nt
t
o
or
r
H
Hi
ig
gh
h
D
De
es
sk
kt
to
op
p
P
Po
os
si
it
ti
io
on
n
A
Ap
pp
pl
li
ic
ca
at
ti
io
on
ns
s
For high desktop position or wall mount use, the handset retainer clip should be installed
with the tab protruding into the hookswitch area.
L
Lo
ow
w
D
De
es
sk
kt
to
op
p
A
Ap
pp
pl
li
ic
ca
at
ti
io
on
ns
s
For low desktop position use, the handset retainer clip should be installed without the tab
protruding into the hookswitch area.

Teo IP Phone 9160 Installation Instructions
Page 14 13-280142 Rev. B
L
Li
in
ne
e
a
an
nd
d
P
Po
ow
we
er
r
C
Co
on
nn
ne
ec
ct
ti
io
on
ns
s
N
Ne
et
tw
wo
or
rk
k
C
Co
on
nn
ne
ec
ct
ti
io
on
n
Connect the LAN switch to the phone’s LAN jack using a Category 5e or better cable. If
the network switch provides 802.3af Power over Ethernet (PoE), a local power supply
connection is not needed.
P
PC
C
C
Co
on
nn
ne
ec
ct
ti
io
on
n
If you want to use a PC on the same network connection, connect the PC network interface
to the phone’s PC jack using a Category 5e or better cable.
H
Ha
an
nd
ds
se
et
t/
/H
He
ea
ad
ds
se
et
t
Plug the supplied handset into the Handset jack. Plug a compatible headset into the
Headset jack.
P
Po
ow
we
er
r
The 9160 is compatible with IEEE 802.3af Power over Ethernet, utilizing power over spare
cable pairs (midspan power source) or phantom power (powered switch/hub port). The
phone provides an 802.3af PD Class 2 indication to the power sourcing equipment and
requires a maximum of 5 watts of power.
Power may also be provided by a local power supply.
WARNING: Use a Listed ITE "Limited Power Source, LPS or Class 2" power supply
rated 12 VDC, 1 A (Teo Model PWR7, Part Number 901057).
Connect power after all other connections are complete. Plug the power supply
barrel connector into the round jack on the back of the phone. Connect the power
supply to a standard 120 VAC, 60 Hz power outlet.

13-280142 Rev. B Page 15
The IP Phone 9160 is typically configured by the Teo UCM (Unified Communications
Manager) Admin Portal. Using the Admin Portal, you can simplify the deployment of
multiple phones by creating reusable configuration templates.
1. Phone configuration is summarized in the following steps (details are in the
following (Optional) Configure DHCP Options.
2. Configure the phone in the UCM Admin Portal
•Add the device to a user extension. The default template will be used if a new
one is not added.
•Enter passwords and identifying label.
•Enter the UC server address and other network options as needed.
•Configure electronic hook switch, voice mode, and dialing mode options.
•Configure multifunction keys/
3. Complete setup at the phone.
•Reset to default configuration, if needed.
•Configure login credentials.
4. Wait for the phone to read its configuration information from the UC server, update
its settings, and complete registration with the system. This process can take up to
two minutes.
5. Verify phone registration by making a test call.
D
DH
HC
CP
P
S
Se
er
rv
ve
er
r
C
Co
on
nf
fi
ig
gu
ur
ra
at
ti
io
on
n
A
Au
ut
to
om
ma
at
ti
ic
c
I
IP
P
C
Co
on
nf
fi
ig
gu
ur
ra
at
ti
io
on
n
(
(D
DH
HC
CP
P)
)
DHCP (Dynamic Host Configuration Protocol) assigns IP addresses to telephones, and can
provide other information to the phones, such as update server address. When using
DHCP, phones do not need to be configured with static IP addresses.
The DHCP server can supply:
•Phone IP Address
•Phone Subnet Mask
•Domain Name
•Default Gateway IP Address (Router)
•DNS Server(s) IP Address(es)
•NTP Server IP Address
•Update Server IP Address (Boot Server Host Name)
Settings not supplied by DHCP must be entered locally at the phone, or in a configuration
file which is supplied to the phone via the Teo UC update server.
C
C
Co
o
on
n
nf
f
fi
i
ig
g
gu
u
ur
r
ra
a
at
t
ti
i
io
o
on
n
n

Teo IP Phone 9160 Installation Instructions
Page 16 13-280142 Rev. B
C
Co
on
nf
fi
ig
gu
ur
ri
in
ng
g
t
th
he
e
D
DH
HC
CP
P
S
Se
er
rv
ve
er
r
The DHCP server requires a scope of IP addresses that can be assigned to the phones. The
scope must be configured with the router address, vendor-specific info, and the update
server address.
You can use an existing DHCP server for assigning IP addresses to the telephones, or add a
new server.
S
Sc
co
op
pe
e
O
Op
pt
ti
io
on
ns
s
The following scope options are supported:
1
1
S
Su
ub
bn
ne
et
t
M
Ma
as
sk
k
Enter the network subnet mask for the phone IP address range.
3
3
D
De
ef
fa
au
ul
lt
t
G
Ga
at
te
ew
wa
ay
y
Enter the default gateway IP address.
6
6
D
DN
NS
S
S
Se
er
rv
ve
er
r
Enter the DNS server IP address.
6
66
6
U
Up
pd
da
at
te
e
S
Se
er
rv
ve
er
r
(
(B
Bo
oo
ot
t
S
Se
er
rv
ve
er
r
H
Ho
os
st
t
N
Na
am
me
e)
)
Enter the Teo UC server IP address or fully qualified domain name with the protocol
prefix “teo://”. For example:
teo://10.10.10.10 (IP address) or
teo://myserver.com (fully qualified domain name)
This option allows the IP Phone 9160 to automatically download a configuration file
from the Teo UC server at initialization.
Note: If DHCP Option 66 is not configured, the installer must manually enter the update server
address at each phone.

Setup Menu Tree
13-280142 Rev. B Page 17
P
Ph
ho
on
ne
e
C
Co
on
nf
fi
ig
gu
ur
ra
at
ti
io
on
n
i
in
n
T
Te
eo
o
U
UC
CM
M
1. Log on to the UCM as an administrator.
2. Find or add the user that will be assigned to this phone
(CONFIGURATION→USERS),
3. Click the DEVICE ASSSIGNMENTS tab.
–
4. From the SELECT A DEVICE TEMPLATE list, select a TEO 9160 template. Your
system may have custom templates in addition to the default template.
5. Click + ADD NEW DEVICE. The phone will be added to the list.
6. Select a device in the list to view or edit its options, as explained below.
D
De
ev
vi
ic
ce
e
I
In
nf
fo
o
a
an
nd
d
P
Pa
as
ss
sw
wo
or
rd
ds
s
•LABEL – enter a name to identify the phone (optional).
•WEB PASSWORD – restricts access to the phone’s web-based configuration utility.
•MENU PASSWORD – restricts access to some configuration items on the phone
display.
•MAC ADDRESS – this read-only field is blank when a device configuration is
created; it displays the MAC address of the phone after it is registered to the
extension. To move a phone to a different extension number, or to replace the

Teo IP Phone 9160 Installation Instructions
Page 18 13-280142 Rev. B
phone with a different one, you must first clear the registered MAC address by
clicking the X at the right of this field, and then click SAVE.
•USER AGENT – displays the SIP User Agent string, which includes the phone’s
revision level and MAC address.
C
Ca
al
ll
l
a
an
nd
d
I
In
nt
te
er
rf
fa
ac
ce
e
O
Op
pt
ti
io
on
ns
s
O
Of
ff
fh
ho
oo
ok
k
R
Ri
in
ng
gi
in
ng
g
This setting controls audible ringing while on a call.
•OFF – no ringing, only a visual indication.
•NORMAL – two beep alerts.
V
Vo
oi
ic
ce
e
M
Mo
od
de
e
This setting selects the device that produces audible ringing and enables headset operation
when a headset is connected.
•HANDSET – all operations that automatically go off-hook (such as Answer, speed
dial or DSS) will connect to the speakerphone first. Ringing for incoming calls is
heard on the speaker.
•HEADSET – if a headset is connected, automatic off-hook operations connect to the
headset instead of the speakerphone. Ringing for incoming calls is heard in the
headset. If a headset is not connected, ringing is heard on the speaker, with a visual
message warning that the headset is not connected.
O
Op
pe
er
ra
at
to
or
r
M
Mo
od
de
e
This setting determines the action of the Home key.
•Unchecked – the Home key shows the main desktop screen.
•Checked – the Home key shows the Feature/DSS screen, useful for operator
positions. The user can swipe right or tap Collapse to view the main desktop screen.

Setup Menu Tree
13-280142 Rev. B Page 19
D
Di
ia
al
li
in
ng
g
M
Mo
od
de
e
Dialing Mode controls automatic dialing.
•NORMAL – after the user has entered all digits, they must tap the voice or video
icon to manually initiate dialing, or wait for the number of seconds set in TIMEOUT
(SEC)for automatic dialing.
•WARM DIAL – when the phone goes offhook, it will automatically dial the number in
the DESTINATION field after the number of seconds set in TIMEOUT (SEC). A user
can dial a different number before the timeout, canceling the automatic dialing.
•HOT DIAL – similar to WARM DIAL, but automatic dialing occurs immediately after
the phone goes offhook (no timeout).
N
Ne
et
tw
wo
or
rk
k
R
Re
es
so
ou
ur
rc
ce
es
s
Basic network information is typically provided by DHCP. SIP OPTIONS and SIP PROXY
SERVERS should be set explicitly via configuration download.
•IP Address – To set the IP address, subnet mask, and default gateway statically,
uncheck AUTOMATICALLY OBTAIN FROM DHCP. Leaving the fields blank will
allow static network information to be set locally at the phone, otherwise set values
as desired.
•DNS – To set the DNS server(s) statically, uncheck AUTOMATICALLY OBTAIN
FROM DHCP. Leaving the fields blank will allow static name server values to be set
locally at the phone, otherwise set values as desired.
•NTP – To set the NTP server(s) statically, uncheck AUTOMATICALLY OBTAIN FROM
DHCP. Leaving the field blank will allow the time server(s) to be set locally at the
phone, otherwise set value as desired.
•SYSLOG – To manually enable syslog, check ENABLE SYSLOG, and fill in the
SERVER ID and LOG LEVEL information.
•SIP OPTIONS – Change the TRANSPORT, NAT KEEP ALIVE, and NAT TIMER (SEC)
options if required by your network.
•SIP PROXY SERVERS – Select +PROXY and enter the Teo UC server IP address or
fully qualified domain name and port. If a backup server is installed, enter that
address below the primary server. If no proxy server is entered, the primary server
address is assumed to be the same as the Update Server address.

Teo IP Phone 9160 Installation Instructions
Page 20 13-280142 Rev. B
M
Mu
ul
lt
ti
if
fu
un
nc
ct
ti
io
on
n
K
Ke
ey
ys
s
Multifunction keys can be configured for a variety of functions described below. On the IP
Phone 9160, keys are shown on five screens with 28 keys per screen, for a total of 140 keys.
Blue dots above the keys indicate the current screen. Swipe left or right to select a different
screen.
You can allow the user to customize keys on a per-key basis locally on the phone. Keys that
are designated “SET AT PHONE” can be configured by the user at the phone, and will not
be overwritten by a configuration update.
Note: Do not set any keys to “SET AT PHONE” if the phone is configured for hot desking. Hot
desking overwrites all key assignments.
These key functions are available:
•LINE – first appearance of the primary line (extension number). The key also
indicates line appearance status.
•ADDITIONAL LINE – additional appearances of the primary line; LED indicator
shows line appearance status. LINE and ADDITIONAL LINE keys for a call
appearance must be consecutive. The ADDITIONAL LINE option is available only if
the preceding key is configured for a line appearance.
•DSS/BLF – initiates a voice call or picks up a ringing call to an assigned extension.
The key shows the presence status of the assigned extension.
•DSS/BLF (VIDEO) – initiates a video call or picks up a ringing call to an assigned
extension. The key shows the presence status of the assigned extension.
•PRESENCE – allows user to set their presence status. The key shows the current
presence status of the user extension.
•END – ends a call.
•LOCK – locks the phone to prevent unauthorized use, except for emergency calls.
•REDIAL – dials the most recently-dialed number.
•SET AT PHONE – key is configured locally at the phone by the user. A configuration
update will not override the user’s settings (not compatible with hot desking).
•SPEED DIAL – initiates a voice call to a preconfigured number.
•SPEED DIAL (VIDEO) – initiates a video call to a preconfigured number.
•VOICEMAIL – initiates a call to the voicemail system.
•MULTICAST – initiates a multicast page.
•Blank – key is unused and cleared at the phone.
Table of contents
Other Teo IP Phone manuals


