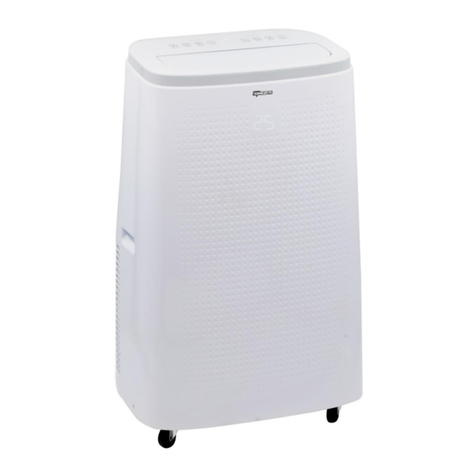
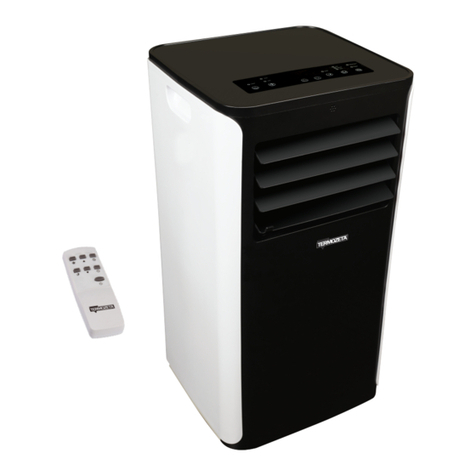
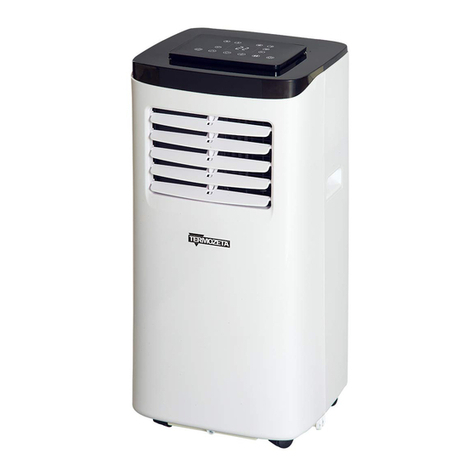
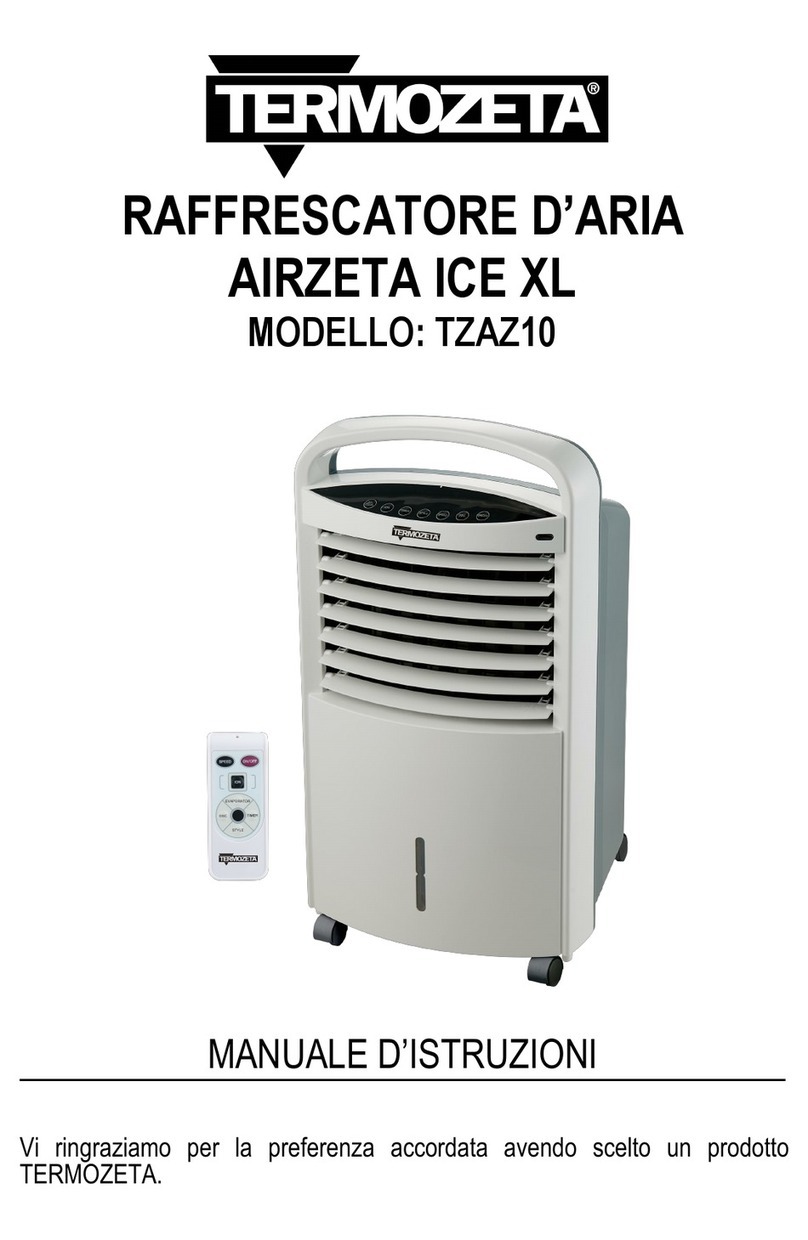
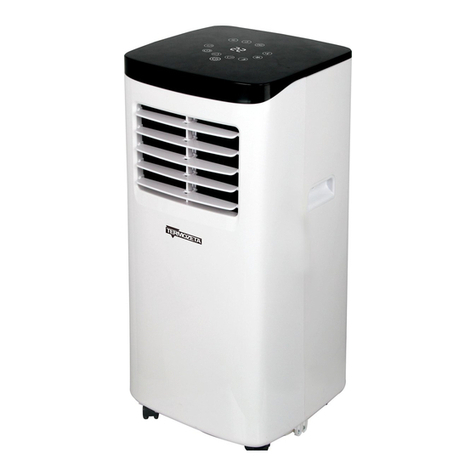
Termozeta TZAZC5 User manual

portable air conditioner
MODELS: TZAZC5
INSTRUCTIONS
Thank you have selected the preference of a long product distribution.

2
Carefully read the information in this guide because it will help you make the most of the features of this
product.
This booklet is an integral part of and should be read carefully before use, because it is important
directions
regarding the safe installation, use and maintenance. Turn gently
sincerely
Long Distribution SrL
Read this manual, because inside there are important safety, operation and maintenance of the device. to hold
Instructions for later use.

3
The R290 refrigerant gas used in this product is environmentally friendly, this refrigerant is devoid of smell, and
compared with other gases has very little environmental impact.
Read the instructions for using the product. The figures are indicative.
I. GENERAL INFORMATION
1. This device can be used by children 8 years 1. This device can be used by children 8 years
and persons with reduced capacity physical, sensory or mental
or lack of experience or knowledge, if adequate counseling or if they receive instructions on how to use
safety equipment and including the related dangers. Children should not play with the appliance. All
cleaning and maintenance should not be performed by children unless they are more than 8 years and
supervised. Keep the appliance and the cord out of the reach of children younger than 8 years.
2. Keep the packaging material (plastic bags, foam, 2. Keep the packaging material (plastic bags, foam,
screws) within reach of children or persons with reduced physical or mental abilities, because this could jeopardize their safety.
3. Before connecting the appliance, make sure the plate data 3. Before connecting the appliance, make sure the plate data correspond to those of
the distribution network. at
incompatibility between the socket and the plug to do is place the plug with a suitable type by
qualified personnel.
4. This product is intended for the exclusive domestic use. 4. This product is intended for the exclusive domestic use.
5. The electrical work according to regulations 5. The electrical work according to regulations
electrical safety.
6. plug from the socket before the device, or 6. plug from the socket before the device or before a new cleaning
cycle.

4
7. Never immerse the device in water. Avoid direct contact with7. Never immerse the device in water. Avoid direct contact with any liquid.
8. Do not beside devices that deliver the unit 8. Do not beside devices that deliver the unit
heat, or near an open or inflammable or dangerous objects flames.
9. Never use your fingers or other objects through the slots 9. Never use your fingers or other objects through the slots of air intakes.
10. Go out in front of the device during use. 10. Go out in front of the device during use.
11. Do not start or stop the unit by inserting or pulling 11. Do not start or stop the unit by inserting or pulling plug
12. Place placed to leave any objects above the appliance 12. Place placed to leave any objects above the appliance
13. Do not climb on. Not cover.13. Do not climb on. Not cover.
14. Hold the product in the upright position, not place it on 14. Hold the product in the upright position, will not lay it on side.
15. inserting objects into the product. 15. inserting objects into the product.
16. at the 16. at the After use, the device must product. 16. at the After use, the device must product.
17. Do not wear for the cleaning device without the 17. Do not wear for the cleaning device without the
First, the power plug pulled or have to turn off the switch.
18. Do not drink the water of condensation 18. Do not drink the water of condensation
19. In the case of air to escape a fire or smoke detecting you 19. In the case of air to escape a fire or smoke detecting logging out of the machine, remove the power supply,
the windows open and the technical assistance.
20. Provide adequate ventilation in the room where installed + 20. Provide adequate ventilation in the room where + installed the device as a
combustion unit is provided.
21. If the power cord is damaged, it has to be 21. If the power cord is damaged, it has to be
replaced by the manufacturer or its service agent or at least "specialists.
22. Do not use insecticides, solvents or aggressive cleaning detersiti 22. Do not use insecticides, solvents or aggressive cleaning detersiti
appliance
23. Do not use the device for purposes other than for which it was purpose 23. Do not use the device for purposes other than for which it was designed, the purpose, ie as a dehumidifier for
domestic use. Any other use is considered improper.
24. Not baths nearby, showers or pools not install 24. Not baths nearby, showers or pools not install

5
25. The use alone in the device should not be used 25. The use alone in the device should not be used outdoors.
26. Do not use extension cables in order to drive the product. 26. Do not use extension cables in order to drive the product.
27. The device does not not be used on sloping or unstable 27. The device does not not be used on sloping or unstable
28. Not to be used in locations where flammable materials are present, or 28. Not to be used in locations where flammable materials are present or potentially explosive, or in the
presence of corrosive vapors or hazardous substances,
29. That there is no water in the upper grille. Not interfere29. That there is no water in the upper grille. Not interfere
provide airflow.
30. To move the device to ensure that the collection tank 30. Empty For moving the unit to ensure that the condensate collection tank.
31. E 'required the collected water removal 31. E 'is necessary, once filled, the collected water into the removal container.
32. Use too small, could the dehumidifier in environments 32. Use the dehumidifier in environments too small, could be dangerous.
33. Install the drainage tube so that the condensed water 33. Install the drainage tube so that the condensed water, they can be ejected into the container without any
problems and / or obstacles.
34. If the power cord is damaged, contact 34. If the power cord is damaged, contact
a qualified service center for repair and / or replacement.
35. damage / change / warming cord or 35. damage / change / warming cord or
support heavy objects
36. The device must be placed so that the plug accessible. 36. The device must be placed so that the plug accessible.
37. Keep a distance of 50 cm between the device and the wall or other 37. Keep a distance of 50 cm between the device and the wall or other objects air
circulation.
38. The product should be installed in accordance with local regulations 38. The product should be installed in accordance with local regulations
flow.
39. The product is designed for internal use only. 39. The product is designed for internal use only.
40. This appliance is not intended for use by persons with 40. This appliance is not intended for use by persons with
reduced capacity sensory or mental physical, or lack of
experience and knowledge, unless they are controlled or instruction concerning use of the appliance by a person responsible for
their safety.
41. Children should be supervised to ensure that they do not play 41. Children should be supervised to ensure that they do not play
with the device.

6
42. Do not repair itself. Do not open the device for each42. Do not repair itself. Using the device for any problem not open, contact an authorized service
center.
43. The product should not be used in the laundry. 43. The product should not be used in the laundry.
44. Not to be used in the case of obvious abnormalities in operation. 44. Not to be used in the case of obvious abnormalities in operation.
45. If the cord is damaged, it must be 45. If the cord is damaged, it must be
replaced by the manufacturer, its service agent or a similarly qualified person to avoid
danger.
46. For maintenance and cleaning loosening 46. For the device disengaging from the maintenance and
cleaning.
47. If an abnormal situations extinguish 47. If an abnormal situations extinguish
the unit immediately and contact your dealer or service center.
48. Do not fly sockets or damaged cables. 48. Do not fly sockets or damaged cables.
49. If you avoid the plug hold tighten shock 49. If you avoid the plug hold tighten electric shock, short circuit or fire
50. E 'absolutely forbidden to disassemble and repair the device 50. E 'absolutely forbidden to disassemble and repair the unit to short circuit; If necessary, contact
your dealer or service center.
51. Do not use the appliance near a bathtub, 51. Do not use the appliance near a bathtub,
shower, swimming pool.
52. Do not insert objects through the slots in 52. Do not insert objects through the slots in
53. Before connecting the device to the mains to ensure that the 53. Before connecting the device to the mains to ensure that the
voltage correctly reported on product plate and that the installation complies with the applicable
standards
54. Risk of injury: Do not use to be used for purposes other than those purposes 54. Risk of injury: Do not use the product for purposes other than the purposes for which it was built. Do not abuse the
unit
55. Do not pull the cord to move the product. 55. Do not pull the cord to move the product.
56. Do not leave the product unattended when plugged in 56. Do not leave the product unattended when it is connected to electricity.
57. After use, the plug from the product dall'aliementazione 57. After use, the plug from the product dall'aliementazione
electricity.
58. This appliance is not intended for use by persons 58. This appliance is not intended for use by persons
(Including children) with reduced physical, sensory or mental, or lack of experience and knowledge,
unless

7
have been given supervision or instruction concerning use of the appliance by a person responsible for their safety.
59. Do not use the product under the following conditions: 59. Do not use the product under the following conditions:
a) In the vicinity of the heat source; a) In the vicinity of the heat source;
b) In areas which could fall or splashing oil or other compounds;
c) In the vicinity of baths, showers or swimming pools
d) In areas exposed to direct sunlight;
e) Maintenance and removal may only be performed by qualified personnel.
60. However, the R290 is a very ecological gas, the refrigerant circuit 60. The R290, however, is a very ecological gas, the refrigerant circuit, the product may not be perforated. At the end of
his life, consign the air conditioner to a special collection centers.
61. Do not use any methods other than those racomandati to the defrost 61. Do not use any methods other than those racomandati to the thawing product.
62. The air conditioner will be placed in a room without any ignition sources 62. The air conditioner will be placed in a room with no sources of ignition (open flames, products
in functional or gas driven stoves
elettriche.Do not use any means to accelerate the defrosting or cleaning, other than those recommended by the
manufacturer.
63. Do not pierce the gas circuit and bring it closer to the fire. 63. Do not pierce the gas circuit and bring it closer to the fire.
64. The refrigerant gas in the product is free of fragrance. 64. The refrigerant gas in the product is free of fragrance.
65. The air conditioner must be installed and used in 65. The air conditioner is to be installed, used and in a local region with superior least
7mq.
66. Make sure that are not obstructed the passage of the air vents. 66. Make sure that are not obstructed the passage of the air vents.
67. The product should be stored in a well ventilated area. 67. The product should be stored in a well ventilated area.
68. Civil engineers work on the cooling circuit must 68. Civil engineers work on the refrigeration system must be in possession of a diploma
or professional qualification.
69. The repair work must be carried out 69. The repairs may be performed only by authorized service centers.
70. Qunado The condensate drain pipes are installed, making sure 70. Qunado The condensate drain pipes are installed, make sure they are properly connected and that they are
not distorted or bent.
71. When moving the product, make sure it stays in place 71. When moving the product, make sure that it stays in place vertically.

8
II. Getting Acquainted
1. Product features: 1. Product features:
Function cooling, dehumidifying, ventilating and continuous discharge of condensate. removal kit air interface on top of the product, in order to
facilitate the mounting and a more linear air flow.
Control panel with LED display and remote control. air filtration capacity. Timer function
protection functions with automatic restarting of the compressor within 3 minutes. Several protections available.
Maximum temperature cooling limit: 35/24 ° C; in the heating mode: 20/12 ° C temperature: 7-35 °
C.
2. components: 2. components:

9
window Kit
exhaust kit assembly

10
III. MODES OF OPERATION
1. Control Panel 1. Control Panel
1. Timer
2. The speed control knob
3. Up-button
4. A display
5. Down
6. Selection Mode
7. ON / OFF
1) When the product is powered for the first time, you will hear a sound and the product is in standby mode.
2) On off switch: Press this button to turn off or turn on the air conditioner On off switch: Press this button to turn off or turn on the air conditioner On off switch: Press this button to turn off or turn on the air conditioner On off switch: Press this button to turn off or turn on the air conditioner
3) Mode button: When the product is turned on, the button to the cooling mode → → Mode button: When the product is turned on, the button to the cooling mode → → Mode button: When the product is turned on, press this button to select the cooling mode → → air dehumidification. Mode button: When the product is turned on, press this button to select the cooling mode → → air dehumidification.
4) Keys values below: Press these buttons to your temperature, or the timer amended as follows: Keys values below: Press these buttons to your temperature, or the timer amended as follows: Keys values below: Press these buttons to your temperature, or the timer amended as follows: Keys values below: Press these buttons to your temperature, or the timer amended as follows:
To select the temperature, press the buttons to set the desired temperature. (Can not be selected in ventilation or dehumidifying) to select the
operating time of the timer, press these buttons to set the desired time.
5) Fan speed button: In cooling and ventilation mode, this button slowly, Fan speed button: In cooling and ventilation mode, this button slowly, Fan speed button: In the cooling and ventilation mode, press this button to select a slow, medium or high fan. Fan speed button: In the cooling and ventilation mode, press this button to select a slow, medium or high fan.
6) Timer button: When the product is powered pressing this button you can set the timer to Timer button: When the product is powered pressing this button you can set the timer to Timer button: When the product is powered pressing this button you can select the timer. Press the button flashes when Timer button: When the product is powered pressing this button you can select the timer. Press the button flashes when
determining the corresponding symbol and the time using the buttons "large" or "small".
The time can vary from 1 to 24 hours with 1 hour.
7) Sleep7) Sleep7) Sleep7) Sleep
Upon cooling, the button "high" and "cooling" button. the

11
product will operate economically and quietly.
Pay attention: You can not enter hibernation or dehumidification ventilation. Pay attention: You can not enter hibernation or dehumidification ventilation. Pay attention: You can not enter hibernation or dehumidification ventilation. Pay attention: You can not enter hibernation or dehumidification ventilation.
2. remote 2. remote
The conditioner can be operated by the remote control. Use two AAA batteries in the remote power.
1) Power on / off press this button
switching on and off of the product.
2) fashion 2) fashion 2) fashion 2) fashion : When the product is turned on, press this : When the product is turned on, press this : When the product is turned on, press this : When the product is turned on, press this
button to select the mode
→ → ventilation cooling dehumidification
3) Press this button to increase the temperature or the timer.
4) Press this button to lower the temperature or timer.
5) fan speed : At the cooling and
vent, press this button to select a low speed, medium or high fan.
6) timer : When the product is supplied under pressure : When the product is supplied under pressure : When the product is supplied under pressure : When the product is supplied under pressure
This button allows you to select the time timer
wherein the product smettrà work.
7) fluctuation : Press to select
the direction of the air outlet flaps
8) temperature : Press to fix it
Temperature display (Celisius or Fahrenheit)
9) sleep : Press this button to select Sleep. the product: Press this button to select Sleep. the product: Press this button to select Sleep. the product: Press this button to select Sleep. the product
It works with a power saving, and low-speed logic.
IV. PROTECTION
Ice protection function
Upon cooling, dehumidification, or sleep mode, when the air temperature is too low within the expansion pipe,
there automaticamene may input protection. If yes, the temperature rises above a certain value, will have to
walk back utomatically.
Protective function by the leakage of water. Protective function by the leakage of water.
When the water in the receiver reaches a critical level, the machine will

12
an alarm signal, and flashes the "FULL". AThis point it is necessary to keep the water in a drain or in a tank. (See
Instructions for unloading at the end of this section). After the water has been evacuated, the device returns to the first
operation.
automatic defrost
The product is equipped with automatic defrost. This feature is accomplished by reversing the flow of the refrigerant in the 4-way
valve.
Protection compressor function
The VTA increase of the compressor will restart with a 3-minute delay after it has been switched off.
V. INSTALLATION
Warning: Before using the air conditioner, keep it in an upright position for at least 2 hours.
The product can be placed in the local easy. In moverlo ensure that premanga in a vertical position, and which is placed on a flat surface stblie. Use the air
conditioner in the bathroom moisture.
Putting air ejection.
Figure 2

13
Installing window kits
A) Open the window slightly and position the window kit horizontally or vertically as shown in Figure 2 and Fig3.
B) Open the spacer in order to cover the entire window opening.
Figure 2 fig3
Product installation
A) Place the product installed with the air discharge tube in the vicinity of A) Place the product installed with the air discharge tube in the vicinity of
window careful to keep a distance between the product and the wall or other objects of at least 50 cm (Figure 4)
B) Extend the air ejection pipe and connect it to the sealant spacer flange B) Extend the air ejection pipe and connect it to the sealant spacer flange, the window shown in
Figure 5 and Figure 6
Pay attention: The tube must not be deformed or bent (restriction 45 °) Pay attention: The tube must not be deformed or bent (restriction 45 °) Pay attention: The tube must not be deformed or bent (restriction 45 °) Pay attention: The tube must not be deformed or bent (restriction 45 °)
Figure 4

14
Make sure the air ejection pipe is not blocked.
note
The length of the air ejection pipe ranges from 280 mm to 1500 mm. Do not use different lines of the cable. The tube must not be impeded, this can lead to overheating.
VI. DISCHARGE CONSENSA
hand drain
1) Quandi the machine stops when the tank is full, switches the product and scolegarlo 1) Quandi the machine stops when the tank is full, switches the product and scolegarlo of the electrical power
supply.
Pay attention: Move not to squeeze the product with care and attention Pay attention: Move not to squeeze the product with care and attention Pay attention: Move the product with care and attention not to squeeze out the water from Pay attention: Move the product with care and attention not to squeeze out the water from
the container.
2) Place a tank under the 2) Place a tank under the exit hole
seat behind the product
3) Unscrew the outlet, remove the 3) Unscrew the outlet, remove the
cap. The water starts automatically discharged into the prepared
container.
Comments:
1. When unloading, may be the product body 1. When unloading, the product can be somewhat
inclinator body.
2. If the tank is not able to contain all 2. If the tank is not able to contain all
the aqua, stop the outflow of water with the drain plug in the manner
dap revenire
Fig.5 Figure 6

15
leakage of water.
3. When the water has been drained, close the drain hole of the cap screw and the 3. When the water has been drained, close the drain hole of the cap and screw the cover.
Pay attention: Set the machine to prevent the condensed water can escape. Pay attention: Set the machine to prevent the condensed water can escape. Pay attention: Set the machine to prevent the condensed water can escape. Pay attention: Set the machine to prevent the condensed water can escape.
Continuous discharge ( Optional) (only in modoumidificazione)Continuous discharge ( Optional) (only in modoumidificazione)Continuous discharge ( Optional) (only in modoumidificazione)Continuous discharge ( Optional) (only in modoumidificazione)
1) Screw on the lid and remove the drain cap.
2) Mount the tube of the water outlet hole 2) Mount the tube of the water outlet hole
3) Collegareil the water pipe into the prepared tank. 3) Collegareil the water pipe into the prepared tank. 3) Collegareil the water pipe into the prepared tank. 3) Collegareil the water pipe into the prepared tank.
hand drain
1) When the machine stops when the tank is full, switches the product and scolegarlo 1) When the machine stops when the tank is full, switches the product and scolegarlo of the electrical power
supply.
Pay attention: Move the product with care and attention not to squeeze out the water from the container. Pay attention: Move the product with care and attention not to squeeze out the water from the container. Pay attention: Move the product with care and attention not to squeeze out the water from the container. Pay attention: Move the product with care and attention not to squeeze out the water from the container.
2) Place a reservoir under the lateral outlet hole behind the product 2) Place a reservoir under the lateral outlet hole behind the product
3) Unscrew the outlet, remove the cap. The water is automatically started3) Unscrew the outlet, remove the cap. The water is automatically discharged into the tank
predisposed
Comments:
1) When unloading, the product body somewhat inclinator
2) If the tank does not contain all the aqua, stop the outflow of water with the drain plug so dap revenire leaking water.
3) When the water has been drained, close the drain hole by the cap and screw the cover.
Pay attention: Set the machine to prevent the condensed water can escape. Pay attention: Set the machine to prevent the condensed water can escape. Pay attention: Set the machine to prevent the condensed water can escape. Pay attention: Set the machine to prevent the condensed water can escape.

16
continuous discharge (Optional) ( Only then cooling and dehumidification)continuous discharge (Optional) ( Only then cooling and dehumidification)continuous discharge (Optional) ( Only then cooling and dehumidification)continuous discharge (Optional) ( Only then cooling and dehumidification)continuous discharge (Optional) ( Only then cooling and dehumidification)continuous discharge (Optional) ( Only then cooling and dehumidification)
1) Screw on the lid and remove the drain cap.
2) Mount the tube on the water drain hole. 2) Mount the tube on the water drain hole.
3) Let the water into the prepared container.
VII. CLEANING AND MAINTENANCE
Cleaning: For each maintenance and cleaning disconntere the product from the electrical outlet.
1. Cleaning surfaces 1. Cleaning surfaces
Clean the machine with a soft damp cloth. Do not use chemicals such as benzene, alcohol, diesel fuel, etc. The surfaces may be damaged,
and also the entire product.
2. Filter cleaning 2. Filter cleaning
If the filter is clogged with dust, the efficiency of the air conditioner is reduced. Make sure you clean the filter to two weeks.
2.1: Cleaning the top flitro EVA
1) Remove the stop for the filter by hand. Tighten the four mounting screws (see FIG)
2) Immerse the EVA filter in hot water with a neutral detergent (about 40 ° C) and allowed to dry
Screws filter down
wedge lock
wedge lock

17
VIII. Storage Product
1. Let the water machine.
2. Turn the product. Select the low ventilation to dry the exhaust pipe and prevent the onset of mold.
3. Turn on the machine, the plug from the socket, and to wrap the cord in place. Replace the cap and the outlet cover ..
4. Keep Remove the expansion tube and secure.
5. Cover up product with lots of plastic. Store it in a dry place out of reach of children and away from dust.
6. The batteries from the remote control and store carefully.

18
IX. TROUBLE
Do not repair or disassemble this product. Just in case of a malfunction, contact your authorized service center.
issue possible cause solution
the
conditio am not
working
There is no electricity
Turn the product and the assicirarsi plug fully
into the outlet.
The indicator
"FL".
Drain the water from the product
the ambient temperature
too low or high.
The range of the recommended temperature for the product is
7-35 ° C
Im so raffreddameno the room
temperature is lower than the
temperature
to establish;
Change the set temperature.
In dehumidifying, the
ambient temperatures
low
Place the product in a room with a
ambient temperature superior to 17 ° C
nto the
raffreddame is
not efficient
Direct sunlight on the car Move the product or obscure rays of the sun
Doors and windows open. The area is
packed with people. There are sources of
heat.
Close doors and windows and add sources
conditioning
The filter is dirty Clean or replace the filter
The output of the air inlet
they are blocked
Remove obstructions
excessive
rumorostà
The product is not on a flat surface, and
stable
Place the product in an area
flat stable and hard.
the
compressor
The
does not work
E 'between the two compressor thermal
protection
Wait for three minutes so that the temperature becomes
lower, and at the restart
conditioner.
the
TV remote or does not work
The distance between the remote control
and excessive product The remote area of the product
it is turned to the receiver
The remote control is not aligned with the
batteries in the receiver layer
Replace the batteries
'E1'
error.
The temperature of the tube
abnormal air
Check the tubing temperature sensor
air, and the electrical circuit
Error "E2" Temperatures in the environment
it is abnormal
Check the temperature
sensor and the circuit ..

19
portable air conditioner
MODELS: TZAZC5
INSTRUCTIONS
Read and keep for future use.

20
The refrigerant used in air conditioners Mobile is the environmentally-friendly hydrocarbon refrigerant R290.This
is odorless, and compared with the alternative refrigerant, the R290 refrigerant is an ozone-free, and its effect is
very low.
Read the instructions for use and repair.
The drawings in this manual is not the same as the physical objects. Please refer to the physical
objects.
I. SAFETY WARNINNGS
1. Do not use any means to accelerate the defrosting process or 1. Do not use any means to accelerate the defrosting process or
clean, other than those recommended by the manufacturer.
2. The device must be stored in an area without continuous 2. The device must be stored in an area without continuous
operating ignition sources (for example, open flames, an operating gas appliance or an active electric heating element.)
3. Do not pierce or burn. 3. Do not pierce or burn.
4. Be aware that refrigerants can not contain a fragrance. 4. Be aware that refrigerants can not contain a fragrance.
5. The machine is installed, operated and maintained in a room with a 5. The machine is installed, operated and maintained in a room with a surface area greater
than 7 m 2.than 7 m 2.surface area greater than 7 m 2.surface area greater than 7 m 2.
6. Keep all necessary ventilation openings free of any obstructions; 6. Keep all necessary ventilation openings free of any obstructions;
7. Maintenance should be performed as recommended by the 7. Maintenance should be performed as recommended by the manufacturer.
8. The device should be stored in a well ventilated 8. The device must be kept in a well-ventilated room in which the room size corresponds to the chamber area as
specified for use.
9. Any person who is involved in working on or breaking into a 9. Anyone who is involved in working on or breaking into a cooling circuit Must be a valid certificate from a recognized
assessment authority by the industry, so their powers authorizes to handle refrigerants safely Secondo with
recognized evaluation specification by the industry to hold.
10. Maintenance should be performed as recommended by the 10. Maintenance should be performed as recommended by the equipment manufacturer.
11. Maintenance and repairs to the assistance of other qualified 11. Maintenance and repairs to the assistance of other qualified
Table of contents
Other Termozeta Air Conditioner manuals
Popular Air Conditioner manuals by other brands

Daikin
Daikin FDA125A5VEB Installer and user reference guide

Bestron
Bestron AAC6000 instruction manual

Cooler Master
Cooler Master Silent Pro Gold 450W user manual

Panasonic
Panasonic CU-2S18NBU-1 Service manual

Hitachi
Hitachi RAM-55QH4 Service manual

Hitachi
Hitachi RA-13JF1 Operation and installation manual

Daikin
Daikin Comfort Flex CLIV Series Installation, operation and maintenance manual

Samsung
Samsung MH FSBA Series installation manual

Hitachi
Hitachi RAS-70YHA1 instruction manual

Vogue
Vogue 373008 Installation instructions & user guide

Klarstein
Klarstein Waterfall manual

Sinclair
Sinclair ASH-09AIE2 user manual