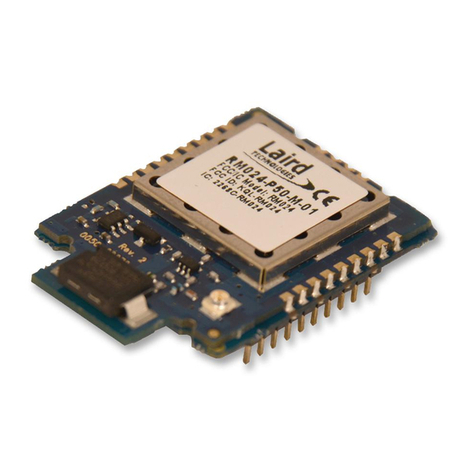
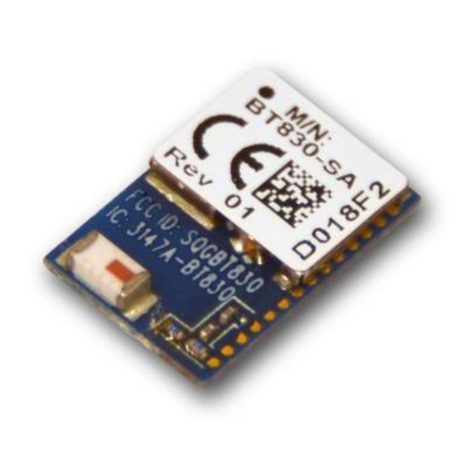
Tesla SMART KIT OSK102 User manual

SPLIT-TYPE
AIR CONDITIONER
SMART KIT
USER MANUAL
ENG SRB
Read the manual carefully before installing or connecting your Smart kit(Wireless
module). Make sure to save this manual for future reference.

2
ENG
DECLARATION OF CONFORMITY
SPECIFICATION
PRECAUTIONS
Hereby, we declare that this Smart kit is in compliance with the essential requirements and
other relevant provisions of Directive 2014/53/EU.
A copy of the full DoC is attached. (European Union products only)
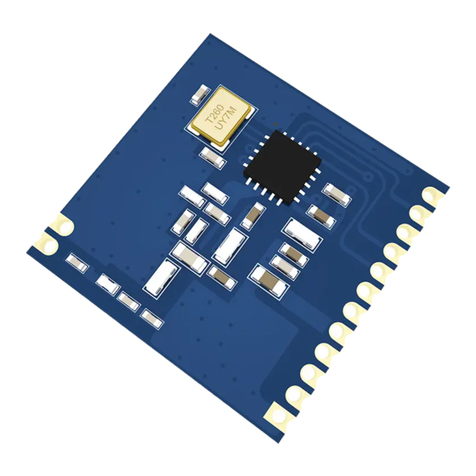
Model: OSK102,EU-OSK103,US-OSK103
Standard: IEEE 802. 11b/g/n
Antenna Type: Printed PCB Antenna
Frequency : WLAN 2400~2483.5 MHz
Operation Temperature:0 C~45 C/32 F~113 F
Operation Humidity: 10%~85%
Power Input: DC 5V/300mA
Maximum Transmitted Power: 19.8dBm Max
Applicable system: iOS, Android. (Suggest: iOS 8.0 or later, Android 4.0 or later)
• Please keep you APP up to date with the latest version.
• Due to special situation may be occurred, we explicitly claims below: Not all of the Android and
i OS system are compatible with APP. We will not be responsible for any issue as a result of the
incompatibility.
Wireless safety strategy
• Smart kit only support WPA-PSK/WPA2-PSK encryption and none encryption .
WPA- PSK/WPA2-PSK encryption is recommended.
Cautions
• Due to different network situation, control process may return time-out sometimes. If this situation
occurs, the display between board and App may not be the same, please do not feel confused.
• Smart Phone camera needs to be 5 million pixels or above to make sure scan QR code well.
• Due to different network situation, sometimes, request time-out could happen, thus, it is necessary
to do network configuration again.
• The APP system is subject to update without prior notice for product function improvement. The
actual network configuration process may be slightly different from the manual, the actual process
shall prevail.
• Please Check The Service Website For More information.
3
ENG
1. Remove the protective cap of the smart kit (wireless module)
2. Open the front panel and insert the smart kit (wireless module) into the reserved interface.
3. Attach the QR code packed with Smart kit (wireless module) to the side panel of the machine,
ensure it is convenience to be scanned by the mobile phone. Alternatively, user can take picture
of the QR Code and save it into their own phones.
DOWNLOAD AND INSTALL THE APP
INSTALL THE SMART KIT (WIRELESS MODULE)
• Android Phone users: scan Android QR code or go to google play, search ‘NetHome Plus” app
and download it.
• iOS users: scan iOS QR code or go to APP Store, search ‘NetHome Plus” app and download it.
Android iOS
CAUTION: The following QR Code is only available for downloading APP. It is totally different with
the QR code packed with SMART KIT.
WARNING: This interface is only compatible with SMART KIT(wireless module) provided by the
manufacturer.
Insert

4
ENG
USER REGISTRATION
NETWORK CONFIGURATION
• Please ensure your mobile device is connected to Wi-Fi router. Also, the Wireless router has
already connected to Internet before doing user registration and network configuration.
• It is better to log in your email box and active your registration account by clicking link in case you
forget the password. You can log in with the third party accounts.
Cautions
• It is necessary to forget any other around network and make sure the Android or i OS device just
connect to the Wireless network you want to configure.
• Make sure the Android or i OS device Wireless function works well and can be connected back to
your original Wireless network automatically.
Kindly reminder:
User must finish all the steps in 8 minutes after powering on air conditioner, otherwise you need to
power on it again.
Using Android device to do network configuration
1. Make sure your mobile device has already been connect to the Wireless network which you
want to use. Also, you need to forget other irrelevant Wireless network in case it influences your
configuration process.
2. Disconnect the power supply of air conditioner.
3. Connect the power supply of AC, and continuously press the “ LED DISPLAY” or “DO NOT
DISTURB” button seven times in 10 seconds.
4. When the unit displays “AP”, it means that the air conditioner wireless has already entered into
“AP” Mode.
• Some type of air conditioner do not need the step 2 to be in AP.
0
o
1. Click “Sign up 2. Enter your email address and
password, and then click “Registration”

5
ENG
5. Press “ + Add Device ”
7. Follow the above steps to enter “AP” mode.
6. Select the appliance you
are setting up

6
ENG
8. Choose the network
configuration method.
10. Please enter password
9. Choose the “ Scan the QR
code ” method.
11. Network configuration is
successful
9. Or choose the “Manual
Setup” method.
12. Configuration Success,
you can see the device on
the list.
WLAN
WLAN
WLAN

7
ENG
Using iOS device to do network configuration
1. Make sure your mobile device has already been connected to the Wireless network which you
want to use. Also, you need to forget other irrelevant Wireless network in case it influences your
configuration process.
2. Disconnect the power supply of AC(some units).
3. Connect the power supply of AC, and continuously press the “LED DISPLAY” button or “DO
NOT DISTURB” button seven times in 10 seconds.
4. When the AC displays “AP” , it means that the AC Wireless has already entered into “AP” Mode.
5. Press “ + Add Device ” 6. Select the appliance you are setting up
7. Follow the above steps to enter “AP” mode.

8
ENG
WLAN
WLAN
WLAN
8. Connect to the Wireless
network.
10. Network configuration is
successful
9. Please enter password
11. Configuration Success, you can see
the device on the list.
NOTE:
• When finishing network configuration, APP will display success cue words on the screen.
• Due to different internet environment, it is possible that the device status still display “offline” . If
this situation occurs, it is necessary to pull and refresh the device list on the APP and make sure the
device status become “online” . Alternatively, user can turn off the AC power and turn on it again,
the device status will become “online” after few minutes.

9
ENG
HOW TO USE APP
Please ensure both your mobile device and air conditioner are connected to the Internet before
using app to control the air conditioner via internet, please follow the next steps:
NOTE:
Not all the function of the APP is available on air conditioner. For example: ECO, Turbo, Swing
function, please check the user manual to find more information.
1. Click “ Sign up “ 2. Choose the air conditioner. 3. Thus, user can control air
conditioners on/off status,
operation mode, temperature,
fan speed and so on.
M
!
08
2

10
ENG
SPECIAL FUNCTIONS
Timer on/Timer off
Including: Timer on, Timer off, 8ºC Heat, Sleep, Check.
NOTE: If the air conditioner do not support the above function, the function will be hided from the
function list.
Weekly, user can make an appointment to turn on or off AC on specific time. User also can choose
circulation to keep the AC under schedule control every week.

11
ENG
8ºC Heat
Sleep
User can let the AC run under 8ºC Heat by one-click. When people go outside, this function can
protect your furniture from frost damage.
User can customize their own comfortable sleep by setting target temperature.

12
ENG
Check
Share Device
User can simply check the AC running status with this function. When finishing this procedure, it can
display the normal items, abnormal items, and detail information.
The air conditioner can be controlled by multi-users at the same time by Share Device function.
1. Click "Share device " 2. QR code display.

13
ENG
3. The other users must log in
" Nethome Plus " app first,
then click "Add Share Device
" on their own mobile, then
ask them to scan the QR
code.
4. Now the others can add the
shared device.

14
SRB
SPECIFIKACIJA
MERE PREDOSTROŽNOSTI
Model: OSK102,EU-OSK103,US-OSK103
Standard: IEEE 802. 11b/g/n
Tip Antene: Štampana PCB Antenna
Frekvencija: WLAN 2400~2483.5 MHz
Radna Temperatura:0 C~45 C/32 F~113 F
Radna Vlažnost: 10%~85%
Ulazna Snaga: DC 5V/300mA
Maksimalna Prenosna Snaga: 19.8dBm Max
Sistem koji se primenjuje: iOS, Android. (iOS 8.0 ili noviji, Android 4.0 ili noviji)
• Molimo vas da aplikacija bude u toku sa najnovijom verzijom.
• Zbog posebne situacije može se dogoditi, u nastavku izričito tvrdimo: Nisu svi Android i i OS
sistemi kompatibilni sa APP-om. Nećemo biti odgovorni ni za jedan problem koji je rezultat
nekompatibilnosti.
Strategija bežične bezbednosti
• Pametni komplet podržava samo WPA-PSK / WPA2-PSK šifrovanje ili nikakvo šifrovanje.
• WPA- PSK/WPA2-PSK šifrovanje je preporučeno.
Oprez
• Zbog različite mrežne situacije, postupak kontrole može ponekad vratiti vremensko ograničenje.
Ako se dogodi ova situacija, prikaz između ploče i aplikacije možda neće biti isti, nemojte se
osećati zbunjeno.
• Kamera pametnog telefona mora biti 5 mpx ili više da bi se osiguralo dobro skeniranje QR koda.
• Zbog različite mrežne situacije, ponekad, može doći do isteka vremenskog ograničenja zahteva,
pa je potrebno ponovo izvršiti konfiguraciju mreže.
• Aplikacija se može ažurirati bez prethodne najave radi poboljšanja funkcije proizvoda. Stvarni
proces konfiguracije mreže može se malo razlikovati od ručnog, stvarni proces će prevladati.
• Molimo pogledajte web lokaciju usluge za više informacija.

15
SRB
1. Uklonite zaštitnu kapicu pametnog kita (Wi Fi modul)
2. Otvorite prednji panel i umetnite kit (Wi Fi modul) na predviđeno mesto.
3. Priključite QR kod upakovan u Smart kit (bežični modul) na bočnu ploču uređaja, osiguravajući
da ga mobilni telefon skenira pogodno. Alternativno, korisnik može slikati KR kod i sačuvati ga na
svom telefonu.
PREUZIMANJE I INSTALIRANJE APLIKACIJE
INSTALIRANJE PAMETNOG KITA (WI FI MODUL)
• Korisnici Android telefona: skenirajte Android KR kod ili idite na google Pla, pretražite aplikaciju
„NetHome Plus“ i preuzmite je.
• Korisnici iOS-a: skenirajte iOS KR kod ili idite u APP Store, potražite aplikaciju „NetHome Plus“ i
preuzmite je.
Android iOS
NAPOMENA: QR kod je namenjen samo za preuzimanje aplikacije. Drugačiji je od QR koda koji se
nalazi na SMART KIT-u.
UPOZORENJE: Ovaj interfejs je kompatibilan samo sa SMART KIT-om (bežični modul) koji nudi
proizvođač.
Insert

16
SRB
REGISTRACIJA KORISNIKA
KONFIGURACIJA MREŽE
• Uverite se da je vaš mobilni uređaj povezan sa Wi-Fi ruterom. Takođe, bežični ruter se već povezao
na internet pre registracije korisnika i mrežne konfiguracije.
• Bolje je da se prijavite u svoju e-poštu i aktivirate svoj nalog za registraciju klikom na vezu u slučaju
da zaboravite lozinku. Možete se prijaviti pomoću naloga nezavisnih proizvođača.
Upozorenje
• Neophodno je zaboraviti bilo koju drugu mrežnu mrežu i osigurati da se Android ili iOS uređaj
samo povežu sa bežičnom mrežom koju želite da konfigurišete.
• Uverite se da Android ili iOS uređaj Vireless funkcija dobro funkcioniše i da se automatski može
ponovo povezati sa originalnom bežičnom mrežom.
Podsetnik:
• Korisnik mora da završi sve korake za 8 minuta nakon uključivanja klima uređaja, u suprotnom ga
morate ponovo uključiti.
Korišćenje Android uređaja za konfiguraciju mreže
1. Proverite da li je telefon već povezan na Wi Fi mrežu. Takođe, morate zaboraviti drugu nevažnu
bežičnu mrežu u slučaju da ona utiče na proces povezivanja.
2. Isključite napajanje klima uređaja.
3. Priključite izvor napajanja klima uređaja, i pritisnite “LED DISPLAY” ili “DO NOT DISTURB” dugme
7 puta za 10 sekundi.
4. Kada uređaj pokaže “AP” na displeju, znači da je modem klima uređaja već u “AP” režimu.
• Nekim klima uređajima nije potreban korak 2 u aplikaciji.
0
o
1. Kliknite na „Prijavi se“ 2. Unesite svoju adresu e-pošte i lozinku,
a zatim kliknite na „Registracija“

17
SRB
5. Pritisnite “ + Add Device ”
7. Pratite korake iznad da aktivirate “AP” režim.
6. Odaberite uređaj koji
podešavate

18
SRB
8. Izaberite metod mrežne
konfiguracije.
10. Unesite lozinku
9. Izaberite metod „Skeniraj
QR kod“.
11. Konfiguracija mreže je
uspešna
9. Ili odaberite “Manual
Setup” metod.
12. Konfiguracija je uspešna,
uređaj možete videti na
listi.
WLAN
WLAN
WLAN

19
SRB
Korišćenje iOS uređaja za konfiguraciju mreže
1. Make sure your mobile device has already been connected to the Wireless network which you
want to use. Also, you need to forget other irrelevant Wireless network in case it influences your
configuration process.
2. Isključite napajanje (neki uređaji).
3. Priključite napajanje naizmeničnom strujom i neprekidno pritisnite taster „LED DISPLAY“ ili
dugme „DO NOT DISTURB“ sedam puta u 10 sekundi.
4. Kada AC prikazuje „AP“, to znači da je AC Wi Fi već ušao u „AP“ režim.
5. Pritisnite “ + Add Device” 6. Odaberite uređaj koji podešavate
7. Sledite gornje korake za aktiviranje “AP” režima.

20
SRB
WLAN
WLAN
WLAN
8. Povežite se na Wi Fi mrežu.
10. Konfiguracija mreže je
uspešna
9. Unesite lozinku
11. Konfiguracija je uspešna, uređaj
možete videti na listi.
NAPOMENA:
• Po završetku mrežne konfiguracije, aplikacija će na ekranu prikazati reči sa znakom uspeha.
• Zbog različitog internetskog okruženja, moguće je da se status uređaja i dalje prikazuje „ offline“
.Ako se dogodi ova situacija, potrebno je povući i osvežiti listu uređaja u aplikaciji i osigurati da
status uređaja postane „online“.Alternativno, korisnik može isključiti napajanje naizmeničnom
strujom i ponovo ga uključiti, status uređaja će nakon nekoliko minuta postati „na mreži“.
This manual suits for next models
2
Table of contents