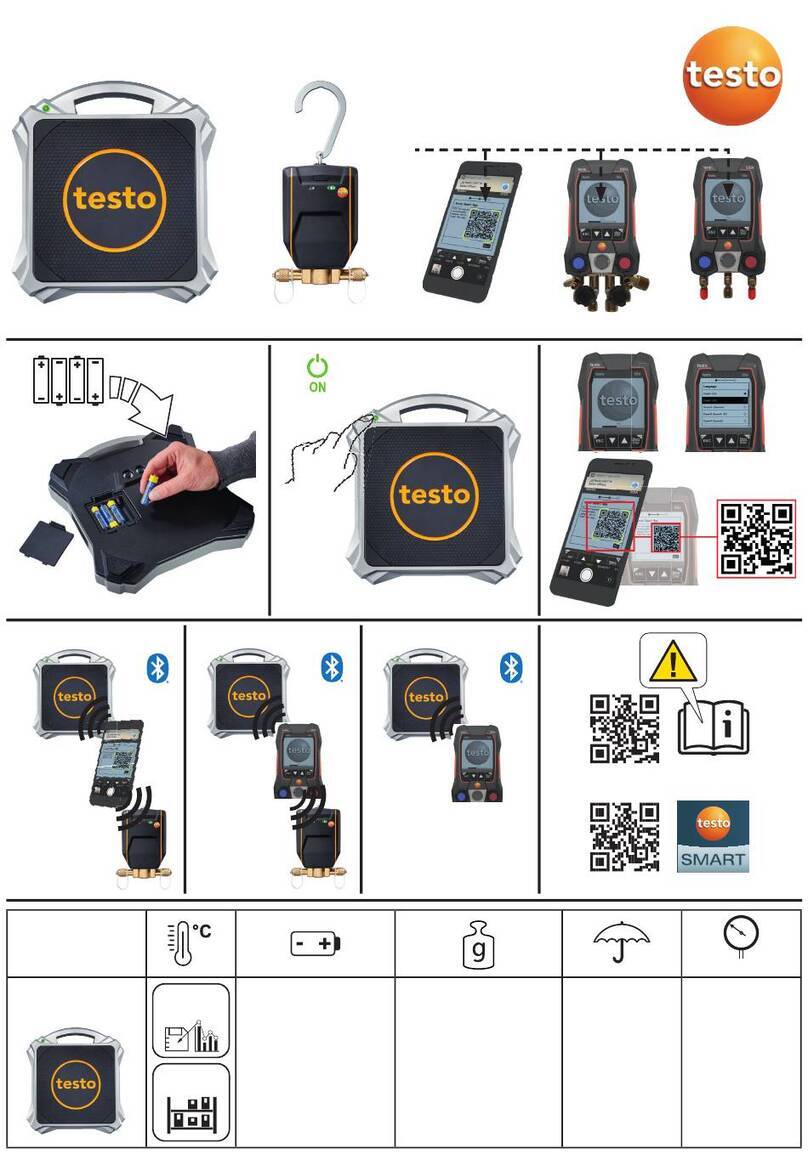
TESTO Saveris 0573 2600 01 User manual

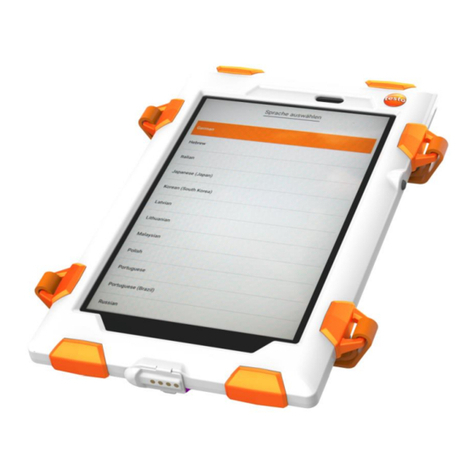
testo Saveris Control Unit
0573 2600 01
Instruction manual

Table of contents
Table of contents
1About this document ...........................................................................3
1.1 Use.....................................................................................................................3
1.2 Icons...................................................................................................................3
2Safety and disposal..............................................................................3
3Product-specific approvals .................................................................3
4Support .................................................................................................4
5Description of the instrument .............................................................4
5.1 Scope of delivery ................................................................................................5
5.2 testo Saveris Control Unit overview ....................................................................6
6Commissioning ....................................................................................7
6.1 Switch on testo Saveris Control Unit...................................................................7
6.2 Initial commissioning and set-up of the testo Saveris Control Unit ......................7
6.3 User login for the testo Saveris App....................................................................8
6.4 Overview of the testo Saveris App ......................................................................9
6.5 Pairing the testo Saveris multifunction handle / testo Saveris online data loggers
...........................................................................................................................9
6.6 Using NFC tags ................................................................................................10
6.7 Switch off testo Saveris Control Unit .................................................................10
6.8 Removing the protective case...........................................................................11
7Operation ............................................................................................12
8Maintenance and care........................................................................12
8.1 Charging the testo Saveris Control Unit ............................................................12
8.2 Cleaning the testo Saveris Control Unit ............................................................13
8.2.1 Cleaning the protective case ....................................................................................13
8.2.2 Cleaning the tablet ...................................................................................................14
8.2.3 Cleaning the charging station ...................................................................................14
9Technical data ....................................................................................14
9.1 testo Saveris Control Unit .................................................................................14
9.2 Protective case .................................................................................................15
10 Order numbers ...................................................................................15

1 About this document
3
1About this document
Please read this instruction manual through carefully and familiarize yourself
with the product before putting it to use.
1.1 Use
•The instruction manual is an integral part of the product.
•Pay particular attention to the safety instructions and warning notices in
order to prevent injuries or damage to the product.
•Keep this documentation to hand so that you can refer to it when necessary.
•Always use the complete original version of the instruction manual.
•Hand this documentation on to any subsequent users of the product.
You will find the General Terms and Conditions in the login area of the
respective testo Saveris solution at: www.testo.com/login.
1.2 Icons
Display Explanation
Note: basic or further information
1
2
…
Action: several steps, the sequence must be followed
>
Action: one step or optional step
Result of an action
Requirement
Menu
Elements of the program interface
[OK]
Buttons of the program interface
2Safety and disposal
Please observe the Testo information document (enclosed with the product).
3Product-specific approvals
Please find the current country approvals in the attached Approval and
Certification document.

4Support
4
4Support
You can find up-to-date information on products, downloads and links to contact
addresses for support queries on the Testo website at: www.testo.com.
5Description of the instrument
The main component of the testo Saveris Control Unit is a tablet with integrated
application software. The integrated software guides the user quickly and easily
through the quality controls that have been previously defined in the testo
Saveris cockpit, with immediate prompting to take corrective actions. The
Control Unit is the core component of the testo Saveris Solution and
communicates via WLAN with the Cloud-based cockpit and via Bluetooth®with
the testo Saveris multifunction handle or other handheld measuring instruments
that can be integrated, such as the testo 104 IR-BT.
For infrared measurements, the testo 104 IR-BT (not included in the
scope of delivery) can be paired with the testo Saveris Control Unit in
the same way as the testo Saveris multifunction handle. (For the sake
of simplicity, we will only deal with the testo Saveris multifunction
handle as representative in the following.)
A WLAN infrastructure must be provided by the customer (not part of
the scope of delivery), so as to enable transmission of the measured
values to the Cloud.

5 Description of the instrument
5
5.1 Scope of delivery
1
testo Saveris Control
Unit including
protective housing
(testo Saveris App
already installed on the
Control Unit)
2
Wrist strap with
housing clips
3
Charging station with
stand
4
Wall bracket for
charging station
5
Charging cable with
USB connection
6
8 housing clips

5Description of the instrument
6
7
Carrying strap
8
Cover for charging
cradle adapter/USB
port
Mounting materials for the charging station wall bracket are not
included in the scope of delivery. Please select suitable mounting
materials that are appropriate for the required mounting location.
5.2 testo Saveris Control Unit overview
Element Element
1
On/off switch
2
Charger connection/USB port
3
Housing clip
4
Housing clip for wrist strap
5
Audio connection
6
Display
7
Main camera
8
Wrist strap
9
NFC detection area
10
Charging/notification light
11
Front camera
12
Light sensor

6 Commissioning
7
6Commissioning
Thanks to its protective case, your instrument has the IP classification
(Ingress Protection, protection against the ingress of dust and water
jets) IP65. Always press all covers down firmly, to ensure that the
instrument is waterproof and dustproof.
6.1 Switch on testo Saveris Control Unit
1
Press the on/off switch for 2 seconds.
The testo Saveris Control Unit switches on. This process can take up
to 30 seconds.
2
Unlock the screen.
The testo Saveris App launches automatically. This process can take
up to 30 seconds.
6.2 Initial commissioning and set-up of the
testo Saveris Control Unit
In order to set up the testo Saveris Control Unit, you need to have successfully
registered in the cockpit of the relevant solution (www.testo.com/login) and
successfully created users for the testo Saveris Control Unit.
The testo Saveris App’s installation wizard will quickly and reliably guide you
through the individual steps during your initial commissioning. Follow the
instructions. Settings can still be adjusted at a later stage too.
Have your WLAN settings ready. You need these to connect your testo
Saveris Control Unit to your WLAN.
Have your testo Saveris access data ready (email address and
password which you used for registration in the cockpit). You need
these to connect your Control Unit to your Saveris account.
You have made sure that the testo Saveris Control Unit is charged.
1
Remove the protective film from the front panel of the housing.
2
You can easily switch between the different carrying options (wrist
strap, carrying strap or none at all) for the testo Saveris Control Unit
via the exchangeable clips.

6Commissioning
8
3
Switch the testo Saveris Control Unit on (see point 4.1 “Switch on
Control Unit”)
The testo Saveris App launches automatically. (If this does not
happen, please start the testo Saveris App by clicking on the following
icon: )
4
To continue commissioning, follow the individual steps of the
installation wizard. This will take you through all the necessary
settings. Pay attention to the correct selection of server settings in the
process.
Once the settings are successfully completed, the testo Saveris
Control Unit is automatically synchronized with your account. This
process may take some time.
5
testo Saveris multifunction handles and/or testo Saveris online data
loggers can now be paired with the testo Saveris Control Unit.
The pairing of the devices was successful. The access area of the
testo Saveris App opens for the users you have created.
6.3 User login for the testo Saveris App
The testo Saveris Control Unit is switched on and initial commissioning
has been successfully carried out.
1
Have your access data for the testo Saveris Control Unit (user name
and PIN) or your NFC tag ready.
2
Log in.
The testo Saveris App’s dashboard opens with the quality controls that
need to be carried out.
When you log into the testo Saveris Control Unit for the first time, the
user password is by default: 0000. This must be changed following the
first login. You are automatically prompted to do this on the login
screen.

6 Commissioning
9
6.4 Overview of the testo Saveris App
Element Function
1
Pairing, updates, synchronization
and settings (regarding WLAN,
language, time, password, etc.) can
be performed here.
2
All quality controls/tasks in the
quality handbook are displayed. The
ad hoc launch of unscheduled tasks
is possible here.
3
/
Access previous/next shift.
4
Online data logger alarm
notifications
5
Date/shift
Here you can move to another shift
in the calendar or to the current one.
6
Status bar
Shows the status of
synchronization, battery charge
level and WLAN signal strength.
You can also read out the current
date and time here.
7
Quality controls that have been
opened can be paused here.
8
Completed quality controls can be
ended here.
6.5 Pairing the testo Saveris multifunction
handle / testo Saveris online data
loggers
During the initial set-up, you can pair your testo Saveris multifunction
handle with the testo Saveris Control Unit and your testo Saveris online
data loggers with your account when the installation wizard finishes.
Please follow the instructions of the testo Saveris App on the testo
Saveris Control Unit for this.
To carry out pairing at a later stage:
The devices that need to be paired are switched on and the
WLAN/Bluetooth®connection is enabled.

6Commissioning
10
1
Choose the “Pair devices” option under in the testo Saveris App on
the Control Unit.
A window opens where you can select the devices that need to be
paired.
2
Follow the instructions on the screen.
3
Following successful pairing, you can carry out further settings for the
measuring unit.
You will find details about the testo Saveris multifunction handle or testo
Saveris online data logger in the relevant instruction manual.
6.6 Using NFC tags
You need an NFC reader to use NFC tags and NFC labels. You can purchase
this from Testo (order number 0554 2580).
NFC tags are configured via the testo Saveris cockpit.
The NFC tag detection area is located on the rear of the testo Saveris
Control Unit.
NFC tags can be assigned both to users who have already been created and
also to quality checks.
If an NFC tag has been assigned to a user, they can use this for fast and easy
user login, amongst other things.
If an NFC tag has been assigned to a quality check, the task assigned to the
NFC tag is launched automatically once the NFC tag has been read in. If the
task has already been carried out, an unscheduled (ad hoc) task is launched.
6.7 Switch off testo Saveris Control Unit
1
Press the on/off switch for approx. 2 seconds.
2
Tap “Switch off” on the display.
The testo Saveris Tablet switches off.

6 Commissioning
11
6.8 Removing the protective case
For cleaning purposes or for removal of the charging cradle adapter, you can
take off the testo Saveris Control Unit’s protective case.
1
Remove the housing clips using an
unfitted clip.
If all housing clips have been removed, the two shells of the protective
case can be detached and taken off.
CAUTION
Removing the tablet from the protective case
Damage to the USB port
-When taking the tablet out, please make sure that you remove the
charging adapter first to ensure that the USB port is not damaged.
ATTENTION
Incorrect fitting of the protective case.
Damage to the instrument.
-Make sure the protective case is properly fitted on the testo Saveris
Control Unit.
If the charging cradle adapter has been removed, the testo Saveris
Control Unit must be sealed using the cover included, in order to
safeguard the IP65 IP classification.

7Operation
12
7Operation
The testo Saveris App guides you through the individual applications and quality
controls on the testo Saveris Control Unit and thus enables simple operation
which is easy to understand.
The dashboard gives an overview of the current status of all tasks. It is indicated
whether the quality control is open, completed or overdue or if it has been
paused. The current alarms are also displayed.
Various work steps have to be performed (e.g. measurement of cooking oil
quality, core, surface or air temperature) depending on previously defined
quality controls. You use the testo Saveris multifunction handle, with the
appropriate probe measuring tip fitted to do this. More detailed information can
be found in the testo Saveris multifunction handle instruction manual.
If you do not intend to carry out a measurement using the testo Saveris
multifunction handle, or if this not possible, you can also enter the reading
manually via the testo Saveris Control Unit keyboard.
8Maintenance and care
8.1 Charging the testo Saveris Control
Unit
The testo Saveris Control Unit can either be charged via the charging cradle or
directly via the charging cable supplied. Charging via the charging cradle is
recommended. Third-party items (power supply units, cables, USB hubs, etc)
may result in undefined behaviour.
The charging cradle is suitable for desktop operation, however it can also
optionally be fixed to the wall. Use the wall bracket which is supplied for this.
DANGER
Life-threatening danger!
Electric cables may get damaged.
-When fixing the wall bracket using screws, it must not be mounted directly
on electrical systems.
Charging cradle and mains unit must not be fitted in a wet area.
Only use the charging cables supplied to charge the testo Saveris
Control Unit.

8 Maintenance and care
13
Make sure that the charging cradle adapter for the charging station is
installed on the testo Saveris Control Unit. This must be removed
manually by taking off the protective case for direct charging via the
special charging cable.
The charging cradle is fixed using the desired bracket (wall bracket or
stand).
1
Connect the mains unit to the charging cradle.
2
Put the testo Saveris Control Unit carefully into the charging cradle.
3
Always pay attention the contact between the charging cradle and the
testo Saveris Control Unit. The charge status is indicated on the
display and via the charging light.
The testo Saveris Control Unit is
charged.
8.2 Cleaning the testo Saveris Control Unit
To clean the Control Unit, the protective case must be properly fitted on the
tablet and all covers firmly pressed on.
The protective case and the tablet can be cleaned separately. Please follow the
instructions below for this.
The Control Unit (with the protective case correctly fitted) can be
washed using a damp cloth or quickly cleaned under running water.
8.2.1 Cleaning the protective case
Only use weak, commercially available neutral/household cleaning
agents (e.g. washing-up liquid) for cleaning. Do not use aggressive
cleaning agents or solvents.
The protective case can be washed using a damp cloth or quickly
cleaned under running water.

9Technical data
14
The protective case is not suitable for cleaning in a dishwasher.
8.2.2 Cleaning the tablet
Use a dry, soft cloth for cleaning.
8.2.3 Cleaning the charging station
Use a dry, soft cloth for cleaning. The charging station must not be
subject to any damp or wet cleaning methods.
9Technical data
9.1 testo Saveris Control Unit
Feature Value
Display type
WUXGA
Display characteristics
illuminated, 16.7M, touch input - multi-touch
Display resolution
1920 x 1200 pixels
Display dimensions
8" (20.3 cm)
Dimensions (W x H x D)
including protective case: 236 x 149 x 16.5 mm
Weight
590 g with protective case
Memory
16 GB EMMC expandable up to 32 GB EMMC
1.8 GB PCDDR3
2 GB RAM expandable up to 32 GB
Processor
MT6750 Octa-Core
,
4*1.5 Ghz + 4*1.0 GHz
Connections Android 7
NFC
Bluetooth®4.0 radio technology
WLAN and WLAN hotspot function
Charging via USB
GPS
GSM/UMTS/LTE-ready
Camera
Main camera: 5M
Camera: 2M
Battery type
Lithium battery 4000 mAh
Rechargeable battery life
11 hours
Rechargeable battery
charging time
~5 h

10 Order numbers
15
Feature Value
Storage temperature
-20°C to +45°C
Operating temperature
-5°C to +45°C
Approvals/guidelines
RED (2014/53/EU)
EMC (2014/30/EU)
RoHS (2011/65/EU)
9.2 Protective case
Feature Value
Dimensions
236 x 149 x 16.5 mm (without clips)
Weight
590g (protective case + control unit)
Protection class
IP65
10 Order numbers
testo Saveris Control Unit
Description Order no.
testo Saveris Control Unit
0573 2600 01

Testo SE & Co. KGaA
Celsiusstr. 2
79822 Titisee-Neustadt
Germany
Phone: +49 (0)7653 681-0
E-mail: [email protected]
www.testo.com
0970 2602 en 03
Table of contents
Other TESTO Control Unit manuals
Popular Control Unit manuals by other brands

KEBCO
KEBCO COMBIVERT H6 Series Instructions for use

Conrad Electronic
Conrad Electronic GX106 operating instructions

Siemens
Siemens Simatic S7-1500 manual

oventrop
oventrop Regufloor HN Installation and operating instructions

ABB
ABB WaveLINE 6731-21-500 Installation and operating instructions

Continental Refrigerator
Continental Refrigerator ACCM manual

Aim
Aim AMCX-FDX-2 Hardware manual

Hayward
Hayward VariFlo Multiport SP0715ALL owner's manual

FLYGT
FLYGT 3152 Installation, operation and maintenance manual

GEM
GEM 428 Installation, operating and maintenance instructions

Nice
Nice Mindy-A01 Instructions and warnings for the fitter

First Solar
First Solar 6 Series user guide