manuals.online logo
Brands
  1. Home
  2. •
  3. Brands
  4. •
  5. Texsport
  6. •
  7. Tent
  8. •
  9. Texsport 02869 User manual

Texsport 02869 User manual

ASSEMBLY INSTRUCTIONS
Item 2869
Spinnaker Auto Shade
Thank you for buying a Texsport Authentic Adventure Gear Product. We hope you enjoy your new shade and that it will serve you with
many years of camping pleasure. We encourage you to read and understand each step of the set-up instructions prior to working with
the shade.
Do not apply excessive force to this product.
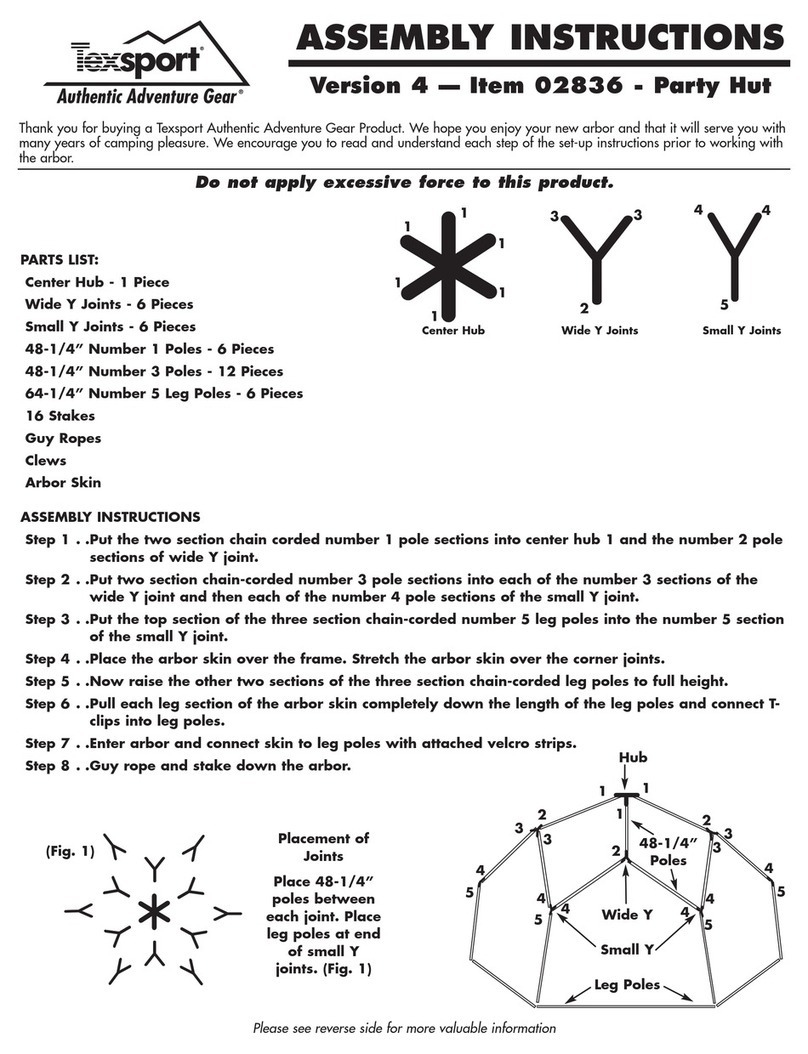
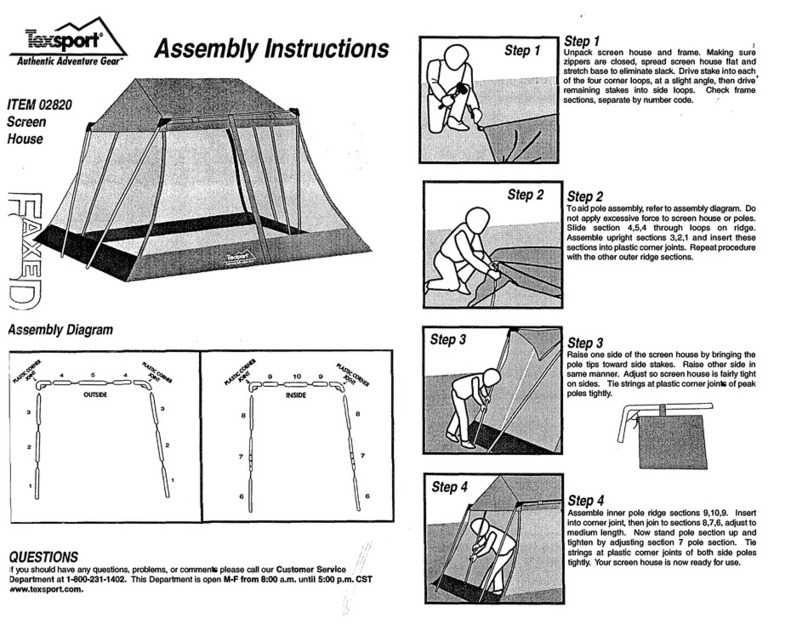
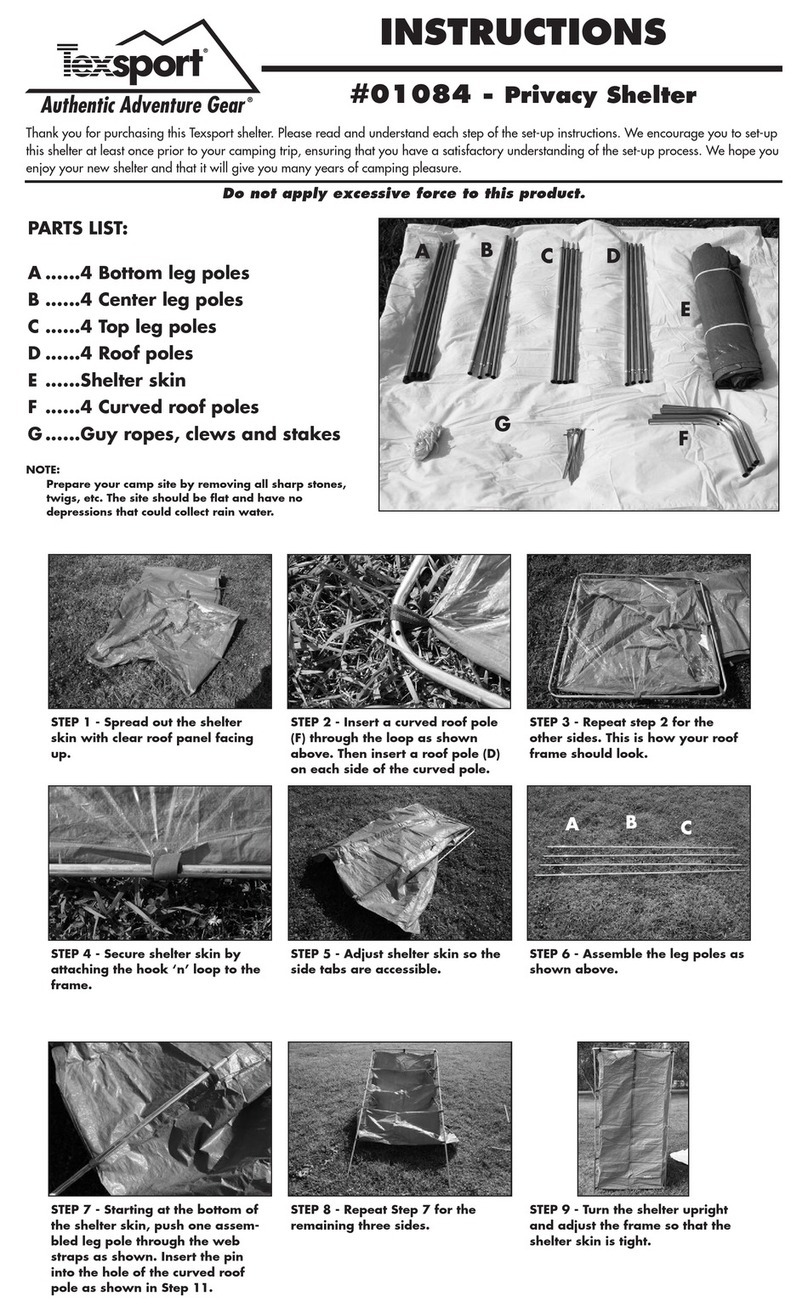
PARTS LIST:
A - 1 Shade Skin
B - 2 Sets of Long Fiberglass Poles
C - Shade Stakes, Ropes and Clews
A
B
C
STEP 1 - Spread the shade skin
on the ground next to your truck
or S.U.V.
STEP 2 - Assemble 1 pole and
push it through the sleeve -
rubber end first.
STEP 3 - Follow the sleeve and
cross the pole to the opposite
corner and insert into the
webbed pocket.
STEP 4 - Repeat step 3 for the
remaining pole. At this point,
your shade should look like the
image above.
STEP 5 - Insert the pin and ring
into the bottom of the poles.
STEP 6 - If the shade skin is too
loose or tight, it may be adjusted
with the webbed tension belt.
M DEL: SPINNAKER AUT SHADE
ITEM # 02869
MADE IN CHINA
JSC08
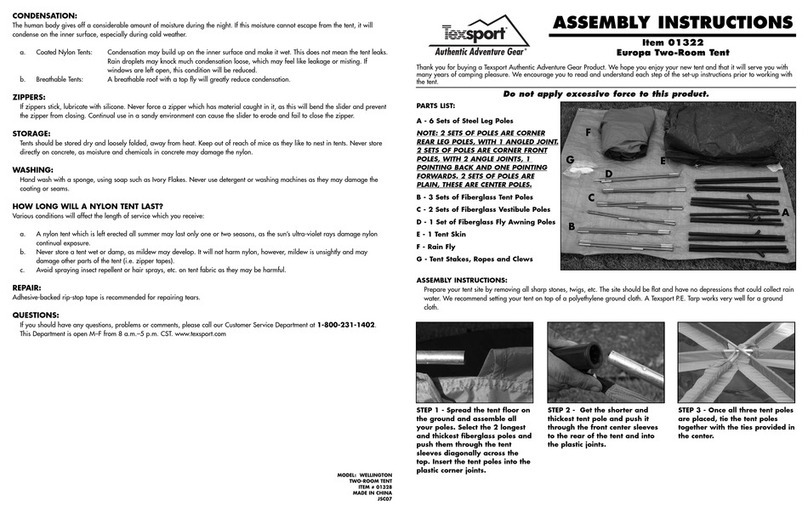
SHADE STAKES:
All shades should be staked down. The stakes supplied with your shade are effective for most conditions; however, specialized stakes
are recommended in certain cases:
a. Sand Stakes: Long broad stakes designed to hold in loose sand.
b. Steel Stakes: Most effective in hard, rocky or frozen soil. These can rust and their sharp edges could damage the shade if
stored with the shade. In extremely hard soil a steel rod can be used to make the starter hole.
c. Skewer Stakes: Lightweight, but less holding power that the standard stakes.
d. Snow Stakes: The most common method is to bury objects with a great deal of surface area in the snow i.e. branches,
aluminum pie plates, stuff sacks or shade bags filled with snow and buried: (this may be referred to as the
dead man method). Shades can also be secured to snow skis or poles which are stuck into the snow.
ZIPPERS:
If zippers stick, lubricate with silicone. Never force a zipper which has material caught in it, as this will bend the slider and prevent
the zipper from closing. Continual use in a sandy environment can cause the slider to erode and fail to close the zipper.
ST RAGE:
Shades should be stored dry and loosely folded, away from heat. Keep out of reach of mice as they like to nest in shades. Never
store directly on concrete, as moisture and chemicals in concrete may damage the nylon.
WASHING:
Hand wash with a sponge, using soap such as Ivory Flakes. Never use detergent or washing machines as they may damage the
coating or seams.
H W L NG WILL A NYL N SHADE LAST?
Various conditions will affect the length of service which you receive:
a. A nylon shade which is left erected all summer may last only one or two seasons, as the sun’s ultra-violet rays damage the
nylon.
b. Never store a shade wet or damp, as mildew may develop. It will not harm nylon, however, mildew is unsightly and may
damage other parts of the shade (i.e. zipper tapes).
c. Avoid spraying insect repellent or hair sprays, etc. on shade fabric as they may be harmful.
REPAIR:
Adhesive-backed rip-stop tape is recommended for repairing tears.
QUESTI NS:
If you should have any questions, problems or comments, please call our Customer Service Department at 1-800-231-1402.
This Department is open M–F from 8 a.m.– p.m. CST. www.texsport.com
S ME ADDITI NAL INF RMATI N:
Make sure you stake the shade (with the shades stakes included) in windy weather, or if you anticipate afternoon winds coming up
while you are away from your campsite. Stake one corner, then stake each consecutive corner in a clockwise rotation. Make sure the
shade remains tight. Always place your shade a safe distance from your campfire - unstaked shades placed upwind of the fire can
be blown into the fire. Shades placed downwind of the fire are often showered with tiny sparks that can burn holes into the light-
weight fabrics of your shade. The frame system on this shade was designed to collapse during high winds. By collapsing in the
wind, the frame will not break; thus offering you years of continued use. We recommend that you practice setting your shade at
home before taking it out into the wilderness.
WATERPR FING Y UR SHADE:
Texsport shades are made from coated water-repellent fabrics. However, the sewing process, necessary in all shade fabrication, can
cause water leakage where the sewing needles have perforated the fabric in the seams. Without treatment the shade will leak. Every
new shade needs to be seam sealed to make it water tight. We recommend using Texsport Spray Waterproofing/Seam Sealer which
may be found at your local outdoor outfitter or camping store.
WARNING:
Texsport shade fabrics are flame retardant treated per C.P.A.I.-84 specification. However, for your safety, we recommend that NO
OPEN FLAME BE USED IN OR NEAR YOUR SHADE.
STEP 7 - Snap the speed clips to
the poles to secure the skin to
the poles.
STEP 8 - Also tie the poles to the
skin with the provided ties to
secure.
STEP 9 - This is what your shade
should look like so far.
STEP 10 - Prop the shade against
the roof of your truck or S.U.V.
STEP 13 - This is what your
shade should look like so far.
N TE - IN HIGH WINDS, IT IS
NECESSARY T GUY R PE Y UR
SHADE S IT D ES N T FLY
AWAY. PLEASE F LL W THESE
INSTRUCTI NS T GUY R PE
Y UR SHADE.
STEP 14 - Insert the guy rope into
the clew in this order pictured
above. Through the top of the
bottom hole. Up through the
back of the middle hole. Back
down through the top top hole.
STEP 15 - Tie a knot at the end
so the rope does not slip out.
STEP 11 - Tie the shade to the
luggage rack with the provided
ties.
STEP 12 - Stake down your
shade at the rings.
STEP 16 - Tie the other end of the
guy rope to the shade.
STEP 19 - To adjust the tension,
slide the clew up or down along
the guy rope.
STEP 17 - Pull the bottom section
looped in the clew out. The knot
will not let the rope slip out.
STEP 18 - Loop this around the
stake’s head and push into the
ground.
ASSEMBLY INSTRUCTIONS
Item 2869
Spinnaker Auto Shade
Thank you for buying a Texsport Authentic Adventure Gear Product. We hope you enjoy your new shade and that it will serve you with
many years of camping pleasure. We encourage you to read and understand each step of the set-up instructions prior to working with
the shade.
Do not apply excessive force to this product.
PARTS LIST:
A - 1 Shade Skin
B - 2 Sets of Long Fiberglass Poles
C - Shade Stakes, Ropes and Clews
A
B
C
STEP 1 - Spread the shade skin
on the ground next to your truck
or S.U.V.
STEP 2 - Assemble 1 pole and
push it through the sleeve -
rubber end first.
STEP 3 - Follow the sleeve and
cross the pole to the opposite
corner and insert into the
webbed pocket.
STEP 4 - Repeat step 3 for the
remaining pole. At this point,
your shade should look like the
image above.
STEP 5 - Insert the pin and ring
into the bottom of the poles.
STEP 6 - If the shade skin is too
loose or tight, it may be adjusted
with the webbed tension belt.
M DEL: SPINNAKER AUT SHADE
ITEM # 02869
MADE IN CHINA
JSC08
SHADE STAKES:
All shades should be staked down. The stakes supplied with your shade are effective for most conditions; however, specialized stakes
are recommended in certain cases:
a. Sand Stakes: Long broad stakes designed to hold in loose sand.
b. Steel Stakes: Most effective in hard, rocky or frozen soil. These can rust and their sharp edges could damage the shade if
stored with the shade. In extremely hard soil a steel rod can be used to make the starter hole.
c. Skewer Stakes: Lightweight, but less holding power that the standard stakes.
d. Snow Stakes: The most common method is to bury objects with a great deal of surface area in the snow i.e. branches,
aluminum pie plates, stuff sacks or shade bags filled with snow and buried: (this may be referred to as the
dead man method). Shades can also be secured to snow skis or poles which are stuck into the snow.
ZIPPERS:
If zippers stick, lubricate with silicone. Never force a zipper which has material caught in it, as this will bend the slider and prevent
the zipper from closing. Continual use in a sandy environment can cause the slider to erode and fail to close the zipper.
ST RAGE:
Shades should be stored dry and loosely folded, away from heat. Keep out of reach of mice as they like to nest in shades. Never
store directly on concrete, as moisture and chemicals in concrete may damage the nylon.
WASHING:
Hand wash with a sponge, using soap such as Ivory Flakes. Never use detergent or washing machines as they may damage the
coating or seams.
H W L NG WILL A NYL N SHADE LAST?
Various conditions will affect the length of service which you receive:
a. A nylon shade which is left erected all summer may last only one or two seasons, as the sun’s ultra-violet rays damage the
nylon.
b. Never store a shade wet or damp, as mildew may develop. It will not harm nylon, however, mildew is unsightly and may
damage other parts of the shade (i.e. zipper tapes).
c. Avoid spraying insect repellent or hair sprays, etc. on shade fabric as they may be harmful.
REPAIR:
Adhesive-backed rip-stop tape is recommended for repairing tears.
QUESTI NS:
If you should have any questions, problems or comments, please call our Customer Service Department at 1-800-231-1402.
This Department is open M–F from 8 a.m.– p.m. CST. www.texsport.com

Other Texsport Tent manuals

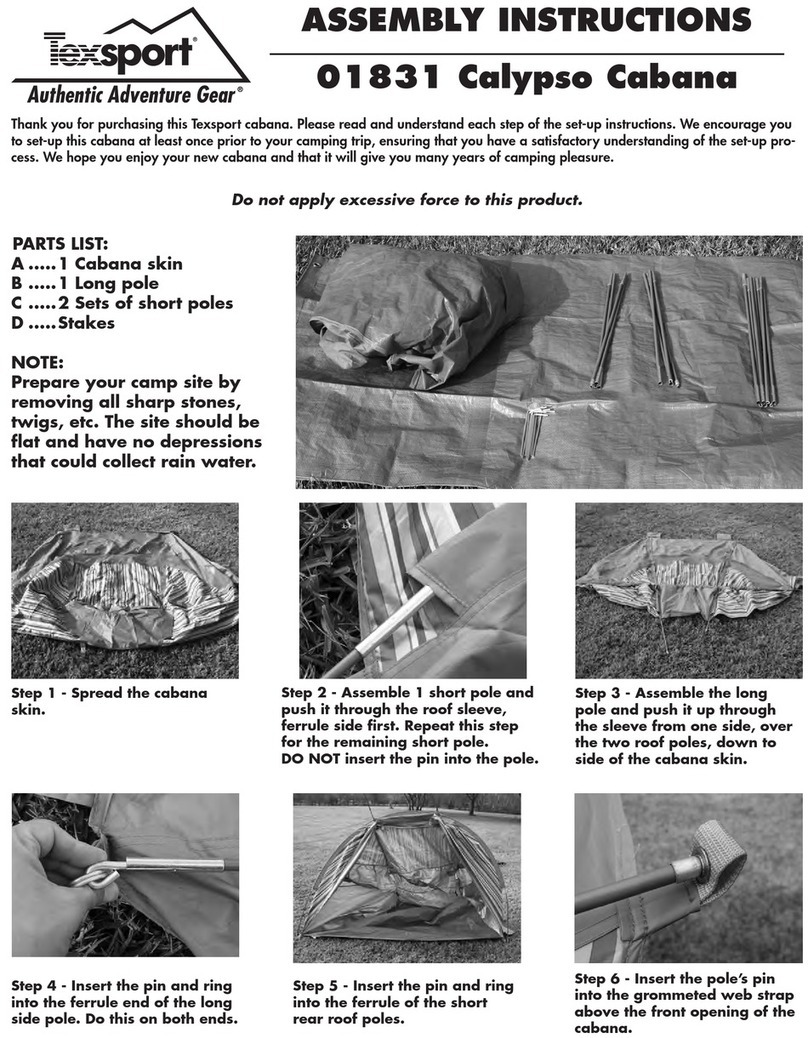
Texsport 01831 Calypso Cabana User manual

Texsport

Texsport 01831 Calypso Cabana User manual

Texsport 01111 User manual

Texsport

Texsport 01111 User manual

Texsport Hastings Square Dome Tent User manual

Texsport

Texsport Hastings Square Dome Tent User manual

Texsport Boulder Creek Vestibule Tent User manual

Texsport

Texsport Boulder Creek Vestibule Tent User manual

Texsport Authentic Adventure Gear 01165 User manual

Texsport

Texsport Authentic Adventure Gear 01165 User manual

Texsport 01084 User manual

Texsport

Texsport 01084 User manual

Texsport 02820 User manual

Texsport

Texsport 02820 User manual

Texsport 02853 User manual

Texsport

Texsport 02853 User manual

Texsport 02836 User manual

Texsport

Texsport 02836 User manual

Texsport 02906 User manual

Texsport

Texsport 02906 User manual

Texsport QSS3 User manual

Texsport

Texsport QSS3 User manual

Texsport Calypso Cabana User manual

Texsport

Texsport Calypso Cabana User manual

Texsport Montana Screen Arbor User manual

Texsport

Texsport Montana Screen Arbor User manual

Texsport Authentic Adventure Gear 01322 User manual

Texsport

Texsport Authentic Adventure Gear 01322 User manual

Texsport Authentic Adventure Gear 01250 User manual

Texsport

Texsport Authentic Adventure Gear 01250 User manual

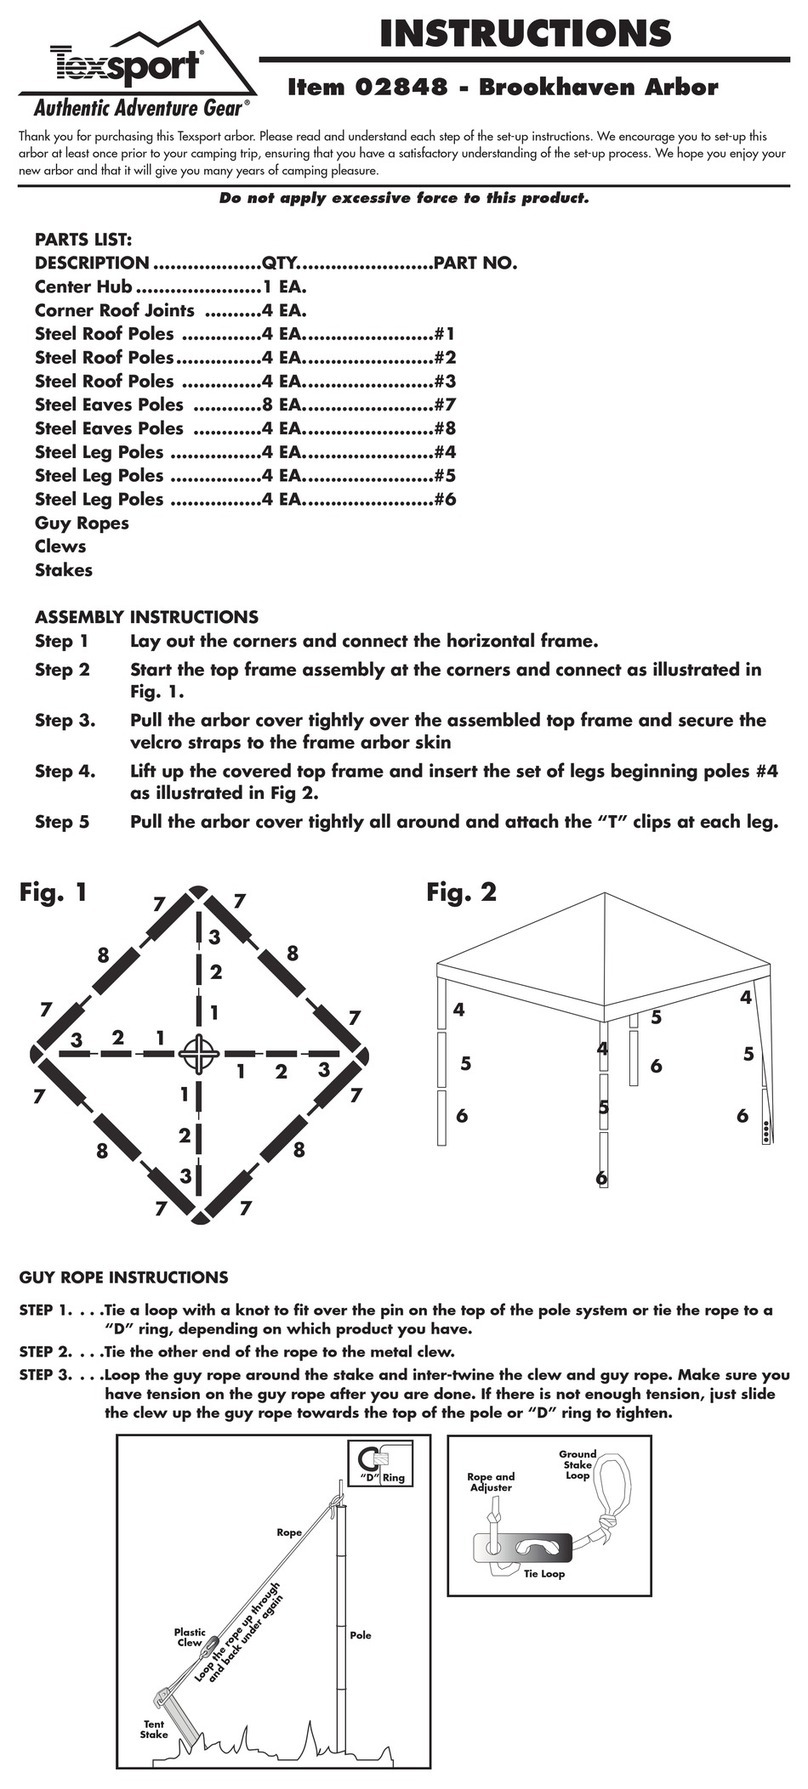
Texsport 02848 User manual

Texsport

Texsport 02848 User manual

Texsport 02901 User manual

Texsport

Texsport 02901 User manual

Popular Tent manuals by other brands

Coleman 9271A163 instructions

Coleman

Coleman 9271A163 instructions

SunnyTent Oval M manual

SunnyTent

SunnyTent Oval M manual

CMi 476 678 operating instructions

CMi

CMi 476 678 operating instructions

Coleman 2000004410 Setup instructions

Coleman

Coleman 2000004410 Setup instructions

REDVERZ SOLO EXPEDITION Setup instructions

REDVERZ

REDVERZ SOLO EXPEDITION Setup instructions

Ozark Trail WF-1414V owner's manual

Ozark Trail

Ozark Trail WF-1414V owner's manual

Isotra MIRA 4 MEASUREMENT AND ASSEMBLY MANUAL

Isotra

Isotra MIRA 4 MEASUREMENT AND ASSEMBLY MANUAL

Homelux DCY190 Original instructions

Homelux

Homelux DCY190 Original instructions

Coleman Air Awning Instructions for use

Coleman

Coleman Air Awning Instructions for use

Quik Shade Go Hybrid 167519DS user manual

Quik Shade

Quik Shade Go Hybrid 167519DS user manual

Vango DELTA ALLOY TENT PITCHING INSTRUCTIONS

Vango

Vango DELTA ALLOY TENT PITCHING INSTRUCTIONS

Palram Verona 5000 manual

Palram

Palram Verona 5000 manual

GigaTent Princess Tower owner's manual

GigaTent

GigaTent Princess Tower owner's manual

Gutta BS Plus 160 Assembly instructions

Gutta

Gutta BS Plus 160 Assembly instructions

carport KDR Series Assembling manual

carport

carport KDR Series Assembling manual

Eureka Forte SQ 2XT Assembly instructions

Eureka

Eureka Forte SQ 2XT Assembly instructions

skandika outdoor SHOWER Assembly instructions

skandika outdoor

skandika outdoor SHOWER Assembly instructions

KROFTMAN T1220 Assembly manual

KROFTMAN

KROFTMAN T1220 Assembly manual

manuals.online logo
manuals.online logoBrands
  • About & Mission
  • Contact us
  • Privacy Policy
  • Terms and Conditions

Copyright 2025 Manuals.Online. All Rights Reserved.