TFortis PSW-2G+ Installation manual

1
Operation Manual
PSW-2G+
Multifunction Gigabit Managed Switch
with PoE+ (IEEE802.3at)
for IP- video surveillance systems
Version 6

2
ATTENTION!
Components of power supply units are under
high voltage. Touching conducting
components of active power supply units is
forbidden.
ATTENTION!
When TFortis TH camera housings are
connected, set mode PoE_B = Passive via the
WEB-interface. By default, PoE_B = Auto.
ATTENTION!
If mode PoE_B = Passive is active at the port,
connect computer to it only by 4-wire (2 paired)
Ethernet cable.
ATTENTION!
Max load over PoE must be less than 160W.
ATTENTION!
SFP port operates only at 1000 Mbit/s. Fast
Ethernet SFP modules will not operate.
For effective operation of lightning protection is
required:
•high quality grounding according
to the ELC;
•use of shielded twisted pair with
shielded connectors RJ45;
•minimization of twisted pair and power cable
length;

3
Table of Contents
1. Designation......................................................................................4
2. Description.......................................................................................6
2.1. Appearance..................................................................................6
2.2. Element arrangement...............................................................8
2.3. Power Supply over PoE............................................................9
2.4. Optical Distribution Frame......................................................11
2.5. Tamper sensor .......................................................................11
2.6. Lightning protection................................................................12
2.7. Additional functions ................................................................14
2.7.1. Cold start…………………………………………………………...13
2.7.2. Restart of video cameras at their hanging……………………...13
2.8. Diagnostic functions ...............................................................15
2.8.1 Cable tester ......................................................................15
2.8.2. Remote polling of video cameras......................................15
2.9. Power supply backup…………………………………………14
3. Technical parameters........................................................16
4. Operation conditions..............................................................16
5. Presetting..............................................................................17
5.1. Restore switch to Factory Settings ........................................17
5.2. Setting the IP address ...........................................................17
5.3. Setting Up Username and Password.....................................18
5.4. Configuring PoE on ports.......................................................18
5.5. Enabling Preheating of camera housings ..............................18
5.6. Enabling backup protocols.....................................................19
6. Device installation..................................................................19
6.1. Unit mounting........................................................................19
6.2. Optic connection....................................................................20
6.3. Power connection..................................................................20
6.3.1. Main power supply………………………………………………..19
6.3.2. Backup power supply…………………………………………….19
6.4. Connection of video cameras ................................................21
7. Manufacturer’s warranty ................................................................21
4
1. Designation
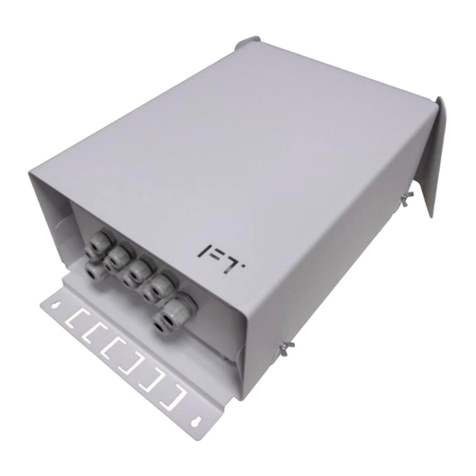
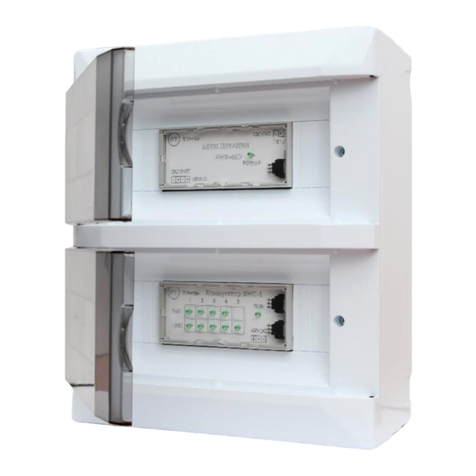
Device PSW-2G+ is an outdoor Multifunction Gigabit Managed Switch
with built-in optical distribution frame. Designed for networking of IP-
video surveillance systems.
Weatherproof version
The body of the device is made of a techno-polymer that is resistant to
severe operating conditions. There is a protection from moisture and
dust IP66.
Operation in extreme temperatures
The device has industrial hardware components that are characterized
by an extended temperature range. Using industrial SFP modules in
industrial version guarantees operation from -55°C to 70°C* (-67 to
+158F)*.
*The maximum temperature depends on the load (see diagram in
section 4. Operation conditions)
High- performance gigabit switch
The basis of the switch is a high-performance chip from Marvell, which
provides processing of a large traffic coming from IР-video cameras.
PoE+ Support
All ports of the switch support PoE+ (IEEE802.3at). Thereby, you can
power any PoE video camera via ordinary 4-paired twisted pair. This is
especially important for PTZ-video cameras with power consumption
up to 60W (for example, the AXIS Q60 series).
Figure 1. Connection diagram for the PSW-2G+

5
Power supply for Camera housings over PoE
Switch operating with TFortis TH camera housings powers both video
camera and Camera housing via PoE (up to 30W per port).
Built-in Optical Distribution Frame
Presence of the Optical Distribution Frame allows distributing optics
inside the device and connecting it to SFP modules.
Tamper sensor
There is an optical Tamper sensor inside the device for the detection
and timely notification of unauthorized access.
Connection to 220V
Built-in AC/DC provides direct connection to the Power Supply 220V
and excludes need in additional PSU. The unit provides place for
installation of the Circuit Breaker.
Lightning protection
Built-in Lightning protection of Ethernet ports and 220V PSU reliably
protects both the switch and connected video cameras from pulse
disturbances induced by lightning discharges.
Cold start
Preheating of camera housings provides safe and guaranteed turn-on
of video cameras in cold conditions.
Automatic restart of video cameras at their hanging
The switch controls operation of video cameras. If video camera is
hanging, switch restart it automatically over PoE. This allows
constructing non-attended IP- video surveillance systems.
Management via WEB-interface
A user-friendly and intuitive interface allows you quickly and easily
configure the system, even for a beginner.
Operation in a ring and in a chain
With two gigabit ports, you can connect the switches in a chain.
STP/RSTP protocol support allows creating ring topologies, that
significantly increases the fault tolerance of the system.

6
2. Description
2.1. Appearance
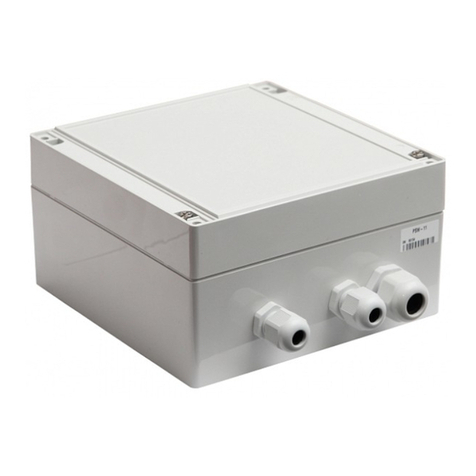
Figure 2.1-1. PSW-2G+ outside view
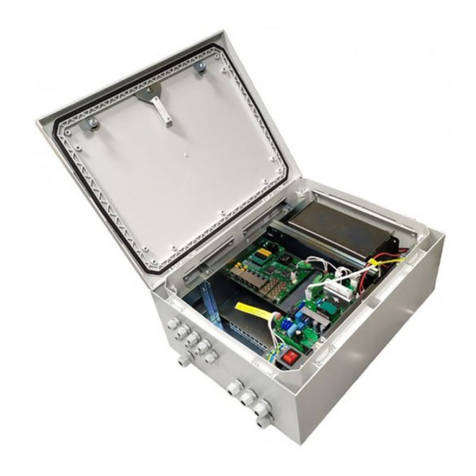
Figure 2.1-2. PSW-2G+ inside appearance

7
Figure 2.1-3. PSW-2G+ disassembled

8
2.2. Element arrangement
Figure 2.2. Element arrangement of the PSW-2G+

9
During normal operation of the processor, a CPU indicator must light
intermittently with a frequency of 2s. (1 sec. - on, 1 sec. - off.) DEFAULT
Indicator is on, when the device is in factory settings (IP 192.168.0.1).
2.3. Power Supply over PoE
The switch PSW-2G+ supports power supply via double PoE+ (IEEE
802.3at), due to which it became possible to power any PoE-video camera
over simple Ethernet cable. This is implemented as follows. Over pairs of
wires 1,2 and 3,6 (mode A) is transmitted 30W and over pairs 4,5 and 7,8
(mode B) is also transmitted 30W. As a result, the total load is 60W. This
power scheme is supported by energy-intensive devices. For example,
outdoor PTZ-cameras with a declared capacity of 60W.
Since the PoE+ standard is backward compatible with ordinary PoE, the
switch will power any IEEE802.3af video camera with up to 15W
consumption.

10
30W
If you use TFortis TH camera housing, then it is necessary to set the power
according to mode B to the Passive PoE mode via the WEB interface on
the Port Settings tab. In this case, the video camera will be powered
according to mode A and the camera housing will be powered according to
mode B.
Figure 2.3 Power supply scheme over PoE in different cases

11
Columns for fastening optic cable string
Plate for adapters
(SC – 8 pcs.)
Places for optic cable
fastening
2.4. Optical Distribution Frame
Figure 2.4. Optical Distribution Frame
2.5. Tamper sensor
Inside the device, there is an Optical Tamper sensor (Figure 2.5-1). Unlike
magnetically operated sealed switches and end switches, optical switch is
more reliable. It does not stick, does not give a rattling. An operating
principle is simple. When the unit is closed, special detector (Figure 2.5-2)
installed on the unit cover breaks the optical flow. When the unit is opened,
the detector exits from the sensor and activates it.
Cover
Cable fixing elements
Splice-cassette
(shrinkable plastic
sleeves-16 pcs.)
ODF front panel
(SC –8 pcs.)
Places for
fastening optic
cable

12
IMPORTANT! Make sure that you correctly orient the cover of the unit
when you close it. The detector should fall between tamper sensor beads.
2.6. Lightning protection
The PSW-2G+ switch has in-built lightning protection modules that
provide protection of Ethernet ports and power supply circuits ~220V from
common-mode and differential electromagnetic disturbances.
Switches are resistant to high-energy microsecond pulse interference
in accordance with GOST R 51317.4.5 standard with a degree of rigidity
according to Table 2.6-1 with performance criteria B.
Switches are resistant to dynamic changes in the voltage of the AC
electrical network in accordance with GOST R 51317.4.11 standard
according to Table 2.6-2 with the performance criteria B.
Figure 2.5-1. Tamper sensor on the board
Figure 2.5-2. The door of the tamper sensor on the unit cover

13
(Performance criterion B - temporary deterioration in the performance
quality or termination of the established function with the subsequent
restoration of normal functioning, carried out without the operator’s
intervention) Maintainability is preserved during fluctuations in supply
voltage from ~ 187 to ~ 246 V
Table 2.6-1.
Port
Degree of rigidity according to the
table 1 GOST R 51317.4.5
Voltage pulse value, kW + 10%
Power lines of the switch “wire-
wire”
3
2
Power lines of the switch “wire-
ground”
4
4
Symmetrical communication lines
of the switch “wire-ground”
3
2
Table 2.6-2.
Types of impacts
Degree of rigidity at testing
Test voltage, % in, + 5 %
Amplitude of dynamic voltage changes, %
Ur
Duration of dynamic voltage changes,
periods (ms)
Voltage dips
1
70
30
10 (200)
Voltage
interruptions
1
0 to 20
100
1 (20)
Voltage surge
2
120
20
25 (500)
Note - Ur - rated supply voltage.

14
2.7. Additional functions
2.7.1. Cold start
The most critical moment in the operation of the video camera is the
process of its activation at low ambient temperature. Precisely a cold start
can cause the failure of an expensive video camera. To avoid such cases,
unit PSW-2G+ is implemented with preheating of TFortis TH camera
housings. The essence of it is that after power is applied to the unit, initially
will be powered heating elements of camera housings, and only then in 1
hour, the video camera itself. This delay allows obtaining comfortable
conditions for starting video cameras and you will be able to save
expensive equipment. Option Comfort Start is available via WEB-interface
in the section Special Function.
2.7.2. Restart of video cameras at their hanging
The PSW-2G+ constantly monitors the connection of the video camera to
the switch. There are three ways to determine the camera’s hanging:
1. No connection to the video camera (Link)
2. No response to service requests (Ping)
3. Reducing the flow from the camera (Speed)
Video camera restart over the Link signal.
The PSW-2G+ switch constantly (1 time per minute) monitors the Link
signal from the IP camera. If the switch does not detect the Link signal, then
it starts a one-minute timer, when it ends, the connection is reconnected. If
the Link signal does not appear, the PSW-2G+ removes power for 10
seconds and resets it, rebooting the camera. This mechanism can be
described in other words. If the switch has not seen the Link signal from the
video camera twice in a row with a 1-minute interval, then it reboots it.
Option Auto Restart is available via WEB-interface in the section Special
Function.
Video camera restart when there is no response to Ping.
The PSW-2G+ switch constantly (1 time per minute) polls the IP camera. If
the switch does not receive a response, then starts a one-minute timer,
during which the poll is repeated every 10 seconds. If the video camera
does not response within a minute, the PSW-2G+ removes power for 10
seconds and resets it, rebooting the camera. If the camera has responded
at least once, the switch decides that the camera is functioning properly and
will start the poll cycle once again, referring to the camera 1 time per
minute. Option Auto Restart is available via WEB-interface in the section
Special Function. To use this mechanism, you will need to enter the IP

15
address of your video camera. Make sure your video camera is responding
to the PING (see diagnostic functions section).
Video camera restart when reducing the flow from the camera
The PSW-2G+ switch constantly controls traffic level (intensity) from the
camera. If the activity falls below the set level the switch restarts the
camera by removing power from the PoE. This function is enabled via WEB
interface for a specific port.
2.8. Diagnostic functions
2.8.1 Cable tester
The PSW-2G+ has functions of a virtual cable tester (VCT - Virtual Cable
Tester), which allows you to determine the break of the twisted pair, short-
circuited twisted pair wires, unconnected cable to the video camera,
distance between the defect and the switch. A cable tester diagnoses pairs
that transmit data (1, 2 и 3, 6). Please note that the accuracy of the cable
tester is ±2 meters.
By default, VCT operates on an average algorithm and does not take into
account the specific features of a particular cable, which can affect the
accuracy of the measurement. To improve the accuracy of the cable tester,
it is recommended to calibrate it. Note that calibration is not recommended
for cables with a length of less than 10 meters. See detailed information in
7.7.2.
3.8.2. Remote polling of video cameras
With the PSW-2G+ it is possible to ping any device in the network via the
WEB-interface, which is convenient when solving network problems.
2.9. Power supply backup
There are two power supply inputs in PSW-2G+ switch. The main power
supply (220 VAC) is put on the power supply unit, the backup power supply
(54 VDC) is directly connected to the switch board. When the main power is
lost, the device continues to work due to backup power. It is possible to use
the device without power supply backup.

16
3. Technical parameters
Gigabit Ethernet Ports
•1000Base-X with SFP connector;
•Number of ports - 2;
Fast Ethernet Ports
•10/100Base-Tx with RJ-45 connector;
•number of ports - 4;
•supports Auto-MDIX for the port 10/100Base-Tx;
•supports flow control of IEEE 802.3x;
•supports PoE+ (802.3at) over mode “A” (pairs 1,2 and 3,6) - 30W;
•supports PoE+ (802.3at) over mode “B” (pairs 4,5 and 7,8) - 30W;
•supports Passive PoE (power supply over mode B) - 30W;
•maximum output power per port 60W;
•total power must not exceed 160W;
•transmission distance – up to 100m.
Main power supply
•unit supply voltage – ~ 220V (from 187V to 246V);
•max power consumption not more than 200W;
Backup power supply
•unit supply voltage –54V DC (from 53V to 55V)
•max power consumption not more than 250W
Design
•Dimensions 240x360x120 mm;
•Maximum weight 4 kg;
•protection level against the external influences IP66;
•number of cable glands for cable diameter 4-8 mm - 5, 6-12 mm - 2.
Reliability
• mean time between failures is more than 50 000 hours (5-7 years);
4.Operation conditions
The switch PSW-2G+ is intended for 24-hour outside operation at outside
temperature from -55 to +70°C* (-67 to 158F)* using industrial SFP
modules.
*The maximum temperature depends on the load (see diagram)

17
The switch PSW-2G+ maintains declared parameters at storage
temperatures from -55C to +50C (-67 to 122F).
5.Presetting
5.1. Restore switch to Factory Settings
Before starting work, put the PSW-2G+ switch into the default settings. For
this, you should press and hold DEFAULT button until DEFAULT indicator
lights up. The switch by default has IP-address 192.168.0.1.
5.2. Setting the IP address
All software functions of the PSW-2G+ are available for management,
configuration and monitoring using the built-in Web interface. The switch
can be managed from remote stations anywhere in the network via a
standard Web browser (for example, Microsoft Internet Explorer). The
browser is a universal access tool and can directly access the PSW-2G+
using the HTTP protocol.
Connect any port on the PSW-2G+ to an Ethernet network. Keep in mind
that if the device is configured over a network, then the IP address of the
management workstation must belong to the same IP network. For
example, if, by default, the switch’s IP address is 192.168.0.1, then the IP
address of the workstation should be 192.168.0.x (where x is a number
from 2 to 254), the default subnet mask is 255.255.255.0.
Open the Web browser and enter the IP address http://192.168.0.1.
Figure 5.2. Entering the IP Address of the switch

18
5.3. Setting Up Username and Password
Until the “Username” and “Password” are set, you will log in without
entering this data. After the password is set, you will need to pass
authentication at logging in.
Note that the Username and the Password are case sensitive.
5.4. Configuring PoE on ports
By default, all ports are switched to PoE_A = Auto, PoE_B = Auto. When
you connect a PoE-enabled video camera, it is automatically powered from
the switch either by option A (pairs 1,2 and 3,6) or by option B (pairs 4,5
and 7,8).
If you want to connect a PoE video camera installed into the TFortis TH
camera housing, you must set the PoE_A = Auto, PoE_B = Passive via the
WEB interface on the Port Settings tab. The video camera will be powered
as the option A, and the camera housing will be powered as the option B.
IMPORTANT! If mode PoE_B = Passive is active at the port, connect
computer to it only by 4-wire (2 paired) Ethernet cable.
5.5. Enabling Preheating of camera housings
When the camera is turned on in cold conditions, it may not start or, even
worse, fail. To solve this problem, use the Comfort Start function. To do
this, go to the Special Function tab in the Comfort Start section and enable
the option. By default, it is disabled. This function is available only with
Figure 5.3. Entering Username and Password.

19
Figure 6.1. Marking of the fastening
TFortis TH camera housing.
IMPORTANT! When this option is enabled, after the power is applied to the
switch, the cameras will only turn on after time of Soft Start Time. To force
the cameras to turn on, click on Manual Start.
5.6 Enabling backup protocols
If you connect switches into a ring, then you need to enable the RSTP
protocol. Otherwise, if alternative paths appear, your network will not work.
By default, RSTP is disabled.
6. Device installation
6.1. Unit mounting
Housing has four attachment points along the edges of the unit. The
marking of the fastening for the installation of the product is shown on the
Fig. 6.1.
IMPORTANT! Drilling of the housing leads to the sealing violation of the
entire switch and, as a consequence, the loss of the warranty.

20
6.2 Optic connection
Inside the PSW-2G+ is installed Optical Distribution Frame. Optical cable is
put into large cable glands that are on the lower tier of the unit. The optical
cable is attached to the metal base of the distribution frame using nylon ties
or metal clamps. For attaching the string are used metal columns with
screws. Optical fibers fit in a splice-cassette designed for 16 shrinkable
plastic sleeves. Welded pigtails are connected to SC adapters located on
the plate. The optical patch cords then connect adapters and SFP modules.
It is allowed to connect pigtails directly to SFP excluding unnecessary
connections.
IMPORTANT! The kit does NOT include nylon ties, shrinkable plastic
sleeves, pigtails, adapters.
IMPORTANT! SFP port operates only at 1000 Mbit/s. Fast Ethernet SFP
modules will not operate.
6.3 Power connection
6.3.1. Main power supply
The PSW-2G+ is connected to the AC source of 220V. The supply cable is
brought into the unit through the cable gland and connected to the terminal
block of the power supply unit. It is possible to make this connection
through a circuit breaker to remove high voltage when maintaining the
switch. Calculation of the cable cross-section is based on the maximum
consumption of the PSU that does not exceed 200W. Grounding of the
device is required. The ground resistance must be no more than 4 ohms.
IMPORTANT! Do not allow circuit boards contacting high voltage live wires.
Failure in this case entails a loss of the warranty.
IMPORTANT!
Since the switch contains switch-mode power supplies, it is a reactive load.
During start-up, when charging input condensers, a starting current appears
and it exceeds the nominal value. In order to avoid false alarms of the
protection devices, it is recommended to choose models with the
characteristic C for a current of at least 4A.
6.3.2. Backup power supply
Table of contents
Other TFortis Switch manuals

TFortis
TFortis SWD-1 User manual

TFortis
TFortis PSW-2G6F+UPS-Box User manual

TFortis
TFortis PSW-2G4F-Box User manual

TFortis
TFortis PSW-1G4F-Box User manual

TFortis
TFortis PSW-1-45-WiFi User manual

TFortis
TFortis PSW-2G4F-Ex Instruction sheet

TFortis
TFortis PSW-2G+Hot User manual

TFortis
TFortis PSW-2G2F+UPS User manual

TFortis
TFortis PSW-11 User manual

TFortis
TFortis PSW-2G8F+Hot User manual
Popular Switch manuals by other brands

socomec
socomec ATyS d Installation and commissioning

Hitachi
Hitachi PC-AR Installation & maintenance manual

Sentrol
Sentrol 2810T Series installation instructions

Aircatglobal
Aircatglobal Virtualfly RUDDO user manual

D-Link
D-Link DGS-1008G user manual

Ruijie
Ruijie RG-S6150-X Series Hardware installation and reference guide