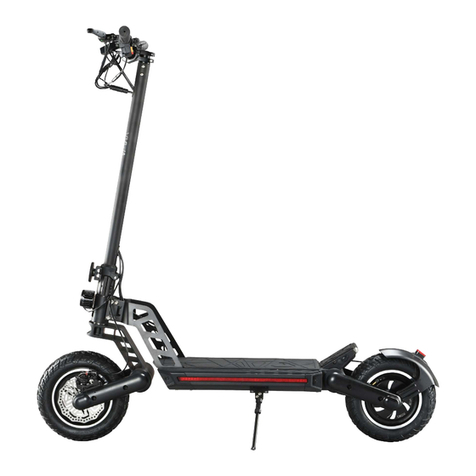
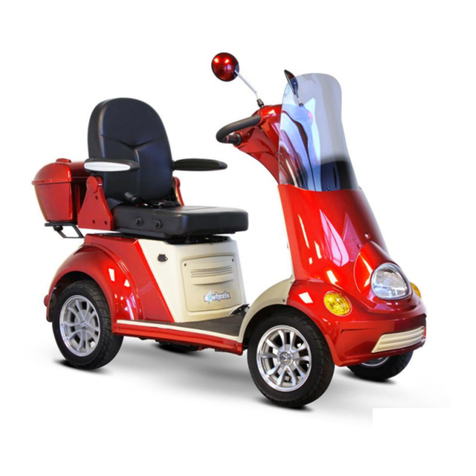
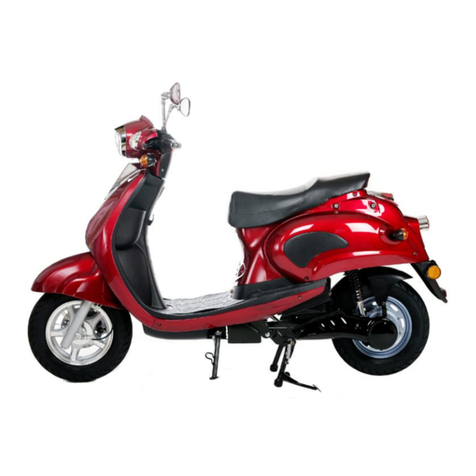
THAMLEV EBIKE User manual

THAMLEV EBIKE MANUAL

Introduction
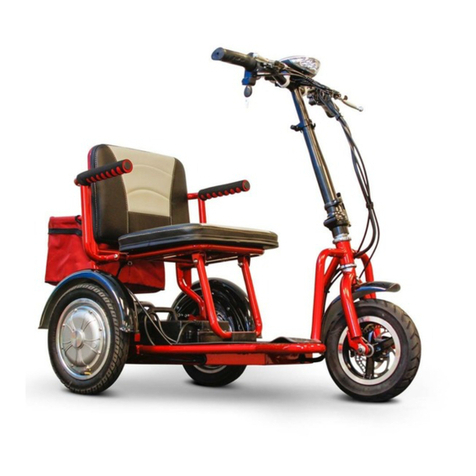
This e-scooter is designed with 3D technology, with a beautiful model. It is
fashionable and casual, and is of a unique style. Its structureis very simple but not
common, and noble but not arrogant. You will love it at the first sight! Its main features
are as follows:
1. Lithium cell: Its service life is 3 times longer than that of lead-acid cells,
so replacement is almost not needed - overlong service life. its weight is
1/3/3f that of lead-acid cells, very light. The voltage is sufficiently high for
climbing and rapid speeding-up - high energy. It is a kind of recognized
green power, and hence there will be no pollution occurred during the
whole production and usage.
2. Cell bin: it is hiding at the central plane underneath the pedal, so it is loaded
evenly, compact, convenient and safe.
3. Motor: it is made of high-quality magnetic steel and silicon steel sheet, with thick
coils, a precise bearing and a thick motor shaft. Thus, it has strong power and
capacity and is durable.
4. Tyres: tyres adopted are over-wide straight-grain vacuum tyres used by ATV. Such
tyres are thick and firm, with better stability, stronger holding capacity and
super-short braking distance. And what's more, you do not have to worry about
tyre burst. They will bring you a safe, comfortable and smooth cycling.
5. Bicycle frame: from three-dimensional virtual design and assembling to
technology-advanced numerical-control pipe bending and argon arc
welding, all these operations are accomplished without stopping. Super-large
frosted (for slip-resistance) pedals will bring you safe and free cycling, whether you
stand or sit dawn, and will also bring you worry-saving loading experience;
6. Disc brake: a compact and fine oil disc brake is adopted. The pump body
adopted aluminum alloy forging technology and advanced CNC processing technic
makes the whole bicycle brake flexibly and freely.
7. Handlebar: it is of streamline ergonomic leisure design, and is very firm, so
will make you handle freely.
8. Turning bar: injection molding by soft rubber materials mold is adopted for it,
so it will bring you comfortable holding.
9. Cushion: it adopts brand new plastic plate, highly flexible foam and high-level
anti-slip leather, with well-designed exterior, perfect manufacturing and suitable
saddle height, which will make you ride comfortably, even for a long time.
10. Intelligent charger: it is of full-automatic and portable design. When
charging, no care is needed. Wherever there is 220V AC power supply, charging
can be done.
11. Controller: it has been calibrated specifically and starts up flexibly without
pause, which make cycling safer.

Considerations for safe driving
1. Please observe traffic regulations and drive it safely. Please control the speed
within safe speed range.
2. Before driving, get familiar with this Instructions first, and then perform exercise at
an open site. Make sure that you fully master driving skills and get familiar with
the structure and performance of this bicycle, which are the foundation for safe
driving.
3. Do not lend it to those personnel who are not familiar with or unable to drive it or
ask them to drive it. It is dangerous to drive it by one hand or even without hands
or drive it when intoxicated.
4. Take more care when driving it in raining or snowy days: danger may occur due to
wet ground in raining or snowy days! Thus, you should drive it a low speed and
take more care when turning. You must particularly remember that you do have to
brake in advance in raining or snowy days to prevent accidents!!!
5. Wear a helmet correctly: wear a helmet correctly and tighten the belt when
driving.
6. Wear suitable clothing: do not wear tights so that your whole body can move
freely. You should wear clothing with sleeves unopened and low-heel shoes
as practicable as possible.
Note: in order for ease maintenance, repair and service, each bicycle produced by our
company is marked with a bicycle frame number and motor number, se as to assist
distribution unit to provide better service for you. The bicycle number is engraved on
the seat plate, and the motor number is engraved on the outer housing cover of the
motor
Operation Method and Considerations
7. Do not overload: the max. load of this bicycle is 100kg. The handling
feeling of handlebar with load is different from that without load.
When many articles are loaded, holding handlebar will vibrate,
resulting in danger. The stable load of this bicycle is one person, it will
be very dangerous to load articles or person at the front pedal.
Method for correct operation
1. Driving method
a) Keep the natural posture, and free driving can be got.
b) Driving in sitting posture: please always keep your body at the
center of the cushion to prevent load reduction of the front tyre
and danger caused by handlebar vibration.
c) Driving in standing posture: when speeding up, you should turn
the turning handle slowly. Danger caused by instability due to
sudden speeding-up should be avoided.
d) Drive it slowly on roads with surface damaged or that paved with
gravels.
In raining or snowy days, wet ground will easily cause sideslip, so you should
drive it slowly with much attention. When the water accumulated on roads
becomes above the cell box located underneath the pedal, do not drive it,
so as to prevent electrical parts damage caused by short circuit.
Meanwhile, braking performance will decrease. which will cause accidents
easily.

2. Parking method
When parking, please pay attention to those vehicles and pedestrians around. Do not
park it on a slope. Operation method for electricity indication
3. Operation method for electricity indication
After the power supply lock is connected, the voltage indicator light will be turned on.
At full charge of capacity, there are green, yellow and red light, with 5 grids in total. The
green light has three grids, with each grid of 25% of rated electricity; each grid of the
yellow light is 20% of rated electricity; while each grid of the red light is 5% of rated
electricity. The yellow light going out while the red light going on indicates that there
is no electricity left, so when you find that the blue light goes out, you should charge
the scooter immediately.
4. Operation method for power supply lock
After the key of the power supply lock is turned by a shift in clockwise direction for
connection, the motor can be started up. During driving, you do not remove the key
and switch off power supply, nor can you turn the key in counterclockwise direction to
close the power supply lock. Once you switch oft the power supply, the motor will stop
running. After parking, you should turn the power supply lock in counterclockwise
direction to switch off the power supply, and then pull the key out.
5. Turning handle (speed-governing handle)
If the turning handle is turned towards the driver, the bicycle will be speeded up; and
if it is released to turn back, the speed will be reduced. After reset, cut off the power
supply of motor.
6. Operation method of disc brake and considerations
a) Operation method of disc brake
Brake clearance adjustment: turn the adjusting screw which is located
between the braking handle and the handlebar tube using a 2mm Allen
wrench, adjust the clearance between braking pads and the braking disc
until your hand feeling is comfortable.
Replace the braking pad when braking pads are worn off by more than
1mm or the adjusting screw of braking pads are adjusted to the end
position or every half a year. When replacing braking pads, press in one of
braking pads using a clean slotted screwdriver to vacate space for taking
out the other braking pad. After replacement is complete, it is needed to
return the adjusting screw of braking pads to a suitable position (a position
that makes your hand feeling comfortable).
Run-in period: the run-in of disc brake surface needs a certain time. After
complete run-in, braking force will increase significantly. The first week in
which you use a new disc brake is the run-in period. During run-in period,
do not brake with too great force, otherwise un-recoverable damage will be
caused to braking pads and braking body. The correct operation method is
to brake slightly during driving, so that there is appropriate friction kept
between braking pads and the disc brake.
Oil replacement: this disc brake adopts mineral oil, which should be
replaced (2-3 years in general) when the braking handle is felt weak.
Replace oil using an injector.

b) Consideration
Do not use lubricating oil around the disc brake and braking pads, as well as the
caliper. Do not touch the surface of disc brake and braking pads with hands, otherwise
braking performance will be reduced significantly.
You'd better not shower a new brake to prevent a small quantity of lubrication grease
in assembling clearance from contaminating braking pads.
Oil hydraulic disc brake has strong braking force, you need to do much exercise at a
safe place, so as to adapt to the difference from a common brake to avoid braking
with too great force, resulting in injury due to wheel lockup.
7. Operation method of the charger and considerations
a) Operation method
When charging, plug in the plug of cell box first, then that of electric supply AC220V.
When charging is complete, take the counter procedures, that is, unplug the plug of
electric supply AC220C, then that of cell box.
During normal charging, the indicator light of the charger shows red. When fully
charged, it will show green;
If charging ambient temperature is too high, the red light will flash, which indicates
that the charger is in the temperature protection state. Please take the charger to a
cool or well-ventilated place. When the inside temperature of the charge lowers to
60°C, normal charging occurs.
If there is no cell connected during usage, what the charger output is a pulse voltage
less than 42V. When testing, place a 1KΩohmic load between the positive and
negative output terminal, then actual charging voltage of the charge can be obtained.
b) Consideration
The charger can only be used indoors.
Charging in a closed space or under scorching sun or at a high temperature
environment is strictly prohibited. Do not put the charger on a seat cask or
inside the rear compartment for charging.
In case of no charging, do not connect the charger to an AC power supply
without load for a long time.
During charging, if the indicator light is abnormal, there is abnormal smell
or the housing of the charger is too hot, please stop charging immediately,
and repair or replace the charger.
Do not disassemble or replace the devices inside the charger by yourself.
Do not charge the charger that has been fully charged.
Do not use the charger in an environment with flammable gas, otherwise
explosion or fire will be caused.
Do not place the charger near water source or wet it, otherwise fire or
electric shock may occur.
In the event that inside parts are exposed due to charger damage caused by
collision, etc., do not touch them with hands, otherwise you may be injured
due to electric shock.

8. Operation method of the cell and considerations
a) Charging
Make sure to charge using the charger specifically equipped by our company. Irregular
or non-conforming chargers may reduce life the cell or invalid the cell!
The cell that has been fully discharged (the bicycle stop running) can be charged with
more than 95% of electricity within 5h, and can be fully charged within 8h.
During charging, neither the positive end nor the negative end is allowed to be
contacted with metal.
When leaving factory, the cell's electricity is about 80%. Prior to driving a new bicycle,
charge it for 3-10h.
If the bicycle is left for more than one month, call's electricity will reduce by about 5%.
It is recommended to charge it before use.
Please charge the cell timely to ensure driving mileage.
During charging, the charger may became hot. As long as the temperature does not
exceed 60 °C, it is normal.
When charging, please put the charger and the whole bicycle at a stable and dry place
which is free of flammable and explosive goods and is out of reach of children.
You should charge the cell within 24h after it is fully discharged, and charging time
should not be less than 3h.
Make sure that there is no short-circuit at the charging port.
b) Discharging
Do not use the cell for purposes other than the electrical bicycle of this
model, otherwise warranty will not be provided.
Once short-circuit occurs, the cell management system will provide
automatic protection, and the fuse piece connected in series with power
line will fuse, giving dual protection for you cell. At about 2min after the
short circuit is released and the fuse piece is replaced, the cell will work
normally.
Damage or unreasonably configuration of the controller, motor, horn,
lighting facility, etc. of electrical bicycle all will cause the cell to discharge at
high current. At this time, the cell will stop output for protection, but will
recover within 10s, which will not have any effect on your driving.
Working temperature range of the cell: -101: —55t. Like other cells, its
available energy will reduce with the rise of temperature, which is a normal
phenomenon.
Make short out the discharging port.
9. Storage
a) If long-time storage (more than one month) is needed, it is
recommended to charge the cell to 60%--80% of electricity. During
storage, it is needed to charge the cell every 3 months, and charging is
also needed before usage.
b) The cell should be stored at a cool and dry environment.
c) During storage, prevent conductive objects connecting the positive pole
with the negative one.
d) Do not use the cell near a fire source.
e) Do not disassemble the cell.
f) Do not refit the cell.

10. Warning
a) If the cell is found to deform or become hot, you should stop using and seek help
from our company or repair department.
b) In case of fire, do not quench the fire directly using water. It is recommended to
quench it using sand, foam extinguisher or thick clothing soaked with water.
c) For the cell fault caused by delayed charging fully-discharged cell, warranty will
not be provided.
d) Do not discard the cell haphazardly.
Check, cleaning and maintenance
1. Check the whole scooter at a safe place.
2. Check whether the abnormal part found the day before impacted running.
3. Braking effect of the brake: check whether the braking handle can be holding and pinching
gently and whether the clearance is appropriate. Check whether it can brake scooter
normally.
4. Check whether there are chaps, damage or abnormal wear on tyres or whether there are
such sharp objects as metal, pebble, glass embedded in tyres. If the lug on a tyre has been
worn off by 213, replace the tyre. Check tyres' air pressure according to sunken condition
of the part of tyres contacted with ground. The normal air pressure of front and rear tyre
is 1.5kg/cm2.
5. Check whether the power supply's voltage indicator indicates full .
6. Steering system: swing the handle and front fork upwards, downwards, forwards,
backwards, leftwards and rightwards to check whether tightness is suitable and steering is
flexible, and whether there are such problems as abnormal sound caused by collision,
steering system loosening, collision sound. If there are, please contact the distributor, so
as to provide perfect after-sale service for you.
7. Check whether the front and rear wheel shaft become loose.

Fault Causes Troubleshoot
I
Speed-governing
fault or max speed
decreased
•
Too low cell voltage;
•
Speed-governing turning
handle damaged;
•
The spring inside speed-
governing turning handle
got stuck or failure
•
Charge the cell;
•
Ask the distributor for
replacement
2
The motor does not
work after power supply
is switched on.
•
The cell's connecting line
becomes loose;
•
4 Speed-governing turning
handle damaged;
•Motor's output line becomes
loose or damaged
•
Reconnect it;
•
Ask the distributor for
replacement;
•
Ask a dedicated maintenance
station to repair it
3
Continuous driving
mileage is not sufficient
after charging
•Air pressure or tyres
is too low;
•low power or the
charger failed;
•Aging of the cell or it
damaged;
•Much climbing, great
headwind, frequent
braking and starling,
heavy load
•
Fill enough air;
•Fully charge the cell or replace
the charger;
•
Replace the cell;
•
Such condition will be
improved when driving
condition changes.
Fault Causes Troubleshoot
4
The charger fails to
charge.
•The socket of the charger
falls off or the connection
between plug and socket
becomes loose.
•The fuse inside the cell
box fused;
•Battery pack's connecting
wire falls off
•
Fasten the socket or
connectors;
•
Replace the fuse inside
cell box;
•
Weld connecting wires.
5
Other fault
•
If there is a fault that you
cannot determine;
•
If the inside of the motor,
cell. controller, charger
etc
damaged.
Please ask the distributor or
dedicated maintenance for
repair. Do not open the parts by
yourself. Otherwise warranty will
not be void.
Common fault and troubleshoot

Warranty
Part Name Standard for replacement Standard for non-replacement Guarantee period
1 Handle tube Broken •Damage caused by human factor or
improper use. 1 year
2 Front fork Breakage, desoldering, open
welding
•Damage caused by human factor or
improper use.
1 year
3 Frame Breakage, desoldering, open
welding
•Damage caused by human factor or
improper use.
•Welded nut fallen off
•Frame structure changed
•Whole scooter structure changed
1 year
4 Tyre cover Aliquation, steel wire exposed
•The groove of tyre cover worn heavily
•Tyre cover tore due to human factor or
improper use and there is narrow and
deep scratch on the tyre cover
1 year
5 Motor The bearing broken, the housing
damage
•Damage caused by human factor or
improper use.
•The outer is corroded or contaminated
•Missing parts, unmatched parts
•Damaged or deformed appearance
1 year

Warranty
Part Name Standard for replacement Standard for non-replacement Guarantee period
6 Controller Failure •Improper use or man-made damage 1 year
7 Charger Failure •Improper use or man-made damage 1 year
8 Lithium cell
•In case that the capacity fading
within the 12th month as from
manufacturing date is lower
than 80%,
•change a new cell
•Upon charging and discharging test, the
specified capacity can be achieved,
•
Housing damage caused by human factor
or improper use, incorrect use of the
charger, assembly and disassembly the
cell by yourself.
•using the cell at high temperature (60°C
).
discharging at high current for a long
time.
•Short circuit caused by man-made
immersion in water
1 year
9 Disc brake
The upper or lower oil pump
leaked oil or damaged; the braking
handle broken due to
manufacturing defect; oil tube
damaged or leaked oil, etc.
•Damage caused by human factor or
improper use
•The user changes state by himself
•Seriously defective accessories
1 year
10 Bottom fork Broken
•Damage caused by human factor or
improper use
•The user changes state by himself
•Seriously defective accessories
1 year

Scan & install APP for Android user
Scan & install APP for Apple user
Biometric Device User Guide
(Optional accessories)
1. Install the biometric App by scanning the QR code below.
2. Make sure Bluetooth is ON when using the App
Install the biometric APP Connect the biometric device
Step 1: Make sure Bluetooth is ON,
and click the “Connection” button
Step 2: Select the “DXKJ” device
and click “Connect”

Register Thumbprint
Step 1: Make sure Bluetooth is ON,
and click “Driving fingerprint”
button in the setting page.
Step 2: Choose an unregistered slot
to register new fingerprint
Step 3: Place the finger on the biometric device.
Step 4: When you heard a “beep” sound,
remove your finger and place the same finger on
the device again. If the registration is successful,
you will heard “beep beep” sound after you
place the finger on the device second time.
If you heard “beep beep beep” sound, it mean
the registration is unsuccessful. You may try to
place your finger on the device again until the
registration is successful.

GPS Device User Guide
(Optional accessories)
Scan & install APP for Apple user
Scan & install APP for Android user
- First time login, key-in username and
password to sign in.
- Please get your login detail from your dealer.
- Click continue after check the boxes to
acknowledge the policy.
- User can check their vehicle location from the
map.
Table of contents
