!WARNING:
6
Adjust width
Go to page 7 and follow “Pressure mounting/Adjusting width” to adjust
your gate width and finish the installation.
In order for gate to swing freely when mounted at top of stairs, you
must adjust the width of the gate and adjustment knobs so that the
edges of the adjustment knobs touch the lower sides of the safety
brackets. If needed, see diagram 9 for location of lower side.
To use
To open gate
Holding the release handle with one hand, first use your thumb to
push and slide the release button that is most comfortable for you,
then lift up on the release handle. You can now swing the gate open for
walk-thru convenience.
To close gate
Swing gate shut. Lower release handle back in place. You may need to
press gently against gate until you hear the handle click into place.
To verify that gate is locked, gently pull or push against it.
To temporarily remove gate for pressure mount use
The All-Clear Swing Gate can be easily removed from the brackets for use
as a pressure mount gate in another room. To temporarily remove gate,
simply open the gate and press the hinge pin release slider down to lower
hinge pin on top of gate. Lift gate up and out of brackets. Then follow
“Pressure mounting/Adjusting width” instructions.
OTE: In pressure mount mode, gate no longer swings open.
IMPORTA T: The gate should be checked periodically for general
condition with particular attention to the security of the attachments
and operation of locking devices.
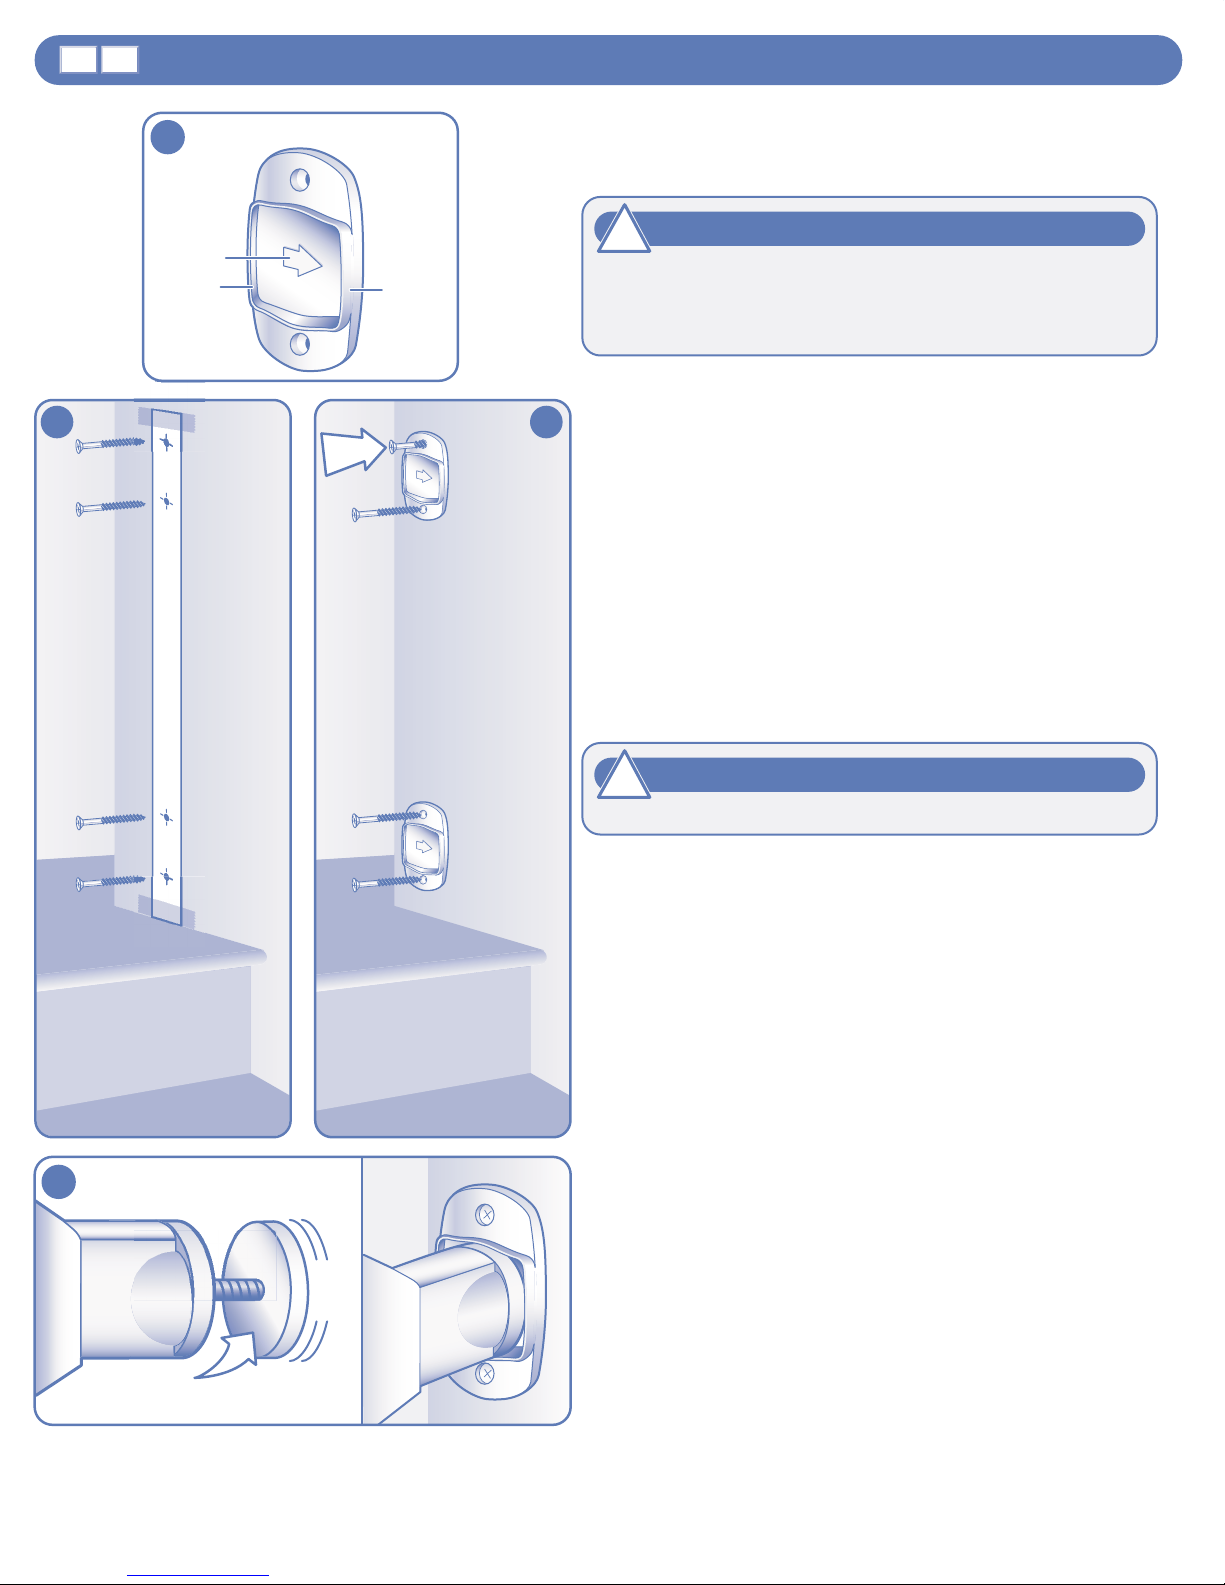
arrow
points
to stairs
Safety Bracket
higher
side
lower
side
9
12
!WARNING:
Attach safety brackets
(Required for use at the top of stairs; optional everywhere else.) These
brackets are for use on wall or surface opposite the hinge bracket.
If installing the All-Clear Swing Gate at the top of the stairs, you
must attach the 2 safety brackets to serve as a mechanical
locking mechanism. Make sure arrows of stair safety brackets are
located to side that faces stairs, as shown in diagram 9.
1. Position mounting template against mounting surface with bottom end
flush against floor as shown in diagram bk. Assure that template is
straight and in alignment with hinge brackets by swinging gate closed.
2. Tape in place as shown in diagram bk.
3. Use tip of screw to mark screw holes as shown in diagram bk.
4. emove template and drill pilot holes with 1/8 inch drill bit,
approximately 2 inches deep.
5. One at a time, attach the safety brackets to the wall with the arrow
pointing to the stairs as shown in diagram bl.
a. Position brackets so holes are centered over pilot holes.
b. Attach using 4 of the screws provided. Insert and secure the screws
using a Phillips screwdriver.
6. Swing gate in place to ensure bumpers come to a stop and rest in
safety brackets. If needed, adjust adjustment knobs for proper fit in
safety brackets, as shown in diagram bm.
Always check gate to ensure it stays in place.
1110
CDNENG Hardware mountin (cont.)