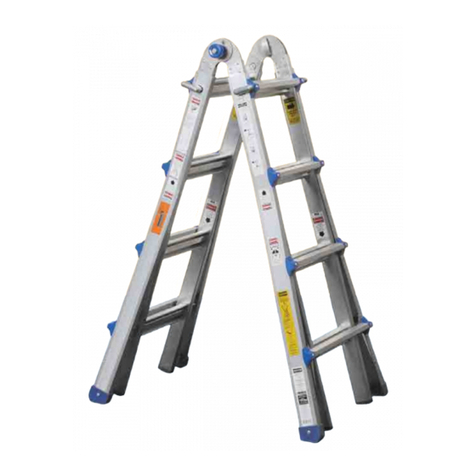
The Renovator Transforma Ladder Installation manual

SAFETY AND
OPERATING MANUAL
For The 24 & 35 Conguration Kit
The Renovator Transforma Ladder - Instruction Manual - BDIV3.indd 1 15/09/2017 1:12:01 p.m.

CONGRATULATIONS
You have purchased one of the most versatile ladder systems in the world.
The Transforma™Ladder’s special design is suited to all types of climbing
needs. The Transforma™Ladder is made from durable materials and parts
to enable it to have a long life expectancy. Vast hours of research and
intensive testing allow the Transforma™Ladder to withstand prolonged use,
whilst giving untroubled performance.
The Transforma™Ladder has been introduced into the market at a
competitive price and provides outstanding versatility that sets a high
standard in the marketplace.
• The A-frame, extension, step level, and scaold positions are all able to
be adjusted to a number of dierent congurations.
These are just a few of the qualities that make the Transforma™Ladder
stand out from the rest. Carefully read the following instructions. They will
help you understand how to operate your ladder safely and to its maximum
potential.
The Renovator Transforma Ladder - Instruction Manual - BDIV3.indd 2 15/09/2017 1:12:01 p.m.

Transforma™Ladder User Manual Page 1
Contents
Welcome .............................................3
About the Transforma™Ladder ..........................3
Why read this manual .................................3
Support ............................................3
Safety ................................................4
Safety Advice: Portable Ladders .........................4
Some other safety tips: ................................5
What’s Included .......................................6
What’s in Transforma™Ladder Kit/Indent ..................6
Transforma™Ladder Parts and Accessories ................7
Dimensions for Transforma™24 & 35 Models: ..............8
Optional Transforma™Ladder Accessories .................9
Using the Transforma™ Ladder ..........................10
Using the Transforma™Ladder System...................10
Congure the ladder ................................. 11
Leg Lock Assemblies ................................14
Using the A-frame Positions ...........................15
Using the Extension Ladder Position.....................18
Using the Step Level Positions .........................19
Scaolding Trestle Instructions .........................20
Work Platform Conguration Instructions .................23
Spreader Bar Attachment .............................26
Tips and precautions ..................................28
Caring for your Transforma™Ladder .....................29
Warranty ............................................30
Lifetime Warranty. . . . . . . . . . . . . . . . . . . . . . . . . . . . . . . . . . . . 30
Final Inspection.......................................32
The Renovator Transforma Ladder - Instruction Manual - BDIV3.indd 1 15/09/2017 1:12:01 p.m.

Page 2 Transforma™Ladder User Manual
The Renovator Transforma Ladder - Instruction Manual - BDIV3.indd 2 15/09/2017 1:12:01 p.m.

Transforma™Ladder User Manual Page 3
Welcome
Welcome
About the Transforma™ Ladder
The Transforma™Ladder is a multi-purpose ladder system combining three
core components: One inner ladder unit with two outer ladder units that
slide and lock over the inner ladder unit.
The inner ladder has a central locking hinge that allows the Transforma™
Ladder to be set up in a variety of ways:
✔A-frame Position
✔Extension Position
✔Step Level Position
✔Scaolding Trestle Position
Safety precaution:
Only use the Tranforma™24 and 35 120kg ladder in the A-frame with
the spreader Installed to brace the ladder.
Locking assemblies on the two outer ladder units allow the telescoping and
height adjustment of the outer ladder sections up and down the inner ladder
unit. This mechanism locks into the rungs of the inner ladder unit, allowing
adjustment at both ends of the ladder.
Why read this manual?
Following a few simple pointers will help you to avoid common mistakes
that can spoil your project. Read this manual to get the maximum use of all
congurations of the ladder and to ensure safety when using.
Support
If you experience problems with the Transforma™Ladder or its performance,
please call our Customer Service Team for assistance:
✔1800 890 840 in Australia
✔0800 002 999 in New Zealand
The Renovator Transforma Ladder - Instruction Manual - BDIV3.indd 3 15/09/2017 1:12:01 p.m.

Page 4 Transforma™Ladder User Manual
Safety
Safety
Safety Advice: Portable Ladders
Ladders can be a serious safety hazard if not used properly.
✔Ensure safety feet are tted to the ladder before each use.
✔Make sure it is rm and steady with no defective rungs, braces or
side rails.
✔Get help in carrying and setting up heavy extension ladders.
✔Always use a ladder that is long enough.
✔Never climb or stand on the top two steps of a stepladder.
✔Don’t stand on the top two rungs of an extension ladder.
✔Always set the ladder up on a level surface. Ladders are not
designed for a side sloping surface and there’s an increased chance
that a ladder set on a slope will tip over sideways.
✔Attaching a leg leveller at the base of the ladder decreases the
chance of tipping, allowing for a safer working area.
✔Use a wide board on soft ground, approximately 15-20 cm (6 - 8
inches) width or more to stop the ladder legs from slipping and
sinking into the ground.
✔Do not set the feet of a ladder so far away that they may slip out at
the bottom.
✔A ladder placed too close and upright may tip backwards. Use the 4ft
to 1ft angle rule or the 75° angle rule.
✔Securing the ladder to a rm support near the top can help to prevent
slipping or tipping.
✔Do not use the outer or inner sections of the ladder as a separate
stepladder.
✔Do not use the inner section of the ladder when separated from the
outer section in the extension ladder position.
✔Never climb from the back of the ladder in the extension ladder
position.
✔Only use the Transforma™120kg ladder in the A-Frame position with
the spreader installed to brace the ladder. Refer to page 26.
The Renovator Transforma Ladder - Instruction Manual - BDIV3.indd 4 15/09/2017 1:12:01 p.m.

Transforma™Ladder User Manual Page 5
Safety
Some other safety tips:
✔Get a responsible person to hold the base of the ladder.
✔Be aware of electrical power lines and try to avoid working near them
at all times.
✔Look out for objects around the ladder that could shake or make the
ladder slip - example, a swaying tree.
✔Beware of sudden gusts of high wind.
✔Ensure the ladder is long enough for the job.
✔Safety feet must be tted to the ladder before each use.
✔Ask for assistance when using a heavy ladder. To avoid the ladder
shifting and swaying, set it up on level ground or use a leg leveller.
✔If the ground is soft use a wide board under the feet.
✔The proper set up angle to use for a straight ladder is a 4 to 1 ratio or
75° angle approximately.
✔Check that your shoe soles and the ladder rungs are not slippery.
✔When climbing the ladder always face it.
✔Work well below the top of the ladder.
✔Secure the ladder at the top and bottom if possible.
✔Do not overreach. Move the ladder!
✔Have one hand on the ladder at all times.
✔Use a line to take up tools rather than carrying them.
✔Be just as careful on a short stepladder as you would be on a 30 foot
extension ladder. False security can lead to carelessness and falls
that can cause serious injuries, even death.
Please read these Quick Ladder Tips before you or your family
use any ladder. Just remember this simple mnemonic: CALL.
Condition of ladder
Angle of 4 to 1 or 75° (approximately)
Level setup
Length is correct
The Renovator Transforma Ladder - Instruction Manual - BDIV3.indd 5 15/09/2017 1:12:01 p.m.

Page 6 Transforma™Ladder User Manual
What’s Included
What’s in Transforma™ Ladder Kit/Indent
This table list the components included in your Transforma™Ladder retail
kit.
Component TRL24
120kg
Kit (1.4
meter)
TRL24
150kg
Kit (1.4
meter)
TRL24
180kg
Kit (1.4
meter)
TRL35
120kg
Kit (1.7
meter)
TRL35
150kg
Kit (1.7
meter)
TRL35
180kg
Kit (1.7
meter)
The Renovator
Transforma™
Ladder
111111
Leg Levellers 222222
Wall Stand-O 111111
Work Platforms 222222
Trestle Joint 222222
Component TRIL24
120kg
Indent
(1.4
meter)
TRIL24
150kg
Indent
(1.4
meter)
TRIL24
180kg
Indent
(1.4
meter)
TRIL35
120kg
Indent
(1.7
meter)
TRIL35
150kg
Indent
(1.7
meter)
TRIL35
180kg
Indent
(1.7
meter)
The Renovator
Transforma™
Ladder
111111
Work Platforms 1 - - 1 - -
Trestle Joint 222222
What’s Included
The Renovator Transforma Ladder - Instruction Manual - BDIV3.indd 6 15/09/2017 1:12:02 p.m.

Transforma™Ladder User Manual Page 7
What’s Included
Transforma™ Ladder Parts and Accessories
The following diagrams show the parts of the Transforma™Ladder.
Outer Ladder
Wall Stand-O
Inner Ladder
Trestle Joint Palm Button
Leg Hinge Lock
Work Platforms
Leg Levellers
The Renovator Transforma Ladder - Instruction Manual - BDIV3.indd 7 15/09/2017 1:12:02 p.m.

Page 8 Transforma™Ladder User Manual
What’s Included
Dimensions for Transforma™ 24 & 35 Models
Conguration Storage
Height
A-Frame Extension
Transforma™24 1.39m
(4ft 6 2/3 inch)
1.38m to 2.30m
(4ft 4 1/4 inch to
7ft 6 1/2 inch)
2.69m to 4.51m
(8ft 10 inch to
14ft 10 inch)
Transforma™35 1.70m
(5ft 9 1/4 inch)
1.70m to 2.92m
(5ft 6 3/4 inch to
9ft 6 4/5 inch)
3.29m to 5.72m
(10ft 9 1/2 inch
to 18ft 9 inch)
High grade aluminium is used to make the inner and outer ladder side
rails.
Both the inner ladder and the outer ladder units use slip-resistant
aluminium.
Both the inner ladder and the outer ladder units are nished with a slip-
resistant footing.
The Renovator Transforma Ladder - Instruction Manual - BDIV3.indd 8 15/09/2017 1:12:02 p.m.

Transforma™Ladder User Manual Page 9
What’s Included
Optional Transforma™ Ladder Accessories
Accessories
Leg Leveller
The leg leveller is designed to make
working on uneven surfaces easier.
Wall Stando
Use the Wall Stando when working
around windows, guttering, overhangs
and other obstacles. The Wall
Stando’s extra width increases the
versatility of any model of Transforma™
Ladder.
Work Platform
The Work Platform is compatible with
all models of the Transforma™Ladder
and can be used to stand on or for
holding tools.
The Work Platform must also used as
a Spreader Bar for the 120Kg model
when using it in the A-frame position.
(refer to Spreader Bar Attachment
section for more information)
Extendable Plank
The Extendable Plank is ideal on
those jobs where you require the
additional height that the ladder
provides over a small or large work
area, such as painting coving in your
house or maintaining your guttering.
Alternatively, you could use your plank
as a portable workbench to store your
tools on.
The Renovator Transforma Ladder - Instruction Manual - BDIV3.indd 9 15/09/2017 1:12:02 p.m.

Page 10 Transforma™Ladder User Manual
Using the Transforma™ Ladder
Safety precaution:
Check the condition of the ladder upon receipt and before each use.
Never use a broken or damaged ladder.
Using the Transforma™ Ladder System
The Transforma™Ladder System has two mechanical components:
The adjustable palm button, found at the top of the ladder when it is in the
storage position, allows you to rotate the legs and recongure the ladder.
This hinge rotates and locks into these three positions.
✔Storage Position.
✔A-Frame Position.
✔Extended Position.
Using the Transforma™ Ladder
Storage Position A-Frame Position Extended Position
Spreader only needs
to be used on the
120kg models.
The Renovator Transforma Ladder - Instruction Manual - BDIV3.indd 10 15/09/2017 1:12:02 p.m.

Transforma™Ladder User Manual Page 11
Using the Transforma™ Ladder
Congure the ladder
Step Action
1Unlock the palm button pins by pushing both buttons straight
in until they stay in the open position.
Note: Any pressure on the palm button pins may make it
dicult to unlock the hinge. Relieve the pressure by simply
jiggling one half of the ladder back and forth until the palm
button pins can move freely.
Palm button Pins
Note: DO NOT USE TOOLS TO FORCE THE PALM
BUTTON IN OR OUT as this will cause permanent damage
to the hinge mechanism. When the holes are aligned
correctly it should only take light pressure to unlock the palm
button.
The Renovator Transforma Ladder - Instruction Manual - BDIV3.indd 11 15/09/2017 1:12:02 p.m.

Page 12 Transforma™Ladder User Manual
2 Open the ladder by pulling the two ladder halves apart
until both palm button pins snap and lock into the A-frame
position.
3Important: Once the palm button pins snap into place,
insert the work platform as a spreader to brace the ladder.
The use of the spreader bar only applies to the 120kg
models (refer to Spreader Bar Attachment section).
Insert Work Platform
Using the Transforma™ Ladder
The Renovator Transforma Ladder - Instruction Manual - BDIV3.indd 12 15/09/2017 1:12:02 p.m.

Transforma™Ladder User Manual Page 13
4 Change the ladder into the extension position by pushing
straight in on the palm buttons of both buttons (Step 1).
Rotate the ladder halves until the palm buttons snap into
their locked position.
To reset the ladder to the storage position, use the
above procedure but in reverse. The palm buttons lock
automatically at the A-frame position to prevent damage
to the ladder or injury to the user. Take care not to let the
full weight of the ladder collapse uncontrollably onto the
palm button as you change the ladder from the extension
to A-frame conguration. Disengage the palm buttons in
the A-frame position and return the ladder to its storage
position.
Safety precaution:
Please read the imprinted text on the hinge!
PALM BUTTON
PINS MUST BE
FULLY IN BEFORE
USE
FAILURE TO DO
SO MAY RESULT
IN INJURY
Using the Transforma™ Ladder
The Renovator Transforma Ladder - Instruction Manual - BDIV3.indd 13 15/09/2017 1:12:02 p.m.

Page 14 Transforma™Ladder User Manual
Using the Transforma™ Ladder
Leg Lock Assemblies
Four Leg Lock Assemblies make up the second mechanical component of
the ladder. These allow you to adjust the height of the ladder.
Snap and lock the leg
lock assembly securely
in to the hole before use.
The Renovator Transforma Ladder - Instruction Manual - BDIV3.indd 14 15/09/2017 1:12:02 p.m.

Transforma™Ladder User Manual Page 15
Using the Transforma™ Ladder
Using the A-frame Positions
Step Action
1 From the storage position, unlock the hinges (refer to
Congure the ladder section)
2 While the ladder is in the storage position, pull out the four
Lock Assemblies from the rung holes and rest them on the
outside ladder rail.
3 Raise the inner ladder to the required height. At the required
height align the nearest inner and outer rung holes. With
the inner and outer ladder aligned hold the ladder in one
hand and re-insert the opposite Lock Assembly with the
other hand. Change hands and re-insert the other Lock
Assemblies.
The Renovator Transforma Ladder - Instruction Manual - BDIV3.indd 15 15/09/2017 1:12:02 p.m.

Page 16 Transforma™Ladder User Manual
4 Pull the ladder halves apart until the palm button pins lock
into place and the ladder stands in the A-Frame position.
5 Insert the work platform as a spreader to brace the ladder.
The use of the spreader bar only applies to the 120kg
models (refer to Spreader Bar Attachment section).
Insert Work Platform
6 To reset the ladder to the storage position, reverse the
procedures and position.
Using the Transforma™ Ladder
The Renovator Transforma Ladder - Instruction Manual - BDIV3.indd 16 15/09/2017 1:12:02 p.m.

Transforma™Ladder User Manual Page 17
Using the Transforma™ Ladder
Safety precaution:
• Read the warning stamped below each lock assembly.
• Always hold the inner ladder whenever changing the leg lock
assemblies otherwise it will slide and hit the ground.
• Do not use the outer or inner sections of the ladder as a separate
stepladder.
The Renovator Transforma Ladder - Instruction Manual - BDIV3.indd 17 15/09/2017 1:12:02 p.m.

Page 18 Transforma™Ladder User Manual
Using the Transforma™ Ladder
Using the Extension Ladder Position
Step Action
1 From the storage position, unlock the palm button pins
(refer to Congure the ladder section) and rotate the legs
until both palm button pins lock into place at the extension
position.
Note: The palm button pins will rst lock into the A-frame
position, unlock the palm button pins again and continue
rotating to the extension position.
2 Unlock the Lock (refer to Using the A-frame Positions
section) Assemblies on the upper half of the ladder. Hold
the outer ladder then walk backwards allowing the ladder to
extend to the required height. Extend the lower half of the
ladder if more height is required.
3 To stow the ladder from its extension position, reverse the
above procedure, starting with the ladder base.
Note: Always hold the inner ladder securely when unlocking
the lock assemblies and adjusting the ladder height.
Safety precaution:
• Do not use the outer or inner sections of the ladder as a separate
stepladder.
• Do not use the inner section when separated from the outer sections
in the extension ladder position.
The Renovator Transforma Ladder - Instruction Manual - BDIV3.indd 18 15/09/2017 1:12:02 p.m.
Table of contents
Other The Renovator Ladder manuals
Popular Ladder manuals by other brands
Garelick
Garelick 19622-61 installation instructions
pixima fontanot
pixima fontanot RING Assembly instructions
zarges
zarges ZAP Safemaster S Assembly and use instructions

VONROC
VONROC SL503XX Original instructions
Sealey
Sealey ASCL2 instruction manual

SPORTSPOWER
SPORTSPOWER Trampoline Ladder for 8FT/10FT Assembly instructions
Confer Plastics
Confer Plastics 635-52X Assembly and installation manual

Great Northern Docks
Great Northern Docks 9079W Assembly instructions
TRI-ARC
TRI-ARC U-DESIGN Assembly instructions
Sealey
Sealey LAD002 quick start guide

Kargo Master
Kargo Master 4A82L Instruction guide
Branach
Branach FEU Series User instructions
