manuals.online logo
Brands
  1. Home
  2. •
  3. Brands
  4. •
  5. Thermo King
  6. •
  7. Automobile Accessories
  8. •
  9. Thermo King T- series User manual

Thermo King T- series User manual

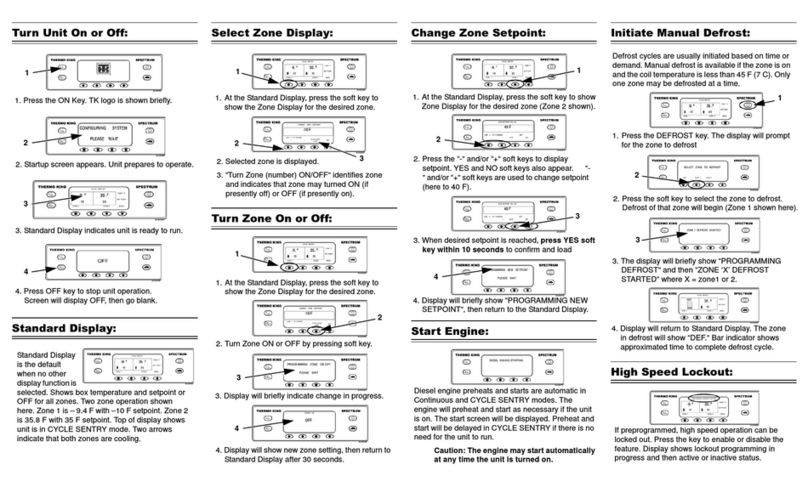
Simple to Start:
One or Multiple Zones
1.Press the ON key to turn
the unit on.
• Dashes will appear in
both the upper and
lower portions of the
display as it powers
up.
• The running time hour
meters are then
displayed briefly.
• The standard display
automatically scrolls
through all configured
zones showing each
zone for 10 seconds. Horizontal bars indicate the current
zone being displayed; One bar = Zone 1, Two bars = Zone
2 and Three bars = Zone 3.
• The diesel engine will preheat and start as required when
the unit is turned on. On SmartPower equipped units, the
electric standby motor will start if the unit is connected to
standby power.
To turn a Zone on or off:
1.Press the ENTER key to
put the unit in Manual
Zone Selection mode.
• A decimal point will
appear to the right of
the horizontal bar
indicating the Manual
Zone Selection Mode
is active.
2. Press the ENTER key
again as require to select the desired zone.
3. When the desired zone is selected, simultaneously press the
ON key and the ENTER key to turn the zone off.
• The box temperature and setpoint temperature will now
show all dashes indicating the zone is turned off.
4. Simultaneously pressing the ON key and ENTER key again will
turn the selected zone back on.
5. Press the Off key to turn the unit off.
• The unit will immediately shut off and the display will go
blank.
Simple to Set:
CYCLE-SENTRY™ or Continuous Run
1.Press the CYCLE-SENTRY/Continuous key to change from
CYCLE- SENTRY to Continuous mode.
• Amber LED indicates the unit is operating in
CYCLE-SENTRY mode.
• No LED illuminated indicates the unit is operating in
Continuous mode.
Simple to Set:
Setpoint Temperature
1.Press the ENTER key to
put the unit in Manual
Zone Selection mode.
2. Press the ENTER key
again as required to
select the desired zone.
3. When the desired zone is
selected, press the UP or
DOWN arrow keys until
the desired setpoint is shown.
4. Press the ENTER key to confirm the new setpoint.
Simple to Defrost:
Initiate Manual Defrost
1. Press the ENTER key to put
the unit in Manual Zone
Selection mode.
2. Press the ENTER key again
as required to select the
desired zone.
3. Press the DEFROST key to initiate a manual defrost cycle in
the selected zone.
• Amber LED next to the DEFROST key indicates the unit is
in defrost in the selected zone.
NOTE: The defrost cycle terminates automatically when the
evaporator coil reaches a predetermined temperature or when the
defrost timer expires. Defrost can also be terminated by turning
the unit off and back on.
Simple to Check:
Pretrip Test
FULL PRETRIP TEST
NOTE: Full Pretrip must be done with the unit not running.
1.Turn the unit on, clear all alarm codes and turn the unit off.
2. Turn the unit on again and wait for the unit running time
hourmeters to be displayed. Once the hourmeters are
displayed, press and hold the PRETRIP key for 5 seconds.
• Flashing LED indicates that the Pretrip is being initialized.
• Steady amber LED indicates the Pretrip is in process.
• Full Pretrip Test typically lasts 20 to 30 minutes.
• The amber LED will turn off when the Pretrip Test is
complete or if a Shutdown Alarm occurs.
ENGINE RUNNING PRETRIP TEST
NOTE: Engine Running Pretrip Test must be done with the
unit running.
1.Turn the unit on, clear all alarm codes and allow the unit to
start.
2. With the unit running, press and hold the PRETRIP key for 5
seconds.
• Flashing LED indicates that the Pretrip is being initialized.
• Steady amber LED indicates the Pretrip is in process.
• Full Pretrip Test typically lasts 20 to 25 minutes.
• The amber LED will turn off when the Pretrip Test is
complete or if a Shutdown Alarm occurs.
To stop a Pretrip Test at any time, press the OFF key to turn the
unit off. This will generate a Alarm Code 28 Pretrip Abort.
PRETRIP TEST RESULTS
Pass Pretrip Test
• If the unit passes the Pretrip Test, the amber Pretrip Test
LED will turn off at the completion of the test and the unit
will continue to run as required.
Fail Pretrip Test with Check Alarms
• If the unit fails the Pretrip Test with Check Alarms, the Alarm
Icon will appear when the alarm condition occurs. The
Pretrip Test will continue to run unless a Shutdown Alarm
occurs.
See Operator’s Manual for more information regarding alarm
codes.
Simple to View and Determine:
Viewing and Clearing Alarm Codes
If an unit alarm condition occurs the Alarm Icon will appear on the
display.
•Check Alarm - the Alarm Icon will turn on and the unit will
continue to run.
•Shutdown Alarm - the Alarm Icon and display will flash on
and off and the unit will shut down.
• If the alarm is zone specific, the zone indicator will be
present to show which zone has the alarm condition
(example: Zone 2 shown).
Displaying Alarm Codes
1.Simultaneously press and
hold the ON key and the
PRETRIP key.
• The Alarm Display will
appear.
• If more than one alarm
code has been set, they
are displayed with the
most recent alarm
shown.
2. Use the UP or DOWN
Arrow keys to scroll
through the alarms.
Clearing Alarm Codes
1.After the alarm situation is
resolved, press the ENTER
key to clear the alarm code
currently being shown.
When all alarms have been
cleared the display will show all zeros to indicate no alarms
codes exist.
• All alarms must be viewed before any alarms can be
cleared.
• If an alarm will not clear, it may still exist. If the alarm is
not corrected, it will not clear or may immediately be set
again.
• Some alarms cannot be cleared using the HMI.
See Operator’s Manual for more information regarding alarm
codes.
Simple to Select:
High Speed Lockout Feature
The High Speed Lockout feature is typically used in noise
sensitive areas to reduce diesel engine noise. This feature does
not have any effect when operating in electric standby mode.
1.Press the High Speed Lockout key.
• Amber LED will illuminate indicating the unit is in High
Speed Lockout.
2. Pressing the High Speed Lockout key again will turn the feature
off.
Simple to Operate:
SmartPower™ Electric Standby (OPTION)
1.Connect the proper voltage power supply to the unit’s power
receptacle.
2. Press the ON key to turn the unit on.
• The preheat buzzer will sound for 20 seconds before the
electric motor starts.
Automatically Switching from Electric to Diesel
If the Electric to Diesel Auto Switch Enabled feature is set to
YES, the unit will automatically switch from Electric Standby Mode
to Diesel Mode when standby power is removed or fails.
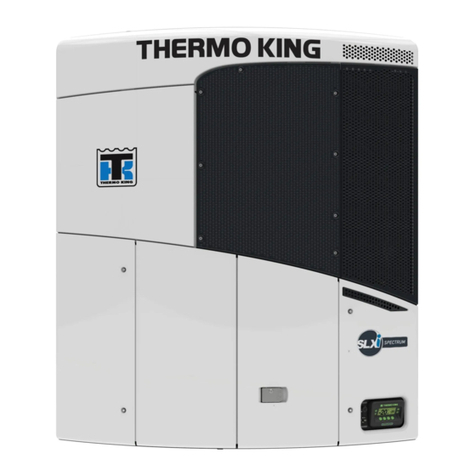
T-Series
Multi-Temperature
Truck Unit
with
Standard HMI
Driver’s Guide to
Simple Operation
TK 54736-1-PC (Rev. 1, 07/10) ©Thermo King Corporation

Other manuals for T- series

2

Other Thermo King Automobile Accessories manuals

Thermo King TriPac EVOLUTION User manual

Thermo King

Thermo King TriPac EVOLUTION User manual

Thermo King B Series User manual

Thermo King

Thermo King B Series User manual

Thermo King Precedent S-750i User manual

Thermo King

Thermo King Precedent S-750i User manual

Thermo King E-200 User manual

Thermo King

Thermo King E-200 User manual

Thermo King VCP2 User manual

Thermo King

Thermo King VCP2 User manual

Thermo King T- series User manual

Thermo King

Thermo King T- series User manual

Thermo King B-100 User manual

Thermo King

Thermo King B-100 User manual

Thermo King Smart Reefer 3 Installation and operation manual

Thermo King

Thermo King Smart Reefer 3 Installation and operation manual

Thermo King Whisper User manual

Thermo King

Thermo King Whisper User manual

Thermo King V220 Series User manual

Thermo King

Thermo King V220 Series User manual

Thermo King T-1000R User manual

Thermo King

Thermo King T-1000R User manual

Thermo King 42-2499 Reference guide

Thermo King

Thermo King 42-2499 Reference guide

Thermo King Precedent C-600M User manual

Thermo King

Thermo King Precedent C-600M User manual

Thermo King UT-800 User manual

Thermo King

Thermo King UT-800 User manual

Thermo King SLXi-100 User manual

Thermo King

Thermo King SLXi-100 User manual

Thermo King Spectrum TS User manual

Thermo King

Thermo King Spectrum TS User manual

Thermo King V-520 Series User manual

Thermo King

Thermo King V-520 Series User manual

Thermo King V-520 RT Series User manual

Thermo King

Thermo King V-520 RT Series User manual

Thermo King V Series User manual

Thermo King

Thermo King V Series User manual

Thermo King V220 Series User manual

Thermo King

Thermo King V220 Series User manual

Popular Automobile Accessories manuals by other brands

Shell NewMotion Home Advanced 2.1 Quick installation guide

Shell

Shell NewMotion Home Advanced 2.1 Quick installation guide

APG IB20EJE7B manual

APG

APG IB20EJE7B manual

Boyo Vision VTC500DIY Installation and owner's manual

Boyo Vision

Boyo Vision VTC500DIY Installation and owner's manual

Mopar 82212184 Installation instructions, operating instructions, product use and care

Mopar

Mopar 82212184 Installation instructions, operating instructions, product use and care

Digi-tails 1981-83 MALIBU installation guide

Digi-tails

Digi-tails 1981-83 MALIBU installation guide

3mk Hyper Car Charger 30W user manual

3mk

3mk Hyper Car Charger 30W user manual

Advent TOYBTSW2 owner's manual

Advent

Advent TOYBTSW2 owner's manual

rough country 92179211200 manual

rough country

rough country 92179211200 manual

Whispbar K706W Fitting instructions

Whispbar

Whispbar K706W Fitting instructions

Wallbox Copper installation guide

Wallbox

Wallbox Copper installation guide

Volvo Mode 2 instructions

Volvo

Volvo Mode 2 instructions

RaceChip Pro 2 installation guide

RaceChip

RaceChip Pro 2 installation guide

Philips SCM4380 Specifications

Philips

Philips SCM4380 Specifications

Safe Fleet PRIME DESIGN VCC-FT31B manual

Safe Fleet

Safe Fleet PRIME DESIGN VCC-FT31B manual

GReddy Turbo Kit installation manual

GReddy

GReddy Turbo Kit installation manual

Kargo Master 4082L Instruction guide

Kargo Master

Kargo Master 4082L Instruction guide

Pittsburgh 68783 manual

Pittsburgh

Pittsburgh 68783 manual

Kargo Master Congo Pro Kit installation instructions

Kargo Master

Kargo Master Congo Pro Kit installation instructions

manuals.online logo
manuals.online logoBrands
  • About & Mission
  • Contact us
  • Privacy Policy
  • Terms and Conditions

Copyright 2025 Manuals.Online. All Rights Reserved.