To Insert battery plate,
align the small taps into
the guide ribs on the
housing
To lock the battery plate,
press down and slide in To Release the battery plate,
Push away this tap.
Battery Plate Unlock position Battery Plate locking position
To Insert battery plate,
align the small taps into
the guide ribs on the
housing
To lock the battery plate,
press down and slide in To Release the battery plate,
Push away this tap.
Battery Plate Unlock position Battery Plate locking position
To Insert battery plate,
align the small taps into
the guide ribs on the
housing
To lock the battery plate,
press down and slide in To Release the battery plate,
Push away this tap.
Battery Plate Unlock position Battery Plate locking position
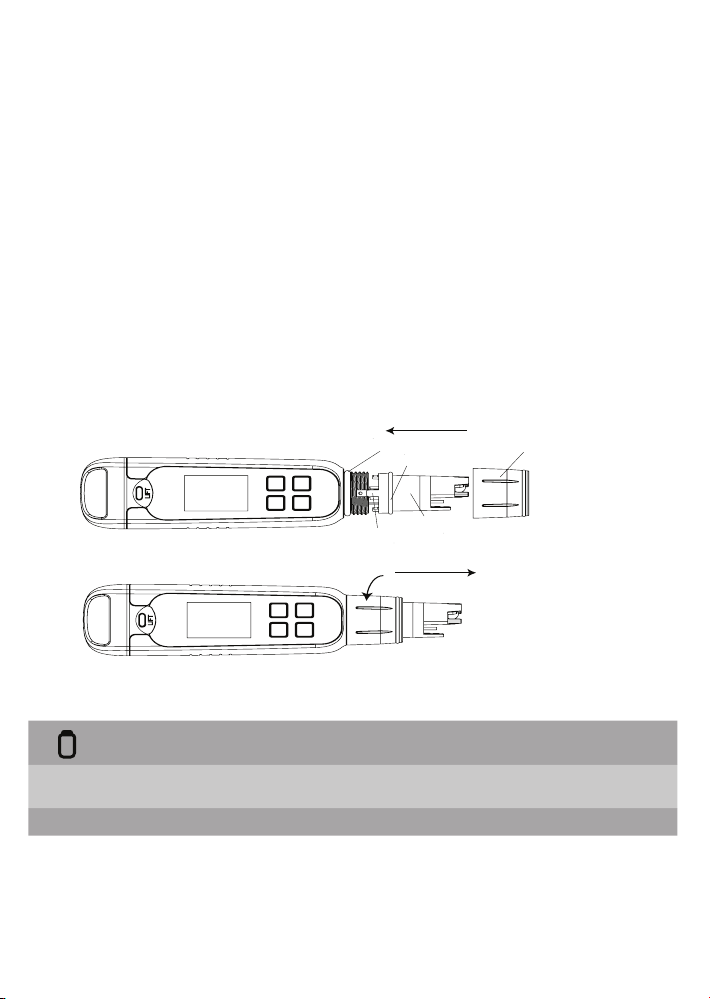
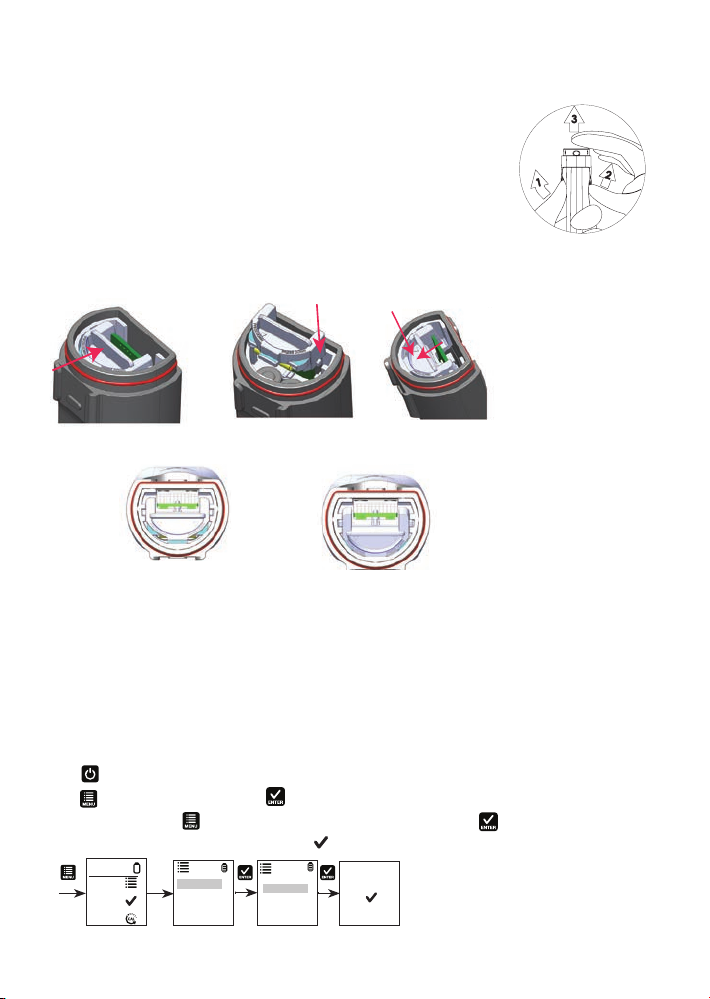
Figure 1: Removing battery
cover
Figure 2: Push to unlock Figure 3: Align tabs Figure 4: Push down to unlock
Figure 5: Battery plate unlock
position
Figure 6: Battery plate lock
position
To Insert battery plate,
align the small taps into
the guide ribs on the
housing
To lock the battery plate,
press down and slide in To Release the battery plate,
Push away this tap.
Battery Plate Unlock position Battery Plate locking position
To Insert battery plate,
align the small taps into
the guide ribs on the
housing
To lock the battery plate,
press down and slide in To Release the battery plate,
Push away this tap.
Battery Plate Unlock position Battery Plate locking position
2 Elite CTS Tester Operating Instructions
This instruction manual is applicable for Elite CTS Tester.
Replacing the Batteries
The Elite CTS tester uses four AAA 1.5 V batteries.
1. To remove the battery cover, See Figure 1. Clear the front catch and then the back
catch, before sliding the cover off.
2. To remove the battery plate, push the center tab towards the front of the tester as
show in Figure 2. Once unlocked, remove the plate to access the batteries.
3. Invert the tester upside down to remove the batteries. Each side uses two
AAA batteries. Orient each battery with positive terminal facing downward.
4. To lock the battery plate, align the small taps into the guide ribs
on the housing and then press down. See Figure 4.
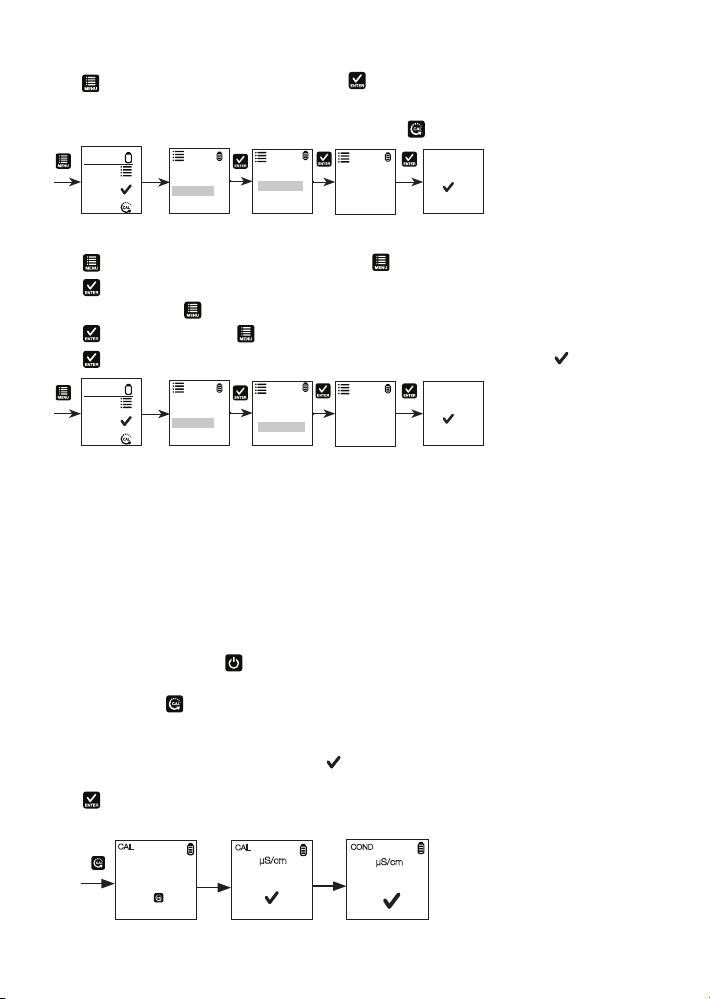
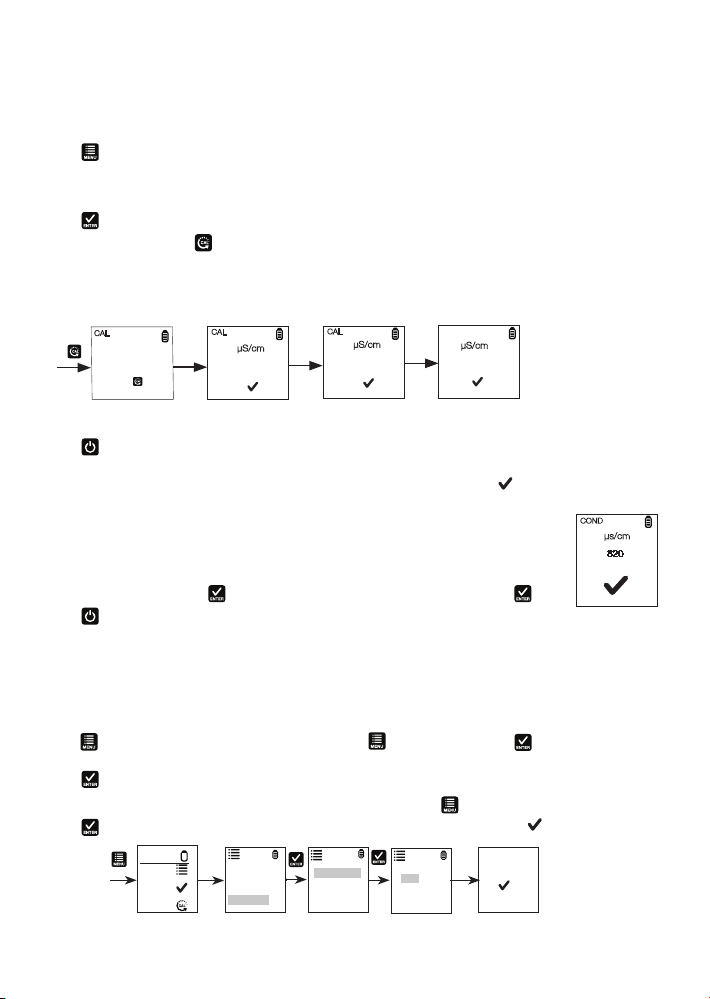
Getting Started
The Elite CTS tester has been factory calibrated and usually works well out of the box. However, after extended
periods of non-use, it is best to remove the sensor cap and soak the sensor in warm tap water for 10 minutes or so.
Prior to taking the measurements, periodic callibaration with certied standards is recommended for best accuracy.
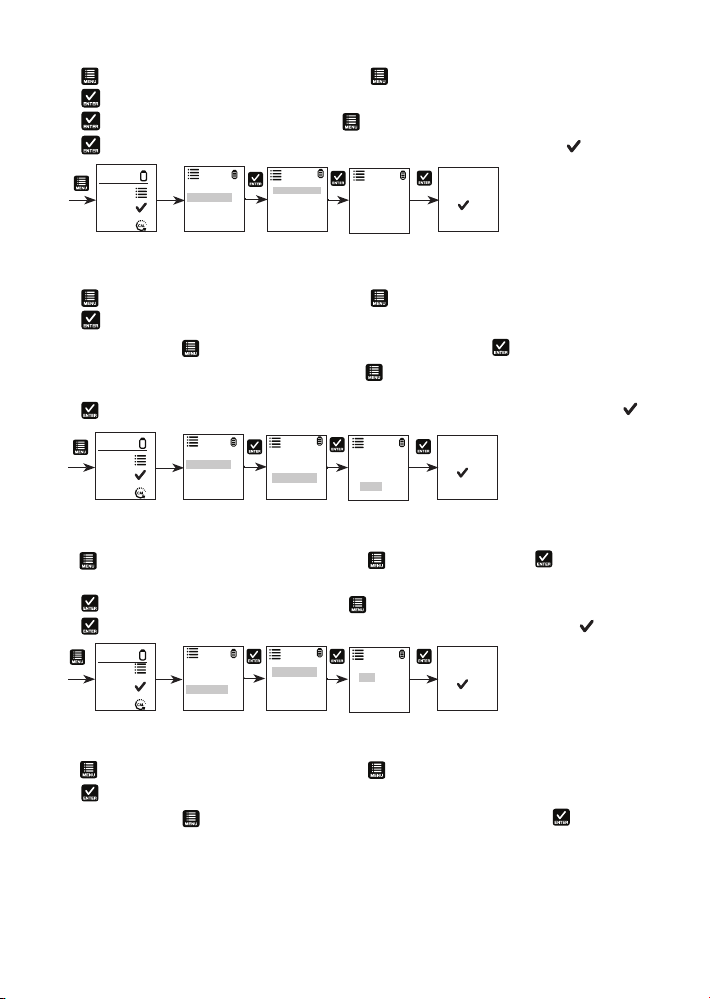
Measurement Parameter Setting
1. Press to power on the tester.
2. Press to enter setup window. Press to select Measure. The display shows Cond, TDS and Salinity.
3. Scroll down by pressing to toggle between Cond, TDS and Salinity. Press to select Cond.
4. The display shows the selected measure with a .
Settings
Temp Set
Reset
Key Info
Scroll
Accept
EXIT
TDS
Salinity
Cond
Measure Cond