manuals.online logo
Brands
  1. Home
  2. •
  3. Brands
  4. •
  5. Thermogroup
  6. •
  7. Thermostat
  8. •
  9. Thermogroup TNTDP Operation manual

Thermogroup TNTDP Operation manual

Installing the thermostat
Carefully separate the front half of the thermostat from the back plate by placing a small flat head
terminal driver into the slots on the bottom face of the thermostat.
Carefully unplug the cable connector which is plugged into the front half of the thermostat.
Place the thermostat front half somewhere safe.
Follow the Wiring Diagram to connect the floor heating cold leads, remote temperature sensor and
electrical supply to the appropriate terminals.
Screw the thermostat back plate on to the flush box. Re-connect the thermostat cable and clip the two
halves together.
Technical data
Supply voltage 230 - 240VAC
Maximum Load 16A
IP Rating IP30
Warranty 2 Years
Width 80mm
Height 120mm
Depth 45mm (27mm in wall)
Temp Range 5°C - 35°C
Floor Sensor (Resistance at 25°C ) 10Kohm
Orientation Vertical
Setting the date and time
Press and the time will begin to flash. Use to select the correct time
Press until the day begins to flash (Note: Monday is Day 1). Use to select the correct day
Press to save the settings
Heating Modes
When the timer is on, press the to switch between manual and schedule modes.
Manual Mode
In manual mode press the to set the desired temperature in the thermostat setting or ON/OF status in the timer setting.
Schedule Mode
In the schedule mode the timer will follow the heating schedule that is set.
By pressing the arrows it will override the current programmed temperature until the next programmed period.
Alternating between the thermostat and timer settings
When the unit is turned on press and hold for about 5 seconds to switch between the thermostat (with temperature displaying) and the
timer (with ON or OF displaying).
Advanced Settings
To access the advanced settings, turn the timer off by pressing
Press to display setting 01. Use the to adjust the settings
Press to cycle between setting 01 to 04. Press to save the settings
Menu
Description
Range
Default
01
Sensor Mode
A=Air Sensoring Only F=Floor Sensoring
AF=Air & Floor Sensoring
A= Air Sensoring Only
02
Max Floor Temp Limit
20°C - 40°C
40°C by default
03
5+2 or 7 day Programming
01= 5+2 day program 02 = 7 day program
01 = 5+2 day program
04
Screen saver
ON = activated OF = not activated
OF= not activated
Key Lock
To lock the key pad, press and hold the for 5 seconds or until the displays. To unlock press and hold the until the
disappears.
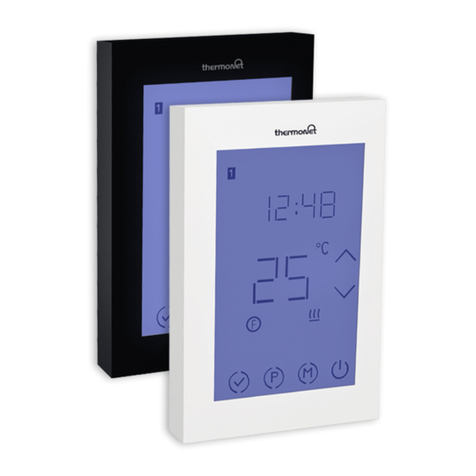
TNTDP / TNTDPB Touchscreen Thermostat Installation & User Guide
1. Day indicator
2. Key lock icon
3. Schedule mode icon
4. Manual mode icon
5. Temperature indicator
6. Confirm settings
7. Program button
8. Mode button
9. Power button
10. Air/Floor sensoring mode
11. Up & down arrows
12. Program period
13. Time
User Interface
Set up your heating schedule (For 5+2 Day Program)
Turn the thermostat on by pressing
To set up the heating schedule for Monday to Friday press
The time for P1 will flash. This is the first ON period for the day.
Use the to adjust the time to when the underfloor heating will turn on in the morning.
Press and the temperature will flash.
Using the select the desired heating temperature for P1(Recommended between 22-28°C).
Press to set period 2, which is when the underfloor heating will turn off. Use the to adjust the time.
Press and the temperature will flash. Using the select the off temperature for P2 (Recommended between 15-18°C).
Repeat above steps for P3 and P4 and then press
(Note: P3 is turning the underfloor heating on in the evening and P4 is turning it off in the evening)
If the underfloor heating is only required to be on once a day set a lower temperature for both P3 and P4 and ensure that the time set for
P3 and P4 is after the time set for P2.
When Monday-Friday has been set press to go onto the Saturday and Sunday schedule.
The time for P1 will flash. This is the first ON period for Saturday and Sunday.
Use the to adjust the time to when the underfloor heating will turn on in the morning.
Press and the temperature will flash.
Using the select the desired heating temperature for P1(Recommended between 22-28°C).
Press to set period 2, which is when the underfloor heating will turn off. Use the to adjust the time.
Press and the temperature will flash. Using the select the off temperature for P2 (Recommended between 15-18°C).
Repeat above steps for P3 and P4.
For Saturday and Sunday if you want to clear the time period of P2 and P3, press during programming. Press again to cancel.
Set up your heating schedule (For 7 Day Program))
Change the advanced menu option 03 to setting 02 (7 Day Program) as per instructions in advanced settings section.
The 7day program option means that all 7 days can be programmed to the same schedule or all 7 days can be programmed individually.
Press until the day display flashes. If programming all 7 days individually use the to select the day to program first.
If programming all 7 days to the same schedule, press and hold the button for about 5 seconds to select all 7 days.
To set up the heating schedule press
The time for P1 will flash. This is the first ON period for the day.
Use the to adjust the time the underfloor heating will turn on in the morning.
Press and the temperature will flash.
Using the select the desired heating temperature for P1(Recommended between 22-28°C).
Press to set period 2, which is when the underfloor heating will turn off. Use the to adjust the time.
Press and the temperature will flash. Using the select the off temperature for P2 (Recommended between 15-18°C).
Repeat above steps for P3 and P4 and then press
(Note: P3 is turning the underfloor heating on in the evening and P4 is turning it off in the evening)
If programming all 7 days to the same schedule, the program is now set up.
If programming all 7 days individually, press and use the to select the next day to program.
Setting up your timer schedule
To set up the timer schedule alternate to the time mode (ON/OF display) as per the instructions in the Alternating between thermostat and
timer section. The timer schedule is set up in the same way as the thermostat so follow the above procedure. However instead of setting a
temperature the timer mode just has ON/OF status to set.
Temporary override
Turning the timer onto temporary override will allow the timer to be operated on manual until the next programmed period.
In schedule mode, press the and the temperature display will flash. Use to adjust the desired temperature and press to
confirm. will be displayed below the temperature display. The thermostat will maintain the newest temperature until the
next programmed period. To cancel the override setting press .
Factory Reset
Press to turn the timer off
Press and the hold until 05 is displayed. Press and hold for approx. 5 seconds
will display on the screen and then the timer has been reset. Turn the timer back on to setup the program
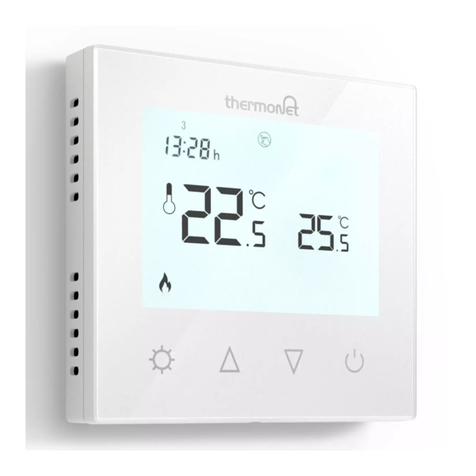
This manual suits for next models

1

Other Thermogroup Thermostat manuals

Thermogroup 5220 Operation manual

Thermogroup

Thermogroup 5220 Operation manual

Thermogroup 5265 Operation manual

Thermogroup

Thermogroup 5265 Operation manual

Thermogroup Thermotouch Dual 5245 Operation manual

Thermogroup

Thermogroup Thermotouch Dual 5245 Operation manual

Thermogroup 5240 Thermotouch 4.3iC User manual

Thermogroup

Thermogroup 5240 Thermotouch 4.3iC User manual

Thermogroup 5259 User manual

Thermogroup

Thermogroup 5259 User manual

Thermogroup 5250 Operation manual

Thermogroup

Thermogroup 5250 Operation manual

Thermogroup Thermotouch 7.6iG Operation manual

Thermogroup

Thermogroup Thermotouch 7.6iG Operation manual

Thermogroup Thermotouch 5235W User manual

Thermogroup

Thermogroup Thermotouch 5235W User manual

Thermogroup 5240 Thermotouch 4.3iC User manual

Thermogroup

Thermogroup 5240 Thermotouch 4.3iC User manual

Thermogroup TNTRP Operation manual

Thermogroup

Thermogroup TNTRP Operation manual

Popular Thermostat manuals by other brands

Delta Controls DNT-T221 installation guide

Delta Controls

Delta Controls DNT-T221 installation guide

Herschel T-PL Installation and user manual

Herschel

Herschel T-PL Installation and user manual

Computherm q3rf operating instructions

Computherm

Computherm q3rf operating instructions

Jaga JRT-100 Installation, setup & user manual

Jaga

Jaga JRT-100 Installation, setup & user manual

ICM Controls SC2201 Installation, operation & application guide

ICM Controls

ICM Controls SC2201 Installation, operation & application guide

CyData Daisy install guide

CyData

CyData Daisy install guide

Siemens REV100 manual

Siemens

Siemens REV100 manual

Venstar P474-1100RF owner's manual

Venstar

Venstar P474-1100RF owner's manual

Watts Tekmar Invita 564 Quick setup guide

Watts

Watts Tekmar Invita 564 Quick setup guide

BECA BHT-1000 user guide

BECA

BECA BHT-1000 user guide

Moehlenhoff Standard manual

Moehlenhoff

Moehlenhoff Standard manual

Whisper MU-600 instruction manual

Whisper

Whisper MU-600 instruction manual

AMX ENV-VST-C instruction manual

AMX

AMX ENV-VST-C instruction manual

Rinnai Remote Thermostat installation instructions

Rinnai

Rinnai Remote Thermostat installation instructions

Siemens EcoView installation instructions

Siemens

Siemens EcoView installation instructions

Viega Programmable Heat/Cool Thermostat Product instructions

Viega

Viega Programmable Heat/Cool Thermostat Product instructions

IDEAL Touch user guide

IDEAL

IDEAL Touch user guide

Tekmar 510 User brochure

Tekmar

Tekmar 510 User brochure

manuals.online logo
manuals.online logoBrands
  • About & Mission
  • Contact us
  • Privacy Policy
  • Terms and Conditions

Copyright 2025 Manuals.Online. All Rights Reserved.