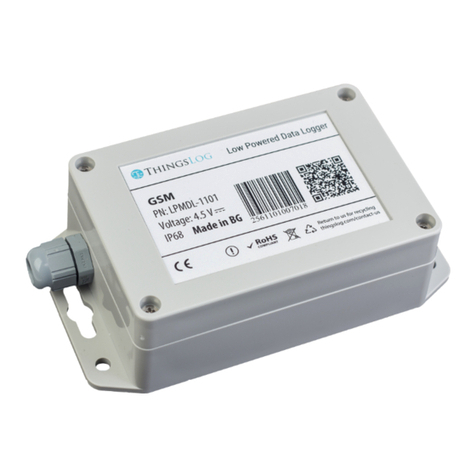
ThingsLog LPMDL-1101 User manual

Visit us at www.thingslog.com; (+359) 875 32 80 70; sales@thingslog.com
User Manual
Low power mobile data logger
ThingsLog LPMDL-1101
GSM / GPRS Data logger
iTransformers Labs Ltd
11 Magnaurska shkola str., fl. 3, office 315 (Hightech Business Park, BIC IZOT),
1784, Sofia, Bulgaria
Phone (+359) 875 32 80 70• Email: info@thingslog.com

Visit us at www.thingslog.com; (+359) 875 32 80 70; sales@thingslog.com
Contents
1Overview 3
2Technical specification 3
3Functional specification 4
4Safe and Healthy instructions 5
5Physical installation 7
6Input/output ports 8
7User guide 9
7.1 Login to ThingsLog platform 9
7.2 Initial configuration ThingsLog LPMDL-1101 10
7.3 Normal operation mode & short functional description 14
7.3.1 Readings 14
7.3.2 Flow graph 15
7.3.3 Cumulative graph 16
7.3.4 Data export 16
7.4 Operational considerations 16
7.4.1 Dashboard 16
7.4.2 Battery status 18
7.4.3 Signal status 19

Visit us at www.thingslog.com; (+359) 875 32 80 70; sales@thingslog.com
1Overview
ThingsLog LPMDL-1101 is a universal, low power mobile data logger able to meter various kinds of pulse meters
and analog sensors. The logger is transmitting the metered data over 2G/GSM/GPRS.
LPMDL-1101 has the following key characteristics:
Optimal data transmissions - LPMDL-1101 is able to transmit the data over a two-way GSM/GPRS network in
an optimal for the battery way. That allows the logger to meter per minute, to transmit a couple of times per
day and still to achieve more than 5 years of battery life.
Intelligence - the data is transmitted over a widely distributed, cellular network and is automatically gathered
in ThingsLog platform.
Pulse metering - LPMDL-1101 has ability for an independent counting of pulse output meters for water, gas,
electricity and heating. With a single data logger, you can meter two meters for example for cold and hot water
or if your meters are in proximity distance you can meter with a single device gas, electricity and heating.
Analog sensors metering - LPMDL-1101 has two extra inputs for connecting analog sensors with 4-20 mA
output. An example could be connecting two pressure sensors or one pressure and one temperature sensor.
Combined monitoring - LPMDL-1101 can fulfill use cases where with a single logger have to be monitored one
water meter and two pressure sensors. For example monitoring of pressure reduction areas by measurements
of pressure sensors before and after the pressure reduction valve and its water meter.
Alarms and notifications - LPMDL-1101 together with the ThingsLog platform is able to monitor consumption
and notify the customer or the utility company for leaks, high or low consumption, fraud or thresholds bridging
of certain sensor value or a combination of a sensor and metered value.
Application - LPMDL-1101 fulfills various use-cases in Water, Electricity and Gas distribution utilities but also
many other use-cases in property management, hotel, manufacturing, condominium sub-metering or in
common need is spread.
Ability to work in any environment - LPMDL-1101 has IP68 dust and leakage protection and is suitable for any
kind of home or industrial usage.
2Technical specification
Length
132.3 mm / 5.2 in
155 mm / 6.1 in
Height
52 mm / 2.04 in
Width
70 mm / 2.75 in

Visit us at www.thingslog.com; (+359) 875 32 80 70; sales@thingslog.com
Weight
130 gram
Temperature range:
-40 - +60 °C
Transmit power
Class 4 (2W @850/ 900MHz)
Class 1 (1W @1800/ 1900MHz)
Sensitivity
GSM850: -109dBm
GSM900: -109dBm
DCS1800: -109dBm
PCS1900: -109dBm
Cable length
1m, 2m, 3m, 4m, 5m
Physical data transmission layer
GSM
MAC layer
GPRS Class 12
Dust & Water protection
IP68
Battery power
4.5 V, 3xAA 1.5 batteries
External sensor battery packs
6x1.5V batteries - up to 9V, fits inside the
logger
Anything else –in an external battery holder
Table I Technical specification
3Functional specification
●Pulse metering: the loggersupports pulses generated by reed contacts, hol sensors or S0 pulse outputs
of water, gas and electricity meters
●Analog sensor metering: The logger supports analog sensors with output from 4 to 20 mA
●Data transmission: LPMDL-1101 support 2G/GSM/GPRS
●Low powered: Preinstalled interchangeable long life battery able to support more than 5000
transmissions of millions of individual counter values
●Average battery life: 5 years
●Antenna: Internal or optional external SMA
●Secured configuration
●Certified for both industrial and home usage

Visit us at www.thingslog.com; (+359) 875 32 80 70; sales@thingslog.com
4Safe and Healthy instructions
Important
information
Please read the complete information, the specifications, the installation
instruction and the electrical interconnect schema prior to working with this
product.
For your own health and safety and for the equipment to function correctly please
ensure that you understand completely the contents of this guide, prior
installation, configuration, operations or profilactics.
CE
From license point of view, unauthorized modifications or additions are not
authorized.
Terms of use
The data logger is intended for use in the following environmental conditions:
●for use indoors or outdoors without prolonged exposure to direct UV
radiation
●for altitudes up to 2000 m
●for ambient temperatures from -40 ° C to + 60 ° C, with continuous
exposure to temperatures of -20 to -40 ° C not recommended
●for relative humidity of 4% to 100%
●for supply voltage deviation of up to + 20% and -15% of declared voltage
●for use under the overvoltage category I;
●for environment with pollution degree 3 (PD3).
Health and safety
rules for installation
All installation work has be performed in accordance with the local regulations
on health and safety at work in electrical systems as well as the regulations
governing the electrical system and networks.
Only engineers or technicians with product expertise that has previously read
and understood this guide should install this product.
Installation and
maintenance
Installation is done in accordance with the instructions in this document.
Incorrect installation may cause damage to the logger and inaccurate
measurements. That is why the installation, the initial configuration must be
done with due attention.
Incorrect installation results in violation of warranty conditions and failure of
the warranty.
An example of improper installation is to connect the pulse or analog input of
the device shortly or to a power source.

Visit us at www.thingslog.com; (+359) 875 32 80 70; sales@thingslog.com
If you need to connect the logger to an equipment in an ATEX zone 0, 1,2 please
do so outside the zone and through an external IC circuit barrier.
Transport and
storage
Store in dry rooms without access to water or other liquids at temperatures not
lower than -20 ° C and not higher than 60 ° C in the original package.
Transportation is allowed to happen accidentally at temperatures below -20 ° C
but not more than 8 hours. Protect against shocks and avoid extreme
conditions.
Subsequent
maintenance
Once installed, the data logger should be cleaned using a dry or lightly
moistened cloth, explicitly prohibiting the use of aggressive and abrasive
detergents.
Every six months, it is desirable for the user of the logger to check the enclosure
integrity and the integrity and waterproofness of the cable and connecting
terminals to the measured device or sensor.
Recycling
When recycling the product and its disposal, local and national legislation and
regulations must be observed. If you hesitate, please return the appliance, we
will recycle it for you.
Table II Health and safety instructions

Visit us at www.thingslog.com; (+359) 875 32 80 70; sales@thingslog.com
Figure 2 Example installation schema for interconnecting LPMDL-1101 with a water meter
●Prior to install the logger please review the health and safety instructions described in chapter 3.
●The data logger is coming with an installation manual and an optional attachment kit
●In order to attach the logger you will need a wall with stiff, flat surface close to the meter or the
sensor that you would like to measure.
●Mark and drill holes with size 4x25 mm for attaching the logger to the wall.
●Attach the logger input/outputs to the connecting cable.
●Attach the corresponding connecting cable input/outputs to the meters/sensors.
6Input/output ports
LPMDL-1101 has 12 input/output ports. To access the ports unscrew the board from the bottom of the logger
enclosure and lift it up.

Visit us at www.thingslog.com; (+359) 875 32 80 70; sales@thingslog.com
Figure 3 Logger input/output ports
Figure 4 Wiring scheme
Note: pinouts 10 and 11 are used for interconnecting with an external battery.
7User guide
7.1 Login to ThingsLog platform
1. In order to perform the initial configuration you should have an account for ThingsLog IoT platform.
If you don’t have an account please contact us at [email protected].
2. Once you have the account navigate to https://iot.thingslog.com

Visit us at www.thingslog.com; (+359) 875 32 80 70; sales@thingslog.com
3. You should be able to see a device list with the devices associated to your profile.
7.2 Initial configuration ThingsLog LPMDL-1101
1. Connect your logger to your meters and sensors as described in section physical installation.
2. Navigate to menu “All Devices” - and pick your newly added logger.
Figure 6 Menu “Devices”
3. From the menu choose “Config” then a similar configuration dialog will appear.

Visit us at www.thingslog.com; (+359) 875 32 80 70; sales@thingslog.com
On the top you can see the logger id, date when it was configured for a last time and current
configuration status.
Then follows the common section for all inputs/outputs.
●Transmission period - Number of minutes/hours/days between the logger scheduled
transmissions
●Record period - Could be Minutes or Hours. This is the period on which the logger will log in
memory the reading values from the pulse inputs or the period on which it will perform low
power reading of its analog current inputs.
4. Pulse sensors
Pulse sensors are typically meters connected to a pulse input port or buttons. To enable the port
please slide the slider to the right and enter. Once the port is enabled you have to set the following.
Figure 7 Pulse input port configuration dialog
●Digits - Number of digits - equals to the number of digits on the display of the meter
●Fraction - Number of digits after the decimal pointer on the display of the meter

Visit us at www.thingslog.com; (+359) 875 32 80 70; sales@thingslog.com
●Initial reading - Initial value of the counter of the meter
●Sensor type –the type of the sensor could be water, gas, power etc meter.
●Units type –the dimension of the metered values –m3, kw etc.
●Pulse per unit –how much of the measured value is equal to one pulse
5. Analog sensors
Figure 7 Analog input port configuration dialog
To enable analog sensor readings (connected to the analog inputs) just slide the slider to the right
and configure:
Sensor type –the type of an analog 4-20mA sensor we are measuring
Sensor conversion formula –convert the “x” into bars or something else based on the
formula for conversation of mA to the required dimension of your sensor. If you leave it as x
you will get values in mA.
Units type –the type of the unit –mA, bar, etc.

Visit us at www.thingslog.com; (+359) 875 32 80 70; sales@thingslog.com
Low Level Alarm –Instant alarm for reaching certain low level analog sensor value
High Level Alarm - Instant alarm for reaching certain high level analog sensor value
6. ON/OFF sensors
To enable the ON/OFF sensors slide the slider to the right. The sensors has to be normally open
ON/OFF sensors. If the port is enabled and the sensor goes from OFF to ON the logger will wake and
will transmit an instant alarm.
7. Delete old counters - once you are ready with the inputs configuration decide do you want to keep
the old values or not. If not choose “NO” else chose “YES”.
8. Once you are ready press “Start Setup” button.
This will start a 1000 seconds counter. You will have to touch the logger with a magnet prior the counter
expiry. This will put the logger into configuration mode and it will try to obtain its configuration from the
server.
9. If the logger get configured successfully you will be able to see the following message on your screen.
Figure 8 Confirmation of successful configuration
If the configuration process is unsuccessful and the device stays in “Not configured” mode please
ensure that the device has been placed in an area with proper GSM coverage. If you are not sure that such is
7.3 Normal operation mode & short functional description
Once configured the logger will start to collect and transmit readings from the attached sensors. The
logger supports the following main functionalities:
7.3.1 Readings
From the readings menu the user has access to the readings gathered by the logger. The user can select a
time interval and export the readings to a file in csv file format.

Visit us at www.thingslog.com; (+359) 875 32 80 70; sales@thingslog.com
7.3.3 Cumulative graph
Figure 11 Cumulative consumption graph
7.3.4 Data export
The system supports readings data export from certain time range in CSV file format.
Figure 12 Data export in CSV file format
7.4 Operational considerations
7.4.1 Dashboard
Navigate from the menu to the “Dashboard” where you can verify the operational status of your
loggers.

Visit us at www.thingslog.com; (+359) 875 32 80 70; sales@thingslog.com
Figure 13 operational status dashboards
ThingsLogТМ supports the following kinds of alarms:
●NO_ZERO_CONSUMPTION - alarm for non-zero consumption. The non-zero consumption is defined
as condition in which the logger is detecting constant consumption over a period equal to the
transmission period.
●HIGH_CONSUMPTION - alarm indicating consumption higher than a certain preconfigured level over
certain period. For example 1m3over 1 hour.
●MISSED_TRANSMISSION - alarm indicating that the transmission from the logger did not happen.
●LOW_FLOW - alarm indicating that the flow time interval is lower than the expected value per
second.
●HIGH_FLOW- alarm indicating that the flow time interval is lower than the expected value per
second.
●HIGH_CONSUMPTION - alarm indicating that the consumption time interval is lower than the
expected one.

Visit us at www.thingslog.com; (+359) 875 32 80 70; sales@thingslog.com
●ALL_ZERO_CONSUMPTION - alarm signaling zero consumption through certain time-period. For
there is no consumption for 24 hours. Could potentially indicate a fault meter.
●DEVICE_REMOVED - alarm indicating that the meter has been disconnected from the logger.
●LOW_BATTERY - alarm indicating that the battery of the logger is under 20%.
●ON/OF alarm –on/off sensor is enabled and an instant alarm is triggered
7.4.2 Battery status
Battery status in % of your logger. The same could be reviewed in more details if you navigate to “Battery”
section of the product.
Figure 13 Battery status

Visit us at www.thingslog.com; (+359) 875 32 80 70; sales@thingslog.com
Since our loggers are with battery holders we sometimes don’t exactly know what kind of a battery is inside
the logger. Therefore the more important value is the voltage in mV. The level in % might be incorrect
depending of the type of the logger and the battery you have placed in.
7.4.3 Signal status
On each transmission, the loggers are sending their current measured RSSI (Received Signal Strength
Indication) and BER (Bit Error Ratio) if there is an error.
Figure 13 Signal status
Other manuals for LPMDL-1101
2
Table of contents
Other ThingsLog Data Logger manuals
Popular Data Logger manuals by other brands
GRAPHTEC
GRAPHTEC gl200 Service manual
T&D
T&D RTR-505 user manual
Measurement Computing
Measurement Computing USB-TEMP user guide
Lascar Electronics
Lascar Electronics EasyLog EL-PDF-1 Series quick start guide
Gulf Coast Data Concepts
Gulf Coast Data Concepts X16-1E user manual
DENT Instruments
DENT Instruments ELITEpro XC quick start guide


