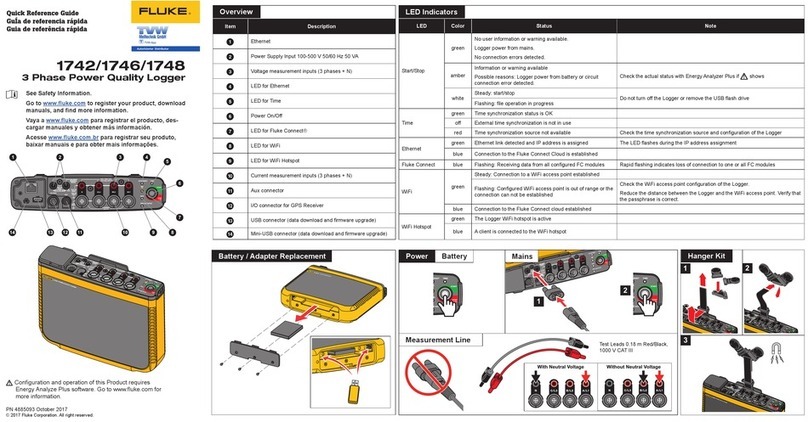
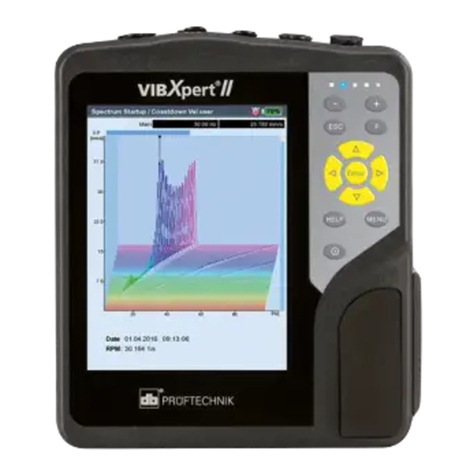
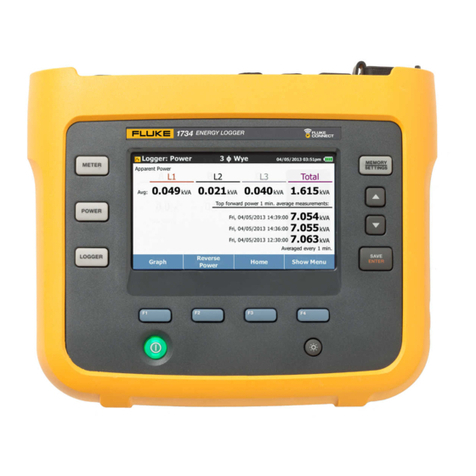
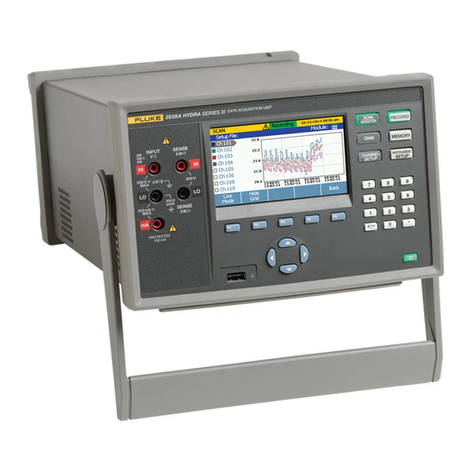
Fluke VIBXPERT 3 User manual

Data Collector &
Vibration Analyzer
VIBXPERT 3
Users Manual

Contents
Contents 1
Safety and general information 5
Symbols 5
General safety 5
Intended use 7
Items in the box 7
Handling precautions 8
Transport of devices that use lithium batteries 8
Transport of magnetic components 8
Storage 8
Care 8
Maintenance 8
Disposal 9
Introduction 10
How to use the on-board help 10
User interface concept 11
Home screen 12
Interfaces and operating elements 14
Overview 14
Notes on operation 16
Switch VIBXPERT 3 on 16
Switch VIBXPERT 3 off 16
Sleep mode 17
Power supply 17
Shoulder and hand straps 17
VIBXPERT 3│On-board help 1

Settings 19
Channels and sensors — basic settings 23
Sensors available in VIBXPERT 3 23
Connections 25
Update VIBXPERT 3 to a newer version 27
RFID 30
Reader module 30
How to program an RFID tag 30
How to use the connected RFID tag when the route is measured 31
How to change measure location recorded on an RFID tag 31
File Manager 33
Machine templates 36
Machine template list menu items 37
Machine template — an overview 37
Create or modify a machine template 39
Measure with machine template 41
Measure configuration 46
Menu items 47
Create asset 47
Parameter icons 51
Kinematic model 54
Configure belt driven machine train 55
Edition: 09.2023 2

Task templates 59
Create a measure task 60
Measure task 62
What is a measure task? 62
Measure speed 68
Create speed point from machine template 68
Start to measure from home screen 70
How the laser trigger RPM sensor works 70
Measure RPM with the stroboscope 70
Stroboscope principles 72
Near location 73
Set up near locations 73
Routes 76
How to measure a route 76
Route list 77
Route summary 78
Measure route 80
Preparation 80
Start route 80
Measure the route 81
Start to measure 81
Tips when route is measured 82
Measure phase 83
Synchronous phase 83
VIBXPERT 3│On-board help 3

Cross channel phase (Coherence) 83
Triaxial sensor 84
Measure 85
Results 90
Overall values 93
Trending spectrum 94
What is a trending spectrum? 94
Understanding results 94
Cursor 96
Use the cursor 96
Prepare for the balancing procedure 100
What is balancing 100
Steps 100
Balancing in one plane 103
Balancing in two planes 111
Technical data – VIBXPERT 3 121
Declaration of conformity 124
LIMITED WARRANTY AND LIMITATION OF LIABILITY 124
Edition: 09.2023 4

Safety and general information
Symbols
Symbol Description
WARNING. RISK OF DANGER.
WARNING. HAZARDOUS VOLTAGE. Risk of electric shock.
Consult user documentation.
Conforms to European Union directives.
Conforms to UK legislation.
This product complies with the WEEE Directive and its marking
requirements. The affixed label indicates that you must not discard
this electrical/electronic product in domestic household waste. Do not
dispose of this product as unsorted municipal waste. For information
about take-back and recycling programs available in your country,
see the PRÜFTECHNIK website.
Denotes that the product is made of parts that are
recyclable.
General safety
A Warning identifies conditions and procedures that are dangerous to the user.
A Caution identifies conditions and procedures that can cause damage to the Product or the
equipment under test.
Warning
To prevent possible electrical shock, fire, or personal injury:
VIBXPERT 3 5
On-board help

lRead all safety information before you use the product.
lCarefully read all instructions.
lDo not alter the product and use only as specified, or the protection supplied by the
product can be compromised.
lDo not use the product around explosive gas, vapor, or in damp or wet environments.
lUse only approved power adapters to charge the battery.
lDo not use the product if it operates incorrectly.
lUse only specified replacement parts.
lHave an approved technician repair the product.
lDo not look directly into the stroboscope light source with either the naked eye or any
optical tools (for example, binoculars, telescopes, microscopes). Optical tools can focus
the light source and be dangerous to the eye.
lDo not look into the stroboscope light source. Do not point the light source directly at per-
sons or animals or indirectly off reflective surfaces.
lThe effects of light can trigger photosensitive epilepsy. Users with neurological proclivity
for epileptic seizures must not operate the stroboscopes.
lInterference with active implants (e.g. pacemakers) cannot be ruled out. Wearers of act-
ive implants must not operate the stroboscope.
lUse the product only as specified.
lDo not open the product. Have the product repaired only through an approved technical
site.
Caution
lAs with any software that processes data, data may be lost or altered under certain cir-
cumstances. Fluke strongly recommends that you keep a backup or printed record of all
important data.
lFluke assumes no liability for data lost or altered as a result of improper use, repairs,
defects, battery replacement/failures or any other cause.
lFluke assumes no responsibility, directly or indirectly, for financial losses or claims from
third parties as a result of use of this product and any of its functions, such as loss or
alteration of stored data.
6 Version:1.0
On-board help

Intended use
VIBXPERT 3 is used only to measure electrical signals in industrial environments with the tech-
nical specifications taken into account. Care must be taken to ensure that the device is not
dropped or knocked about. Sensors and cables are used only in specified areas. Applicable
technical specifications for sensors and cables are found in the PRÜFTECHNIK product catalog
which can be downloaded from www.pruftechnik.com.
No liability will be assumed when components or operation procedures as described in this
manual are altered without permission of the manufacturer. Use VIBXPERT 3 as intended or
the device protection can be compromised.
Items in the box
VIBXPERT 3 has different packages that depend on functionality.
Note:Check and make sure that the delivered package items agree with the purchase
order and the packing list. You can also refer to the PRÜFTECHNIK product catalog which
is available for download at www.pruftechnik.com. Contact Fluke Reliability or your local
sales representative if any package items miss or are damaged.
VIBXPERT 3 7
On-board help

Handling precautions
VIBXPERT 3 and the related sensors are precision instruments and must not be dropped or sub-
jected to physical shock.
Transport of devices that use lithium batteries
When you return lithium-ion battery operated devices to an approved technical site for inspec-
tion, service, calibration check or repair, make sure that the batteries are not defective. If you
suspect a defect in the battery, DO NOT ship the unit with the defect battery back to
PRÜFTECHNIK. You may contact your local representative for further information.
The relevant material safety data sheets for all PRÜFTECHNIK batteries are posted on the
PRÜFTECHNIK website at www.pruftechnik.com. The package and dispatch regulations for any
given battery are described under section 14 in the material safety data sheets.
Transport of magnetic components
To make sure that stray magnetic fields do not affect the avionics in aircraft, the aviation
industry has put forward stringent regulations for air transportation of magnetic material. The
magnetic field strength of such components must not exceed specified limits. To comply with
this regulation, a cover plate for all PRÜFTECHNIK magnetic components is available. The
plate lowers the magnetic field strength significantly, and keeps the magnetic field strength
well below the required limits, and therefore cause no restrictions for air transportation. The
relevant safety data sheets are available for download and reference on the PRÜFTECHNIK
website at www.pruftechnik.com.
Storage
Use the provided case to transport the system and the related components. If the system is
not used for an extended period, the system components must be stored in a cool, dry and
well-ventilated location. Connect VIBXPERT 3 regularly to the power supply to avoid complete
discharge of the rechargeable battery.
Observe the storage temperatures specified in the technical data.
Care
VIBXPERT 3 and the related system components must be kept clean. Wipe the device housing
with a soft cloth dampened with a mild detergent. Do not use abrasives or solvents. Use a soft
lint-free dry cloth to clean the display.
Maintenance
VIBXPERT 3 is essentially maintenance-free, but these points are to be observed:
8 Version:1.0
On-board help
lThe manufacturer recommends that measurement accuracy be checked every 2 years.
The date for the check is indicated by the colored wheel label affixed to the back of the
device.
lPlease return the device to an approved technical site for inspection by the indicated
date. Make sure to backup data before you send the device to be inspected or repaired.
Disposal
Dispose of old devices in a professional and environmentally sound manner.
lDelete personal data on the product before disposal.
lRemove batteries that are not integrated into the electrical system before disposal. Dis-
pose of batteries separately.
VIBXPERT 3 9
On-board help

Introduction
How to use the on-board help
Tap the start screen Help icon to access the on-board help.
Tap on any screen to access context sensitive help for the specific screen.
Tap to return to previous screen in the given path.
Tap PREVIOUS to go back to last help page visited.
Tap NEXT to go forward with visited help pages.
Tap SEARCH for a full-text search. A search field together with an onscreen
keyboard appears.
Tap TOP to return to the beginning of the help page.
Throughout this on-board help, image thumbnails have been used. Tap the
image thumbnail to enlarge the image for better viewing.
To zoom out and proceed, tap the enlarged image.
Note:Scroll to the bottom of the page to access other related topics wherever used.
10 Version:1.0
On-board help

User interface concept
The home screen which shows when the device is turned on contains short cut icons required
to operate VIBXPERT 3 . The shown icons depend on the registered application.
The home screen icons are used to quickly access the items shown .
In VIBXPERT 3 , the focus is on the full machine train and not individual measure locations.
Machine templates are used create full asset to be measured, and includes all machines on the
train, all measure locations, and measure tasks for the locations.
Note:In this help, the term measure locations is used to refer to the locations where
sensors are mounted when an asset is measured. In eMaint condition monitoring the
measure locations are referred to as test points and the terms are therefore inter-
changeable.
The spectra data is immediately available. Additional applications such as balancing, bump
test and coast down are started within the selected asset by means of an application switch. All
results related to an asset are saved within the asset, and can be saved in the file manager.
VIBXPERT 3 uses Routes to collect route data. A route is a compilation of assets and their
measure locations. The measure locations are assigned required measured tasks. A route is
arranged for maximum efficiency during data collection. Routes are created in eMaint con-
dition monitoring, a web-based software, then transferred to the device by cloud transfer.
To quickly determine machine speed,VIBXPERT 3 uses Speed measurement. This function
can also be accessed via the measurement screen hamburger menu ( ).
VIBXPERT 3 11
On-board help

Home screen
The home screen appears when the device is switched on. If required, use to trace path
back to home screen.
Note:Icons shown on the home screen are different, and depend on the registered
application.
Tap the respective icon to accesses the respective function.
Use Routes to update and measure the desired route. Route-
based measurements are configured in the cloud-based soft-
ware eMaint condition monitoring. Such measurements save
measurement time.
Use Speed measurement to determine machine speed
(RPM) or the alternating frequency.
Use Help to access the device on-board help.
Use Settings to apply desired device and measurement set-
tings.
Use File manager to administrate saved machine templates.
Use Machine templates to create machine hierarchy or when
measuring similar machines.
Use Task templates for predefined measurement data set.
This includes measurement quantity, type of sensor, and data
for the evaluation of results.
The dots at the bottom of the screen show the number pages for the home screen.
12 Version:1.0
On-board help

VIBXPERT 3 13
On-board help

Interfaces and operating elements
Overview
Label Part Function
ENTER button
(left)
Start to measure and/or cancel action
Battery charge
LED
Shows battery charge capacity when device is
in sleep mode.
Ambient light
sensor
Adjusts display brightness automatically
Multi-touch-
screen
Graphical display and touch-sensitive user
interface
ENTER button
(right)
Start to measure and/or confirm action
14 Version:1.0
On-board help

Label Part Function
Stroboscope Strobe light to verify machine speed or the
alternating frequency
Stand Retractable stand to hold device in different
positions
Note:The two yellow ENTER buttons ( and ) are by default connected to the
action buttons in the application. The ENTER buttons can be used to activate action but-
tons such as / .
Label Part Function
ON/OFF
button
Switch device ON and OFF; activate/deactivate
sleep mode
Channel 6 Analog input— connection for sensor
Channel 5 Analog input — connection for sensor
Channel 4 Analog input — connection for triaxial sensor or
VIBCODE sensor
Trigger
point 2
Connection for sensor to measure rotational
speed or trigger signal
Trigger
point 1
Connection for sensor to measure rotational
speed or trigger signal
Channel 3 Analog input— connection for sensor
Channel 2 Analog input— connection for sensor
VIBXPERT 3 15
On-board help

Label Part Function
Channel 1 Analog input — connection for triaxial sensor or
VIBCODE sensor
Micro USB
port
Communication interface to a PC
Charging
socket
Connection for charger
Stand Retractable stand to hold device in different pos-
itions
Note:When a triaxial sensor is connected, then the two analog input channels next to
the occupied channel cannot be used.
Notes on operation
Switch VIBXPERT 3 on
Press and hold down the ON/OFF button until the device peeps. The battery status LED lights
up green. After a short period, the home screen shows in the display, and the battery status
LED switches off.
Switch VIBXPERT 3 off
Press and hold down the ON/OFF button briefly. A hint to switch the device off is shown. Tap
TURN OFF to confirm.
16 Version:1.0
On-board help

Sleep mode
The device can be made to either sleep or switched off. When the device is in sleep mode, it
uses very little power and starts instantly when the ON/OFF button is pressed. When in sleep
mode, the battery status LED lights green. The duration required before the device enters
sleep mode is set under Power Manager in device settings.
Power supply
The device has an internal, rechargeable battery. To charge, connect the device to a mains sup-
ply via the provided charger/adapter. The charger/adapter is connected to the charging socket
(refer to images above and below). The battery status LED lights green when charging. The
battery capacity is shown on the right top corner of the display.
lCharge the non-removable battery only with the supplied charger/adapter. Follow the
safety instructions supplied with the charger.
lMaximum charge temperature is 40°C (104°F).
lDo not deep discharge the battery (<15%).
lObserve the storage and transport conditions given in Handling precautions.
Shoulder and hand straps
A shoulder strap and two hand straps are provided with VIBXPERT 3 to give more comfort
when the device is used to measure extended routes.
VIBXPERT 3 17
On-board help

Use the buckles to adjust the length of the hand straps. When the size of the hand straps is cor-
rect, use the Velcro fasteners to wrap the straps. This gives you a reliable and comfortable
grip.
Use the buckles and the two Velcro fasteners to adjust the length of the shoulder strap to the
required size.
Use the snap hooks and attach the shoulder strap to the hand strap eyelets. Use any two diag-
onally positioned eyelets. This makes left- or right-handed operation possible.
Note:When the device is carried with either the hand straps and/or the shoulder straps,
the display must face the operator. This makes sure that the device cools as required,
and meets radio transmission requirement. Also, the display is protected.
18 Version:1.0
On-board help
Settings
These settings can be checked and edited if necessary:
l Wi-Fi: used to identify and connect the device to available Wi-Fi networks.
Tap to turn the device Wi-Fi on ( indicates on). Tap the name of the required
Wi-Fi network. Enter the network password using the alphanumeric keyboard then tap
APPLY CHANGES to confirm. The connected network IP address will be shown below
the network name.
lConnections: used to join a cloud service; VIBXPERT 3 connects to eMaint condition
monitoring through Accelix™ the cloud-based data platform .
l Date & Time: used to set time and date automatically or manually; set the 24-hour
format; show date on status bar
Tap to turn on the desired function ( indicates on). When Set time auto-
matically is on, manual edit ( ) is off.
When Set time automatically is off ( indicates off), tap to set time and date
manually. Use the pop-up calender and the pop-up clock and set time and date respect-
ively. Tap SET TIME or SET DATE to confirm respective changes.
l Language & Keyboard: used to change user interface (UI) language and UI keyboard
layout. Only one UI language can be set at a time but selection of several UI keyboard
layouts is possible. If several UI keyboard layouts have been selected, this keyboard
icon ( ) is active. Tap to cycle through the available keyboard layouts.
Tap LanguageorKeyboard then use the related drop-down to select UI language or UI
keyboard layout(s).
lUnits: used to set the measurement system to either metric or imperial. The accuracy in
decimal places is can also be set. If the units of any quantity is set to differ from the
selected measurement system, then the system name custom is shown.
VIBXPERT 3 19
On-board help
Other manuals for VIBXPERT 3
1
Table of contents
Other Fluke Data Logger manuals

Fluke
Fluke 1743 User manual

Fluke
Fluke VIBXPERT EX Manual

Fluke
Fluke 1745 User manual

Fluke
Fluke 1742 User manual

Fluke
Fluke VIBXPERT 3 User manual

Fluke
Fluke 1745-BASIC User manual

Fluke
Fluke 1735 User manual

Fluke
Fluke 2680A User manual

Fluke
Fluke Comark RF300 Series User manual

Fluke
Fluke 1750 Instruction manual