thomann Millenium MPS-1000 User manual

MPS-1000
e-drum module
user manual

Musikhaus Thomann
Thomann GmbH
Hans-Thomann-Straße 1
96138 Burgebrach
Germany
Telephone: +49 (0) 9546 9223-0
E-mail: [email protected]
Internet: www.thomann.de
24.09.2021, ID: 511732 (V2)

Table of contents
1 General information.............................................................................................................. 4
1.1 Further information........................................................................................................ 4
1.2 Notational conventions................................................................................................. 4
1.3 Symbols and signal words........................................................................................... 5
2 Safety instructions................................................................................................................. 6
3 Features....................................................................................................................................... 7
4 Installation and starting up............................................................................................... 8
5 Connections and controls................................................................................................ 10
6 Operating................................................................................................................................. 14
6.1 ‘KIT’ menu....................................................................................................................... 14
6.2 ‘EDIT’ menu.................................................................................................................... 16
6.3 ‘SETUP’ menu................................................................................................................. 19
6.4 Connecting the device via Bluetooth®.................................................................. 28
7 Technical specications.................................................................................................... 29
8 Plug and connection assignment................................................................................. 31
9 Cleaning.................................................................................................................................... 32
10 Protecting the environment........................................................................................... 33
11 Appendix.................................................................................................................................. 34
11.1 Kit list............................................................................................................................... 34
11.2 Song list.......................................................................................................................... 35
11.3 Voice list......................................................................................................................... 36
11.4 MIDI note list................................................................................................................ 45
Table of contents
MPS-1000
3

1 General information
This user manual contains important information on the safe operation of the device.
Read and follow all safety notes and all instructions. Save this manual for future refer‐
ence. Make sure that it is available to all persons using this device. If you sell the
device to another user, be sure that they also receive this manual.
Our products and user manuals are subject to a process of continuous development.
We therefore reserve the right to make changes without notice. Please refer to the
latest version of the user manual which is ready for download under
www.thomann.de.
1.1 Further information
On our website (www.thomann.de) you will nd lots of further information and
details on the following points:
Download This manual is also available as PDF le for you to download.
Keyword search Use the search function in the electronic version to nd the
topics of interest for you quickly.
Online guides Our online guides provide detailed information on technical
basics and terms.
Personal
consultation
For personal consultation please contact our
technical hotline.
Service If you have any problems with the device the
customer service will gladly assist you.
1.2 Notational conventions
This manual uses the following notational conventions:
The letterings for connectors and controls are marked by square brackets and italics.
Examples: [VOLUME] control, [Mono] button.
Texts and values displayed on the device are marked by quotation marks and italics.
Examples: ‘24ch’ , ‘OFF’ .
Letterings
Displays
General information
e-drum module
4

The individual steps of an instruction are numbered consecutively. The result of a
step is indented and highlighted by an arrow.
Example:
1. Switch on the device.
2. Press [Auto].
ðAutomatic operation is started.
3. Switch o the device.
References to other locations in this manual are identied by an arrow and the speci‐
ed page number. In the electronic version of the manual, you can click the cross-
reference to jump to the specied location.
Example: See
Ä
‘Cross-references’ on page 5.
1.3 Symbols and signal words
In this section you will nd an overview of the meaning of symbols and signal words
that are used in this manual.
Signal word Meaning
DANGER! This combination of symbol and signal word indicates
an immediate dangerous situation that will result in
death or serious injury if it is not avoided.
CAUTION! This combination of symbol and signal word indicates
a possible dangerous situation that can result in minor
injury if it is not avoided.
NOTICE! This combination of symbol and signal word indicates
a possible dangerous situation that can result in mate‐
rial and environmental damage if it is not avoided.
Warning signs Type of danger
Warning – danger zone.
Instructions
Cross-references
General information
MPS-1000
5

2 Safety instructions
Drum modules are intended to be used for converting digital trigger signals from
drum pads to various percussion sounds. Use the unit only as described in this
manual. Any other use or use under other operating conditions is considered to be
improper and may result in personal injury or property damage. No liability will be
assumed for damages resulting from improper use.
This device may be used only by persons with sucient physical, sensorial, and intel‐
lectual abilities and having corresponding knowledge and experience. Other persons
may use this device only if they are supervised or instructed by a person who is
responsible for their safety.
Safety
DANGER!
Danger for children
Ensure that plastic bags, packaging, etc. are disposed of properly and are not within reach of babies and young children. Choking
hazard! Ensure that children do not detach any small parts (e.g. knobs or the like) from the unit. They could swallow the pieces
and choke! Never let children unattended use electrical devices.
CAUTION!
Possible hearing damage
With loudspeakers or headphones connected, the device can produce volume levels that may cause temporary or permanent
hearing impairment. Do not operate the device permanently at a high volume level. Decrease the volume level immediately if
you experience ringing in your ears or hearing impairment.
NOTICE!
Operating conditions
This device has been designed for indoor use only. To prevent damage, never expose the device to any liquid or moisture. Avoid
direct sunlight, heavy dirt, and strong vibrations. Only operate the device within the ambient conditions specied in the chapter
‘Technical specications’ of this user manual. Avoid heavy temperature uctuations and do not switch the device on immediately
after it was exposed to temperature uctuations (for example after transport at low outside temperatures). Dust and dirt inside
can damage the unit. When operated in harmful ambient conditions (dust, smoke, nicotine, fog, etc.), the unit should be main‐
tained by qualied service personnel at regular intervals to prevent overheating and other malfunction.
NOTICE!
External power supply
The device is powered by an external power supply. Before connecting the external power supply, ensure that the input voltage
(AC outlet) matches the voltage rating of the device and that the AC outlet is protected by a residual current circuit breaker.
Failure to do so could result in damage to the device and possibly the user. Unplug the external power supply before electrical
storms occur and when the device is unused for long periods of time to reduce the risk of electric shock or re.
NOTICE!
Possible staining
The plasticiser contained in the rubber feet of this product may possibly react with the coating of your parquet, linoleum, lami‐
nate or PVC oor and after some time cause permanent dark stains. In case of doubt, do not put the rubber feet directly on the
oor, but use felt-pad oor protectors or a carpet.
Intended use
Safety instructions
e-drum module
6
3 Features
nComplete e-drum set in the look of acoustic drum sets
nWooden shell with a Finish Grey Line
nDrum pads with double-layer mesh heads
nfully playable cymbal pads
ndual zone pads
nCrash and ride pads with choke function
n820 sounds
n70 songs
n40 drum kits
n40 user kits
n23 eects
n3.2" TFT colour display
n9 illuminated faders for pad volume
nRecording function (Quick Record)
nMetronome
n4-band equalizer (DSP)
nReverb eect, distortion (FX) and compressor
nFlexible pad assignment
nBluetooth®
nConnections: Headphones, external triggers, USB midi, line out, line in
nStandby function
Features
MPS-1000
7

4 Installation and starting up
Rack setup and assembly of the pads and pedals are described in detail in the
enclosed set assembly guide. Finally check that all cables between the pads and the
drum module have been properly connected.
Connect the supplied D-sub plug of the pad connector cable to the D-sub input
socket on the rear panel of the drum module.
Connect the included power supply unit to the [DC IN] input on the rear panel of the
drum module and then put the power plug into the power outlet.
Connect your computer to the USB midi port on the rear panel of the drum module.
Connect the inputs of your amplier or active monitor to the output sockets
[LINE OUT] on the rear panel of the drum module. Connect a CD or MP3 player etc. to
the [LINE IN] input socket on the rear panel of the drum module.
Rack setup, connecting pads and
pedals
Connecting the pads
Connecting the power adapter
12V
DC IN
Connecting USB devices
Connecting audio devices
Installation and starting up
e-drum module
8

Connect your stereo headphones to the [HEADPHONE] output on the front panel of
the drum module.
Connecting headphones
Installation and starting up
MPS-1000
9

5 Connections and controls
15
16
14
12
10
13
11
9
7 8
6
5
4
3
21
17
1[MASTER VOLUME]
Rotary control for adjusting the Line out volume
2[HEADPHONE VOLUME]
Rotary control for adjusting the headphones output volume
3/
Buttons to scroll forward and backward through the open menu
4 Backlit display
5[ENTER]
Enter button to conrm a selection or change
6[EXIT]
Return key to exit a menu or to discard changes
PLAYBACK CONTROL
7[EDIT]
Button to open the ‘EDIT’ menu
8[SETUP]
Button to open the ‘SETUP’ menu
9[TEMPO]
Button to adjust the metronome tempo and thus the tempo for recording and playback
Control panel
Connections and controls
e-drum module
10

10
Button to turn the metronome on and o
11
Button to start recording
12 /
Button for starting and stopping the playback of songs and for ending a recording, in the ‘EDIT’ and ‘SETUP’ -‘ADVANCE’
menu for previewing the currently set sound
13
Button to jump to the previous song, in ‘EDIT’ and ‘SETUP’ -‘ADVANCE’ menu to jump to the previous trigger
14
Button to jump to the next song, in ‘EDIT’ and ‘SETUP’ -‘ADVANCE’ menu to jump to the next trigger
KIT/VALUE CHANGE
15 Rotary control
Increases or decreases the value of the currently selected parameter
16 [–] | [+]
Buttons to increase or decrease the currently displayed value. Press both buttons simultaneously to reset the displayed
value to the value before the change.
17 [VOLUME MIXER]
Volume fader for the respective drum pads
Connections and controls
MPS-1000
11

20
19
21
22 23 24
25
26
27 28
29
18
18 [HEADPHONE]
Headphone output, designed as a 3.5 mm or 6.35 mm jack socket (stereo)
19 [TRIGGER INPUT] - [CONNECTOR]
Socket for the D-Sub multi-trigger plug (25-pin)
20 [TRIGGER INPUT] - [CRASH2]
Connection for Crash2 cymbal pad
21 [TRIGGER INPUT] - [EXT]
Connection for external trigger, display as ‘EXT’ , the trigger type is set in the ‘SETUP’ -‘ADVANCE’ menu
22 [MIDI]
Connection for USB-MIDI B, for rmware updates, for playing, for recording via MIDI and for using plugins for more
sounds on the computer
23 [MEMORY]
Connection for USB storage medium, for loading user samples or for updating the sound bank. The content of the USB
storage medium is checked when the drum module is switched on. Remove the USB storage medium before switching
on to avoid updating the sound bank.
24 [LINE IN]
Input socket (3.5 mm) for connecting audio devices. An additional plug-plug cable is required to connect audio sources
like tablets, smartphones or computers.
25 [LINE OUT] / [L/MONO] / [R]
Output socket to connect an amplier or active monitor (mono left, stereo left/right)
26 [DIRECT OUT] / [1] … [8]
Each balanced output has its own drum sound. The following sounds are assigned by default:
[1] [2] [3] [4] [5] [6] [7] [8]
Kick Snare Ride Hi-hat Tom L Tom R Crash L Crash R
Front and rear panel
Connections and controls
e-drum module
12

27 [DC IN]
Connection socket for the power adapter
28 [POWER]
Main switch to turn the device on and o
29 Cable holder for securing the power cable to protect against unintentional disconnection
Connections and controls
MPS-1000
13

6 Operating
The labelling of the display is described in English in these instructions. To
change the language, proceed as described under
Ä
Chapter 6.3 ‘ ‘SETUP’
menu’ on page 19.
Check all cable connections for correct t before turning on
Before switching on, turn both volume controls of the drum module down
to minimum.
Use the main switch [POWER] on the rear panel to switch the drum module on.
The device automatically switches to standby mode if you do not press any of the
buttons or hit any of the connected pads during the set interval (see
Ä
Chapter 6.3
‘ ‘SETUP’ menu’ on page 19). Then press the main switch [POWER] to turn the device
back on again.
6.1 ‘KIT’ menu
After powering on the drum module, the display shows the following:
1 Main menu
2 Kit number
3 Kit name
4 Tempo
5 Time signature
6 Song status
A drum kit is a compilation in which a certain sound and several sound parameters
are assigned to each trigger. Selecting dierent drum kits lets you customise the
sound of your e-drum sets in seconds to the desired music genre.
Use the rotary control or [–] | [+] to select the desired drum kit ( ‘01’ … ‘80’ ).
As standard, the user kits ( ‘41’ … ‘80’ ) are copies of the preset kits ( ‘01’ … ‘40’ ).
Powering on
Standby function
%&
# $
'
Selecting a drum kit
Operating
e-drum module
14

7 Pad volume
Use the faders in the [VOLUME MIXER] zone to adjust the volume of each indi‐
vidual pad.
The volume set with the faders is not saved for the respective drum kit.
1. Press [TEMPO].
ðThe tempo value in the lower right corner of the display appears in red.
2. Change the tempo with the rotary control or with [–] | [+] or press [TEMPO]
repeatedly until the desired tempo is reached.
3. Wait a few seconds without making any further changes or press [EXIT] to exit
the menu.
1. Press to turn the Metronome on.
ðThe metronome clicks at the set tempo. Tempo and time signature are
shown in the lower right corner of the display.
When a song is playing or paused, the display shows the tempo and time
signature of the current song.
2. Wait a few seconds or press [EXIT] to exit the menu.
ðThe display now shows the standard values for tempo and time signature
again, which you can set in the ‘SETUP’ menu.
3. Press to turn the Metronome o.
The drum module oers the possibility of recording up to 15 of your own songs.
1. Press to activate the recording mode.
ðThe display shows ‘STANDBY’ at the bottom left.
2. Set the tempo and press to start recording
or press / to record the current song. The set tempo is applied
or hit any pad to start recording straight away.
ðIf you do not start recording by hitting a pad, countdown beats will sound.
Changing pad volume
(
Changing the tempo
Turning the metronome on and o
Recording function
Operating
MPS-1000
15

3. Use [EXIT], or / to stop the recording.
4. Use the rotary control or [–] | [+] to specify a memory location. Existing data
will be overwritten.
5. Conrm with [ENTER] or cancel saving with [EXIT].
1. Use | to select a song.
ðThe standard values for tempo and time signature are read out and trans‐
ferred to the metronome.
2. Switch between songs to change back to the standard tempo value.
3. Use / to start or pause a song.
6.2 ‘EDIT’ menu
The pre-programmed sounds of the drum module can be freely programmed to the
connected pads, i.e. you can create your own drum kits and save them in the device.
1 Main menu
2 Parameter
3 Trigger
4 Values
5 Scroll bar
1. Select one of the available drum kits and use [EDIT] to switch to Edit mode.
2. Hit the trigger whose sound you want to edit, or select it with | .
ðThe display shows the corresponding name at the bottom right.
3. Press / to view the values for the set sound.
4. Use / to select a parameter.
ðThe selected parameter appears in red.
5. Change the value with the rotary control or with [–] | [+].
Playing songs
Customising a drum kit
$%
#
&
Operating
e-drum module
16

6. Press [–] | [+] simultaneously to restore the value set before the change.
7. Some parameters have submenus. In this case, is displayed to the right of
the value. Press [ENTER] to switch to the submenu.
ðDetails on the respective parameter are displayed.
8. Press [EXIT] to exit the menu.
ðA dialogue appears on the display.
9. Use the rotary control or [–] | [+] to select the target kit and conrm with
[ENTER] to save the changes. Or press [EXIT] to exit the menu without changes.
The following parameters can be changed with the rotary control or with [–] | [+]:
Parameter Values included values
Parameters for the individual triggers
‘GROUP’ ‘Kick’ Bassdrum
‘Snare’ Snare head, Snare rim, Cross stick
‘Tom’ Tom head, Tom rim
‘Ride’ Ride bow, Ride bell, Ride edge
‘Crash’ Crash bow, Crash edge
‘Hi-hat’ Hi-hat open, closed, half-open, pedal chick, pedal splash
‘Perc’ More percussions and FX sound
‘Loop’ Melody section (if a loop is assigned to a trigger, 4 bars of the melody are played
automatically when a trigger is struck, all loops are synchronized)
‘O’No sound
‘User Sample’ Loaded samples
‘VOICE’ Voice selection, see
Ä
Chapter 11.3 ‘Voice list’ on page 36
‘VOLUME’ Volume setting
‘PITCH’ Adjusting pitch in semitones
Parameters for the individual drum pads
‘PAN’ Position within the stereo signal (panorama right / left)
‘PAD FX SEND’ Adjusting the eect strength of the pad
Parameters for the entire kit that cannot be set for each individual trigger and pad
‘KIT FX PRESET’ Selecting eect preset Some names are abbreviated. Press [ENTER] to view details.
‘KIT FX LEVEL’ Setting eect strength
‘KIT FX TIME’ Setting eect duration
The following table shows ‘FX LEVEL’ and ‘FX TIME’ for each ‘FX PRESET’ :
Operating
MPS-1000
17

FX PRESET FX LEVEL FX TIME
None None None
Room Bright Reverb volume Reverb time
Room standard Reverb volume Reverb time
Room Damp Reverb volume Reverb time
Hall Bright Reverb volume Reverb time
Hall Standard Reverb volume Reverb time
Hall Damp Reverb volume Reverb time
Plate Bright Reverb volume Reverb time
Standard Plate Reverb volume Reverb time
Chorus+Reverb Reverb+Chorus volume Reverb time
Tremolo Reverb Reverb volume + Tremolo depth Reverb time + Tremolo rate
Chorus Chorus volume Chorus rate
Chorus+Room Reverb+Chorus volume Reverb time
Chorus+Hall Reverb+Chorus volume Reverb time
Chorus+Plate Reverb+Chorus volume Reverb time
Flanger Flanger volume Flanger rate
Flanger+Reverb1 Reverb+Flanger volume Reverb time
Flanger+Reverb2 Reverb+Flanger volume Flanger rate
Delay Delay volume Delay time
Delay (feedback) Delay volume Delay time
Panning Delay Delay volume Delay time
Panning Delay (feedback) Delay volume Delay time
Chorus+Delay Chorus+Delay volume Delay time
Chorus+Delay (feedback) Chorus+Delay volume Delay time
Operating
e-drum module
18

6.3 ‘SETUP’ menu
Various device settings can be customised in the Setup menu. The parameters set
here aect the entire drum module and cannot be changed by changing the drum
kit.
1 Main menu
2 Parameter
3 Values
4 Scroll bar
1. Press [SETUP] to enter the menu.
2. Use / to select the desired parameter.
ðThe selected parameter appears in red.
3. Change the value with the rotary control or with [–] | [+].
4. Press [–] | [+] simultaneously to restore the value set before the change.
5. Some parameters have submenus. In this case, is displayed to the right of
the value. Press [ENTER] to switch to the submenu
ðDetails on the respective parameter are displayed.
6. Press [EXIT] to exit the menu.
ðA dialogue appears on the display.
7. Press [ENTER] to save the changes or press [EXIT] to exit the menu without
making any changes.
The following parameters can be changed with the rotary control or with [–] | [+]:
Parameter Function
‘BACK VOLUME’ Song volume preset
‘CH.MUTE’ Mutes some parts of the song.
‘O’No muting
‘Accomp’ Mutes parts other than the drums in the song.
‘Drum’ Mutes the drums in the song.
‘PLAY MODE’ Playback mode for songs
‘PlayOne’ A single song is played once
‘PlayAll’ All songs are played once
$
#
%
Operating
MPS-1000
19

Parameter Function
‘RepeatOne’ A single song is played in a loop
‘RepeatAll’ All songs are played in a loop
‘METRONOME’ ‘SWITCH’ Switching the metronome on and o ( ‘On’ / ‘O’)
‘VOLUME’ Metronome volume
‘TEMPO’ Number of beats per minute
‘SOUND’ Click sound
‘TIME SIGNATURE’ Metronome time signature
‘ASSIGN’ ‘All’ Metronome audibly in the master (Line Out) and head‐
phones
‘Master’ Metronome only audible in the master (line out)
‘Headphone’ Metronome only audible in headphones
‘AUTO POWEROFF’ Shows the minutes after which the drum module switches o automatically if there is no more action.
‘NIGHT MODE’ ‘O’All LEDs light up if necessary
‘On’ All LEDs are always on for better visibility in the dark
‘LANGUAGE’ Selection of the display language, change must be conrmed when exiting the menu
‘STANDBY’ ‘o’/ ‘5min’ / ‘10min’ / ‘30min’ / ‘60min’
Setting the time after which the drum module turns to standby mode.
‘RESET’ Reset to factory defaults. Use the rotary control or [–] | [+] to select the values to be reset.
‘Kits’ All parameters in the ‘EDIT’ menu
‘Setup’ All parameters in the ‘SETUP’ menu incl. XTalk
‘Xtalk’ Setting all XTalk values to minimum (not default value)
‘Songs’ All User songs
‘All’ Entire drum module
Press [ENTER] and conrm with [ENTER] in the following dialogue to conrm the resetting of the selected
values or press [EXIT] to cancel the process.
Operating
e-drum module
20
Other manuals for Millenium MPS-1000
1
Table of contents
Other thomann Music Equipment manuals

thomann
thomann Harley Benton HBW-150 User manual

thomann
thomann Harley Benton PowerPlant Tuner Junior User manual

thomann
thomann Mellenium MPS-600 User manual

thomann
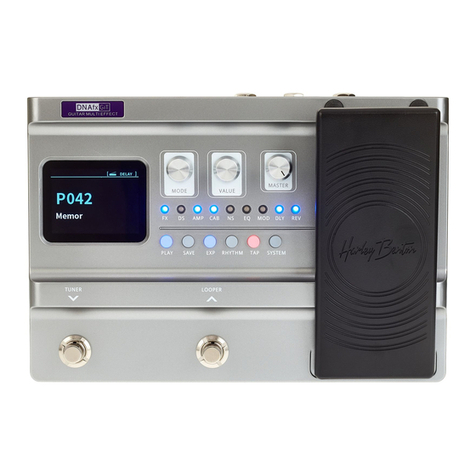
thomann Harley Benton DNAfx GiT User manual

thomann
thomann Millenium RW500 User manual

thomann
thomann Harley Benton Bass Guitar Kit J-Style User manual

thomann
thomann millenium mps-750 User manual

thomann
thomann Millenium MPS-200 User manual

thomann
thomann Harley Benton Bass Guitar Kit P-Style User manual

thomann
thomann Harley Benton D-SEED User manual