manuals.online logo
Brands
  1. Home
  2. •
  3. Brands
  4. •
  5. THOMSON
  6. •
  7. Headphones
  8. •
  9. THOMSON WHP 562 User manual

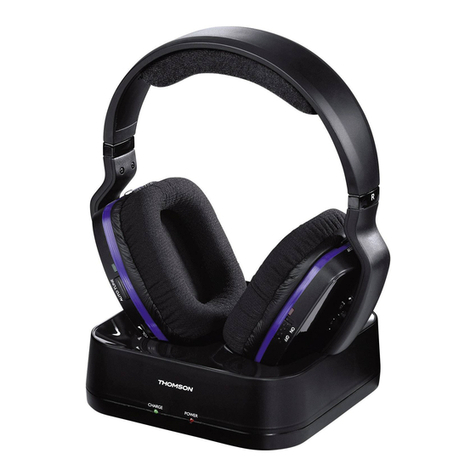
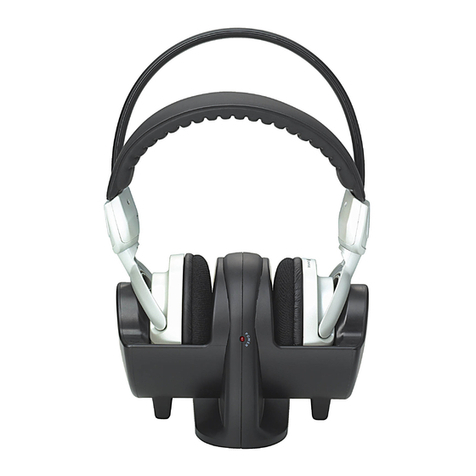
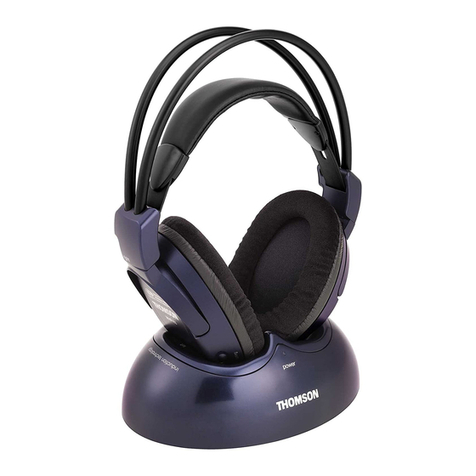
THOMSON WHP 562 User manual

1 2 4
24H
5
DC IN 12V L RAUDIO CHANNEL
1 2 3
230V~50Hz
UK
EU
DC IN 12V
3
THOMSON Multimedia Sales Europe
46, quai A. Le Gallo
92648 Boulogne Cedex
FRANCE
322 019 464 RCS NANTERRE
http://www.thomson-europe.com
35901080 © CopyrightTHOMSON 2005
WHP562
Sit the headphones in the cradle, making sure the
charging contacts on the headphone mate with the
cradle contacts (headphones fully pushed towards
the rear). Check that the Red charging light on the
cradle comes on. Leave the headphones to charge
for 24 hours.
Placez le casque sur la base en prenant soin de
placer les contacts de charge du casque sur les
contacts de la base (casque en butée vers l’arrière).
Vérifiez alors que le témoin de charge Rouge de la
base soit allumé. Laissez le casque en charge
pendant 24 heures.
Legen Sie den Kopfhörer auf den Sockel und beachten
Sie dabei, dass die Ladekontakte des Kopfhörers auf
den Kontakten des Sockels liegen (Kopfhörer nach
hinten eingerastet). Überprüfen Sie nun,dass die rote
Ladekontrolllampe des Sockels leuchtet. Lassen Sie
den Kopfhörer 24 Stunden lang aufladen.
Sistemare la cuffia sulla base facendo attenzione
a collocare i sensori di contatto della cuffia sui
sensori di contatto della base (cuffia a finecorsa
verso la parte posteriore).Verificare quindi che la
spia rossa della base sia accesa. Lasciare la cuffia
sotto carica per 24 ore.
Coloque los auriculares sobre la base con cuidado
de situar los contactos de carga de los auriculares
sobre los contactos de la base (auriculares apoyados
en la parte posterior). Compruebe que se enciende
el indicador rojo de carga situado en la base. Deje
los auriculares cargándose durante 24 horas.
Plaats de koptelefoon op het basisstation. Let daarbij
op dat u de contacten voor het opladen van de
koptelefoon op de contacten van het basisstation
plaatst (koptelefoon raakt de achterkant).Controleer
dan dat de rode indicator van het basisstation brandt.
Laat de koptelefoon 24 uur lang opladen.
Coloque os auscultadores na base, tendo o cuidado
de colocar os contactos de carga dos auscultadores
sobre os contactos da base (inclinado para trás).
Verifique se o indicador de carga vermelho da
base fica aceso. Deixe os auscultadores carregar
durante 24 horas.
GB
F
D
I
E
NL
P
Open the rechargeable battery compartment and
insert two AAA type rechargeable batteries,
making sure their positive and negative (+and –)
poles are correctly aligned.
Ouvrez le compartiment des piles rechargeables et
placez-y 2 piles rechargeables de type AAA en
respectant les polarités (+et -).
Öffnen Sie das Fach für die aufladbaren Akkus, und
legen Sie dort 2 aufladbare Akkus vom Typ AAA
ein, wobei Sie bitte auf die Pole (+und -) achten.
Aprire lo scomparto delle pile ricaricabili e
introdurre due pile ricaricabili di tipo AAA
rispettando le polarità (+e -).
Abra el compartimiento de las pilas recargables y
coloque 2 pilas recargables de tipo AAA
respetando las polaridades (+y -).
Open het compartiment voor de herlaadbare
batterijen en plaats er 2 herlaadbare batterijen van
het type AAA in waarbij u rekening houdt met de
polariteiten (+en -).
Abra o compartimento das pilhas recarregáveis e
coloque 2 pilhas recarregáveis de tipo AAA,
respeitando as polaridades (+e -).
GB
F
D
I
E
NL
P
Close the rechargeable battery compartment.
Refermez le compartiment des piles
rechargeables.
Schließen Sie das Fach für die wieder aufladbaren
Akkus.
Richiudere lo scomparto delle pile ricaricabili.
Vuelva a cerrar el compartimiento de las pilas
recargables.
Sluit het compartiment voor de herlaadbare
batterijen weer.
Feche o compartimento das pilhas recarregáveis.
GB
F
D
I
E
NL
P
Connect the plug on the AC/DC mains adapter
cable to the DC IN socket at the back of the cradle
then plug the adapter into a 230V~50Hz mains wall
outlet.
Branchez la fiche de l’adaptateur secteur AC/DC
dans la prise DC IN à l’arrière de la base puis
branchez l’adaptateur dans une prise secteur
murale de 230 V~50 Hz.
Stecken Sie den Stecker des AC/DC-Netzadapters
in die Buchse DC IN hinten am Sockel ein, und
schließen Sie den Adapter dann an einer
Wandsteckdose von 230 V und 50 Hz an.
Inserire la spina dell'adattatore di rete AC/DC nella
presa DC IN situata sulla parte posteriore della
base e collegare l'adattatore alla presa a muro da
230 V~50 Hz.
Conecte el pequeño enchufe del adaptador de
corriente eléctrica CA/CC en la toma DC IN
situada en la parte trasera de la base y, a
continuación, conecte el adaptador a una toma de
corriente de pared de 230V~50 Hz.
Steek de stekker van de netadapter AC/DC in het
DC IN contact aan de achterkant van het
basisstation en sluit de adapter dan aan op een
wandcontactdoos van 230 V~50 Hz.
Ligue a ficha do transformador AC/DC à tomada
DC IN na parte posterior da base, depois ligue o
transformador a uma tomada de parede de
230V~50 Hz.
GB
F
D
I
E
NL
P
The Green running light comes on and confirms
electrical power is reaching the cradle.
Le témoin Ver t de fonctionnement s’allume et vous
confirme que la base est alimentée.
Die grüne Funktionskontrolllampe leuchtet auf und
bestätigt Ihnen, dass der Sockel mit Strom versorgt
wird.
La spia verde di funzionamento si accende e vi
conferma che la base è alimentata.
El indicador verde de funcionamiento se encenderá
confirmando que la base recibe alimentación.
De groene indicator van het onder spanning
brengen gaat branden en geeft u daarmee aan dat
het basisstation van elektriciteit wordt voorzien.
O indicador verde de funcionamento acende-se,
confirmando que a base está a ser alimentada.
GB
F
D
I
E
NL
P
If the volume is too low, the cradle switches off after 2 minutes of use.This is to comply with the current legislation on reduce the
amount of radio emissions in the environment.Therefore, to ensure that this function is not accidentally triggered, we suggest that
you set the television, audio amplifier or DVD/CD player headphone volume level at approximately half way (50%). Please consult
your equipments user manual for details on how to set the head / earphones volume level.
Pour un fonctionnement correct assurez-vous que le volume sonore de la source (prise casque) soit suffisant. Réglez-le par exemple
à la moitié du volume. Avec certains appareils, vous devrez ajuster le volume de la prise casque par l’intermédiaire du menu de
configuration. Si le volume est trop faible, la base se coupera après 2 minutes d’utilisation.Ceci afin d’être en accord avec la législation
en vigueur sur la réduction des émissions radios.
Für eine ordnungsgemäße Funktion vergewissern Sie sich bitte, dass die Lautstärke der Tonquelle (Anschluss für Kopfhörer) ausreicht.
Stellen Sie sie z.B. auf die Hälfte ein. Bei einigen Geräten (z.B.TV) muß die Lautstärke des Kopfhöreranschlusses über das
Konfigurationsmenü eingestellt werden.Wenn die Lautstärke zu schwach ist,schaltet sich der Sockel nach etwa 2 Minuten Einsatz aus. Diese
automatische Abschaltung hat den Zweck,gemäß den der EMV-Vorschriften eine unnötige Belegung der Sendefrequenzen zu vermeiden.
Per un corretto funzionamento, verificate che il volume sonoro della sorgente (presa cuffia) sia sufficiente. Regolare, ad esempio, alla
metà del volume. Con alcuni apparecchi, si dovrà regolare il volume della presa cuffia mediante il menu di configurazione.Se il volume
è troppo debole, la base si spegne dopo 2 minuti di utilizzazione.Tale funzionamento automatico è del tutto normale ed ha lo scopo
di evitare un’occupazione inutile delle frequenze di emissione.
Para un funcionamiento correcto, cerciórese de que el volumen acústico de la fuente (toma de los auriculares) sea suficiente,
ajustándolo por ejemplo a medio volumen.En algunos aparatos deberá ajustarse el volumen de la toma de auriculares por medio del
menú de configuración. Si el volumen es demasiado bajo, la base se cortará después de 2 minutos de utilización. Este funcionamiento
es conforme con la legislación vigente relativa a la reducción de emisiones de radio.
Voor een correcte werking kijkt u na of het geluidsvolume van de bron (aansluiting koptelefoon) voldoende is. Stel de knop,
bijvoorbeeld, in op de helft van het volume.Voor sommige toestellen regelt u het volume van de koptelefoon met behulp van het
configuratiemenu. Indien het volume te zwak is,zal het basisstation uitgaan na een gebruik van 2 minuten. Deze automatische functie
is volstrekt normaal en moet voorkomen dat zendfrequenties onnodig bezet worden.
Para um funcionamento correcto,verifique que o volume sonoro da fonte (tomada do auscultador) é suficiente.Ajuste-o,por exemplo,
na metade do volume.Em certos aparelhos, o volume da tomada de auscultadores deve ser ajustado através do menu de configuração.
Se o volume for excessivamente fraco,a base desliga-se após 2 minutos de utilização.Este funcionamento automático é perfeitamente
normal e tem por finalidade evitar a ocupação inútil das frequências de emissão.
GB
F
D
I
E
NL
P
WHP562_GBFDIENLP.qxd 15/03/05 17:07 Page 1
DCIN 12V L RAUDIO CHANNEL
1 2 3
8
x1
10
6
DCIN 12V L RAUDIO CHANNEL
1 2 3
AUDIO/VIDEO
L RAUDIO
97
GB
F
D
I
E
NL
P
Sit the headphones firmly in the cradle, pushing
them back so the charging contacts on the
headphone mate with the cradle contacts.
En fin d'utilisation, éteignez le casque et replacez-le
sur sa base de façon à recharger les piles
rechargeables.
Schalten Sie den Kopfhörer nach dem Gebrauch aus
und legen ihn wieder auf den Sockel, sodass die
wiederaufladbaren Akkus erneut aufgeladen werden.
Alla fine dell'utilizzo, spegnere la cuffia e collocarla
sulla sua base in modo da ricaricare le pile
ricaricabili.
Al final de la utilización, apague los auriculares y
colóquelos en la base para que vuelvan a cargarse
las pilas recargables.
Na het gebruik zet u de koptelefoon uit en plaatst
u hem op het basisstation zodat de herlaadbare
batterijen weer worden opgeladen.
Quando terminar a utilização, desligue os
auscultadores e recoloque-o sobre a base, de forma
a carregar as pilhas recarregáveis.
GB
F
D
I
E
NL
P
Connect the Land Raudio inputs on the cradle to
the headphone socket of an audio appliance
(amplifier or other device). Use a 6.35mm/3.5mm
adapter jack if necessary. Switch on the audio
appliance and adjust its volume to approximately
one quarter of its maximum setting.
Branchez les entrées Audio Let Rde la base à la
sortie casque d'un appareil Audio (amplificateur ou
autre). Eventuellement utilisez l'adaptateur 6,35/3,5
mm. Mettez en marche l'appareil et réglez son
volume approximativement au quart de la puissance
maximum.
Verbinden Sie die Audio-Eingänge Lund Rdes
Sockels mit der Ausgangsbuchse für Kopfhörer
eines Audio-Geräts (z. B.Verstärker).Verwenden Sie
eventuell denAdapter 6,35/3,5 mm. Schalten Sie das
Gerät ein und stellen die Lautstärke auf etwa ein
Viertel der Höchstleistung ein.
Collegare gli ingressi audio Le Rdella base all'uscita
cuffia di un apparecchio audio (amplificatore o
altro). Eventualmente utilizzare l'adattatore 6,35/3,5
mm. Mettere in funzione l'apparecchio e regolare il
volume approssimativamente ad un quarto della sua
potenza massima.
Conecte las entradas de audio Ly Rde la base a la
salida de auriculares de un aparato con salida de
audio (un amplificador u otro dispositivo). Si es
necesario, utilice el adaptador 6,35/3,5 mm.Encienda
el aparato y ajuste su volumen aproximadamente a
un cuarto de la potencia máxima.
Sluit de Audio-ingangen Len Rvan het basisstation
aan op koptelefoonuitgang van een Audioapparaat
(versterker of ander). Gebruik eventueel de
6,35/3,5 mm adapter. Stel het apparaat in werking
en stel het volume af op ongeveer een kwart van
het maximale vermogen.
Ligue as entradas Áudio Le Rda base à saída de
auscultador de um aparelho de Áudio (amplificador
ou outro). Eventualmente, utilize o adaptador de
6,35/3,5 mm. Coloque o aparelho em
funcionamento e regule o volume aproximadamente
para um quarto da potência máxima.
GB
F
D
I
E
NL
P
Your WHP562 unit is a wireless Stereophonic Headphone set that uses 863 Mhz radio frequency
transmissions to link the transmitter and headphones. It incorporates PLL (Phase Lock Loop) technology
enabling a constant reception without interferences.
Votre WHP562 est un Casque Stéréophonique sans fil, à transmission Radio-Fréquences (863 Mhz).Il intègre
la technologie PLL (Phase Lock Loop) pour une réception constante sans parasite.
Ihr WHP562 ist ein schnurloser Stereo-Funk-Kopfhörer (Frequenz 863 Mhz). Es integriert die PLL-
Technologie (Phase Lock Loop) für einen konstanten störungsfreien Empfang.
La vostra WHP562 è una Cuffia Stereofonica senza fili, con trasmissione a Radio-Frequenza (863 Mhz).
Integra la tecnologia PLL (Phase Lock Loop) per una ricezione costante senza interferenze.
El modelo WHP562 corresponde a auriculares estereofónicos inalámbricos, con transmisión de
radiofrecuencias (863 Mhz). Integra la tecnología PLL (Phase Lock Loop) para una recepción constante sin
interferencias.
Uw WHP562 is een draadloze Stereofonische Koptelefoon via Radio-Frequenties (863 Mhz). De
geïntegreerde PLL-technologie (Phase Lock Loop) waarborgt een constante ontvangst zonder ruis.
O seu WHP562 é um Auscultador Estereofónico sem fio, com transmissão Rádio-Frequências (863 Mhz).
Integra a tecnologia PLL (Phase Lock Loop) para uma recepção constante sem parasita.
Switch on the heaphones and make sure the red
running light comes on; this confirms that the
rechargeable batteries contain power. Turn the
volume adjustment thumbwheel to the half-way
position.
Mettez le casque en marche et vérifiez que le
témoin rouge de fonctionnement soit allumé, il
confirme que les piles rechargeables sont
chargées. Positionnez la molette de réglage du
volume sonore à mi-course.
Schalten Sie den Kopfhörer ein und vergewissern Sie
sich, dass die rote Funktionskontrolllampe leuchtet:
Sie bestätigt, dass die aufladbaren Akkus geladen sind.
Drehen Sie das Einstellrädchen für die Lautstärke auf
mittlere Stärke.
Indossare la cuffia in funzione e verificare che la
spia rossa di funzionamento sia accesa, il che
conferma che le pile ricaricabili sono cariche.
Posizionare la manopola di regolazione del volume
a metà corsa.
Encienda los auriculares y compruebe que el
indicador rojo de funcionamiento está encendido,
dicho indicador confirma que las pilas recargables
están cargadas. Gire el botón de ajuste del volumen
hasta la mitad del recorrido.
Stel de koptelefoon in werking en controleer dat de
rode indicator van het onder spanning brengen
brandt, dit geeft aan dat de herlaadbare batterijen
zijn opgeladen. Zet nu de afstelknop voor het
geluidsvolume op de helft.
Coloque os auscultadores em funcionamento e
verifique se o indicador vermelho de
funcionamento se ilumina, confirmando que as
pilhas recarregáveis estão carregadas. Posicione o
selector de volume sonoro em metade do curso.
GB
F
D
I
E
NL
P
Adjust headphone reception by pressing the fine
tuning button once. If the sound is poor, change to
a different channel on the cradle and press the fine
tuning button once more.
Réglez la réception du casque en appuyant une fois
sur la touche d’accord. Si le son n’est pas bon,
changer de canal sur la base et appuyez de nouveau
sur la touche d’accord.
Regeln Sie den Empfang des Kopfhörers, indem Sie
ein Mal auf die Bestätigungstaste drücken.Wenn Sie
mit dem Ton nicht zufrieden sind, wechseln Sie auf
dem Sockel den Kanal und drücken erneut auf die
Bestätigungstaste.
Regolare la ricezione della cuffia premendo una
volta il pulsante di sintonia fine. Se il suono non è
buono, cambiare il canale sulla base e premere di
nuovo il pulsante di sintonia fine.
Ajuste la recepción de los auriculares pulsando una
vez sobre el botón de sintonización. Si el sonido no
es bueno, cambie de canal en la base y vuelva a
pulsar el botón de sintonización.
Stel de ontvangst van de koptelefoon af door
eenmaal op de knop 'tuning' te drukken. Als het
geluid niet goed is, wijzig dan het kanaal op het
basisstation en druk opnieuw op de knop 'tuning'.
Regule a recepção dos auscultadores apoiando uma
vez sobre a tecla de sintonia. Se o som não estiver
bem, mude de canal na base e prima de novo a tecla
de sintonia.
GB
F
D
I
E
NL
P
Turn the volume down on the headphones before
putting them on your head; once you are wearing
them, adjust the volume to suit.
Diminuez le volume sonore du casque avant de le
placer sur votre tête puis réajustez-le.
Verringern Sie die Tonstärke des Kopfhörers, bevor
Sie ihn aufsetzen, und justieren Sie ihn dann erneut.
Diminuire il volume della cuffia prima di indossarla
e riaggiustarlo successivamente.
Baje el volumen de los auriculares antes de
ponérselos en la cabeza y, a continuación, vuelva a
ajustar el volumen.
Verminder het geluidsvolume van de koptelefoon
voordat u hem op uw hoofd plaatst en stel het dan bij.
Diminua o volume de som dos auscultadores antes
de os colocar na cabeça, após o que pode reajustar
o volume.
GB
F
D
I
E
NL
P
Features
Cradle
Power supply:12 V (DC)
via a 230V - 50 Hz (AC) mains power supply adaptor
Transmission frequency: UHF - 3 channels:
864.30 MHz (1), 863.70 MHz (2) and 863.10 MHz (3)
Range: 100 metres in the open air
Headset
Power supply:Two AAA type 1.2V rechargeable batteries
If you encounter difficulties, advisors are at your disposal to help you solve
your problems at this telephone number.
Principales caractéristiques
Base
Alimentation : 12V continu (DC) via une alimentation secteur
230V - 50 Hz (AC)
Fréquence d’émission : UHF - 3 canaux : 864,30 MHz (1), 863,70 MHz
(2) et 863,10 MHz (3)
Portée : 100 mètres en champ libre
Casque
Alimentation : 2 piles rechargeablesAAA de 1,2 Volts.
Si vous rencontrez des difficultés, un numéro de téléphone est à votre
disposition où des conseillers vous aideront à résoudre vos difficultés.
Technische Daten
Sockel
Stromversorgung: 12 V Gleichstrom (DC) über eine Netzsteckdose
230V - 50 Hz (AC)
Sendefrequenz: UHF - 3 Kanäle:
864,30 MHz (1), 863,70 MHz (2) und 863,10 MHz (3)
Reichweite: 100 Meter im Freien
Kopfhörer
Stromversorgung: 2 wieder aufladbare 1,2-Volt-AAA-Akkus
Wenn Sie auf Schwierigkeiten stoßen: Eine Telefonnummer steht Ihnen zur
Verfügung, unter der technische Berater Ihnen helfen, Ihre Probleme zu lösen.
Principali caratteristiche
Base
Alimentazione: 12 V continua (DC) via un’alimentazione rete elettrica
230V - 50 Hz (AC)
Frequenza d’emissione: UHF - 3 canali:
864,30 MHz (1), 863,70 MHz (2) e 863,10 MHz (3)
Copertura: 100 metri in campo aperto
Cuffia
Alimentazione: 2 pile ricaricabili AAA da 1,2Volt
In caso di difficoltà: È disponibile un numero di telefono mediante il quale è
possibile mettersi in contatto con dei tecnici in grado di aiutare l’utente a
risolvere le difficoltà incontrate.
Características Principales
Base
Alimentación: 12 V continua (CC)
vía una alimentación de red 230V - 50 Hz (CA)
Frecuencia de emisión: UHF - 3 canales:
864,30 MHz (1), 863,70 MHz (2) y 863,10 MHz (3)
Alcance: 100 metros de campo abierto
Auriculares
Alimentación: 2 pilas recargablesAAA de 1,2 Voltios
Si tiene dificultades: Está a su disposición un número de teléfono en el cual
unos técnicos le ayudarán a resolver sus dificultades. (linea de ayuda).
Voornaamste technische gegevens
Basisstation
Voeding: 12 V gelijkstroom (DC)
via het elektriciteitsnet 230V – 50 Hz (AC)
Zendfrequentie: UHF - 3 kanalen:
864,30 MHz (1), 863,70 MHz (2) en 863,10 MHz (3)
Reikwijdte: 100 meter op een open terrein
Koptelefoon
Voeding: 2 herlaadbareAAA-batterijen van 1,2 Volt
Principais características
Base
Alimentação: 12 V contínuo (DC)
via uma alimentação do sector 230V - 50 Hz (AC)
Frequência de emissão: UHF - 3 canais:
864,30 MHz (1), 863,70 MHz (2) e 863,10 MHz (3)
Alcance: 100 metros em campo livre
Auscultador
Alimentação: 2 pilhas recarregáveis AAA de 1,2Volts
GB
F
D
I
E
NL
P
PLL
WHP562(A) / epheme - rst / 02-2005
WHP562_GBFDIENLP.qxd 15/03/05 17:07 Page 2

Other THOMSON Headphones manuals

THOMSON WHP2659 User manual

THOMSON

THOMSON WHP2659 User manual

THOMSON WHP5305BK User manual

THOMSON

THOMSON WHP5305BK User manual

THOMSON hed2303 User manual

THOMSON

THOMSON hed2303 User manual

THOMSON WHP 360RU User manual

THOMSON

THOMSON WHP 360RU User manual

THOMSON EAR3005W User manual

THOMSON

THOMSON EAR3005W User manual

THOMSON WHP 990 User manual

THOMSON

THOMSON WHP 990 User manual

THOMSON WEAR7009 User manual

THOMSON

THOMSON WEAR7009 User manual

THOMSON WEAR7208 User manual

THOMSON

THOMSON WEAR7208 User manual

THOMSON WHP8650 User manual

THOMSON

THOMSON WHP8650 User manual

THOMSON WHP8650 User manual

THOMSON

THOMSON WHP8650 User manual

THOMSON WHP140 RF8398 User manual

THOMSON

THOMSON WHP140 RF8398 User manual

THOMSON WEAR7811 User manual

THOMSON

THOMSON WEAR7811 User manual

THOMSON WHP3569 THOMPSON User manual

THOMSON

THOMSON WHP3569 THOMPSON User manual

THOMSON WEAR8500BT User manual

THOMSON

THOMSON WEAR8500BT User manual

THOMSON WHP5327 User manual

THOMSON

THOMSON WHP5327 User manual

THOMSON WHP8650 User manual

THOMSON

THOMSON WHP8650 User manual

THOMSON WHP 565 User manual
THOMSON

THOMSON WHP 565 User manual

THOMSON WEAR7208GR User manual

THOMSON

THOMSON WEAR7208GR User manual

THOMSON WHP5509 User manual

THOMSON

THOMSON WHP5509 User manual

THOMSON WHP3311W THOMPSON User manual

THOMSON

THOMSON WHP3311W THOMPSON User manual

THOMSON WHP3311BK User manual

THOMSON

THOMSON WHP3311BK User manual

THOMSON WEAR 6206 BT User manual

THOMSON

THOMSON WEAR 6206 BT User manual

THOMSON WHP6011BT User manual

THOMSON

THOMSON WHP6011BT User manual

THOMSON WHP 265 User manual

THOMSON

THOMSON WHP 265 User manual

Popular Headphones manuals by other brands

AQL BOOST user manual

AQL

AQL BOOST user manual

ENACFIRE E18 Plus user manual

ENACFIRE

ENACFIRE E18 Plus user manual

Chisana C1L user guide

Chisana

Chisana C1L user guide

Turtle Beach Ear Force X3 operating instructions

Turtle Beach

Turtle Beach Ear Force X3 operating instructions

Paradigm H15 owner's manual

Paradigm

Paradigm H15 owner's manual

MEE AUDIO X6 Plus user manual

MEE AUDIO

MEE AUDIO X6 Plus user manual

Shure SE846-V instructions

Shure

Shure SE846-V instructions

Newskill ANUKI LITE manual

Newskill

Newskill ANUKI LITE manual

Focal SPARK WIRELESS quick start guide

Focal

Focal SPARK WIRELESS quick start guide

Sony MDR-XB910 instruction & operation manual

Sony

Sony MDR-XB910 instruction & operation manual

Boult Audio ANCHOR user manual

Boult Audio

Boult Audio ANCHOR user manual

RYGHT OSIS instructions

RYGHT

RYGHT OSIS instructions

Korg NCQ1BK owner's manual

Korg

Korg NCQ1BK owner's manual

Jabra Elite 75t Titanium Black quick start guide

Jabra

Jabra Elite 75t Titanium Black quick start guide

Laser EPS-KWGLOW-GN user manual

Laser

Laser EPS-KWGLOW-GN user manual

Sony MDR-570LP/GRN Specifications

Sony

Sony MDR-570LP/GRN Specifications

Sven SEB-140 user manual

Sven

Sven SEB-140 user manual

Philips SHP8500 Specifications

Philips

Philips SHP8500 Specifications

manuals.online logo
manuals.online logoBrands
  • About & Mission
  • Contact us
  • Privacy Policy
  • Terms and Conditions

Copyright 2025 Manuals.Online. All Rights Reserved.