THOMSON RR220PLL - annexe 1 User manual

CAUTION:
For UK Only
CONNECT THE MAIN LEAD INTO A MAINS
POWER SOCKET
POWER SUPPLY 230V. It must not be connected
to D.C. mains.
Note: The mains lead of the set is fitted with a
moulded plug. If the mains socket are not
compatible or if for any reason the plug is
removed please follow the directions below. The
moulded plug cannot be rewired and if removed
must be disposed of safely.
DO NOT under any circumstances plug the severed
plug into any mains socket as this could result in
electric shock.
Important: If the plug is removed, rewire the
new plug as follow:
The wires in the mains plug are coloured in
accordance to the following code:
BLUE = NEUTRAL & BROWN = LIVE
B
LUE BROWN
If the colours of the wires in the mains lead of
this apparatus may not correspond with the
coloured markings identifying the terminals in
your plug, proceed as follows:
BLUE wire to the terminal coded N (Neutral) or
coloured black.
BROWN wire to the terminal coded L (Live) or
coloured red.
DO NOT make any connection to
the terminal in the plug which is
marked by the letter E or by the
earth symbol or coloured green
or green and yellow.
A fused plug must be fitted
with a 3A fuse approved by
ASTA or BS1362 and fuse
covers must be always be
securely replaced. If your set
does not work, the fuse may
be blown.
MAINS CONNECTIONS:
(For UK, see inside front cover)
MAINS OUTLET POWER SUPPLY: 230V ~50Hz
Note:
Power is fed to the unit even when it is not functioning. To cut the
power supply off, the power cable must be unplugged.
Main Connections (For UK only)
RR220PLL/M EN 5/17/02, 4:33 PM1

Safety Information
1
EN
Do not place the system near wet areas such as
bathrooms and pool side.
Do not expose this appliance to rain or moisture
Avoid storing the system at humid places or near
abnormally heated areas.
Power is continuously supplied to the system. To
disconnect power completely, unplug the power
cord from the power outlet.
Do not expose this appliance to dripping and
splashing.
WARNING:TO PREVENT FIRE OR ELECTRICAL
SHOCK HAZARD, DO NOT EXPOSETHIS PRODUCT
TO RAIN OR MOISTURE.
SEE MARKING ON BOTTOM / BACK OF PRODUCT
CAUTION
RISKOFELECTRICSHOCK
DONOTOPEN
THE EXCLAMATION
POINT WITHIN THE
TRIANGLE IS A
WARNING SIGN
ALERTING YOU OF
IMPORTANT
INSTRUCTIONS
ACCOMPANYING
THE PRODUCT.
THE LIGHTNING
FLASH AND ARROW-
HEAD WITHIN THE
TRIANGLE IS A
WARNING SIGN
ALERTING YOU OF
"DANGEROUS
VOLTAGE" INSIDE
THE PRODUCT.
CAUTION: TO REDUCE THE
RISK OF ELECTRIC SHOCK,
DO NOT REMOVE COVER
(OR BACK). NO USER-
SERVICEABLE PARTS IN-
SIDE. REFER SERVICING
TO QUALIFIED SERVICE
PERSONNEL.
TECHNICAL SPECIFICATIONS:
Power supply
AC 230V ~50Hz
Clock:9V 6F22
Power consumption: 4W
Please respect the environment. Before
throwing any batteries away, consult your
distributor who may be able to take them
back for specific recycling.
RR220PLL/M EN 5/17/02, 4:33 PM2

EN
2
Battery Back-Up Operation
This clock radio is equipped with a memory
holding system that can be powered with
a 9-volt battery (not included). The power
failure protection circuit will not operate
unless battery is installed.
When normal household power is inter-
rupted, or AC line cord is unplugged, the
battery will power the clock radio to keep
track of time and alarm settings pro-
grammed into memory. When the battery
backup functions, the digital display will
not be backlighted, however, the function
of alarm still occurs during the power in-
terruption if remaining battery power is
adequate. Normal operation will resume
after AC power is restored so you will not
have to reset the time or the alarm.
Install battery as follows:
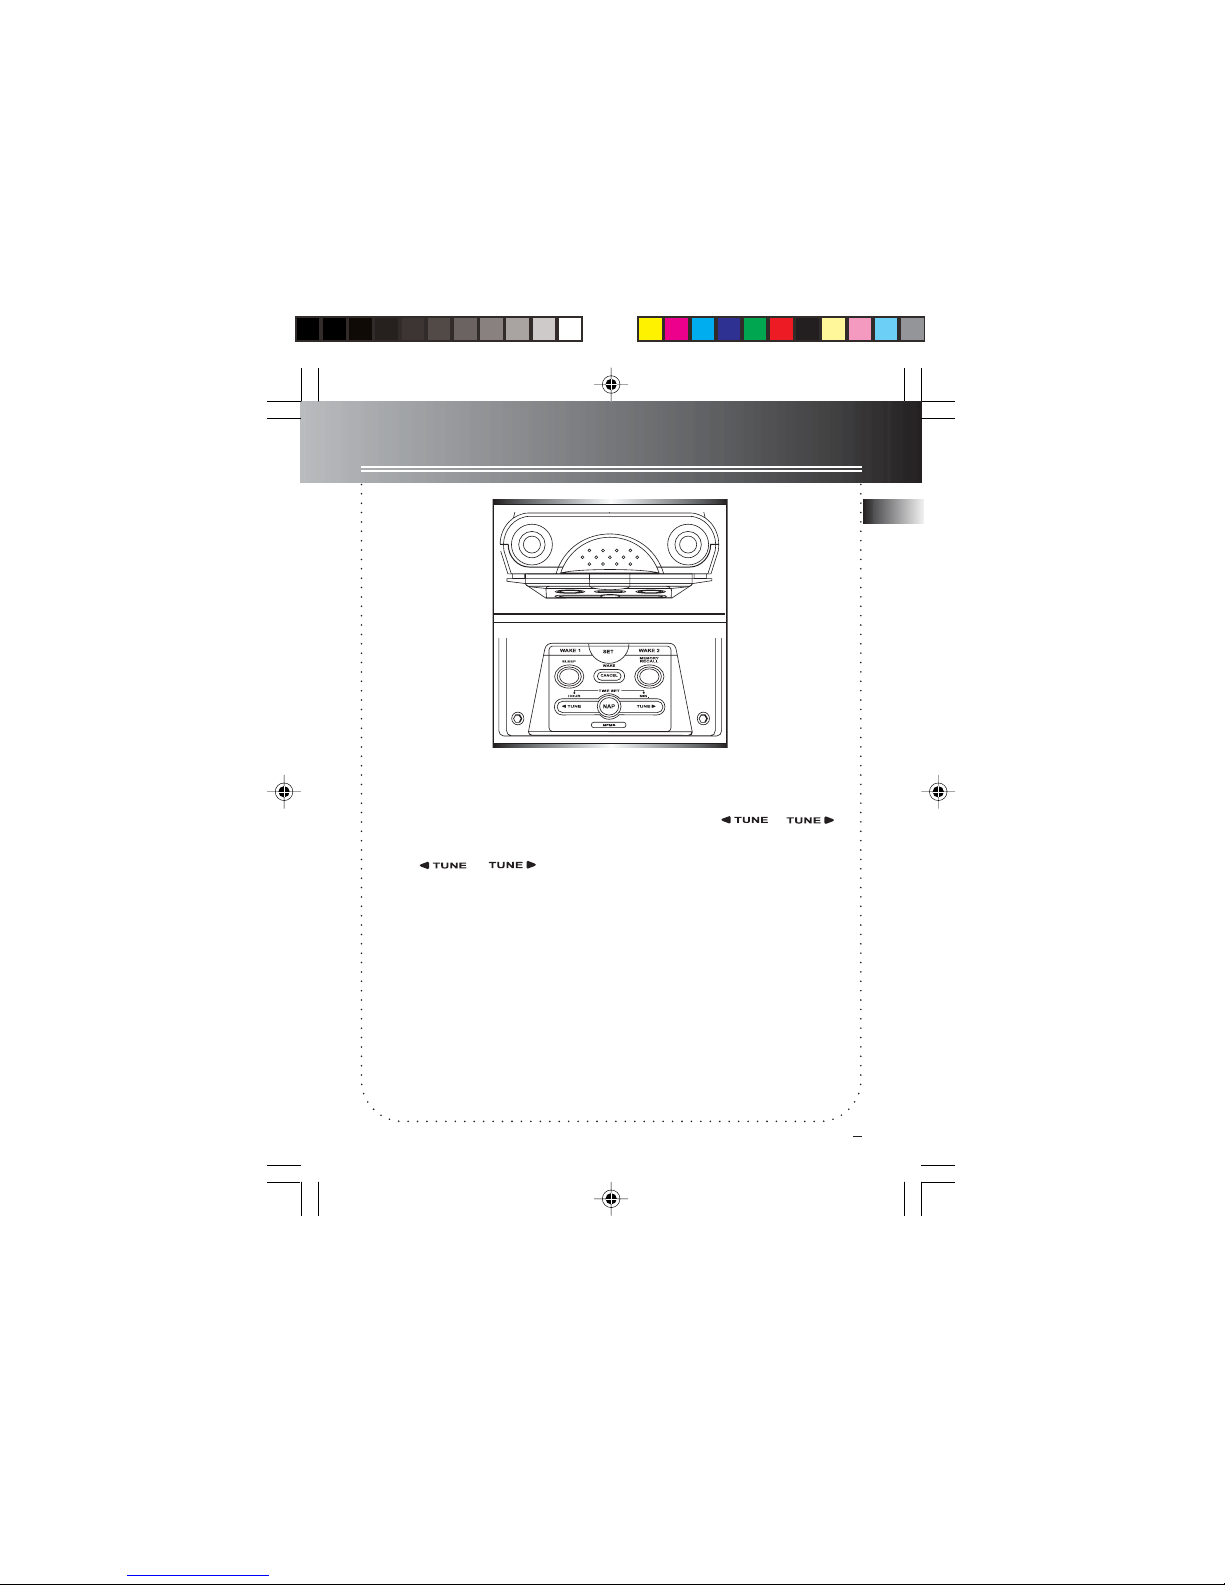
1. Remove battery compartment door (lo-
cated at the bottom of the radio) by ap-
plying thumb pressure to area indicated
on battery door and then lift the door
out and off the cabinet.
2. Connect a 9-volt battery to the connec-
tor plug.
3. Insert battery in the compartment and
replace the compartment door.
Power Failure Indicator
When AC power is interrupted (discon-
nected) for a short period of time, both
time and alarm settings will change (un-
less optional battery is installed). After AC
power is restored (reconnected), the Digi-
tal Display will blink to indicate that power
was interrupted and you should readjust
the time and alarm settings.
Note: Alkaline (NEDA 1604A / IEC 6LR61) battery is
recommended. Carbon Zinc (NEDA 1604 / IEC 6F22) bat-
tery may be used but memory holding time will be substan-
tially reduced. Memory holding time for a fresh alkaline battery is
approximately 8 hours (if radio or alarm is not operated), which should
take care of short, nuisance-type AC power failures. To preserve
battery life, the radio should remain plugged into an AC outlet. As
batteries get older, their voltage drops and memory may be lost. Be
sure to replace the battery periodically. Battery should be removed
if the radio will be stored for more than one month. Leaky batter-
ies may badly damage the clock radio.
RR220PLL/M EN 5/17/02, 4:33 PM3

3
Operating the clock
EN
Setting the Wake Time
1. Press the SET button once to set
ALARM 1 (1 will flash on display),
twice to set ALARM 2 (2 will flash on
display). Press to set the
hour, and to set minute.
3. When wake time is set. You can exit
set mode by pressing SET button until
no flashing sign or clock icon is dis-
played.
Setting Clock Time
Your digital clock operates on a 24 hour
standard mechanism.
1. Press the SET button until a clock icon
is shown on display..
2. Press to set the hour, and
to set minute.
Example 1: ALARM 1 mode
setting:
8:50 AM Wake to Alarm
Example 2: ALARM 2 mode
setting:
Alarm off
RR220PLL/M EN 5/17/02, 4:33 PM4

EN
4
Operating the Clock
Waking by Selected Source
Programme
You may be woken up by music or
alarm .
1. Select an AM or FM station. (refer to
“Tuning the Stations”)
2. Set wake time (see above direction).
3. Press the ALARM 1 or ALARM 2 but-
ton to select waking up by music or
alarm. An indicator is up next to the
selected setting.
4. Adjust the volume by turning VOLUME.
Note: When you turn off the alarm or
the music by pressing OFFOFF
OFFOFF
OFF, the
alarm or the music will turn on at
the same time tomorrow.
Note: The unit equips with GRAD-U-GRAD-U-
GRAD-U-GRAD-U-
GRAD-U-
WAKEWAKE
WAKEWAKE
WAKE feature, the alarm tone volume will
increase gradually to its maximum in about
30 to 45 seconds.(Volume level cannot be
adjusted in GRAD-U-WAKEGRAD-U-WAKE
GRAD-U-WAKEGRAD-U-WAKE
GRAD-U-WAKE mode)
Sleep Mode
In sleep mode, the radio will turn off au-
tomatically. Simply:
1. Press SLEEP then the time display will
exhibit 2:00 and the radio will turn on.
2. While holding SLEEP, the sleep time will
drop by a 15 minutes step. The time
range is from 15 minutes to 2 hours.
3. Release SLEEP and the current time will
be shown again. The radio is turned
on and you may select the station as
usual. The radio will turn off when the
preset time elapses. If you decide to
turn off the radio sooner, press SNOOZE
or OFF.
4. Press SLEEP to read the remaining sleep
time.
Nap Mode
This function wakes you up after a short
period of time. Simply:
1. Press NAP and release. The NAP indi-
cator will light.
2. While holding NAP, the nap time will
drop by a 15 minutes step. The time
range is from 15 minutes to 2 hours.
3. The clock will be shown after 3 seconds
if no button is pressed. The NAP indica-
tor will lit up.
4. Press NAP once to show time left.
Stop the Nap alarm
Press NAP or follow “Turning off Alarm”.
Notes:
1. Press and hold NAPNAP
NAPNAP
NAP to cancel the nap
setting.
2. Only alarm sound can be selected.
3. If the radio is currently on (by press-
ing ON/BANDON/BAND
ON/BANDON/BAND
ON/BAND button), then the radio
will be on after NAPNAP
NAPNAP
NAP is pressed.
RR220PLL/M EN 5/17/02, 4:33 PM5

5
Operating the radio
EN
Tuning the Stations
1. Press ON/BAND (located on the top of
the radio) to turn on the radio.
2. Press ON/BAND to change the broad-
cast band, press the OFF button to turn
off the radio.
3. Press or to select a
station.
4. If you want to memorize this station,
press MEMO button once, and press
MEMORY RECALL button to choose the
station number you want to record in,
once you choose a number, press MEMO
again to confirm.
5. If you set the station in the AL location,
it will be the wake up station of the
alarm.
Note: This unit can store up to 11 preset
stations, while AL location is for the wake
up station.
ON/
BAND OFF
Automatic station search
1. Press ON/BAND (located on the top of
the radio) to turn on the radio.
2. Press and hold or for
2 seconds, it will automatically search a
station for you.
RR220PLL/M EN 5/17/02, 4:33 PM6

EN
6
Operating the Clock
Turning off Alarm
Silence the alarm momentarily
Press SNOOZE. The alarm will sound again
when the snooze period is over. (see
“Snooze Alarm Operation”).
Stop the alarm
Press OFF. Then the alarm will be on the
following day at the same time.
Disable the alarm permanently
1. Press CANCEL button.
2. The ALARM 1 and ALARM 2 indicator
will be flashing.
3. Press ALARM 1 or ALARM 2 button
within 3 seconds to deactivate the alarm
function permanently, “OFF” will be
shown when the above procedures are
done.
Tip: You can activate the previously
set alarm time by pressing ALARM 1ALARM 1
ALARM 1ALARM 1
ALARM 1 or
ALARM 2ALARM 2
ALARM 2ALARM 2
ALARM 2 button.
Snooze Alarm Operation
This operation allows extra sleep time af-
ter the alarm is on. The alarm will be off
by pressing SNOOZE until the snooze pe-
riod is over, the default SNOOZE period is
9 minutes.
Seconds Time Display
The unit may display in seconds.
1. The clock should be in normal mode.
2. Press and hold SNOOZE to show sec-
onds display.
3. Release SNOOZE to return to the hour
and minute display.
Changing the lens
The unit has three different lens provided:
blue, green and gray. You may change your
favourite colour with the hexagon key
(size: 3/32” ) located at the buttom of the
unit.
Brightness control
You can adjust the back-
light by the DIMMER but-
ton, there are three modes
you may select from:
AUTO - Backlight on for a
few seconds whenever a
button is pressed.
HIGH - Backlight always
high.
LOW - Backlight always
low.
DIMMER
Hi
Lo AUTO
RR220PLL/M EN 5/17/02, 4:34 PM7
Table of contents
Other THOMSON Radio manuals