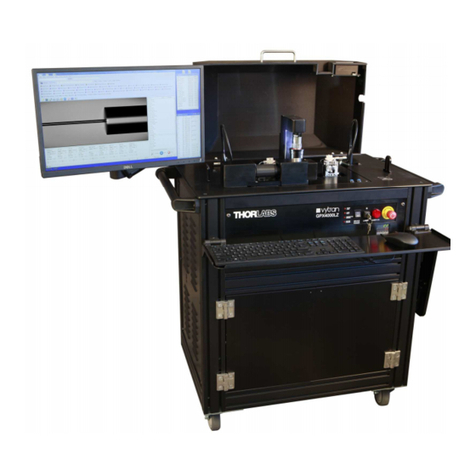
THORLABS Vytran GPX3400 User manual

GPX3400 and GPX3600
Glass Processors
User Guide

GPX3400 and GPX3600 Glass Processors
Table of Contents
Chapter 1Warning Symbol Definitions..............................................................................................3
Chapter 2Safety....................................................................................................................................4
Chapter 3Description...........................................................................................................................5
3.1.Introduction .....................................................................................................................5
3.2.Features ...........................................................................................................................6
3.2.1.GPX3400...............................................................................................................................6
3.2.2.GPX3600...............................................................................................................................6
3.3.Accessories GPX3400 and GPX3600.............................................................................7
3.4.System Overview............................................................................................................. 7
3.4.1.External Workstation Connections........................................................................................8
3.4.2.Fiber Holding Blocks .............................................................................................................9
3.4.3.Splice Head.........................................................................................................................10
3.4.4.Mirror Tower........................................................................................................................13
3.4.5.Imaging System ..................................................................................................................13
Chapter 4Setup....................................................................................................................................14
Chapter 5Operation.............................................................................................................................16
5.1.Software Interface .........................................................................................................16
5.2.Graphical User Interface...............................................................................................16
5.2.1.Menu Bar.............................................................................................................................17
5.2.2.Command Bar .....................................................................................................................22
5.2.3.Camera Bar.........................................................................................................................22
5.2.4.Process Bar.........................................................................................................................23
5.2.5.Macro Bar............................................................................................................................23
5.2.6.Quick Open File Bar............................................................................................................23
5.2.7.Main Toolbar .......................................................................................................................24
5.2.8.Splice Process List..............................................................................................................25
5.2.9.Camera Image ....................................................................................................................25
5.2.10.Movement Control Bar ........................................................................................................26
5.2.11.Status Bar............................................................................................................................28
5.3.Initialization and Shutdown..........................................................................................28
5.4.Storage and Transportation .........................................................................................29
5.5.Fusion Splicing..............................................................................................................29
5.5.1.Filament Fusion...................................................................................................................29
5.5.2.Filament Normalization .......................................................................................................31
5.5.3.Edge Alignment...................................................................................................................31
5.5.4.Active XY Alignment............................................................................................................32
5.5.5.Core Alignment ...................................................................................................................32
5.5.6.End View Alignment (or PM alignment) ..............................................................................32
5.5.7.Multiple-Stage and Multiple File Splicing ............................................................................33
5.6.Steps of a Basic Splice with One Button Process .....................................................34
5.6.1.Basic One Button Splice .....................................................................................................34
5.6.2.Modifiying the Splice Routine..............................................................................................35
5.7.Application Notes..........................................................................................................35
5.7.1.Active Rotation Alignment ...................................................................................................35

GPX3400 and GPX3600 Glass Processors
5.7.2.Manual Alignment ...............................................................................................................36
5.7.3.Drawing Tapers...................................................................................................................36
5.7.4.Taper Properties .................................................................................................................36
5.7.5.Tension Monitor ..................................................................................................................39
5.7.6.Filament Ramp and System Configuration .........................................................................40
5.7.7.Thermal Core Expansion ....................................................................................................42
5.7.8.Fiber Lensing ......................................................................................................................42
5.7.9.Mode Adaptors....................................................................................................................42
5.7.10.Pump Combiners and Couplers..........................................................................................42
5.7.11.GPXFBT-SFT Fused Biconic Taper (FBT) Processing Add-On Software..........................43
5.7.12.Taper Tension Process .......................................................................................................45
Chapter 6Maintenence........................................................................................................................48
6.1.General Care ..................................................................................................................48
6.2.Keep the System Clean................................................................................................. 48
6.3.Fiber Handler Maintenance ..........................................................................................48
6.3.1.Changing Transfer Inserts:..................................................................................................48
6.3.2.Cleaning the Fiber Holding Block Insert..............................................................................49
6.3.3.Adjusting the Transfer Insert Block .....................................................................................49
6.4.Filament Replacement Procedure ...............................................................................50
6.4.1.Changing the Filament ........................................................................................................50
6.4.2.Filament Centering Procedure ............................................................................................52
6.5.Cleaning the Mirror .......................................................................................................53
6.5.1.Procedure............................................................................................................................53
6.6.Measuring the Argon Flow Rates ................................................................................54
6.7.RMA Process .................................................................................................................55
Chapter 7Appendix..............................................................................................................................56
7.1.Top Inserts .....................................................................................................................56
7.2.Bottom Inserts ...............................................................................................................56
7.3.Fiber Holder Insert Size Selection Guide ....................................................................57
Chapter 8Specifications.....................................................................................................................59
8.1.Electrical Power.............................................................................................................60
8.2.Gas Supply.....................................................................................................................60
8.2.1.Gas Supply Specifications ..................................................................................................61
Chapter 9Regulatory...........................................................................................................................62
Chapter 10CE Certificate......................................................................................................................63
Chapter 11Thorlabs Worldwide Contacts..........................................................................................65

GPX3400 and GPX3600 Glass Processors Chapter 1: Warning Symbol Definitions
Rev B, July 24, 2017 Page 3
Chapter 1 Warning Symbol Definitions
Below is a list of warning symbols you may encounter in this manual or on your device.
Symbol Description
Direct Current
Alternating Current
Both Direct and Alternating Current
Earth Ground Terminal
Protective Conductor Terminal
Frame or Chassis Terminal
Equipotentiality
On (Supply)
Off (Supply)
In Position of a Bi-Stable Push Control
Out Position of a Bi-Stable Push Control
Caution: Risk of Electric Shock
Caution: Hot Surface
Caution: Risk of Danger
Warning: Laser Radiation
Caution: Spinning Blades May Cause Harm

GPX3400 and GPX3600 Glass Processors Chapter 2: Safety
Page 4 TTN047532-D02
Chapter 2 Safety
WARNING
The filament in the glass processor furnace generates intense light when it is in operation. It is
strongly advised that the user does NOT look directly at it during splicing or tapering operations.
CAUTION: HOT SURFACE
The furnace gets extremely hot when the filament is turned on. Do not touch the furnace during or
immediately after the filament has been on for a few seconds, such as after a splice or tapering
operation.
WARNING
The fiber handlers and the splice head can exert a fair amount of force as they move from side to side.
Do not put your fingers between them, or between the fiber handlers and the slot end walls, while the
machine is in operation.
DANGER
The camera tower on the glass processors can generate a fair amount of force as it moves forward
and backward, and up and down. Do not put fingers between it and the furnace or mirror tower while
the machine is in operation.
CAUTION
Be sure your electrical power and gas supplies meet the criteria detailed in the Chapter 8.
!
!
!
!
!
!
!
!

GPX3400 and GPX3600 Glass Processors Chapter 3: Description
Rev B, July 24, 2017 Page 5
Chapter 3 Description
3.1. Introduction
Thank you for purchasing a Vytran®Glass Processor. This manual is intended to convey the basic instructions
necessary for operating the glass processor.
The Vytran Glass Processors are a versatile glass processing platform for the fabrication of splices, tapers,
terminations, couplers and combiners. All systems incorporate a filament furnace assembly that provides a stable
high temperature heat source for precise control of glass processing conditions. An embedded real time control
system and powerful machine level macro programming language allow the user to develop unique event-driven
routines for fast and flexible process development. All high level system communication is through a user-friendly,
PC based graphical interface that provides for easy operation and convenient data storage. This level of control
combined with the consistency of filament fusion technology makes the glass processors a multipurpose platform
for the production of fiber laser and other specialty fiber applications.
The Vytran Glass Processors consist of four different models designed to perform high-quality fusion splicing and
tapering of specialty fibers. The system consists of a filament-based heater, precision stages with multi-axis
control, microscopic high resolution CCD imaging system and a personal computer. The filament assembly can
heat optical fiber to temperatures up to 3000 °C, which makes it possible to fuse and process various fiber types
and sizes. The multi-axis stages precisely control and aid the alignment and positioning of the fibers for high
quality splicing and tapering. The imaging system displays magnified fiber image with sub-micron resolution. The
fiber can be viewed both from fiber side and fiber end. All glass processors have the ability to rotate fibers;
making it possible to align PM fibers, eccentric core fibers or non-circular fibers.

GPX3400 and GPX3600 Glass Processors Chapter 3: Description
Page 6 TTN047532-D02
3.2. Features
3.2.1. GPX3400
Standard Features
Fiber Splicing and Tapering up to Ø1.25 mm Cladding
Automated Splice Head
XY Alignment Blocks with Rotary Capability
Camera Tower with Ring Illuminator
Tension Monitoring and Control System
Optional Features
Liquid Cooling System (Item # GPXWCS)
Fused Taper Software Enhancement (Item # GPXFBT-SFT)
Fixture with Adjustable Gripper (Item # GPXFBT-FXTA)
Fixture with Removable Taper Holder (Item # GPXFBT-FXTB)
Software and Fixture Kit with Adjustable Gripper (Item # GPXFBT-KITA)
Software and Fixture Kit with Removable Taper Holder (Item # GPXFBT-KITB)
3.2.2. GPX3600
Standard Features
Fiber Splicing and Tapering up to Ø1.7 mm Cladding
Automated Splice Head
XY Alignment Blocks with Rotary Capability
Camera Tower with Ring Illuminator
Liquid Cooling System (Item # GPXWCS)
Tension Monitoring and Control System
Optional Features
Fused Taper Software Enhancement (Item # GPXFBT-SFT)
Fixture with Adjustable Gripper (Item # GPXFBT-FXTA)
Fixture with Removable Taper Holder (Item # GPXFBT-FXTB)
Software and Fixture Kit with Adjustable Gripper (Item # GPXFBT-KITA)
Software and Fixture Kit with Removable Taper Holder (Item # GPXFBT-KIT)

GPX3400 and GPX3600 Glass Processors Chapter 3: Description
Rev B, July 24, 2017 Page 7
3.3. Accessories GPX3400 and GPX3600
Component Description
Workstation GPX3400 or GPX3600 Glass Processor Workstation
PC Computer, including Monitor, Keyboard and Mouse
Vacuum Pump Vacuum Pump for Vacuum V-Grooves
(Alternative Model Supplied for 230 V Markets)
Power Supply Dual Voltage Power Supply and Cable
Gas Tank Regulator Regulator for Argon Tank (European DIN 477 Number 6 Also Included )
An Adaptor May be Required in other Areas or Countries
Gas Line 1/8" Teflon Line for Argon Gas
RS-232 Communication Cable 9-pin D-sub Cable for RS-232 Communication
Camera Cable 6 pin IEEE-1394 Fire Wire Cable
Tool Kit Hex Wrenches for Filament and Inserts Replacement
Fiber Holding Block Inserts Top and Bottom Inserts for Fiber Holding Blocks
Filament Assemblies Set of Filament Assemblies
3.4. System Overview
The Vytran Glass Processor has three basic components: a splicing and glass processing workstation, a personal
computer (PC), and a gas supply. The splicer workstation is illustrated in Figure 1.
Figure 1 GPX3400 Workstation

GPX3400 and GPX3600 Glass Processors Chapter 3: Description
Page 8 TTN047532-D02
3.4.1. External Workstation Connections
The splicer workstation is the main component of the glass processor. The PC and gas supply, as well as
peripheral components, are connected to its back panel as illustrated in Figure 2.
Figure 2 GPX3400 Back Panel Connections
Power
The glass processor workstations are powered from an external dual voltage supply. The GPX3400 uses
a 5-pin round connector. The GPX3600 utilizes a 2-pin 24 V and 3-pin 12 V power cord.
Communication
PC – GPX Control communication:
RS-232, 9-pin D-Sub connector. Connect to Com 1 on the PC
Camera – PC: IEEE-1394 6 pole connection. Connect to IEEE-1394 on PC
Analog Output: 2 BNC connectors - Analog 1 & Analog 2
Gas
Argon: 1/8" Push fit connector
Vacuum: 5/32" Push fit connector

GPX3400 and GPX3600 Glass Processors Chapter 3: Description
Rev B, July 24, 2017 Page 9
3.4.2. Fiber Holding Blocks
The fiber handlers are used for holding, positioning and moving the fibers during the various processes
implemented on the a glass processor workstation. The GPX3400 and GPX3600 fiber handlers that can align
fibers prior to splicing. Fiber XY alignment can be performed using either the edges of the fibers, or their cores.
The GPX3400 and GPX360 fiber handlers can also perform a rotary alignment. Rotary alignment is useful for
aligning the stress members of PM fibers, for aligning the cores of eccentric core fiber, and for aligning surface
features of non-circular fiber.
GPX3400 and GPX3600 Fiber Holding Blocks
The GPX3400 and GPX3600 fiber holding blocks can rotate each fiber up to 200°. This is primarily used for
aligning stress members of PM fibers, but can also be used to align the cores of eccentric core fibers. It can also
be used to align surface features on fibers that are not round.
Rotary Fiber Holding Block
Fiber Holder Inserts
Different sized bottom V-grooves and top inserts are available for various coating fiber diameters. For available
insert sizes, please see the selection chart in Chapter 7. In addition to the standard sizes, custom inserts may be
specially designed for various applications. Contact Thorlabs for more information.
Figure 3 Bottom (Left) and Top (right) Fiber Holding Block Inserts

GPX3400 and GPX3600 Glass Processors Chapter 3: Description
Page 10 TTN047532-D02
Fiber Handler Transfer Inserts
The fiber handler transfer insert used on the glass processors make splicing faster and easier because it
facilitates repeatable fiber positioning when used in conjunction with a LDC400 Large-Diameter Fiber Cleaver. For
example, if the operator uses transfer inserts to hold fibers during cleaving, the operator can then transfer each of
those cleaved fibers a glass processor in the same insert that held them during cleaving and ensure that the ends
of the fibers will fall exactly in the same place every time. This is due to the fact that the transfer inserts are
designed to precisely sit at the same location on both the cleaver and the glass processor, and a magnetic lid on
each transfer insert prevents axial movement of the fiber during transport from one piece of equipment to the
other.
Figure 4 Transfer Insert for Fiber Handle
3.4.3. Splice Head
The Splice Head consists of two parts: the Filament Tower and the Mirror Tower. The splice head moves along
the Z-axis to allow for viewing and splicing stationary fibers.
Figure 5 Filament Splice Head

GPX3400 and GPX3600 Glass Processors Chapter 3: Description
Rev B, July 24, 2017 Page 11
Filament Tower
After the splice head moves to the correct position, the Filament Tower raises in the Y-axis to a predefined height
to surround the fibers. A filament assembly, available in many different sizes for various applications, sits atop the
filament tower. This assembly is screwed to the filament tower and also held down by two filament clamps. In
addition to holding down the filament assembly, the filament clamps also serve to limit the influx of room air into
the splicing area, as they have protrusions that cover most of the filament housing cavity.
To change a filament assembly, please see Section 6.4.1 Changing the Filament
Filament Tower
Filaments
The filaments are omega-shaped resistive heaters. Thorlabs offers these filaments preassembled in a variety of
sizes as well as different materials that could be more appropriate to a particular splicing application.
Graphite filaments are capable of achieving the high temperature required for splicing large-diameter silica fibers.
It uses less argon and outgases very little compared to the other filaments. Iridium filaments are also available for
with soft glass fibers.
Proper filament selection and splice parameters are essential for optimum splice performance. For filament
selection guidelines, see Figure 7. In addition to the standard sizes, custom filaments may be specially designed
for various applications. Contact Thorlabs for more information.
Filament Heater Element

GPX3400 and GPX3600 Glass Processors Chapter 3: Description
Page 12 TTN047532-D02
Filament Assembly
Thorlabs supplies filaments pre-assembled in a filament body as shown in the Figure 6. This is called a filament
assembly. Different filament bodies are used with different filaments, and are distinguished by a version number
engraved on the front of the housing.
Figure 6 V and T Filament Body Version
Figure 7 lists the standard graphite filament types as a function of the fiber size and application.
Item # Filament
Material
Application Cladding Diameter
(Min/Max)
FTAV2 Graphite Splice 80 µm / 250 µm
FTAV4 125 µm / 600 µm
FTAV5 250 µm / 1000 µm
FTAV6 400 µm / 1300 µm
FTAT3 Tapering 250 µm / 1500 µm
FTAT4 400 µm / 1800 µm
FRAV1 Iridium Splice ≤200 µm
FRAV3 ≤400 µm
FRAV5 250 µm / 1050 µm
Figure 7 Filament Size Table

GPX3400 and GPX3600 Glass Processors Chapter 3: Description
Rev B, July 24, 2017 Page 13
3.4.4. Mirror Tower
The mirror tower has two sets of mirrors and an LED. The first set of mirrors makes it possible to view the sides of
the fiber. They provide the “Front View” and “Back View”. The second set of mirrors makes it possible to view the
ends of the fibers. The LED provides backlighting when viewing the fiber directly in center view. The Mirror Tower
moves in the X-axis to provide the ability to view both the side view and end view of the fibers.
Mirror Tower
3.4.5. Imaging System
The GPX3400 and GPX3600 workstations come with an automated camera assembly used for imaging the fibers.
This tower can be moved forwards and backwards as well as up and down. It is equipped with a ring illuminator
that provides backlighting for the front and back views of the fiber. The camera objective may be replaced if a
larger (or smaller) field of view is desired.
Imaging Camera Assembly
Center View LED
End-View Mirror
Front View Mirror
Back View Mirror
Camera Objective
Ring Illuminator
Camera Tower

GPX3400 and GPX3600 Glass Processors Chapter 4: Setup
Page 14 TTN047532-D02
Chapter 4 Setup
1. Unpack PC, monitor and peripherals. Set-up the computer using the included instructions from the
computer manufacturer.
2. Unpack the glass processor workstation and place it on a workbench. Make sure not to damage any
components of the glass processor during handling of the workstation. Lift the unit using the retractable
handles only. Remove the transport block marked with the red “PLEASE REMOVE BEFORE USE” label
from the base of the camera tower and store in a secure location for future use.
Transport Blocks Located Near Camera Tower
3. Connect the external vacuum pump:
4. Connect the muffler to the top connector of the vacuum pump.
5. Connect the bottom connector on the vacuum pump, labeled “VAC” with the included tube to the back of
the glass processor labeled “VACUUM”.
External Vacuum Pump
6. Connect the camera with the supplied IEEE-1394 Fire Wire cable to the port on the glass processor
labeled “CAMERA” and to the Fire Wire port on the computer. The connector has a directional design so
be sure to orientate the connector correctly. Both the computer and glass processor workstation MUST
be off during this operation, otherwise damage to the CCD camera can occur.
7. Connect the serial communication cable (RS-232) to the outlet in the back of the workstation labeled
“SERIAL COMMS” and to the computer’s serial communication port (see instructions from the computer
manufacturer). Tighten the screws on both sides of the cable to secure it in place.

GPX3400 and GPX3600 Glass Processors Chapter 4: Setup
Rev B, July 24, 2017 Page 15
8. Clean the outlet of the gas tank thoroughly to remove any debris or deposits, and then install the supplied
CGA-580 or DIN 477 Number 6 gas regulator to the gas tank, using the manufacturer-supplied operating
and safety instructions.
Argon Gas Regulator
9. Open the Argon Tank and allow gas to flow through the tubing to ensure a clean gas line; then connect
the gas line to the back of the glass processor to the port labeled “ARGON”.
10. Connect the DC power cable to the back of the glass processor to the port labeled “POWER” with the
ferrite end of the cable. Plug the other end of the cable into the external DC-power supply. Note: make
sure to align the red dot on the plug with the red dot on the receptacle.
11. Connect the AC power cord to the DC power supply and a power source of 110/230 VAC, 47-63Hz.
12. If the liquid cooling system is to be fitted to the splice head, follow the instructions provided with the
cooling system.
Liquid Cooling System Connected to Glass Processor.

GPX3400 and GPX3600 Glass Processors Chapter 5: Operation
Page 16 TTN047532-D02
Chapter 5 Operation
5.1. Software Interface
The software interface involves a graphical user interface, or GUI, and an SQL database. Here is a detailed
explanation for the control of the machine.
5.2. Graphical User Interface
The GUI is the main window when working on the glass processor workstation. It has different menus and
toolbars that are explained later in this document. The buttons are described in this chapter from top to bottom, as
indicated in Figure 8.
Figure 8 Software GUI Main Screen
The following sections will explain each of these components in detail.

GPX3400 and GPX3600 Glass Processors Chapter 5: Operation
Rev B, July 24, 2017 Page 17
5.2.1. Menu Bar
a. File
The File menu is structured in the same way as
shown.
Open: Open a new splice data file.
Open Recent: Shows the files opened recently.
Save: Save the current settings to the current splice
data file.
Save As: Save the current settings to a new splice
data file.
Data Base Options: Enables / Disables the
Database. Reset the Database. The database has
preconfigured settings that should not be altered.
Engineer Mode: Engineer mode allows full access
of SW and control of the limited GUI for the Non-
Engineer.
Engineer Password: Engineer mode is password
protected.
Exit: Close the GUI.
b. View
View enables the user to display or hide the various
toolbars, data windows, and guides associated with
the GUI (like crosshair and alignment guides). The
“Processes Toolbar”, “Macro Toolbar” and “Quick-
Open File Toolbar” can only be activated if functions
are assigned to them. You can achieve this under
the Configuration menu.
Another feature under the View menu is the Tension
Monitor. See Section 5.7.3 for more details.

GPX3400 and GPX3600 Glass Processors Chapter 5: Operation
Page 18 TTN047532-D02
c. Configuration
The Configuration Menu allows the user to
edit the property of the user interface and also
set up the machine parameters.
Four tool bars on the interface can be
modified through Toolbars window.
Through the Edit Processes Bar, the user can
define which process will be shown in the user
interface for quick usage. “Selected
Processes” window includes all the processes
which will be shown on the screen.
Through the Edit Macro Bar, the user can
define which macro or commands will be
shown on the screen.

GPX3400 and GPX3600 Glass Processors Chapter 5: Operation
Rev B, July 24, 2017 Page 19
All the files added in this window will be
shown on the quick-open file bar. Users can
add or remove files from this window.
The camera has five image positions for
viewing the fiber. Each camera position
contains the settings for the camera and
optics in that position.
In the CCD Camera property window, the
view settings allow the user to turn on and off
all the cursors on the screen. Camera settings
are preset, the user should not change these
values.
Home to View Distance sets the distance
between the splice home and the actual
viewing position of the splice head.
Time Delays are preset by Thorlabs.
This manual suits for next models
1
Table of contents
Other THORLABS Computer Hardware manuals
Popular Computer Hardware manuals by other brands

Boca Systems
Boca Systems Wireless LAN PC Card 11Mbps user guide

Linear Technology
Linear Technology 1446 quick start guide

Amptek
Amptek DP5 User's manual and operating instructions

American Megatrends
American Megatrends Olympus III 875 Series quick hardware installation guide

NEC
NEC NE3304-132 Startup guide

Allen-Bradley
Allen-Bradley SLC 5/03 installation instructions