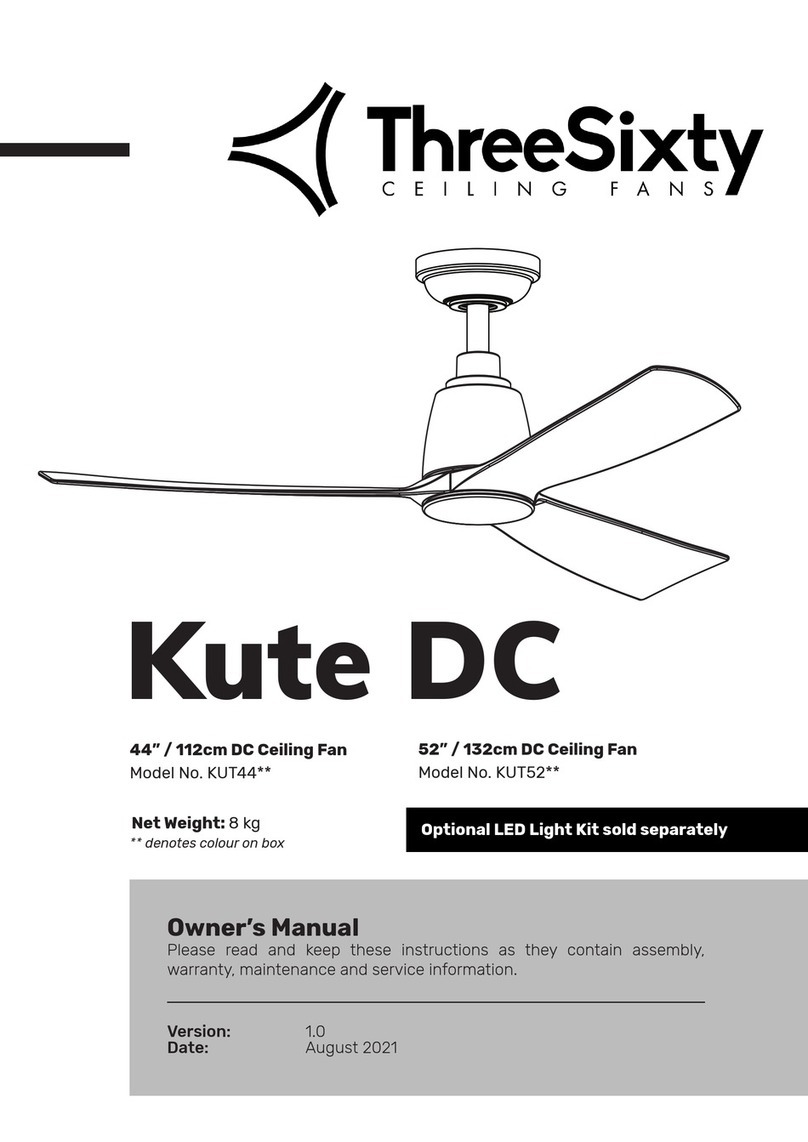
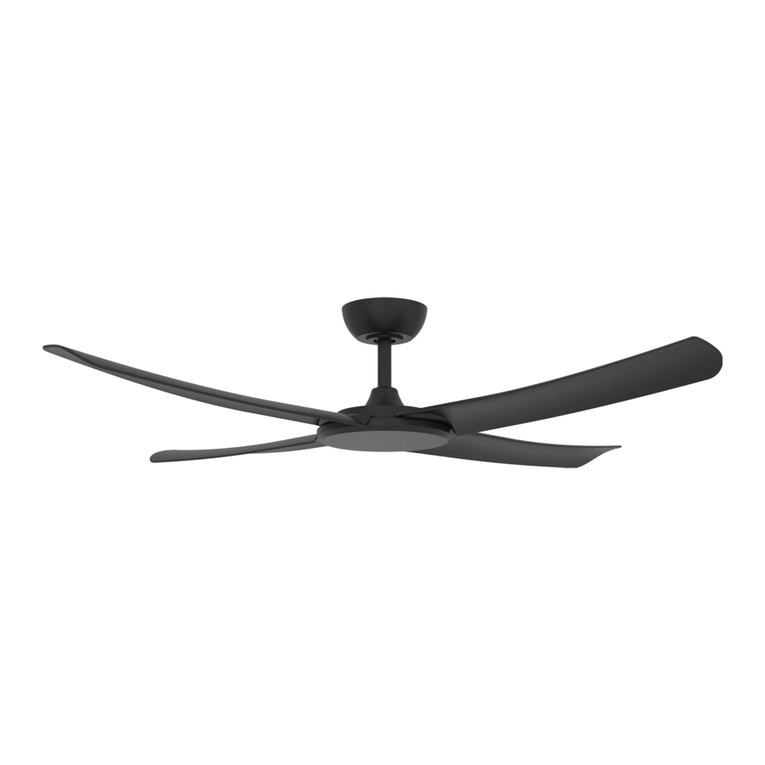
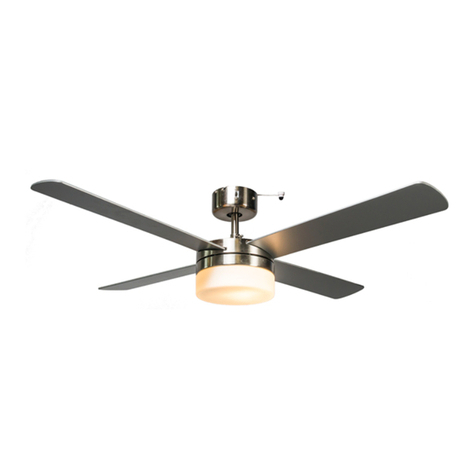
Three Sixty Arumi AC Series User manual

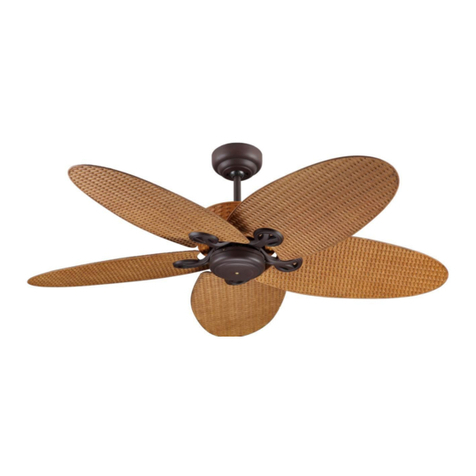
AC Series - Polymer blades
The ™
Ceiling Fan
Indoor use only. Recommended
for living and family rooms.

ThreeSixty Innovations
Fan Technology that's Innovative and Reliable
ThreeSixty Innovations is proud of it's range of ceiling ceiling fans, accessories
and lighting products. We believe these are the best products in their category,
reflecting over 30 years collective Australian experience in design, development,
manufacturing and distribution of electronics and electrical equipment.
The Arumi AC series is a decorator style AC motor ceiling fan intended to
operate for long periods and provide very strong airflow directly beneath it.
The Arumi is optimised for use in living rooms and family rooms.
Distinctly different, Arumi caters for a variety of climates and the AC motor
is efficient and ultra-reliable.
Our manufacturing is subject to strict quality control and we back our products
with a plain-English warranty. We guarantee any problem caused by a fault in
the product will be fixed quickly and with the least inconvenience.
We welcome feedback and suggestions. By listening to our customers we
aim to continuously improve our products and services.
1

1. Read your owner’s manual and safety information before installing your new fan. Review the accompanying assembly diagrams.
2. Before servicing or cleaning unit, switch power off at service panel and lock service panel disconnecting means to prevent power
from being switched on accidentally. When the service disconnecting means cannot be locked, securely fasten a warning device, such
as a tag, to the service panel.
3. Be careful of the fan and blades when cleaning, painting, or working near the fan. Always turn off the power to the ceiling fan before
servicing.
4. Do not insert anything into the fan blades while the fan is operating.
5. Do not operate reversing switch until fan blades have come to a complete stop.
6. Do not dispose of electrical appliances as unsorted municipal waste, use separate collection facilities.
7. Contact your local government for information regarding the collection systems available.
8. If electrical appliances are disposed of in landfills or dumps, hazardous substances can leak into the groundwater and get into the
food chain, damaging your health and well-being.
9. This appliance is not intended for use by persons (including children) with reduced physical, sensory or mental capabilities, or lack
of experience and knowledge, unless they have been given supervision or instruction concerning use of the appliance by a person
responsible for their safety.
10. Children should be supervised to ensure that they do not play with the appliance.
1. To avoid possible shock, be sure electricity is turned off at the fuse box before wiring, and do not operate fan without blades.
2. All wiring and installation procedures must comply with AS/NZS 3000 Wiring Rules and any local regulations. The ceiling fan
must be earthed as a precaution against possible electrical shock. Electrical installation must be made by a licensed electrician.
3. The fan base must be securely mounted and capable of reliably supporting at least 27kg. See page 4 of owner’s manual for support
requirements.
4. The fan must be mounted with the fan blades at least 2.1 meters from the floor to prevent accidental contact with the fan blades.
5. Follow the recommended instructions for the proper method of wiring this ceiling fan.
6. This fan is not suitable for use with solid state controllers.
WARNING: This product is designed to use only those parts supplied with this product and/or accessories designated specifically for
use with this product. Using parts and/or accessories not designated for use with this product will void your warranty and could result in
personal injury or property damage.
WARNING: To reduce the risk of personal injury, do not bend the blade bracket (flange or blade holder) when installing the brackets,
balancing the blades, or cleaning the fan. Do not insert foreign objects in between rotating fan blades.
This fan MUST be installed with an easily accessible isolating
2
We are here to help you. Please call our support line if you have any questions or
need assistance with installing or wiring the product.
Electricians and Installers
Customers and Purchasers
Please call us if you have any questions about your fan or would like advice on the
best ways to use your fan to save energy.
ThreeSixty Support and Information Line - 1300 4 MYFAN (1300 469 326)

This manual is designed to make it as easy as possible
to assemble, install, operate, and maintain this ceiling fan
Wiring and connectors must be of types and sizes
required by the wiring rules (AS/NZS3000) and Type
Approved (safety approved) if required.
This fan must be connected to
an earthing conductor.
3
• One Phillips head screwdriver
• One stepladder
• One small blade screwdriver
• One wire stripper
WARNING
Electrical work can only be done by a licensed electrician.
* Images in this manual may slightly differ from the product.
WARNING
Hanger
Bracket
Cotter Pin
Ceiling Canopy
Motor Housing
Blade Screw
Blade
Ball Joint Screw
Down Rod
Ceiling Canopy
Ring
Motor Canopy
Ceiling
Canopy
Screw
Bracket Mounting Screw
Down Rod
Pin
Ball
Joint
Pin
Ball Joint
Grip Plate
Grip Plate Screw
Base Plate
WARNING
Do not install or use fan if any part is damaged or
missing. This product is designed to use only those
parts supplied with this
product and/or any accessories
designated specifically for use with this product.
Substitution of parts or accessories not designated
for
use with this
product could result in personal injury
or property damage.
IF ANY PART IS DAMAGED OR MISSING,
CALL 1300 469 326 (1300 4 MY FAN)
2x Grub Screws
Reverse
Switch

4
1
Hanger Bracket Down Rod
(26mm Diameter) 3
Blade
1
Grip Plate1
Cotter Pin
2
Bracket Mounting Screw 1
Grip Plate Screws1
Ceiling Canopy
2
Ceiling Canopy Screws 3
1
Base Plate
1
Screw Cover
1
Ball Joint Pin
1
Motor Canopy
1
Ball Joint Screw Wall Control Assembly
comprising of wall
switch, wall knob and
capacitor
1
Motor Housing
1
Ball Joint
9Blade Screw
1
Down Rod Pin
1
The Arumi fan down rod may have a thread at one end. When assembling the fan
ensure the threaded end is tightly screwed into the housing. The pin and screws are
essential and must be fitted. The screws must be tight to prevent movement and
noise.
Ceiling Types and Mounting Methods
Ceilings may be constructed from a variety of materials. Some materials may not be
suitable for mounting a ceiling fan, or the structure behind the ceiling may cause noise
or movement in your fan.
Concrete ceilings that are covered with render or gap filler may not be smooth and the
surface compound may not be sound enough to suspend a fan from. Make sure
concrete anchors are set deep enough and when tightened the ceiling fan bracket is
pulled tight against the ceiling. If the anchor pulls out slightly, before the bracket is
sitting flush to the ceiling, the fan may wobble.
Plasterboard ceilings must be rigid and not have any movement. If the plasterboard
sags or has any movement it could hum or drum, magnifying the noises made by
most ceiling fans.
Foam sandwich ceiling panels require proper structural bracing to prevent ceiling fans
from wobbling and making excessive noise.
In all cases the ceiling canopy must not touch the ceiling. There should be a gap of
2 mm (minimum) between the edge of the canopy and the ceiling. If necessary a thin
shim or spacer may be needed between the the foot of the bracket and the ceiling to
prevent the ceiling canopy touching the ceiling. Noise and vibration can be transmitted
to the ceiling if the canopy touches the ceiling.
Grub Screws 2

Choosing the Appropriate Mounting Location
Ceiling fans should be installed, or mounted, in the middle
of the room and at least 2.1 m above the floor and 50 cm
from the walls. If ceiling height allows, install the fan
2.4-2.7 m above the floor for optimal airflow.
5
This new
ceiling fan
requires
an earthed
electrical
supply
of 230-240 volts AC, 50 Hz circuit.
The bracket must be securely anchored and capable of
supporting a load of least 27kg. If your fan is to replace an
existing ceiling light fixture, turn electricity off at the main
fuse box at this time, remove the existing light fixture and
verify there is a suitable rafter or structural member in
the positions for each screw.
Figure 1 depicts a typical structural configuration that may
be used for securely mounting the fan.
WARNING
Turning off wall switch is not sufficient. T
o avoid
possible electrical shock, be sure electricity is turned
off at the main fuse box before wiring. All wiring must
be in accordance with AS/NZS 3000 “The Wiring Rules”
and the ceiling fan must be properly grounded as a
precaution against possible electrical shock.
Ceiling fan performance and energy savings rely
heavily on the proper installation and use of the ceiling
fan. Here are a few tips to ensure efficient product
performance.
Turn Off When Not in the Room
Ceiling fans cool people, not rooms. If the room is
unoccupied, turn off the ceiling fan to save energy.
Using the Ceiling Fan Year Round
Summer Season: Use the ceiling fan in the counter-
clockwise direction. The airflow produced by the ceiling
fan creates a wind-chill effect, making you “feel” cooler.
Select a fan speed that provides a comfortable breeze,
lower speeds consume less energy.
Winter Season: Reverse the motor and operate the ceiling
fan at low speed in the clockwise direction. This produces
a gentle updraft, which forces warm air near the ceiling
down into the occupied space. Remember to adjust your
air conditioner when using your ceiling fan-additional energy
and dollar savings could be realized with this simple step!
Ceiling
Ceiling
Joists
Ceiling
Joists
Figure 1
45 X 95 mm
Timber Batten
Between Joists
WARNING
Electrical work can only be done by a licensed electrician.
NOTE: The stability and strength of the ceiling structure will influence safety and long term
user satisfaction. If the structure is weak, flexes or drums this will make the fan wobble, hum
or even work loose.
WARNING
NEVER USE SCREWS WITH ANGLED OR COUNTERSINKING HEADS
THESE WILL DAMAGE THE BRACKET AND MAKE THE FAN WOBBLE.
ONLY USE PAN HEAD SCREWS OR ROOFING TYPE SCREWS

6
WARNING
The fan must be hung with at least 2.1m of
clearance from oor to blades. (Figure 2)
WARNING
To avoid possible fire or shock, be sure electricity is
turned off at the main fuse box before wiring.
(Figure 1)
Figure 1
MAIN FUSE BOX
WARNING
The hanger bracket must be securely mounted and
capable of supporting at least 27 kg. If bracket and /or
timber batten are not securely attached, the fan could
wobble or fall.
WARNING
Failure to seat tab in groove could cause damage to
electrical wires and possible shock or fire hazard.
WARNING
To avoid possible shock, do not pi nch wires between
the hange r ball assembly and the hanger bracket.
1. Drill aholein the ceilin board and batten for wirin
g g
Securelyattachthehangerbracket t o a rafter, beam
orotherstructuralsupport usingpan head fasteners
(for use with flat surfaces). Never use countersinking
screws or those without flat contact to the bracket.
(Figure 3)
2. Carefullylift the fan and seat the downrod/hanger
ballassemblyon the hanger bracket that was just
attached to the timberbatten. Be sure thegroove
in the ballis lined up with tab on the hanger bracket.
(Figure 4)
Figure 2
CEILING
FLOOR
NO
LESS THAN
2.1 M
Downrod/Hanger
Ball Assembly
Hanger
Bracket
Note: Ceiling board and
wiring omitted for clarity. Figure 4
Figure 1
Figure 3
Note: Ceiling board and
wiring omitted for clarity.
Screw with hex head
wood screws(2)
Hanger
Bracket
Tab
Timber Batten
CAUTION:
Straighten the wires and inspect for damage before
connecting to power.
Do not cut the wires until certain the fan is the right height
above the floor. On high ceilings temporarily connect the
fan and check the air movement is acceptable. If not an
extension rod may be required, necessitating the longer
wires. Once certain of the height, cut the wires to fit, leaving
a 5little slack to allow for movement of the ball joint.
5555555999

Figure 3
7
WARNING
T
o avoid possible fire or shock, be sure electricity is
turned off at the main fuse box before wiring.
(Figure 2)
Figure 4
WARNING
Check to see that all connections are tight, including
earth, and that no bare wire is visible at the wire
connectors, except for the earth wire. Do not operate
fan motor for long periods unless the blades are in place.
1. Securely connect the green/yellow earth wires from the
hanger ball and the hanger bracket and the supply
green/yellow earth wire to the terminal block as shown in
Figure 3.
2. Securely connect the blue fan motor wire and the black
supply neutral to the “N” terminal of the connector block
as shown in Figure 3.
3.
. Securely connect the red light wire and the wire from
light switch to the “L1” or light symbol terminal of the
Securely connect the brown fan motor wire and the
wire from the wall control to the "L" terminal on the
connector block as shown in Figure 3.
1. With electrical power still disconnected, route fan
(and light) wiring to desired location on wall.
2. Ensure wiring connections are as shown in Fig 3. The
Active (Red) supply wire must be connected
to terminal "C" on the rotary switch. Return switched wire
tcelngfantbecnnectedfrmtermnal3nthertar
stchttermnalnthecnnectrblck.
3. Fit the wall control (rotary) switch to a face plate (not
supplied) and attach to wall.
INSTALLATION NOTE:The “O” and the small corner
cut-out on the front of the switch mechanism must be at
the top and top left respectively (See Figure 4).
4. Restore electrical power by turning on the
electricity on at the main fuse box.
5. Check the operation of the fan by rotating the control
through the four positions marked 0 - III
(“0” position is OFF) (Figure 5).
6. All fans are shipped from the factory with the reverse
switch positioned to circulate air downward.
If airflow is desired in opposite direction, turn your fan
OFF and wait for the blades to stop turning,
then slide the reversing switch to the opposite position,
and turn fan on again.
Figure 5
= OFF= FAST = MED = SLOW
After connections have been made, carefully push wires
into the recess making sure there is separation between
conductors and cover joiners with PVVC tape.
INSTALLATION NOTE: If light fixture is NOT required,
insulate the unused wires and restrain them.
Red Wire
(Light Active)
Fan Speed Control
Light Switch (not supplied)
Fan Speeds: 3 = High, 2 = Medium, 1 = Slow
connector block as shown in Figure 3 (if applicable).
The light (if fitted) can be
wired to an ordinary light switch (not supplied). The fan
and light must be fed from the same incoming supply.
Home automation and complex switching systems must
ensure the active and neutral come from the same circuit to
avoid problems with safety switches or shock hazards.
Isolating
Switch
**
** Refer to wiring rules and product standards for isolation switch requirements.

8
Assemble the the Ceiling Fan Blades
WARNING
To avoid possible fire or shock, make sure that the
electrical wires are completely inside the canopy
housing and not pinched
between the housing and
the
ceiling.
INSTALLATION NOTE
Do not attach
fan blades until the fan is completely
installed. Installing the fan with blades assembled may
result in damage to the fan blades.
WARNING
To reduce the risk of personal injury, do not bend the
blades when installing, balancing or cleaning the fan.
Do not insert foreign objects in between the rotating
blades.
NOTE: This step is applicable after the neccessary wiring
is completed.
1. Loosen the two shoulder screws without fully
removing them from the hanger bracket. Assemble
canopy by rotating key slots in canopy over shoulder
screws in hanger bracket. Tighten all the shoulder
screws.
2. Slide the screw cover up the rod and locate the
keyways over the canopy screws. Rotate the cover
to click it into place.
The canopy shape may vary depending on fan model.
1. Position the first blade on motor, align the screw holes and insert the middle screw but do not tighten.
2. Position the other two blades and likewise, insert the middle screws without tightening.
3. With all three blades in place, insert the remaining six screws but do not tighten
4. Position the grip plate under the fan and loosely fit the three screws.
5. Tighten all the blade screws and grip plate screws. Make sure the blades do not have any movement
under the grip plate after all screws have been tightened. If movement evident then slacken screws and
slightly move the blades and retighten.

9
Re
verse Switch Informatio
n
Season
Summer
Rotation DirectionSwitch Position
Counter-Clockwise
WinterClockwise
1. If airflow is desired in the opposite direction, turn the
fan off and wait for the blades to stop turning. Slide the
reverse switch above the motor assembly to the
opposite position and turn fan on again.
WARNING
T
o avoid possible fire or shock, make sure that the
electrical wires are completely inside the base plate
housing and not pinched between the housing and the
edge of the base plate.
Down
Up
Reverse
Switch
1. To attach the base plate, lift the base until the inner
ringsurrounds the keyed housing on the bottom of the
motor.
2. Engage the pins in the slots and rotate the base plate
clockwise while gently pushing upwards.
3. Tighten by hand only. Check the base doesn't wobble.
4. Fit the optional light by connecting the earth wire to the
earth terminal and then the power connector.
5. Fit the light the same way as the base plate (see 1 -3)
above.
Only ThreeSixty Lights designated for
use with the Arumi Fan are suitable.
Attempting to modify the fan to fit other
lights can be hazardous and will void the
safety certification

Before discarding packaging materials, be certain all parts have been removed
H
ow To Order Parts
When ordering repairs or parts,
always give the following information:
• Fan Model and Size
• Part Description
• Date of Purchase
For parts and advice please call:
10
DANGER
Do not use water when cleaning your ceiling fan. It
could damage the motor or the blades
and create the
possibility of electrical shock.
Clean your fan as you would any other household electrical
appliance. Use a soft dry cloth to lightly remove dust and
debris at least every 3 months.
Built up grime such as pet dander or dirt caused by
moisture (condensation) will cause metal parts (especially
blades) to corrode or rust. Regularly remove grime with a
dampened (not wet) cloth and dry afterwards.
Metal bodies and blades can be coated with a polymer base
car polish (do not use cutting agents) to protect the finish.
In humid climates air conditioning will make the fan blades
cold and when warm, humid air enters the room it will cause
moisture to condense on the fan blades. This may cause
dirt and corrosion to form more quickly.
Polymer blades will be less susceptible to condensation.
but still must be cleaned regularly.
Chipped paint can be touched up with automotive paint,
applied sparingly with a cotton tip or micro sprayer. Do not
sand the damaged area. A blade should be taken to the
paint shop for colour matching.
If the instructions have been followed you will have years of trouble free use of your Arumi fan.
First, check the fan is operating in the correct direction by switching the fan on and setting it to the highest speed.
A steady stream of air should be blowing downwards. To change the direction of airflow follow the procedure given.
If no immediate problems are apparent allow the fan to run for 6 hours on high speed. A slight smell may be
noticeable for the first few hours and this is normal for most electric motors. If a slight wobble develops after several
minutes this is usually caused by air currents in the room (the Arumi is a very powerful, high airflow fan).
If a wobble develops very soon after the fan reaches full speed, swap 2 of the blades that are next to each other
(ie. swap blades 1 & 2, or 2 & 3). If a wobble develops after several hours, days or weeks then the mounting
bracket is not tight against the ceiling, the ceiling is moving or the fans blades may have been struck by something.
During extended use the motor will become quite warm.
The Arumi Fan has an open frame motor. It is normal for the motor to hum slightly at high speed.
The wall control provides three distinct speeds but the actual motor RPM will vary slightly with household voltage..

3. Reversing switch in neut
For your own safety, turn off power at fuse box or
!
Trouble Probable Cause
1.FAN WILL NOT RUN
1. Fuse or circuit breaker tripped
2. Loose power connect
fan, or loose switch wires going to
or in the wall switch housing.
2.FAN SOUNDS NOISY
1. Attach blades to fan before operating.
2. Check to make sure all screws in
motor assembly are tight.
3. Check to make sure the screws which
attach the fan blade to the motor
assembly are tight.
3. Check to make sure the screws which
attach the fan blade to the motor
assembly are tight.
1. Blades not attached to fan.
2. Loose screws in motor assembly.
3. Screws securing fan blade to motor
assembly are loose.
3. Screws securing fan blade to motor
assembly are loose.
3.FAN WOBBLES
EXCESSIVELY
1. Tighten both setscrews securely in
downrod support.
2. Tighten the setscrew in the down
rod - hanger ball assembly.
4. Tighten the hanger bracket screws
and check timber batten is stable.
1. Setscrew in downrod support is loose.
2. Setscrew in downrod/hanger ball
assembly is loose.
4. Hanger bracket and/or timber
batten is not securely fastened.
1. Typically, airflow can be increased by
lowering fan blades further from
ceiling using a longer downrod.
4.NOT ENOUGH AIR
MOVEMENT
1. If possible, consider using a longer
downrod. Please be aware blades
must be at least 2.1 m above floor
level.
Tr
11
3. Make sure reversing switch position is
all the way up or down.
ral position.
WARNING
Suggested Remedy
1. Check main and branch circuit fuses
or circuit breakers.
2. Check line wire connections to fan
and switch wire connections in the
switch housings.
ions to the
ouble Shooting
Remedies in bold can only be checked/done by a licensed electrician.
4. Check the ball joint pin and set
screw are not loose or rattling.
4. Lower ceiling canopy and check ball
joint screw and pin. Rotate ball joint
180 degrees and refasten screw.
5. Countersunk screws used to fasten
hanger bracket.
5. Remove incorrect screws and
replace with roofing or pan head.
2. The fan is too close to the ceiling or
is boxed into a corner or placed in
the peak of the roof.
2. The fan should be moved at least
0.5m from any wall and no closer
than 300mm to the ceiling (leaving
2.1m between blades and floor).
If in the peak of the roof the fan must
be lowered to achieve good airflow.

ThreeSixty Innovations Pty. Ltd. – Plain English Ceiling Fan Warranty Terms
ThreeSixty Fan Warranty Ed. 1.3 Technical and Warranty Hotline: 1300 469 326 Page 1 of 2
Our goods come with guarantees that cannot be excluded under the Australian Consumer Law. You are entitled to a refund or
replacement for a major failure and for compensation for any other reasonably foreseeable loss or damage. You are also entitled
to have the goods repaired or replaced if the goods fail to be of acceptable quality and the failure does not amount to a major
failure.
Mechanical and Structural Components
Your ThreeSixty Product is covered against mechanical and structural defects that prevent it from working by a limited 36 month
on-site warranty. This warranty covers only the product itself and excludes workmanship or materials related to its installation
or any modifications. A major failure may be, for example, a motor defect preventing a product from operating shortly after it
was first installed or if it was damaged while in the original packaging. If the product stops working due to a mechanical or
structural defect within the first 36 months we will repair or replace the product at our discretion.
Electronic Components
Your ThreeSixty Product is covered against electronic defects that prevent it from working by a limited 12 month on-site
warranty. This warranty covers only the electronics supplied with the product and excludes workmanship or materials related to
its installation or any modifications. A major failure may be, for example, a power module that failed shortly after it was first
installed or if it was damaged while in the original packaging. If the product stops working due to an electronic defect within the
first 12 months we will repair or replace the electronic part at our discretion.
Compensation for reasonably foreseeable loss
Compensation normally comprises us paying associated labour costs to replace the defective product ifit’sinstalledwithina
reasonable distance from our repair agent. If beyond a reasonable distance (30km) you can arrange your own electrician and we
will compensate you for this up to a maximum of $115.50 inc GST. Note, we do not pay extra for extended travelling time or
additional costs when the job requires a longer than average time to complete.
To prevent or limit costs you may incur for service calls, you must notify us of the intention to use your own contractor and not
engage one until we have spoken to them (to arrange parts that may be required). If the problem is not a defect covered by our
warranty terms you will have to pay all costs. To reduce cost and inconvenience for all involved we will do our best to diagnose
the fault and supply parts before the contractor visits the site.
Eligibility for In-Home Service Calls
Hard wired electrical products must (by law) be installed by a licensed electrician. To obtain in-home warranty service you must
be able to provide a copy of the installing electricians invoice or the Certificate of Compliance given to you when the product
was first wired up and tested. If you cannot provide this information we limit our warranty to repair or replacement of the
product at our workshop and you will bear the costs of removal, shipping to us and reinstallation. We will pay the freight to
send the rectified unit back to you.
Access to products
Products installed on ceilings 4m and above may require special access equipment or WH&S measures. All costs for this
equipment must be borne by the site owner and the ceiling height given when booking a service call. If a service agent chooses
not to access a product installed at height due to WH&S concerns the owner must remove and reinstall the product at their own
expense.
Isolation Switches
Australian Standards require our instructions to state an isolation switch must be fitted. This allows the product to be physically
switched off in case of faults or to prevent damage from surges, lightning, etc. Emergency disconnection and/or remote control
re-programmingthatcan’tbeperformedduetolackofanisolationswitchisnotcoveredbywarranty.
Commencement
The warranty period begins from date of purchase and in-home warranty service is available only at the site of original
installation. If the product is installed as part of a project or development the warranty period commences when the product
was delivered to the site.
Damage
Damage from Force Majeure, electrical surges, wind, rain, lightning, power grid fluctuations, water ingress, condensation or use
with incompatible power sources will not be rectified under warranty. Likewise solid state or dimmer type speed controls may
damage ceiling fans or cause them to make unusual noises. Genuine parts and advice are available through our online and
telephone support services.

ThreeSixty Innovations Pty. Ltd. – Plain English Ceiling Fan Warranty Terms
ThreeSixty Fan Warranty Ed. 1.3 Technical and Warranty Hotline: 1300 469 326 Page 2 of 2
Cosmetic defects
Carefully inspect your product prior to installation and notify us as soon as possible if there are cosmetic defects. Cosmetic
defects are generally not covered by warranty unless present when the product is initially unpacked. Damage from being struck
by objects or not being kept clean is not covered by warranty.
Corrosion
Deterioration of finishes, including rusting, pitting, corrosion, fading, tarnishing or peeling is not covered by warranty beyond six
months. Products specified as corrosion resistant or made from Stainless Steel are not corrosion proof and will discolour or
deteriorate if not cleaned. As a guide, maintain your product as you would your kitchen appliances (clean every 3 months).
Noise
Signals sent through the power grid by the electricity supplier may cause intermittent noises in your product. These noises are
not the result of a fault and filters to reduce this noise may be available at additional expense.
Clicking, ticking and creaking noises from fans are usually caused by the mounting bracket not being correctly attached or when
blades screws are loose. Only use the hardware provided to install ceiling fans. If the mounting bracket is attached using
counter-sunk screws it will work loose and cause unwanted noise and movement in your fan. Wooden bladed fans may need
their blade screws periodically tightened. Unless a product is defective noise will not be rectified under warranty.
Wobbling
Wobbling is generally not caused by a defective fan but by air currents in the room. After a fan has been running for a long
period it will cause air currents to form and, depending on the shape of the room and its furnishings, the air returning to the fan
may be uneven.
Improper mounting will also cause a fan to wobble. Every mounting bracket screw must be secured to solid materials in the
ceiling. Metal C section rafters may need to be doubled to form a box section to prevent flexing. Foam sandwich ceiling panels
will require reinforcing to stop flexing. Unless a product is defective wobbling will not be rectified under warranty
Airflow
The amount of airflow produced by a fan is dependent on where it’sinstalled because room shape, mounting height and
furnishings will affect the perceived air movement. A product is deemed to be functioning normally if it is running within 15% of
the specified RPM when installed.
Installation Records – we will ask for this information when diagnosing a problem
Purchase Date: ___________________________________________
Seller Name: ___________________________________________
Product Model: ___________________________________________
Installed by: ___________________________________________
License/Certificate No: ___________________________________________
Phone numbers: ___________________________________________
Light type and model: ___________________________________________
Remote control type: ___________________________________________
Height of Fan and Ceiling: Fan: _______ (at blades) Ceiling: _______ (in metres)
Circuit breaker numbers: _____ _____ _____ Circuit Type: Lighting / Power
RCD Details: [ ] One RCD covers whole installation
[ ] Separate RCDs for power and lighting
[ ] No RCD fitted on fan or lighting circuit
Table of contents
Other Three Sixty Fan manuals

Three Sixty
Three Sixty The Tropicana TRO54 Series User manual

Three Sixty
Three Sixty Kensington DC KEN720BLED Setup guide

Three Sixty
Three Sixty Kute DC KUT44 Series User manual

Three Sixty
Three Sixty Kirra KIR100 Series User manual

Three Sixty
Three Sixty SC45 Series User manual

Three Sixty
Three Sixty FlatJet FLA56 Series User manual