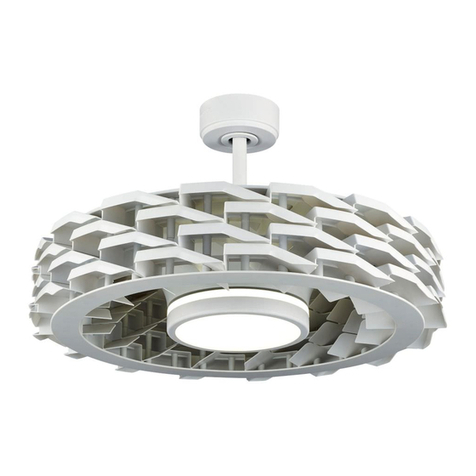
Three Sixty FlatJet FLA56 Series User manual

Operation & Installation Instructions
MODEL FLA56**
FlatJet
CEILING FANS

FJMAN V1.2 Pg2/15
ThreeSixty Fan Technology
that’s Innovative and Reliable
ThreeSixty Fan is proud of its range of ceiling fans, accessories and lighting
products. We believe these are the leading products in their category,
reflecting over 40 years collective Australian experience in design,
development, manufacturing and distribution of electronics and electrical
equipment.
The Flatjet is a decorator style DC motor powerd ceiling fan intended to

Important Safety Information
Read your owner’s manual and safety information before using or installing your new fan.
Beware of fan blades when cleaning, painting or working near the fan.
Always turn off power at the isolation switch before working on ladders near the fan.
Never allow children to play with the remote control.
Batteries may be hazardous to young children. Keep the remote control out of their reach.
This appliance is not intended for use by persons (including children) with reduced physical,
sensory or mental capabilities, or lack of experience and knowledge, unless they are
supervised or been given instruction concerning use of the appliance by a person
responsible for their safety.
Safety Instructions for Installers
Always switch off power at the switch board and never work on live circuits.
An isolation switch serving this fan must be fitted in an easily accessible location.
Isolation switches require a contact separation of 3mm in both poles or as required by the Wiring Rules.
The lowest edge of the fan blades must be at least 2.1m above floor level
The mounting surface and structure must be capable of supporting 40 kg of dead weight.
This fan is NOT suitable for use with ANY other type of remote control,
wall control or solid state controller
WARNING: This is a permanent magnetic DC motor fan. Use only the controllers and
parts supplied with the fan or supplied by ThreeSixty as genuine accessories or
genuine replacement parts. Modifications, other than down rod length, can lead to loss
of warranty, safety certification, reduced life, incorrect operation or fire.
by a licensed electrician or call ThreeSixty for expert advice.
If damaged by water, driving rain, storms, etc. please have the fan checked
observed, stop the fan and contact ThreeSixty for advice.
around damaging itself, the ceiling or other objects. If unusual wobbling is
If mounted where strong breezes are likely the fan can wobble or swing
moving objects such as plants or decorations.
do not spray water on this fan and keep it protected from rain, wind and
This fan is not weather proof. If installed outdoors, to avoid electric shock
FJMAN V1.2 Pg3/15
ON-SITE WARRANTY MAY
BE VOIDED IF PROOF OF
PURCHASE CANNOT BE
PROVED.

Coupling cover
Steel pin
Grub Screw Hanger ball
Mounting bracket
Screws (2)
Motor
Motor Coupler
Blade Screws (8)
Flatjet
Support Pin and
Cotter (R) pin
Grub Screws (2)
Motor Coupler
Extra Length Down Rod
(not included)
When changing or
adjusting down rod
length, re-use the
parts in
bold
WARNING
Never hang the fan without the
5mm steel pin in the ball joint
or without motor support pin
in the coupler. If the pins are
missing the fan will fall.
Mounting bracket
screw kit
Bottom Cover
Bottom cover
screws (4)
Moulded Polymer Blades (4)
Control Module
Handset
Wall bracket
This fan weighs 8 kg
FJMAN V1.2 Pg4/15
Dress Ring

Ceiling fan performance relies heavily on proper
installation and use of the fan.
First, choose an appropriate mounting location. Fans
with broad airflow should be located in the middle of a
room. Fans with more intense, localised airflow should
be located above or nearer to the area where the
airflow is desired. Keep the blade tips at least 0.5m
from walls and avoid placing fans in corners (or they
may wobble).
Second, choose the best mounting height, allowing at
least 2.1m from the floor. Mounting the fan too high will
reduce its effectiveness. Different length rods are
available.
Avoid being too close to air conditioning ducts and
breezeways (these may cause the fan to wobble).
For cooling, the ‘wind chill’effect of a breeze
passing over skin provides direct cooling and the
circulation of air helps reduce stuffiness and
makes a room more comfortable.
During winter, a ceiling fan is an inexpensive way
to reduce heating costs by forcing the layer of
warm air that pools under the ceiling to spread out
and mixwith the cooler air below. Setting the fan
to ‘winter’or ‘reverse’avoids the wind chill effect
occurring directly beneath the fan.
Tips for Energy Efficient Use of Ceiling Fans
Electrical and Structural Requirements
WARNING
Electrical work can only be done by
a licensed electrician
WARNING
This fan requires an earthed circuit
supplying 240V~ 50Hz
Always turn off power, isolate and tag
the breaker before handling potentially
live circuits.
WARNING
place where no suitable structure existed.
Figure 1 is an example of adding a batten between rafters or joists to position a fan in a
be suitable for longitudinal loads and installed according to the manufacturer’s directions.
ceiling must penetrate half their length into the structural member. Concrete anchors must
mounting device that has been correctly installed. All screws holding the bracket to the
least 40 kgs. The mounting bracket must be screwed directly to the rafters or a ceiling fan
Always verify the ceiling structure is sound and capable of supporting a dead weight of at
FJMAN V1.2 Pg5/15

WARNING
This fan requires an earthed circuit
supplying 240V~ 50Hz
AS/NZS60335.2.1 states an all pole
isolation switch must be fitted. The
installer should verify what is required
under the Wiring Rules.
Hanging and Wiring
Mount the bracket using the supplied hardware.
Never use angled head screws, only use pan
head or roofing screws.
Install circuit wiring. A single or double pole
isolation switch is required
(#check local regulations).
Assemble the fan using the instructions on
the following pages, hang it and verify the
floor to blade height is more than than 2.1m
When the ball is fitted to the down rod, make
sure the 5mm diameter steel pin is in place
and the grub screw is tight. The steel pin
supports the mass of the fan and the grub
screw stops the rod wobbling in the ball joint.
WARNING
Never hang the fan without the
5mm steel pin in the ball joint. If
the pin is missing the fan will fall.
When hanging the fan, make sure the tab in
the bracket locks into the notch in the ball. This
stops the fan motor and ball joint spinning inthe
bracket. If the tab & notch are not locked
wiring and bracket can be damaged.
FJMAN V1.2 Pg6/15
> 2.1m
Terminal Block

Step 1 - Assemble the canopy, dress ring and coupling cover over the downrod.
Step 2 - Route all the wires from the motor through the down rod. Fit the down rod into the shaft
coupler, align the pin holes and pass the motor support pin through the coupler and down rod.
Secure the motor support pin with the R shaped cotter pin.
Next tighten the two grub screws and check there is no movement of the down rod in the coupler.
Generic canopy, rod and cover
shown for illustrative purposes
FJMAN V1.2 Pg7/15
Dress Ring

Slide the control module into the gap
in the mounting bracket.
Carefully store wiring in the excess
space. Beware of pinching wires.
Step 3 - Hang fan from bracket, attach motor wires tothe control module and connect
the control module tothe incoming power supply. Fit the control module into the
recess in the mounting bracket. Tuck and route wires carefully to avoid pinching.
Step 4 - Fit the ceiling canopy by fastening the 2 screws. The canopy should NOT touch
the ceiling. If it does touch the ceiling a shim may needed between the bracket and ceiling.
Unevenness in the ceiling panels may cause touching at one or more places (creates noise).
Ensure a 2mm
gap exists all
the way around
the canopy. Generic canopy shown for
illustrative purposes
FJMAN V1.2 Pg8/15
Grey
White
Yellow
Brown(L)
Yellow/Green(E)
Blue(N)
Notice:
“N”to“N” / “L”to“L” / “E”to“E”
Grey
Red(L)
Black(N)
Yellow/Green(E)
White
Yellow

Although the blades can be attached with the fan motor
sitting on a surface, to avoid damage it is recommended
to attach them after the motor is hung.
Step 5 - Align the 2 holes on the blade holder, blade and screw with
screws and washers provided.
FJMAN V1.2 Pg9/15

FJMAN V1.2 Pg10/15
function together when first installed, or
't
Power
Turn on/off Fan
Fan Speed
1 - Lowest Speed
6 - Highest Speed
Timer Off
Fan turns off after 1/3/6 hr
Forward Reverse
Anti-clockwise or
clockwise rotation
Speed Adjust
For higher speed
For lower speed

&
Maintenance
Cleaning
ThreeSixty recommends cleaning your fan at 3 monthly intervals. Use warm water and soft
non-abrasive cloths to remove dirt. Drying with a separate clean cloth will prevent smears.
Never spray water onto a fan and protect it from rain, wind and other damage.
If a fan blade shows signs of cracking, crazing, excessive
bending or damage, discontinue use and contact
ThreeSixty for expert technical assistance.
authorised service agents or other qualified persons.
safety related parts must be performed by ThreeSixty
Repairs and/or replacement of the mounting system and
FJMAN V1.2 Pg11/15

ThreeSixty Fans Pty. Ltd. – Plain English Ceiling Fan Warranty Terms
ThreeSixty Fan Warranty Ed. 1.3 Technical and Warranty Hotline: 1300 469 326
Our goods come with guarantees that cannot be excluded under the Australian Consumer Law. You are entled to a refund or
replacement for a major failure and for compensaon for any other reasonably foreseeable loss or damage. You are also entled
to have the goods repaired or replaced if the goods fail to be of acceptable quality and the failure does not amount to a major
failure.
Mechanical and Structural Components
Your ThreeSixty Product is covered against mechanical and structural defects that prevent it from working by a limited 36 month
on-site warranty. This warranty covers only the product itself and excludes workmanship or materials related to its installaon
or any modificaons. A major failure may be, for example, a motor defect prevenng a product from operang shortly aer it
was first installed or if it was damaged while in the original packaging. If the product stops working due to a mechanical or
structural defect within the first 36 months we will repair or replace the product at our discreon.
Electronic Components
Your ThreeSixty Product is covered against electronic defects that prevent it from working by a limited 12 month on-site
warranty. This warranty covers only the electronics supplied with the product and excludes workmanship or materials related to
its installaon or any modificaons. A major failure may be, for example, a power module that failed shortly after it was first
installed or if it was damaged while in the original packaging. If the product stops working due to an electronic defect within the
first 12 months we will repair or replace the electronic part at our discreon.
Compensaon for reasonably foreseeable loss
Compensaon normally comprises us paying associated labour costs to replace the defecve product if it’s installed within a
reasonable distance from our repair agent. If beyond a reasonable distance (30km) you can arrange your own electrician and we
will compensate you for this up to a maximum of $115.50 inc GST. Note, we do not pay extra for extended travelling me or
addional costs when the job requires a longer than average me to complete.
To prevent or limit costs you may incur for service calls, you must nofy us of the intenon to use your own contractor and not
engage one unl we have spoken to them (to arrange parts that may be required). If the problem is not a defect covered by our
warranty terms you will have to pay all costs. To reduce cost and inconvenience for all involved we will do our best to diagnose
the fault and supply parts before the contractor visits the site.
Eligibility for In-Home Service Calls
Hard wired electrical products must (by law) be installed by a licensed electrician. To obtain in-home warranty service you must
be able to provide a copy of the installing electricians invoice or the Cerficate of Compliance given to you when the product
was first wired up and tested. If you cannot provide this informaon we limit our warranty to repair or replacement of the
product at our workshop and you will bear the costs of removal, shipping to us and reinstallaon. We will pay the freight to
send the recfied unit back to you.
Access to products
Products installed on ceilings 4m and above may require special access equipment or WH&S measures. All costs for this
equipment must be borne by the site owner and the ceiling height given when booking a service call. If a service agent chooses
not to access a product installed at height due to WH&S concerns the owner must remove and reinstall the product at their own
expense.
Isolaon Switches
Australian Standards require our instrucons to state an isolaon switch must be fied. This allows the product to be physically
switched offin case of faults or to prevent damage from surges, lightning, etc. Emergency disconnecon and/or remote control
re-programming that can’t be performed due to lack of an isolaon switch is not covered by warranty.
Commencement
The warranty period begins from date of purchase and in-home warranty service is available only at the site of original
installaon. If the product is installed as part of a project or development the warranty period commences when the product
was delivered to the site.
Damage
Damage from Force Majeure, electrical surges, wind, rain, lightning, power grid fluctuaons, water ingress, condensaon or use
with incompable power sources will not be recfied under warranty. Likewise solid state or dimmer type speed controls may
damage ceiling fans or cause them to make unusual noises. Genuine parts and advice are available through our online and
telephone support services.
FJMAN V1.2 Pg12/15

ThreeSixty Fan Warranty Ed. 1.3
Cosmec defects
Carefully inspect your product prior to installaon and nofy us as soon as possible if there are cosmec defects. Cosmec
defects are generally not covered by warranty unless present when the product is inially unpacked. Damage from being struck
by objects or not being kept clean is not covered by warranty.
Corrosion
Deterioraon of finishes, including rusng, ping, corrosion, fading, tarnishing or peeling is not covered by warranty beyond six
months. Products specified as corrosion resistant or made from Stainless Steel are not corrosion proof and will discolour or
deteriorate if not cleaned. As a guide, maintain your product as you would your kitchen appliances (clean every 3 months).
Noise
Signals sent through the power grid by the electricity supplier may cause intermient noises in your product. These noises are
not the result of a fault and filters to reduce this noise may be available at addional expense.
Clicking, cking and creaking noises from fans are usually caused by the mounng bracket not being correctly aached or when
blades screws are loose. Only use the hardware provided to install ceiling fans. If the mounng bracket is aached using
counter-sunk screws it will work loose and cause unwanted noise and movement in your fan. Wooden bladed fans may need
their blade screws periodically ghtened. Unless a product is defecve noise will not be recfied under warranty.
Wobbling
Wobbling is generally not caused by a defecve fan but by air currents in the room. Aer a fan has been running for a long
period it will cause air currents to form and, depending on the shape of the room and its furnishings, the air returning to the fan
may be uneven.
Improper mounng will also cause a fan to wobble. Every mounng bracket screw must be secured to solid materials in the
ceiling. Metal C secon raers may need to be doubled to form a box secon to prevent flexing. Foam sandwich ceiling panels
will require reinforcing to stop flexing. Unless a product is defecve wobbling will not be recfied under warranty
Airflow
The amount of airflow produced by a fan is dependent on where it’s installed because room shape, mounng height and
furnishings will affect the perceived air movement. A product is deemed to be funconing normally if it is running within 15% of
the specified RPM when installed.
Installaon Records– we will ask for this informaon when diagnosing a problem
Purchase Date: ___________________________________________
Seller Name: ___________________________________________
Product Model: ___________________________________________
Installed by: ___________________________________________
License/Cerficate No: ___________________________________________
Phone numbers: ___________________________________________
Light type and model: ___________________________________________
Remote control type: ___________________________________________
Height of Fan and Ceiling: Fan: _______ (at blades) Ceiling: _______ (in metres)
Circuit breaker numbers: _____ _____ _____ Circuit Type: Lighng / Power
RCD Details: [ ] One RCD covers whole installaon
[ ] Separate RCDs for power and lighng
[ ] No RCD fied on fan or lighng circuit
FJMAN V1.2 Pg13/15
ThreeSixty Fans Pty. Ltd. – Plain English Ceiling Fan Warranty Terms
Technical and Warranty Hotline: 1300 469 326

Records, Notes and Comments
Use this section to record important information about your fan.
ThreeSixty Technical Support and Warranty Hotline: 1300 469 326
Date of Purchase: _______________________________________
Purchased from: _______________________________________
Installed By: ________________________________________
Phone Number: ________________________________________
Staple receipts, electricians invoice or compliance certificate below:
FJMAN V1.2 Pg14/15

FJMAN V1.2 Pg15/15
CEILING FANS
Table of contents
Other Three Sixty Fan manuals
Three Sixty
Three Sixty Arumi AC Series User manual
Three Sixty
Three Sixty SC45 Series User manual
Three Sixty
Three Sixty Kute DC KUT44 Series User manual

Three Sixty
Three Sixty Kensington DC KEN720BLED Setup guide

Three Sixty
Three Sixty The Tropicana TRO54 Series User manual
Three Sixty
Three Sixty Kirra KIR100 Series User manual
Popular Fan manuals by other brands
ECG
ECG FS 40 R instruction manual
Fanimation
Fanimation SUBTLE 56 manual

Vents-us
Vents-us TT PRO 100 installation guide

Honeywell
Honeywell HV-1800E technical information

Westinghouse
Westinghouse ETL-ES-CasaaSupreme-WH16 owner's manual
Home Decorators Collection
Home Decorators Collection MARLON Use and care guide
