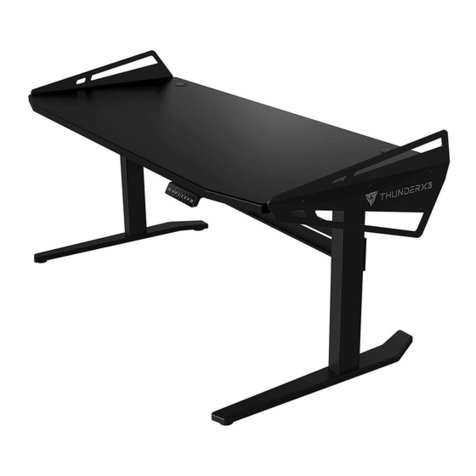
threeposts TY-18 Instruction sheet

For assistance with assembly or questions contact:
Wayfair Customer Service, 877-WAYFAIR (877-929-3247) | www.wayfair.com
PAGE 2
TY-18 Desk
Before beginning assembly, separate all parts and carefully study the parts
diagrams below. Review all parts and hardware before disposing of any
packaging. You may receive extra hardware with your unit. Call Customer
Service for missing hardware.
A: Top Panel (1)
B: Left Panel (1)
C: Right Panel (1)
D: Middle Left Panel (1)
E: Middle Right Panel (1)
F: Front Cross Bar (1)
G: Cross Bar (1)
H: Base (2)
Parts List

For assistance with assembly or questions contact:
Wayfair Customer Service, 877-WAYFAIR (877-929-3247) | www.wayfair.com
PAGE 3
I: Rear Cross Bar (1)
J: Right Rear Panel (1)
K: Left Rear Panel (1)
L: Left Door (1)
M: Top Drawer Face Panel (2)
N: Top Drawer Left Panel (2)
O: Top Drawer Right Panel (2)
P: Top Drawer Rear Panel (2)
Q: Top Drawer Base (2)
R: Center Drawer Face Panel (1)

For assistance with assembly or questions contact:
Wayfair Customer Service, 877-WAYFAIR (877-929-3247) | www.wayfair.com
PAGE 4
S: Center Drawer Left Panel (1)
T: Center Drawer Right Panel (1)
U: Center Drawer Rear Panel (1)
V: Center Drawer Base (1)
W: Middle Drawer Face Panel (1)
X: Middle Drawer Left Panel (1)
Y: Middle Drawer Right Panel (1)
Z: Middle Drawer Rear Panel(1)
A1:Middle Drawer Base (1)
B1:Lower Drawer Face Panel (1)

For assistance with assembly or questions contact:
Wayfair Customer Service, 877-WAYFAIR (877-929-3247) | www.wayfair.com
PAGE 5
C1:Lower Drawer Left Panel (1)
D1: Lower Drawer Right Panel (1)
E1: Lower Drawer Rear Panel (1)
F1: Lower Drawer Base (1)
1: Cam Bolt (23)
2: Cam Lock (23)
3: Dowel 5/16”x1-1/4”(22)
4: Bolt ∮1/4”x1-1/4”(4)
5: Spring Washer ∮1/16”(4)
6: Flat Washer ∮1/4”x3/4” (4)

For assistance with assembly or questions contact:
Wayfair Customer Service, 877-WAYFAIR (877-929-3247) | www.wayfair.com
PAGE 6
7: Allen Wrench (1)
8: Drawer Stop (3)
9: Screw Dia. 1/8” x1/2”L(9)
10: Screw Dia. 1/8”x1-1/4”L (4)
11: Screw Dia. 1/8” x1/2”L (22)
12: Magnet (1)
13: Knob (7)
14: Bolt Dia. 5/32” x3/4”L (7)
15: Cam Bolt (20)
16: Cam Lock (20)
17: Screw Dia. 1/8”x1”L (20)
18: Aluminum Strut (2)

For assistance with assembly or questions contact:
Wayfair Customer Service, 877-WAYFAIR (877-929-3247) | www.wayfair.com
PAGE 7
TY-18 Desk
Figure 1
Unpack and lay parts on a
clean, padded surface like a
carpet or blanket. Check that
you have all parts indicated on
the front page.
Step 1
Slide Front Cross Bar (F) into
groove on Middle Panels (D &
E) as shown in Figure 1.
Figure 2
Step 2
Insert Cam Locks (2) into holes
on Front Bars (F & G).
Screw Cam Bolts (1) into holes
on Panels (B, C, & E).
Attach unit from Figure 1 to
Panels (B & C) by inserting Cam
Bolts (1) and Dowels (3) into
corresponding holes until
components meet as shown in
Figure 2.
Tighten Cam Locks (2) by
rotating clockwise with Phillips
screwdriver (not included).
Assembly Instructions

For assistance with assembly or questions contact:
Wayfair Customer Service, 877-WAYFAIR (877-929-3247) | www.wayfair.com
PAGE 8
Figure 3
Step 3
Insert Cam Locks (2) into holes on
bottom of Panels (B, C, D, & E) as
shown in Figure 3.
Screw Cam Bolts (1) into holes on
Bases (H).
Attach unit from Figure 2 to Bases
(H) by inserting Cam Bolts (1) and
Dowels (3) into corresponding
holes until components meet.
Tighten Cam Locks (2) by rotating
clockwise with Phillips screwdriver
(not included).
Figure 4
Step 4
Attach Rear Cross Bar (I) to
Panels (B & C) using Bolts (4),
Spring Washers (5) and Flat
Washers (6).
Tighten Bolts (4) with Allen Wrench
(7).
Attach Rear Cross Bar (I) to
Panels (D & E) using Screws (10)
as shown in Figure 4.
Attach Drawer Stop (8) to Front
Cross Bar (F) using Screws (9).
Tighten Screws (9) with Phillips
screwdriver (not included).

For assistance with assembly or questions contact:
Wayfair Customer Service, 877-WAYFAIR (877-929-3247) | www.wayfair.com
PAGE 9
Figure 5
Step 5
Insert Cam Locks (2) into holes on
top of Panels (B, C, D, & E).
Screw Cam Bolts (1) into holes on
Top Panel (A).
Attach Top Panel (A) to unit from
Figure 4 by inserting Cam Bolts (1)
and Dowel (3) into corresponding
holes until components meet.
Tighten Cam Locks (2) by rotating
clockwise with Phillips screwdriver
(not included).
Figure 6
Step 6
Attach Rear Panels (J & K) to unit
on Figure 6 using Screws (11).
Tighten Screws (11) with Phillips
screwdriver (not included).

For assistance with assembly or questions contact:
Wayfair Customer Service, 877-WAYFAIR (877-929-3247) | www.wayfair.com
PAGE 10
Figure 7
Step 7
Attach hinges on Left Door (L) to
Left Panel (B) using Screws (9).
Attach Magnets (12) to unit from
Figure 6 with screws (11).
Attach the Knob (13) to the door
with Bolts (14).
Tighten Screws (9), Screws (11),
and Bolts (14) with Phillips
screwdriver (not included)
Figure 8
Step 8
Insert Cam Locks (16) into holes
on Drawer Panels (N & O).
Screw Cam Bolts (15) into holes
on Face Panel (M).
Attach Drawer Panels (N & O) to
Face Panel (M) by inserting Cam
Bolts (15) into corresponding holes
until components meet.
Insert Drawer Base (Q) into the
grooves on Panels (N, O, & M).
Attach Rear Panel (P) to pre-
assembled drawer using Screws
(17).
Attach Knob (13) to Face Panel
(M) using Bolt (14).
Tighten Bolt (14) and Screws (17)
with Phillips screwdriver (not
included).

For assistance with assembly or questions contact:
Wayfair Customer Service, 877-WAYFAIR (877-929-3247) | www.wayfair.com
PAGE 11
Figure 9
Step 9
Insert Cam Locks (16) into holes
on Drawer Panels (S & T).
Screw Cam Bolts (15) into holes
on Face Panel (R).
Attach Drawer Panels (S & T) to
Face Panel (R) by inserting Cam
Bolts (15) into corresponding holes
until components meet.
Insert Drawer Base (V) into
grooves on Panels (S, T, & R).
Attach Rear Panel (U) to the pre-
assembled drawer using Screws
(17).
Attach Knobs (13) to Face Panel
(R) using Bolts (14).
Tighten Bolts (14) and Screws (17)
with Phillips screwdriver (not
included).
Figure 10
Step 10
Insert Cam Locks (16) into holes
on Drawer Panels (X & Y).
Screw Cam Bolts (15) into holes
on Face Panel (W).
Attach Drawer Panels (X & Y) to
Face Panel (W) by inserting Cam
Bolts (15) into corresponding holes
until components meet.
Insert Drawer Base (A1) into
grooves of panels (X, Y, & W).
Attach Rear Panel (Z) to pre-
assembled drawer using Screws
(17).
Attach Knob (13) to Face Panel
(W) using Bolts (14).
Tighten Bolts (14) and Screws (17)
with Phillips screwdriver (not
included).

For assistance with assembly or questions contact:
Wayfair Customer Service, 877-WAYFAIR (877-929-3247) | www.wayfair.com
PAGE 12
Figure 11
Step 11
Insert Cam Locks (16) into holes
on Drawer Panels (C1 & D1).
Screw Cam Bolts (15) into holes
on Face Panel (B1).
Attach Drawer Panels (C1 & D1) to
Face Panel (B1) by inserting Cam
Bolts (15) into corresponding holes
until components meet.
Insert Drawer Base (F1) into
grooves on panels (C1, D1, & B1).
Attach Rear Panel (E1) to pre-
assembled drawer using Screws
(17).
Attach Aluminum Struts (18) to
Drawer Panels (C1 & D1) using
Bolts (14).
Attach Knob (13) to Face Panel
(B1) using Bolts (14).
Tighten Bolts (14) and Screws (17)
with Phillips screwdriver (not
included).
Figure 12
Step 12
Insert drawers into pre-assembled
unit from Figure 7.
Other threeposts Indoor Furnishing manuals
threeposts
threeposts TRT-LS-1OAK User manual
threeposts
threeposts TRT-BRC-1 Instruction sheet

threeposts
threeposts YD-5022 Instruction sheet
threeposts
threeposts TRT-BS-1 User manual
threeposts
threeposts ZH1825 Instruction sheet
threeposts
threeposts YD-5542 Instruction sheet
threeposts
threeposts DD-QHB4250-1CR Instruction sheet
Popular Indoor Furnishing manuals by other brands
LF
LF Portfolio LSTC04MT manual
Peka
Peka Magic Corner II Assembly instruction
Argos
Argos Normandy Tall 3+3 Mirror Robe Assembly instructions

Amart Furniture
Amart Furniture KLAUS 73591 Assembly instruction
Riverside
Riverside Windward Bay 42870 Assembly instructions
AmazonBasics
AmazonBasics B00XBC3BF0 manual


