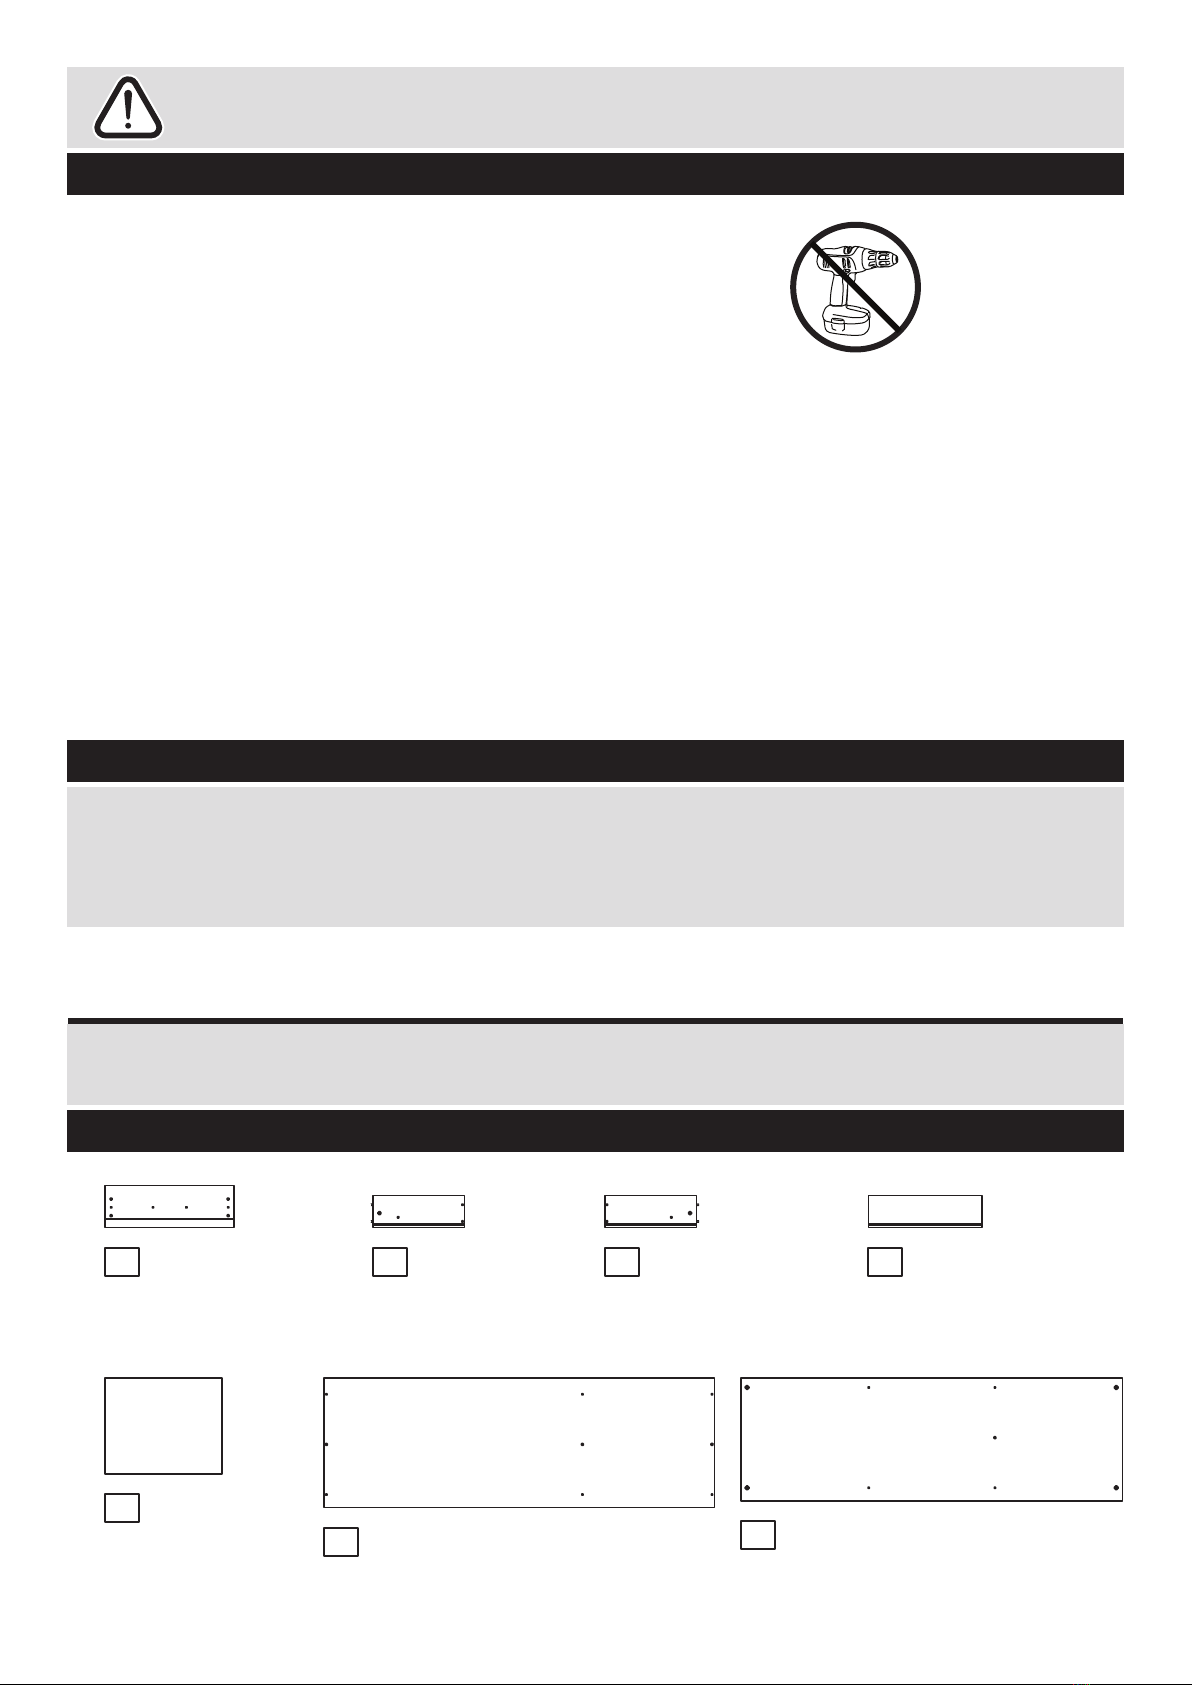
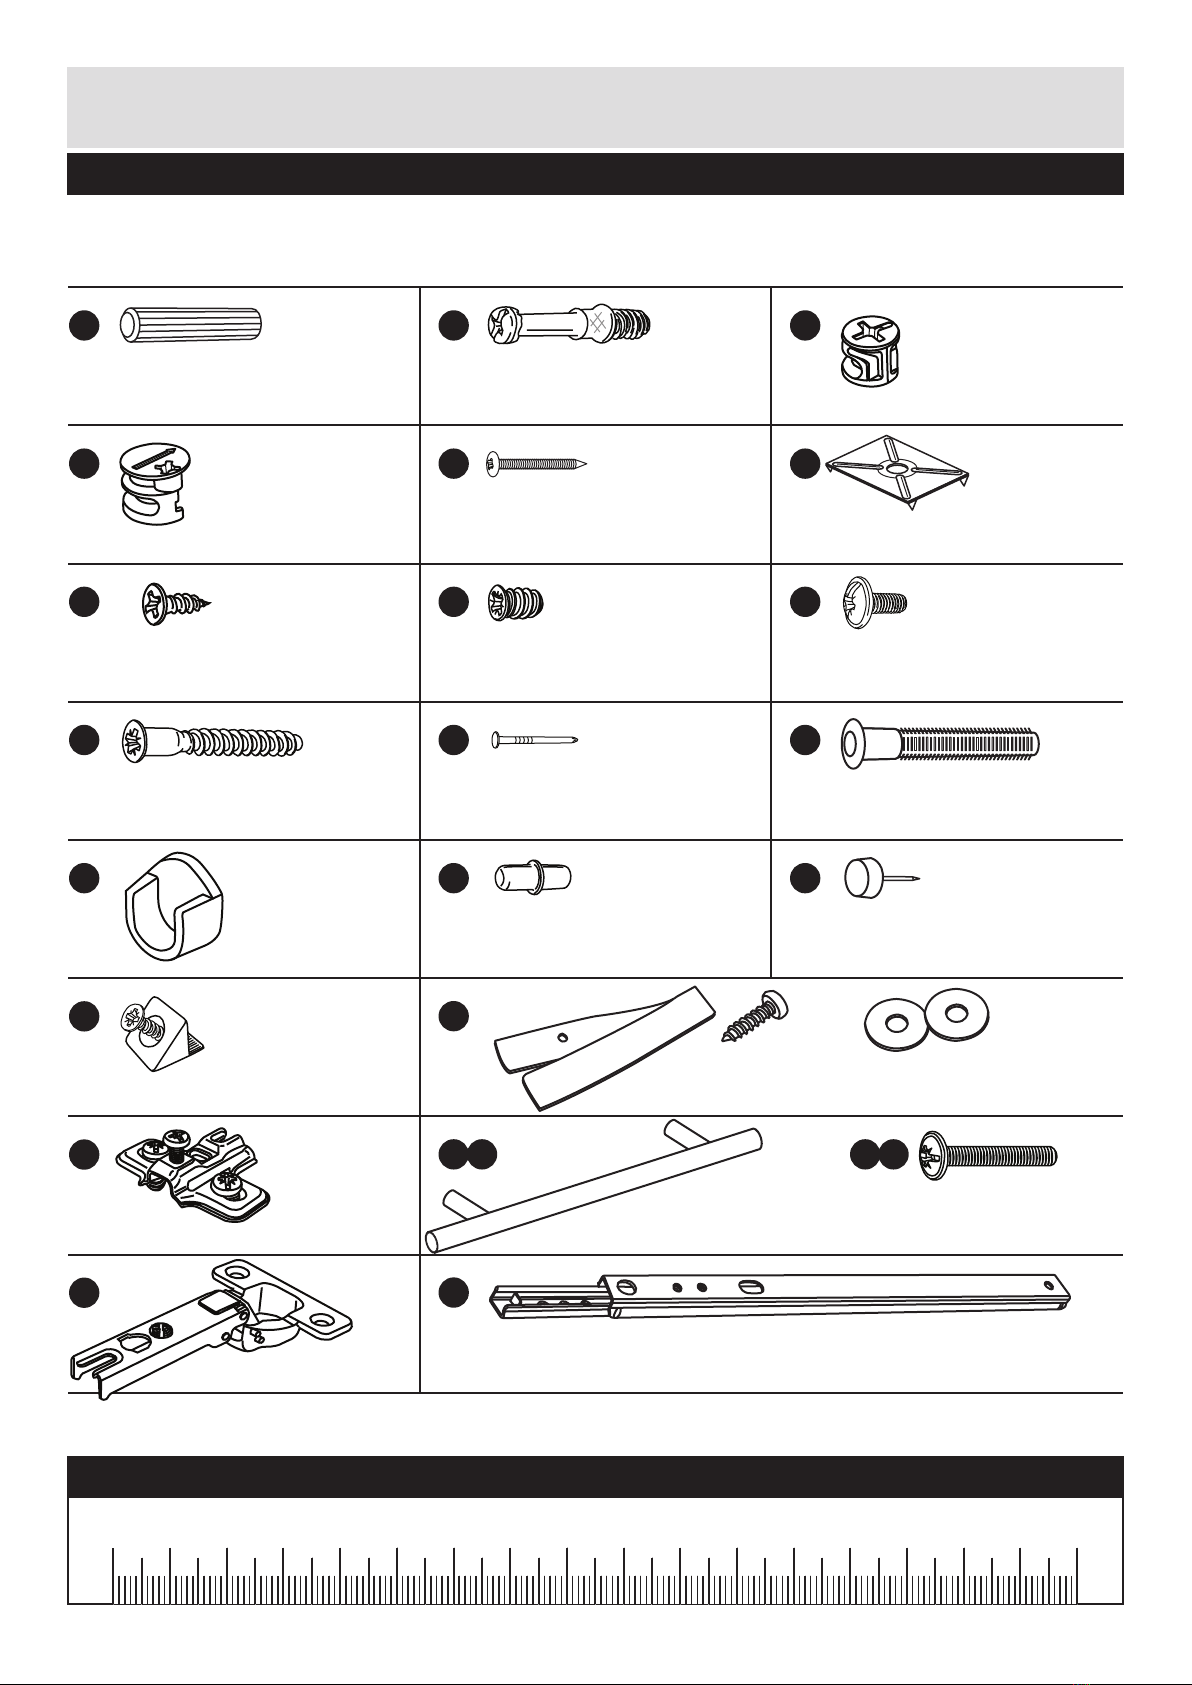
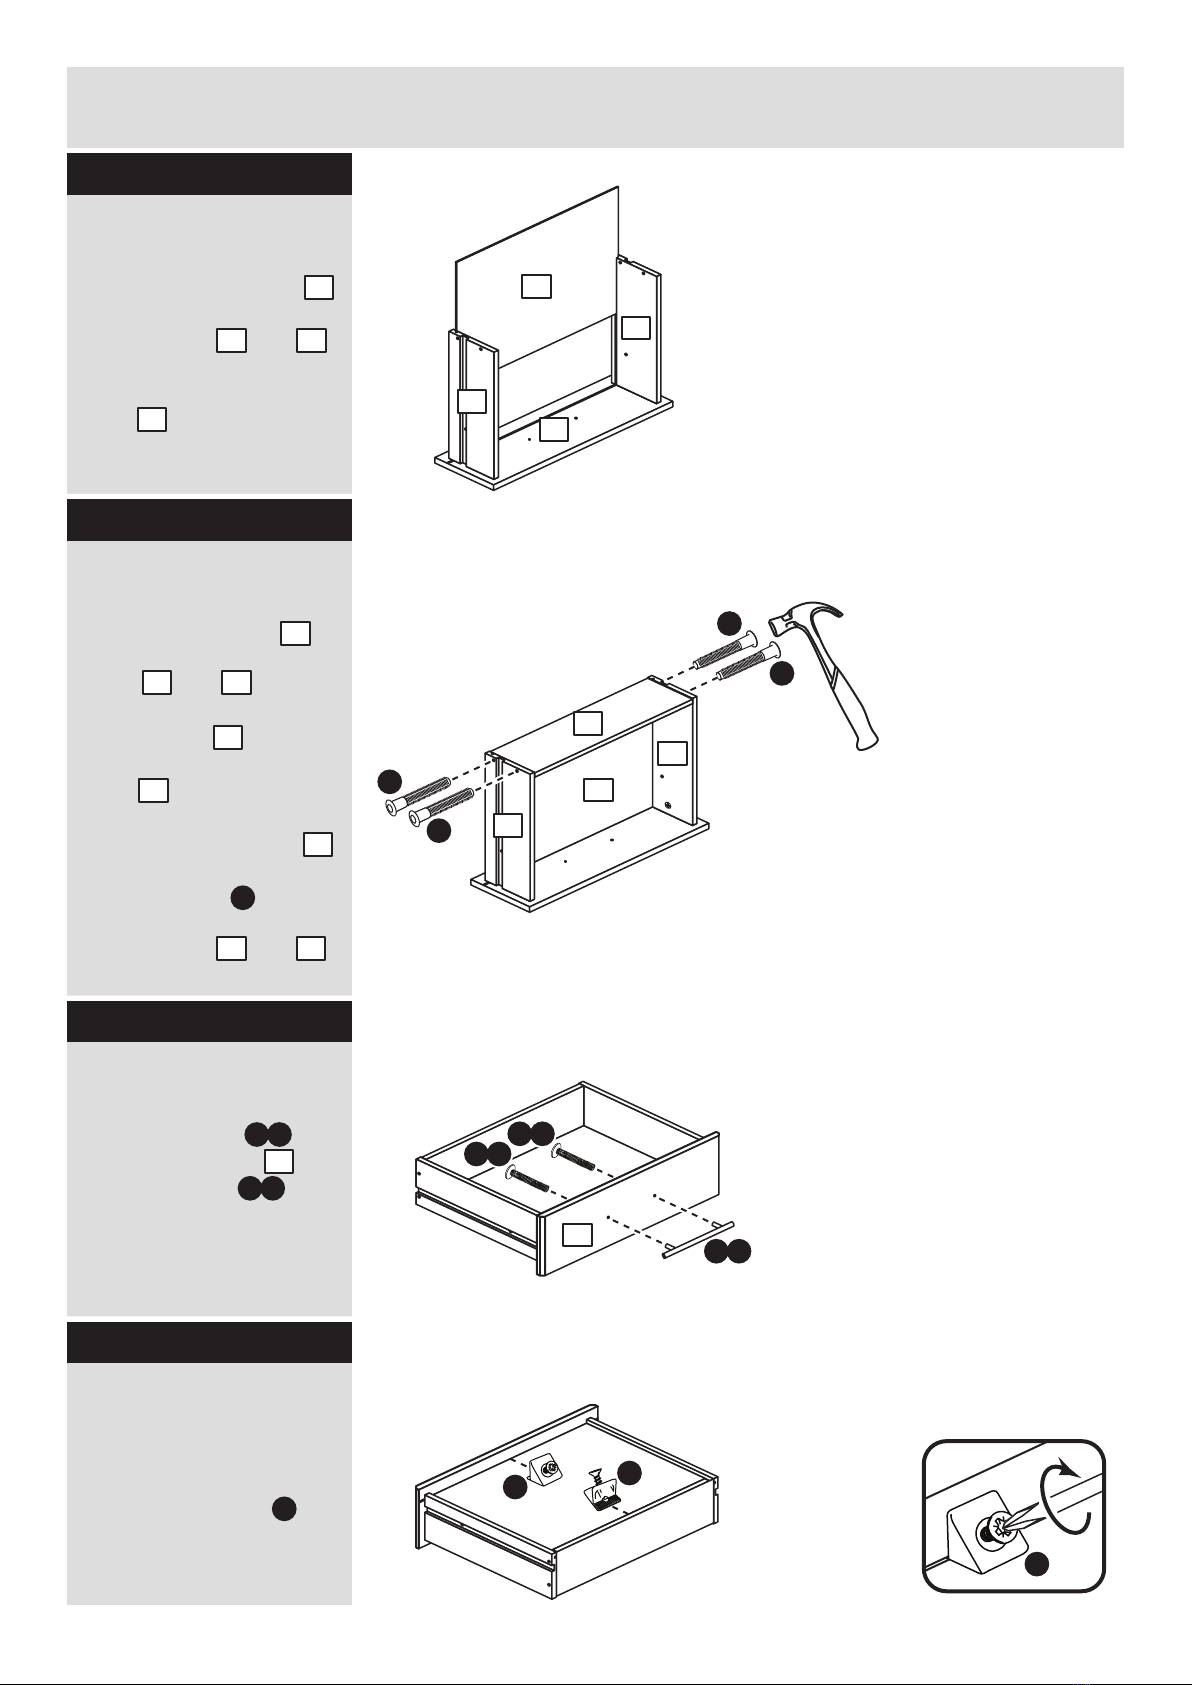
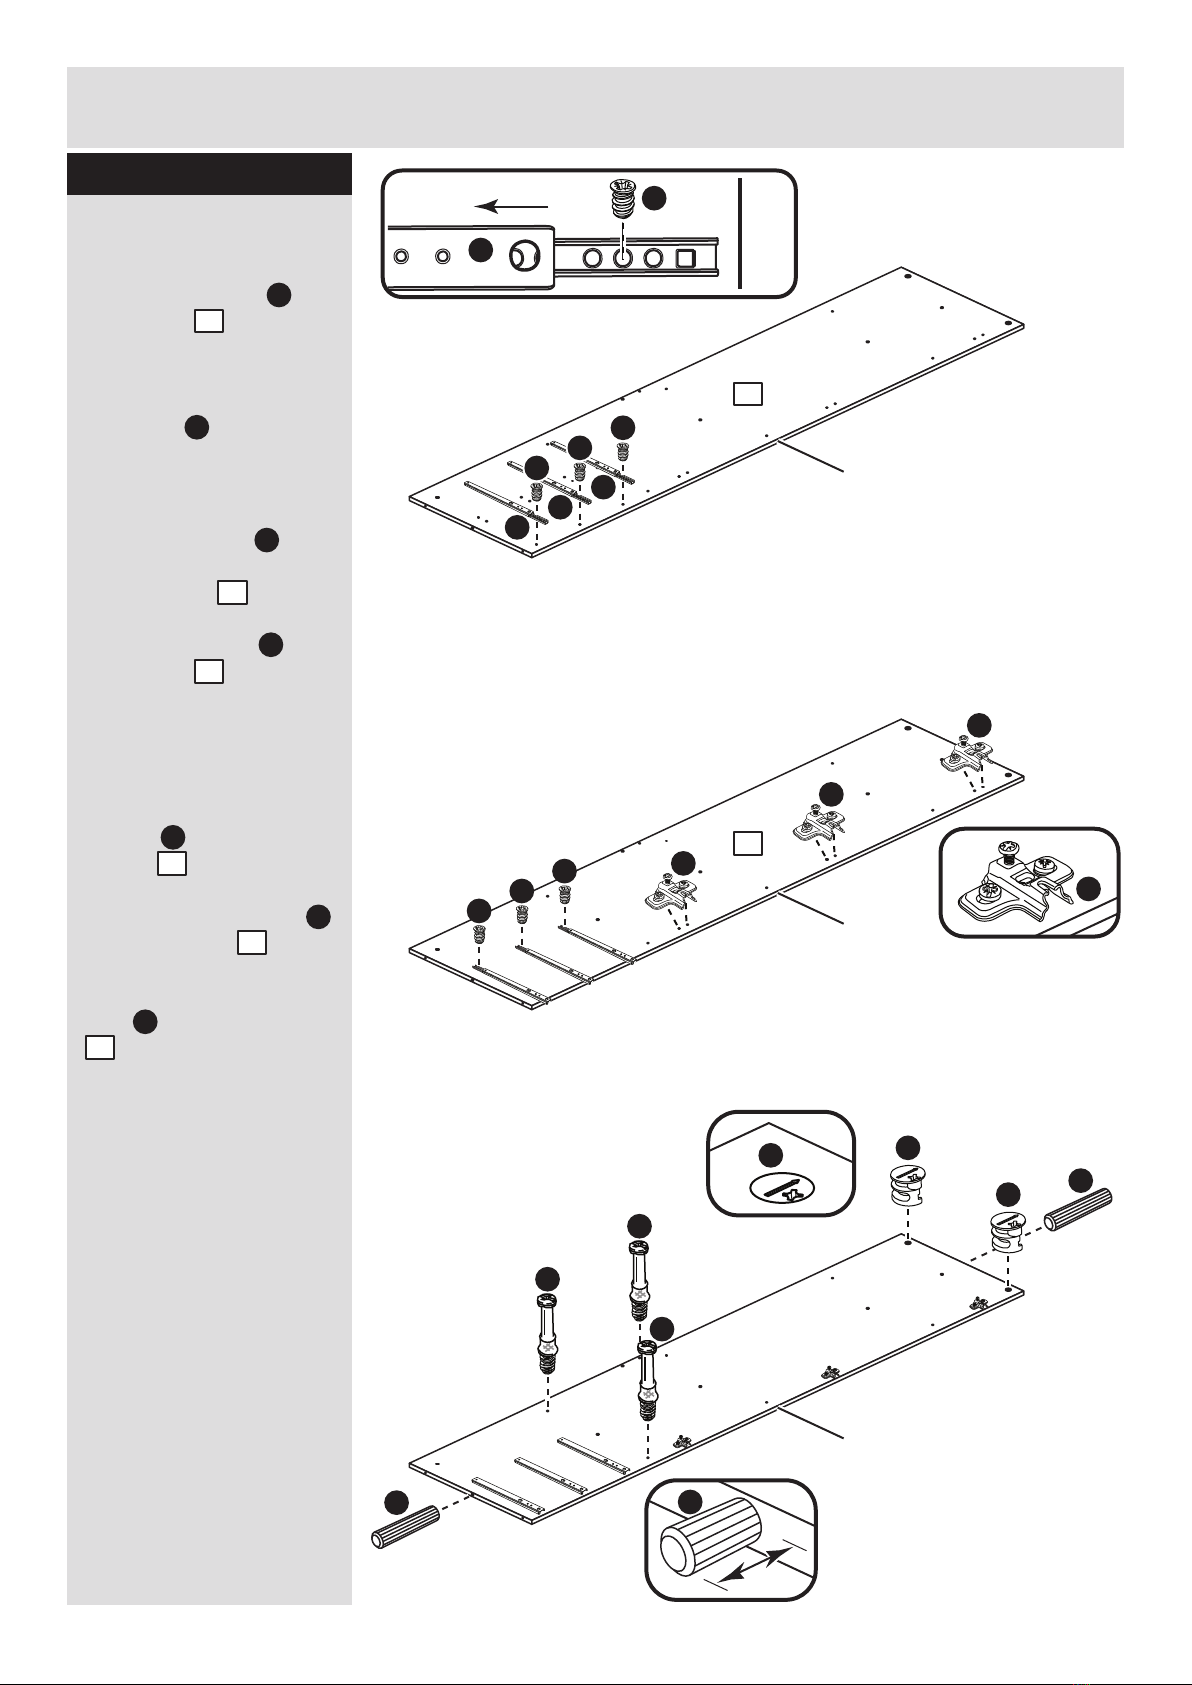
Argos Normandy Tall 3+3 Mirror Robe User manual
Other Argos Indoor Furnishing manuals

Argos
Argos 719/1792 User manual

Argos
Argos Malibu Tall Unit 833/7115 User manual

Argos
Argos Malibu 184/8072 User manual

Argos
Argos Camden 259/3773 User manual

Argos
Argos HOME 607/7446 User manual

Argos
Argos Pagnell 709/2664 User manual

Argos
Argos Savannah 602/5326 User manual

Argos
Argos 932/6943 User manual

Argos
Argos 875/4664 User manual

Argos
Argos Jenson 937/4610 User manual

Argos
Argos TOBY 8559230 User manual

Argos
Argos 239/2352 User manual

Argos
Argos Aspley 391/8168 User manual

Argos
Argos Chequer Corner 609/2452 User manual

Argos
Argos 411/7023 User manual

Argos
Argos 600/3575 User manual

Argos
Argos Matrix 609/0722 User manual

Argos
Argos 338/7005 User manual

Argos
Argos Double Tidy Rail User manual

Argos
Argos Seville 151/3297 User manual


Popular Indoor Furnishing manuals by other brands


Coaster
Coaster 4799N Assembly instructions

Stor-It-All
Stor-It-All WS39MP Assembly/installation instructions

Lexicon
Lexicon 194840161868 Assembly instruction

Next
Next AMELIA NEW 462947 Assembly instructions

impekk
impekk Manual II Assembly And Instructions

Elements
Elements Ember Nightstand CEB700NSE Assembly instructions