TimeTronics Argus Photo Finish User manual

2020v1 Argus Quick Start
0
Manual
Argus Photo Finish Quick Start Guide
Oct 2020

TimeTronics bv
Lammerdries-Oost 23B
B-2250 Olen, Belgium
Tel +32 (0)14 23 19 11
Fax +32 (0)14 23 20 24
VAT BE0500 903 347
R.P.R. Antwerpen-Afd.Turnhout
ING 363-1719463-81
BIC code : BBRUBEBB
IBAN : BE36 3631 7194 6381
Table of contents
PREFACE……………………………………………………………………………………………………….3
1. Software Launching and Initial Set Up .............................................................. 4
1.1 Ethernet Settings ............................................................................................... 4
1.2 License Key ....................................................................................................... 4
2. Main Window Overview ..................................................................................... 6
2.1 About & Language .............................................................................................. 6
2.2 All My Races ...................................................................................................... 7
2.3 Camera Control .................................................................................................. 7
2.3.1 Live Camera Preview ..................................................................................... 8
2.3.2 Continuous Camera Recording ........................................................................ 8
2.3.3 Camera Control ............................................................................................ 9
2.4 Results Table ..................................................................................................... 9
2.5 Photo Finish Picture .......................................................................................... 10
2.6 Link With Others .............................................................................................. 10
2.7 Preferences ..................................................................................................... 10

2020v1 Argus Quick Start
3
Welcome to the Argus Quick Start user manual.
This guide is intended for those users that have had prior experience with TimeTronics photo finish products and wish
to have a quick overview of how the new Argus Photo Finish cameras operate. This guide assumes that the user has the
software installed correctly and all hardware connected. For those users that require more detail into the overall
functionalities of the Argus Photo Finish cameras (with set up information and troubleshooting), please see our full ‘Argus
Photo Finish Manual’.
Please note that all pictures are examples, the delivered version can be different than shown in this manual please
inform yourself before purchase.
If you, after reading this document, have any further question regarding the operation or service of this or any other
TimeTronics equipment, please contact your local distributor or TimeTronics directly, by email: [email protected], or
call us at +32 (0) 14 23 19 11.
Please also contact us if you have any remarks or advice regarding this user manual: info@timetronics.be
Good luck and thank you for your confidence in the TimeTronics products and services.
The editors
© Copyright 2020 TimeTronics. All rights reserved.
TimeTronics bv
Lammerdries-Oost 23b
B-2250 Olen
Belgium
Tel.: +32 (0) 14 23 19 11
Disclaimer
Under no circumstances shall TimeTronics be liable for any loss, damage or expense suffered or incurred with respect
to any defective product. In no event shall TimeTronics be liable for any incidental or consequential damages that you
may suffer directly or indirectly from use of any product.
2020v1 Argus Quick Start
4
1. Software Launching and Initial Set Up
When Launching the Argus software for the first time, there are some key points that need to
be completed first before you can begin to use the Argus photo finish camera.
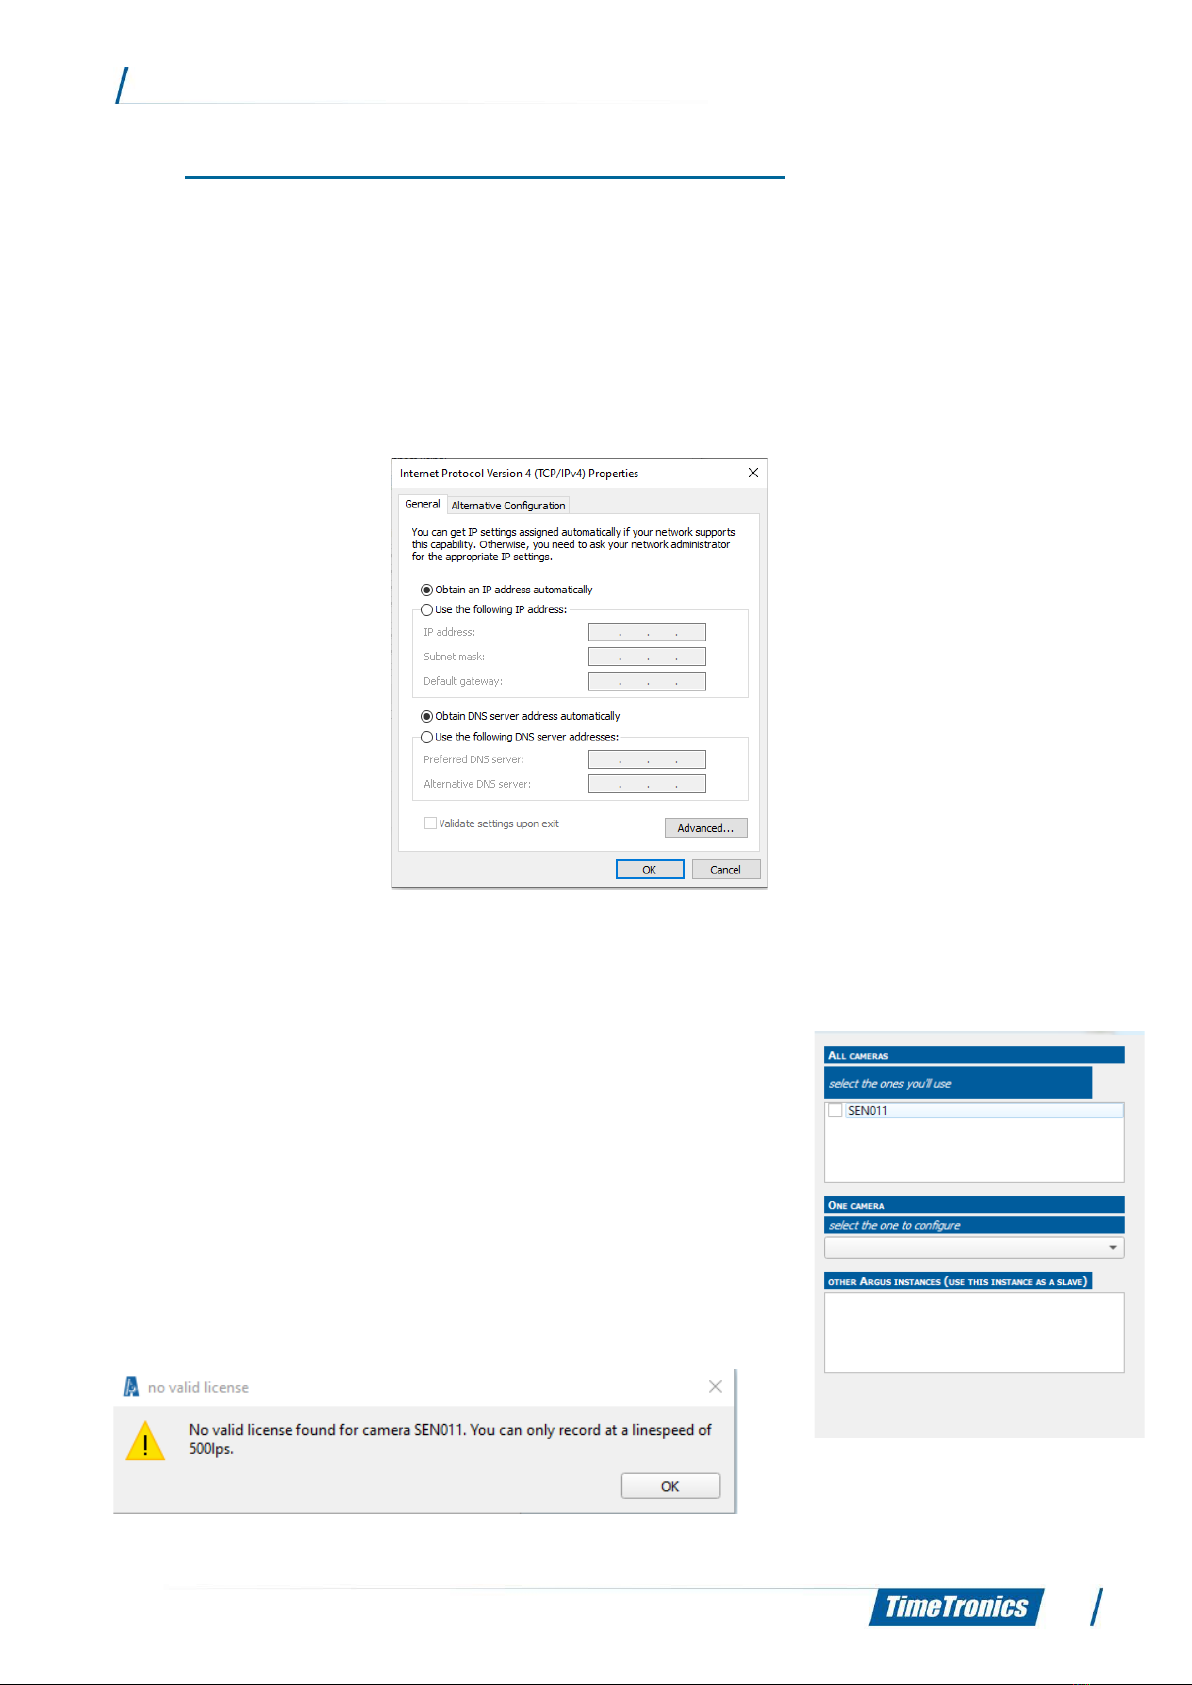
1.1 Ethernet Settings
Please make sure your Ethernet connection settings are set to ‘Obtain an IP address
automatically’. This option can be found in the ‘Change adapter settings’ of your ‘Network and
Sharing Centre’.
1.2 License Key
When launching the software for the first time, you will be presented
with the camera connection window. This is where you will see your
new Argus camera ready for connection.
When you press the check box next to the camera to connect to it,
a‘no valid license’ window prompt will appear. We now need to
install the license key of the camera to enable its functionalities
which you have purchased.

2020v1 Argus Quick Start
5
First you will need to locate the licence key for your camera. This can be found on the USB drive
inside the carry case of your Argus photo finish camera delivery. The file you require will be
Argus xx-xx-xx.lic (where xx-xx-xx is replaced by the serial number of your camera).
To load the licence key into the Argus software, you need to go to the
‘i’ icon on the top left of the software window and press ‘about’
In the ‘About’ window, press the ‘+add’ icon and locate your .lic file to load into the software.
When this has loaded correctly, you will see the serial number of your photo finish camera in the
‘About’ window and you will see (when you click on the camera number) the camera functionality
information to the right.
You can now close this window and we can begin to use your new Argus photo finish camera!
2020v1 Argus Quick Start
6
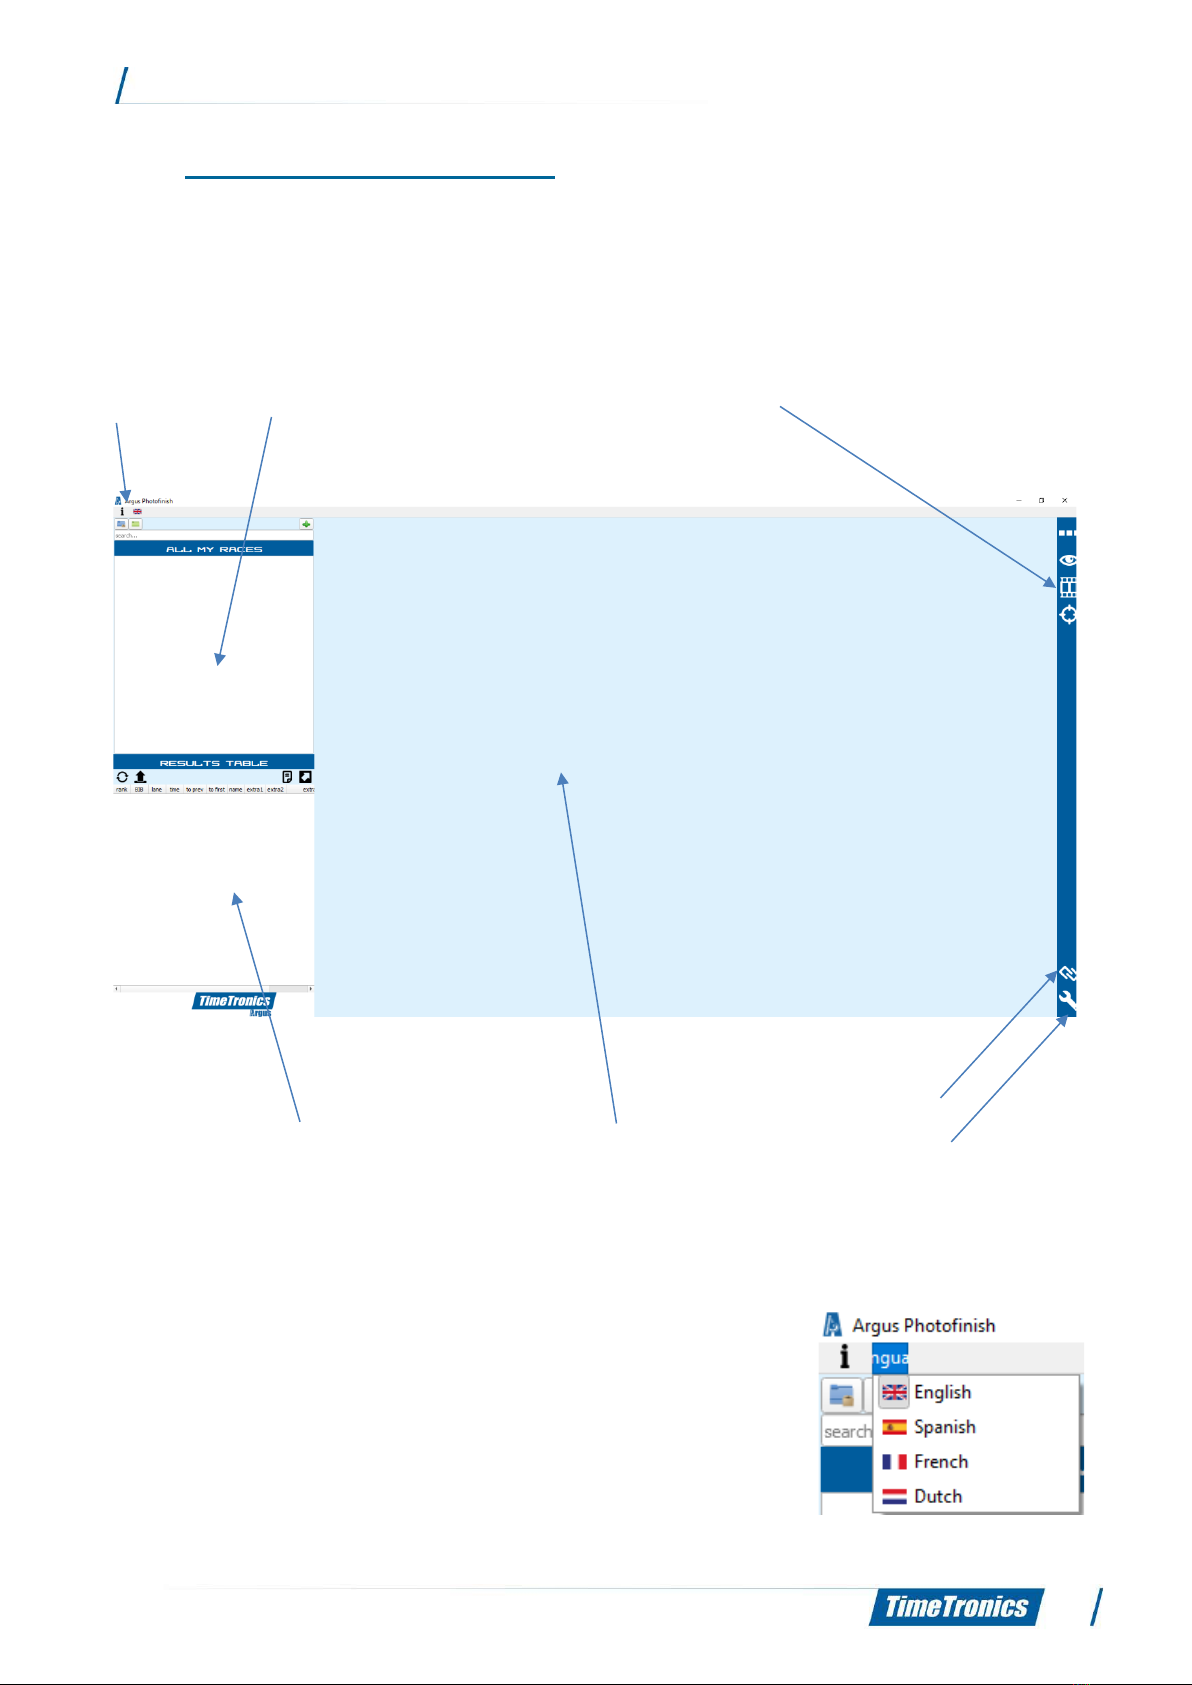
2. Main Window Overview
Now you have installed your licence key, you are ready to use your Argus photo finish camera
for the first time. Here is a quick overview into the main window you will see during your time
operating the Argus camera.
2.1 About & Language
As discussed earlier, here is where you can see information about
the software (version number and licence key information) as well
as change the language that you wish to operate the software in.
2.1
2.2
2.3
2.4
2.5
2.6
2.7
2020v1 Argus Quick Start
7
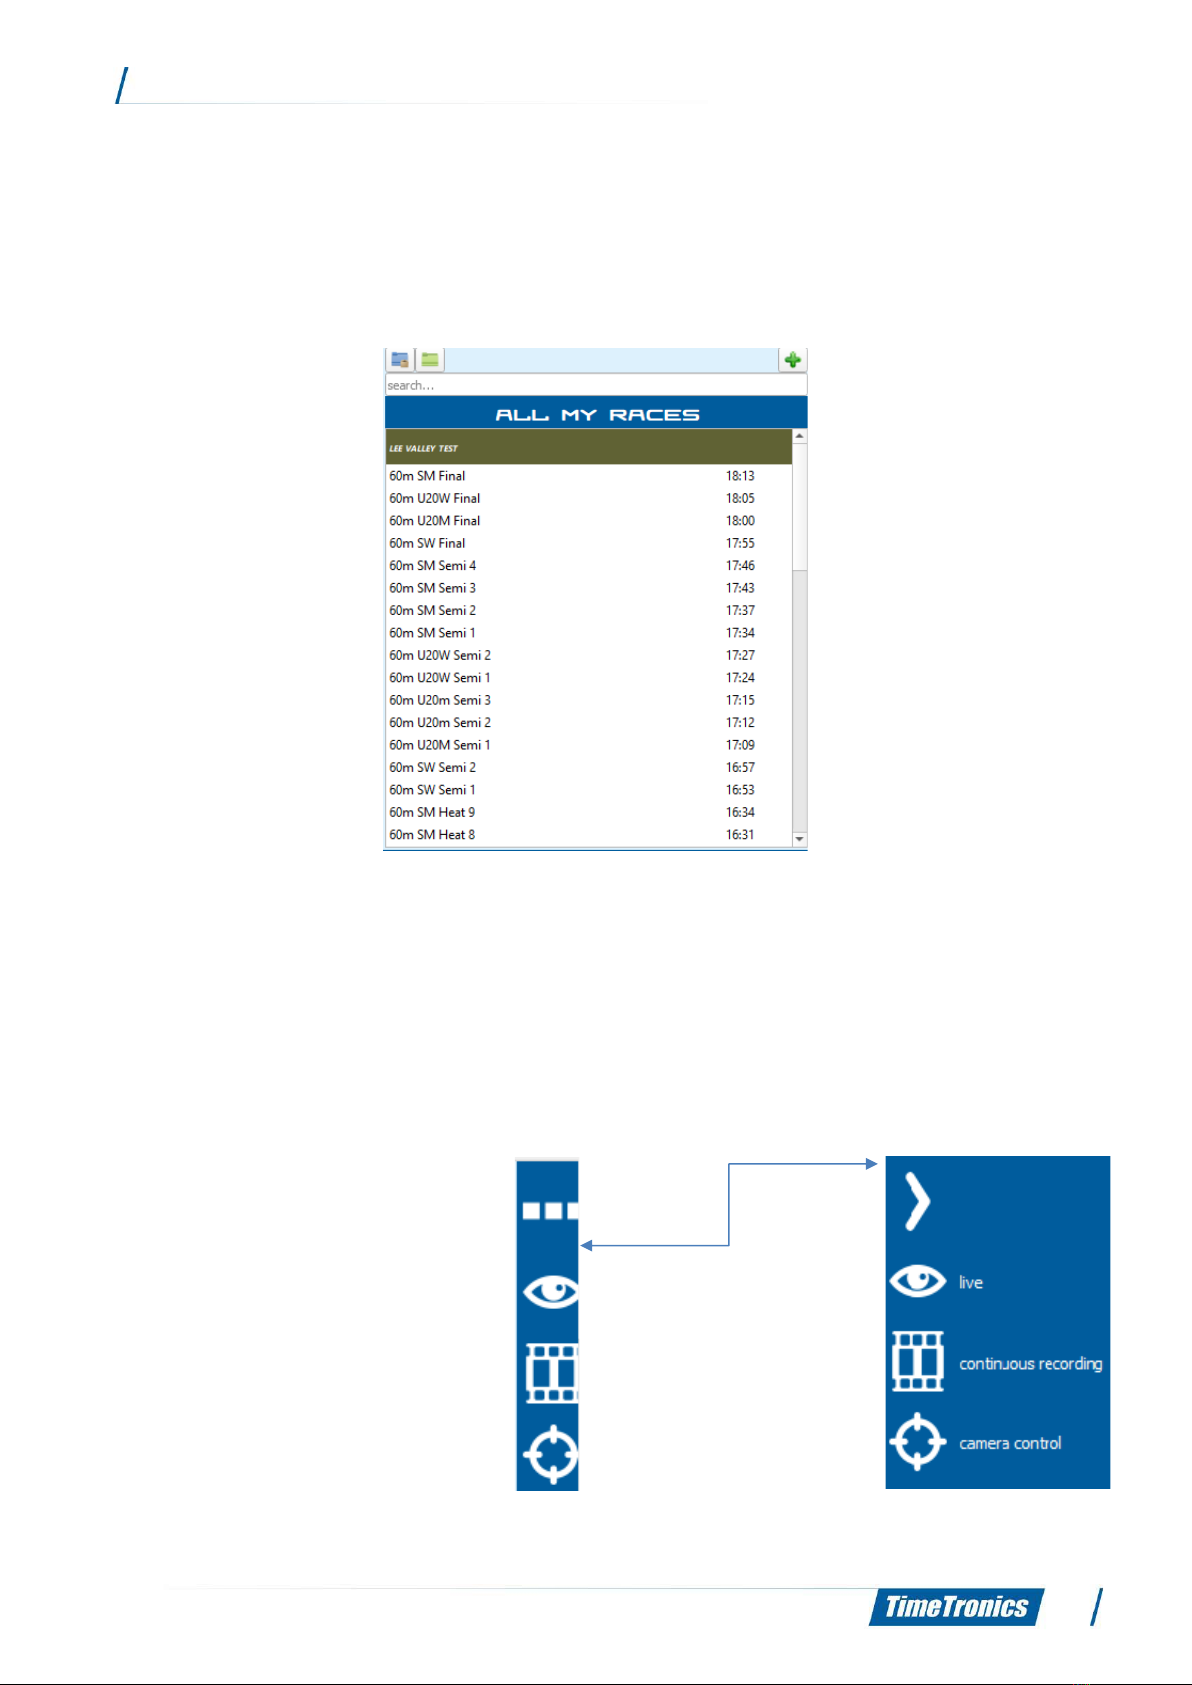
2.2 All My Races
Here is where will be listed all the races that you have created for competition. These can either
be created manually using the Argus software, or imported via AthleticsManager data base/Excel
import.
NOTE: For previous users of TimeTronics MacFinish cameras, in the past you would normally link
a photo finish recording of a race to the database race information after the race has been
completed. However, as the Argus camera is a LIVE RECORDING camera, you must first create
a race that you will then save the live recording to.
2.3 Camera Control
This is the section of the software
where you set up and align the camera
before a competition and monitor it
during a competition.
Icon to expand or
collapse the side bar
menu

2020v1 Argus Quick Start
8
2.3.1 Live Camera Preview
Here is where you can see the live camera preview. For previous users of TimeTronics Macfinish
software, this is similar to the Window→Preview function. You will use this view before the
competition to make final checks as to the alignment of your camera and lens zoom/focus.
During the competition you can use this function to check on the quality of the photo finish
picture and adjust if necessary, in relation to any changing lighting conditions.
2.3.2 Continuous Camera Recording
For those that have purchased the Argus Pro camera, you will have the option of a Continuous
Recording mode. This is whereby the Argus photo finish camera is continuously recording all
footage of the finish line for the past 20 minutes. Therefore, if you have an incident where you
lose Ethernet connection to the camera, have an athlete run under the photocells or forget to
set the photo finish system ready to accept an arrival, you can go back and import finish line
footage from up to 20 minutes ago into the race file you desire. When selecting the Continuous
recording mode, you will see the recording at the top of the software window.
Continuous Recording Mode
Live Camera Preview
2020v1 Argus Quick Start
9
2.3.3 Camera Control
When you select this icon, the camera control window will be opened, and this is where you will
set all the options for your camera (frame rate/motion control/alignment/colour balance
settings). For previous users of TimeTronics Macfinish software, this is similar to the Window→
Camera Control function.
NOTE: When you launch the software and connect to a camera without a licence key, you will
be presented with the no licence key window. However, when you launch the software and
connect to the camera with the licence key installed, the Camera Control function will
automatically open.
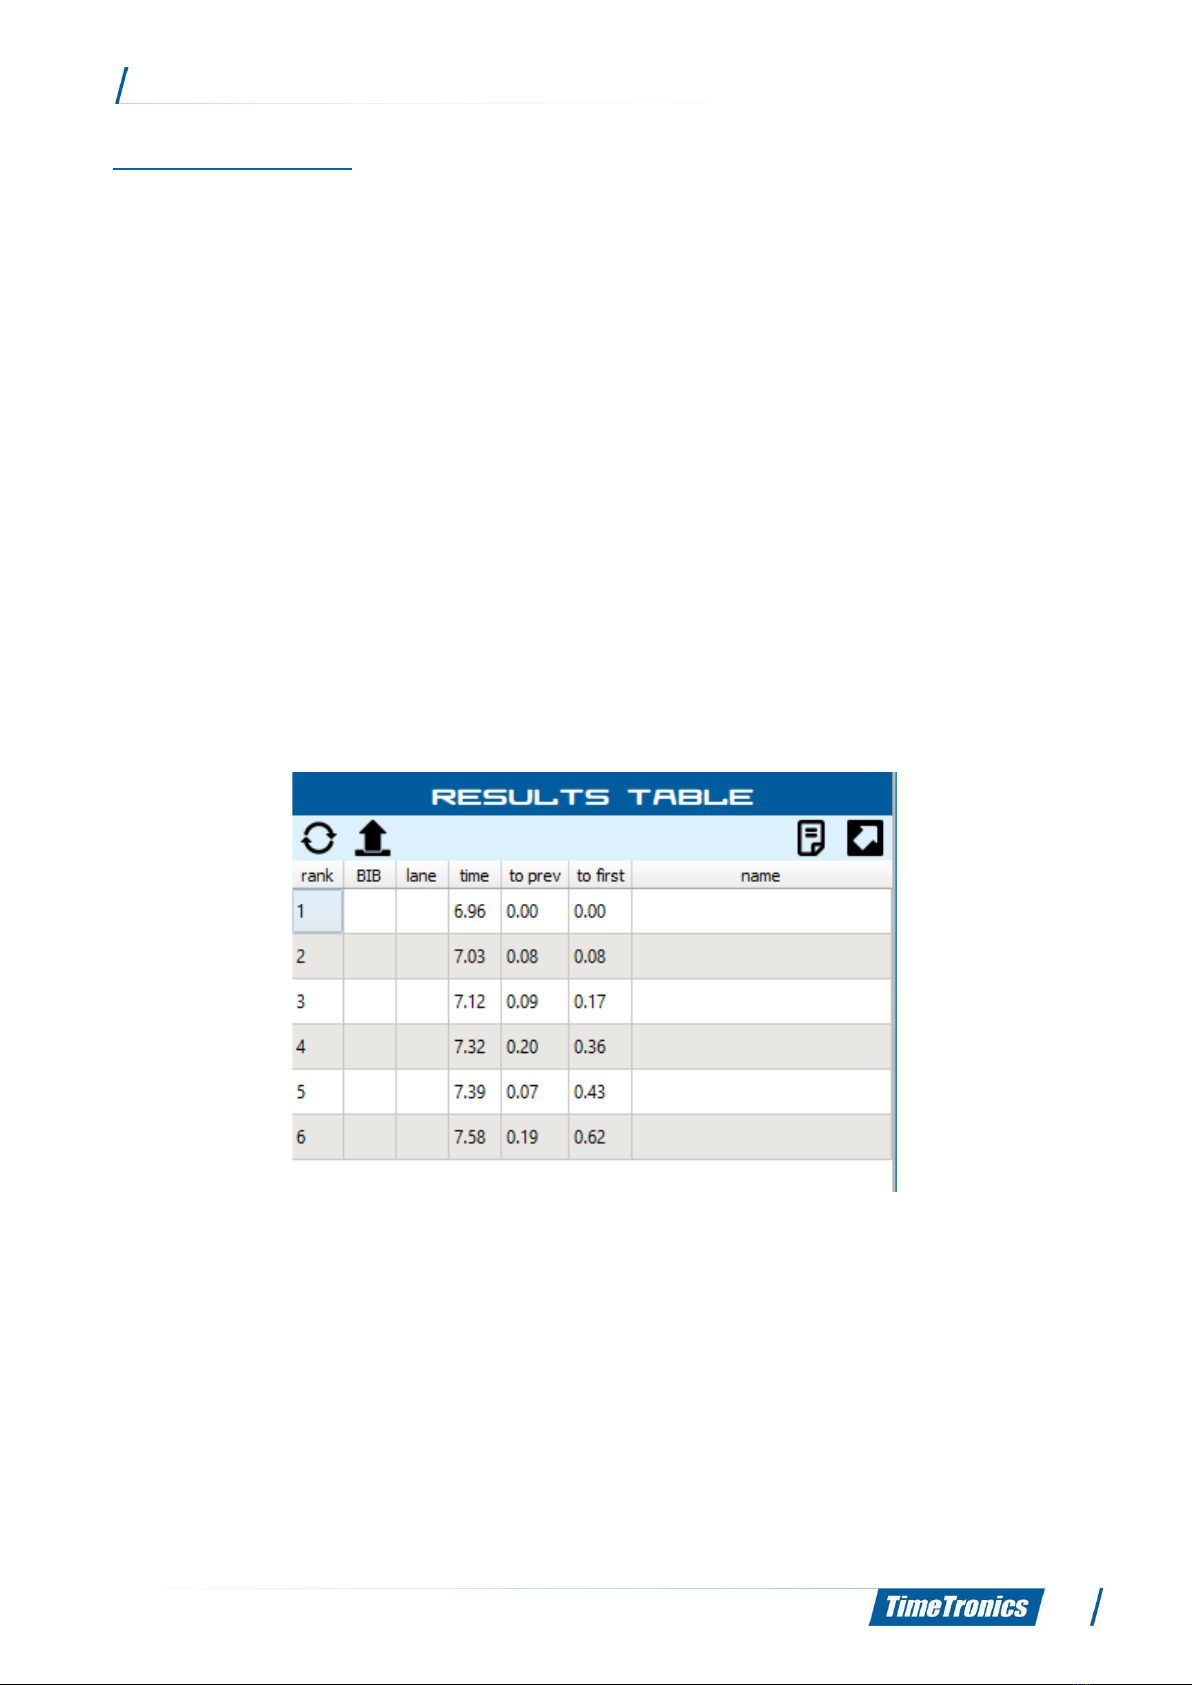
2.4 Results Table
The Results Table section of the software is where you will see all the data in relation to the
results of your photo finish picture.

2020v1 Argus Quick Start
10
2.5 Photo Finish Picture
When you have a recording, the image of the athletes will appear live in this section of the
software window. You will also notice that above the photo finish picture, you will see the
overview of the photo finish image (if functionality has been purchased).
2.6 Link With Others
Here you can link the Argus photo finish software with additional external hardware, for example
transponder timing system, scoreboards, or wind gauges.
2.7 Preferences
In the Preferences section of the software, you can configure all of the main settings required
for the operation of your Argus photo finish camera; for example, sport type, lines before/lines
after and software updates.

2020v1 Argus Quick Start
11
© Copyright 2020 TimeTronics. All rights reserved.
TimeTronics bv
Lammerdries-Oost 23b
B-2250 Olen
Belgium
Tel.: +32 (0) 14 23 19 11
Table of contents
Other TimeTronics Measuring Instrument manuals


