Tion Breezer 3S User manual

User Manual
Compact ventilation unit
Tion Breezer 3S


Table of Contents
1. GENERAL .................................................................................................................. 2
2. PACKING LIST ......................................................................................................... 3
3. SAFETY REQUIREMENT ........................................................................................ 4
4. TECHNICAL PARAMETERS .................................................................................... 5
5. SCHEMATIC DIAGRAM AND OPERATING PRINCIPLE ................................ 6
6. GETTING STARTED ................................................................................................. 22
7. MAINTENANCE ........................................................................................................ 25
8. STORAGE, TRANSPORTATION, DISPOSAL ........................................................ 27
9. WARRANTY ................................................................................................................ 28

2Tion Breezer 3S
Dear Customer!
Thank you for your purchase of the Tion Breezer 3S compact ventilation unit.
1. GENERAL
The Compact Ventilation Unit Tion Breezer 3S ("the device" in what follows) is
designed for active supply of considerable volumes of outside air into the building. This
involves the following:
• fresh air is continuously supplied by a silent fan from outside in a controlled flow;
• a filter set cleans the air of the main contaminants;
• the intake air can be heated to a preset temperature (depending on the version);
• the device is compatible with the MagicAir system (section 5.4).
Before using the device please read the User Manual and warranty conditions
carefully, and check the completeness of the packing list and the appearance of the
device.
Developed by:
«Tion Smart Microclimate» JSC, Russia, 630090, Novosibirsk,
Inzhenernaya 20.
Manufactured:
Russia. 633009, Berdsk, Zelenaya roshcha 7/4.
Assembled in Russia
For more details about the product, manufacturer, sales and
service center adress and contact information please visit:
tion.global
Sales office: Novosibirsk, Inzhenernaya St., 20, 630090,
Tel.: +7 (383) 383-00-64.
PLEASE NOTE:
• The device is not intended for heating premises.
• The device is not designed as a medical device.

3
2. PACKING LIST
Delivery set
Package option
Tion
Breezer
3S
Tion
Breezer
3S
Special
Tion
Breezer
3S
Lite
Construction + + +
Coarse filter of Class G4 + + +
+ + +
Adsorption catalytic filter AK-XL + – –
Heater + + –
Remote control + + +
User manualRC bracket + + +
AAA batteries, 2 pcs. + + +
Power cord, 3 m + + +
Quick Start Guide + + +
User Manual + + +
Warranty card + + +
Mounting template + + +
Anchor bolt, 4 pcs. (for attaching the device) + + +
Anchor bolt, 2 pcs. (for fixing the remote controller
mounting bracket) + + +
The packing list of the device is given in the Warranty Card.
The device supplies considerable volumes of air into the premises by means of
a designated low-noise fan, cleans it from the principal types of contaminants and
performs air heating if necessary. It is recommended for use in all regions, especially in
locations with unfavorable environmental conditions and low winter temperatures. The
device can be used in both domestic and office premises.

4Tion Breezer 3S
3. SAFETY REQUIREMENTS
1. The device should be installed in a location that ensures free and safe access.
2.
3.
4. Avoid direct sunlight.
5. During a lightning storm, turn the device off and unplug it from the mains supply.
6. The device should be disconnected from the power supply system prior to
maintenance or scheduled servicing by pulling out the plug, or, if concealed
wiring is used, it should be disengaged by the power supply switch (section
6.4.2).(section The user is not authorized to perform any repairs or alterations to
the device design.
7. No foreign objects or water should be allowed to get into the device.
8. The device must not be operated if the power supply cord insulation or any part
of the housing are damaged.
9. A protective bar must be installed on the ventilation duct from the outer (street)
side.
10. If any damage or possible signs of malfunctioning are detected, pull the plug out
of the power socket, or disengage the power switch in the case of concealed
wiring (section 6.4.2), and contact an authorized Service Center for advice on
further operation of the device.
Tion Breezer 3S in the Lite configuration is recommended for use in regions
with warm climate. Both Tion Breezer 3S Lite and Tion Breezer 3S Special versions
are recommended for use in environmentally clean regions. To ensure enhanced air
cleaning, Tion Breezer 3S Lite or Special configurations should be outfitted with an
additional AK-XL filter.
The Tion Breezer 3S Lite can be upgraded to Tion Breezer 3S configuration upon the
user’s request. Please contact any authorized Service Center of the Manufacturer to
install optional heater system and AK-XL filter (at additional cost).
The filters are available from the official "Tion" online store tion.global or from
authorized dealers.

5
4. TECHNICAL PARAMETERS
Package option Tion Breezer
3S
Tion Breezer
3S Special
Tion Breezer
3S Lite
Maximum power consumption, W 1450 1450 30
Permissible outdoor temperature
-40 ... +50 -40 ... +50 0 ... +50
Air flow rate*, m³/hr 30/45/60/75/
90/140
30/50/70/90/
110/160
30/50/70/90/
110/160
Maximal sound pressure level**, dB 19/23/29/35/
40/47
19/23/29/35/
40/47
19/23/29/35/
40/47
Power supply 230 V ±10%,
50 Hz
230 V ±10%,
50 Hz
230 V ±10%,
50 Hz
Weight, kg 9,5 9 8,5
Overall dimensions (H × W × D), mm 528×453×203 528×453×203 528×453×203
Assigned lifetime, years 5 5 5
Guarantee period, years 2 2 2
Compatibility with MagicAir + + +
Compatibility with Bluetooth devices + + +
* Device performance depends on the operating conditions.
** These values are measured in accordance with the GOST 23337-2014 standard at 18.5 dB
background noise.

6Tion Breezer 3S
5. SCHEMATIC DIAGRAM AND OPERATING PRINCIPLE
5.1. Construction
The layout of the device with the service panel removed (Tion Breezer 3S) is shown
below.
2
3
4
5
6
7
8
1
1. Fan unit
2. Heater
3. Adsorption catalytic filter AK-XL
Figure 1. Device layout
5. Coarse Class G4 filter
6. Air flap
7. Prefilter
8. Control button

7
5.2. Operating principle
The device is attached to the wall with a drilled air duct leading to the street. The
air from outdoors enters the device through the air duct. The air duct is protected by
a thermal insulator, and the slope of the channel prevents rain water from penetrating
into the device. A flap is located at the device inlet (Fig. 1, Pos. 6). It protects against
air penetrating into the room, if the device is either turned off or operating in the
recirculation mode (drawing air from inside the room). The air is drawn into the room
by a fan (Fig. 1, Pos. 1). If necessary, the inlet air can be heated up with a heater (Fig. 1,
Pos. 2). The air is cleaned inside the device. The schematic of the operation is shown
in Fig.2.
The prefilter traps coarse dust particles in the recirculation and mixed operating
modes.
The coarse class G4 filter (Fig. 1, Pos. 5) entraps coarse and medium-sized particles
of dust, lint, soot and allergens with efficiency up to 90% (for particles with sizes above
10 um). It extends the service life of the high-efficiency E11 (H11) filter.
The high-efficiency E11 (H11) filter (Fig. 1, Pos. 4) entraps the finest particles of
dust, allergens, bacteria, viruses and mold spores with efficiency above 95% for air
flow rates below 120 m³/hr. The E11 filtration grade is the air cleaning standard for
medical facilities. Only E11 grade filters can entrap hazardous microorganisms (lower
class filters cannot stop them).
The AK-XL adsorption catalytic filter (Fig.1, Pos. 3) deep-cleans the air, removing the
major components of exhaust fumes, industrial emissions, odors and smoke.
Figure 2. Device operating principle

8Tion Breezer 3S
The AK-XL adsorption catalytic filter can be optionally replaced by AK-XXL model
from harmful substances in concentrations even as high as 10 times above maximal
permissible levels. Strong unpleasant odors are removed as well.
Aside from the outside air supply mode, the device can function in recirculation and
mixed modes.
In the recirculation mode the air duct flap closes the air channel to the outside, and
the air is taken into the device from indoors through the prefilter unit (Fig.1, Pos.7),
where it gets cleaned. The heater automatically goes off in recirculation mode.
The mixed mode of Tion Breezer 3S ensures air intake from indoors and from
outdoors in equal ratios. The air is cleaned by a set of filters and, if necessary, can be
heated to a preset temperature. In this mode the device does not act as a heater for
the room. Mixing indoor and outdoor air decreases power consumption in winter and
ensures additional air cleaning in the room.
5.3. Controls
The user interface of the device contains the following elements, ensuring control
over working parameters and set points:
• Control button with LED indication,
• Remote control (RC),
• MagicAir software (section 5.4),
• Sound notifications.
5.3.1. Control button
The command button is located on the device casing (Fig. 1, Pos. 8). This button
switches the device between operating and standby modes, performs connection to
the MagicAir base station and remote control unit. The color of the button indicates the
current operating mode of the compact ventilation unit according to the Table below.
PLEASE NOTE: The mixed mode can be used at inlet air temperature

9
5.3.2. Remote control
The remote controller unit (RC) is used for manual remote control of the device.
Controller button functionsBefore first startup of the device, and if RC is not
functioning, install new batteries as follows.
1. Open battery compartment lid;
2. Insert two AAA 1.5 V batteries (included), making sure to observe polarity;
3. Reinstall compartment lid, pushing it until it clicks.
PLEASE NOTE: The batteries supplied with the device may have shorter
lifespan.
No. Operating modeIndication IndicationOperating mode
1. Glowing yellow The device is connected to power
mains and is in Standby mode
2. Glowing light-green Normal functioning without
connection to MagicAir system.
3. Glowing dark-green Normal functioning with MagicAir
system
4. Glowing blue Automatic functioning with MagicAir
system
5. Blinking blue during connection Connecting to MagicAir system
6.
Blinking red and blue until update
is complete.
Firmware update result:
Software update
7. Blinking green Update successful
8. Blinking red Critical error during device operation,
or failure of the update process.

10 Tion Breezer 3S
Connecting RC and the device:
1. Place RC within 1 m away from the device;
2. Press and hold for 5 s the command button on the lower panel of the device
until the indication changes to blinking blue;
3. Turn on RC by pressing any button;
4. Press and hold for 5 s the buttons [POWER] and [DISP] of the RC unit until "PAIR"
is displayed on the LCD.
If pairing was successful, the indication on RC will change to the indication of the
operating mode; otherwise "NPAIr" is displayed on RC screen. If "NPAIr" is displayed,
repeat the connection, switching on RC with its any button. If "nocon" is displayed, repeat
the connection procedure, as described above. If reconnection fails again, contact the
Service Center.
Figure 3. Remote control

11
Pos. in Fig.3 Notation
1 Timer is on or is adjusted right now
2 Days before filter replacement.
3Heater is off / Heater is on
4 Inlet temperature
5 Outlet temperature
6 Fan speed (1, 2, 3, 4, 5, 6)
7 Automated control with MagicAir
8One arrow ( )– outside air supply mode, three arrows ( ) –
recirculation mode, four arrows ( ) – mixing mode
9 The device is connected to MagicAir
Combination Description
Press [DISP], [MENU] and [FLOW]
and hold for 5 s Sound ON/OFF
Press [DISP] and [MENU] and hold 5 s Connecting to MagicAir system
Press [MENU], [DISP], [FAN UP],
[FAN DOWN] for 5 s Reset to factory settings
Press [POWER] and [DISP] for 5 s Connecting RC and the device
POWER Switching Operation/Standby mode
DISP Switching display modes
MENU User menu
FLOW Selecting flap position
TEMP UP Increasing intake air temperature
TEMP DOWN Decreasing intake air temperature
FAN UP Increasing air flow
FAN DOWN Decreasing air flow
Key combinations on RC invoke additional functions
Remote Control button functions

12 Tion Breezer 3S
5.3.3. Sound signals
Sound signals indicate certain functions performed by the device. The meaning of
these sound notifications is given in the table below. If desired, sound notifications can
be switched off completely: press simultaneously the [DISP], [MENU] and [FLOW] buttons
on the remote control unit.
Sound signals are disabled when the device is under MagicAir system automated
control (p. 5.4).
5.3.4. Standby mode
When the device is turned off using the RC or via MagicAir system, it enters the
Standby mode. In the standby mode the device does not perform its operating functions
(the flap is closed, the fan is off and the heater is off).
Device activation (switching from standby to active mode) is accompanied by a single
beep, device deactivation by a double beep (in manual control mode, if sound signals are
enabled). All user configured values are retained upon switching between modes.
If the device was in active mode before being disengaged using the switch button on
the side panel or by disengagement from the power supply, its re-engagement will bring
it into standby mode.
5.3.5. Air Flow Settings
Six air flow rate steps are provided. The air flow rate is adjusted manually (using
MagicAir software or remote control) or automatically with MagicAir system (section
5.4).
The "turbo" mode is used for enhanced, rapid aeration in a room after a longer period
of not being used by people.
Sound signal description Notation
Single beep “Success”/”Enabled”/Button press
confirmed
Two beeps at short interval ”Disabled”/ unavailable fan speed
Four beeps at short interval Filter replacement counter reset
Six beeps at short intervals Reset to factory settings

13
Pressing [FAN DOWN] or [FAN UP] on the Remote Control decreases/increases the air
flow, if no other settings are being adjusted at the same time (section 5.3.6).
The device may automatically decrease the fan speed to ensure proper air heating up
to the target temperature. Should this happen, any attempt to boost the fan speed above
the available limit will result in a double beep signal. To regain the operating mode with all
flow steps available, wait for a higher outer temperature, reduce the target temperature
for heating or turn the heater off.
5.3.6. List of adjustable parameters
The device settings are adjusted manually (using MagicAir software or remote
control) or automatically under MagicAir system control. Parameter adjustment with
MagicAir is described in section 5.4.
To adjust the parameters from the remote control, press [MENU] to go to Menu screen.
In the menu mode switch between parameters with the [FAN DOWN] and [FAN UP]
buttons of RC. When selecting a parameter, its icon on the LCD display will start blinking.
If the parameter value can be set, then one pressing of the [TEMP DOWN] or [TEMP UP]
buttons changes its value by one unit of measurement. To change the parameter value
by several units, press and hold the [TEMP DOWN] or [TEMP UP] buttons for more than
one second, until the desired value is reached.
The parameter list in the menu mode operates on a loop, which means when the
last parameter is reached, an attempt to jump to the next one will cycle back to the first
parameter in the list. Parameters and their display order are described below. Detailed
description of adjustment of all parameters is given in the next sections (5.3.7 to 5.3.12).

14 Tion Breezer 3S
Heater coil status (ON/OFF)
Timer adjustment
If the appliance is under control
of the MagicAir system, timers are
automatically disabled
Start-up and shutdown time
adjustment for Timer [ON] mode
Days before filter replacement.
Clock setting (24 hour format)
1.
3.
4.
5.
2.

15
To save settings go to the next parameter pressing [FAN UP], [FAN DOWN] buttons or
press [MENU] to exit the Setting mode. A single beep will sound, confirming the changes
on RC have been saved and updated.
All parameters keep the configured values upon switching to and from Standby mode,
and in case of the power supply outage.
PLEASE NOTE: To ensure that the configured parameters are stored into
memory, do not disconnect the device from power supply for 10 minutes
after finishing adjustment from RC.
Pressing the [DISP] button switches the information to be displayed on the remote
control display. Available options: inlet air temperature, outlet air temperature, current
time (Fig. 4).
Figure 4. Information displayed on RC

16 Tion Breezer 3S
5.3.8. Setting target air heating temperature
The target temperature of the outlet air is adjusted
manually (using MagicAir software or from the remote
controller) or automatically by the MagicAir system
(section 5.4).
If the heater is off (section 5.3.9), then pressing
the buttons [TEMP DOWN] or [TEMP UP] will display
minutes.
Factory setting: +20°C.
Using the [TEMP DOWN] or [TEMP UP] buttons on
the RC, select the required target heating temperature.
5.3.7. Resetting to default settings
The parameters can be reset to factory settings. During this operation, all user
configurable settings are replaced by factory set values. To reset to default settings,
press simultaneously and hold for 5 s the buttons [MENU], [DISP], [FAN UP], [FAN DOWN]
on the remote control. The default settings are listed in the following Table.
Figure 5. "Heater off"
indication
№Parameter Default value
1. Fan speed No. 2
2. Flap position Air flow
3. Heating temperature, ºC 20
4. Heater ON
5. Start by timer OFF
6. Start-up time by timer 17:00
7. Shutdown time by timer 8:00 AM
8. Current time 12:00 AM
9. Days before filter replacement 360 days
10. Confirmation sounds ON

17
PLEASE NOTE:
be displayed on the remote control, and the flap will close. Should this
happen, to start the device for normal operation switch to Standby mode
and turn on the device again a few seconds later.
* Except for Tion Breezer 3S Lite configuration.
** If you are using the Tion Breezer 3S Lite version, then turn the device off in case of condensate
or frost formation. It is recommended to resume operation only after the temperature of the device
warms up to room temperature and traces of frosting disappear. To prevent frosting or condensate
formation in the future, contact any authorized Service Center of the Manufacturer to upgrade the
installation with a heater (at additional cost).
5.3.9. Turning air heating on/off
The device can heat air up to a preset temperature. The heater can be turned on and
off* by the remote control or via MagicAir software.
To turn off the heater, go to the parameter "Heater ON/OFF" pressing [MENU] button
warning will be displayed and a single beep issued, and heating temperature adjustment
will be disabled. To switch the heater on follow the same steps. Target temperature will
be displayed.
PLEASE NOTE:
• The device is not intended for heating premises!
• It is not recommended to turn off the heater if the inlet air temperature
performance as well as a higher noise level.
• Under increased humidity conditions in the room, for a certain range of
outlet air temperatures, condensate may accumulate on the external
surfaces of the device. In this case, turn on the climate control system
and, if necessary, increase the target temperature.
* Except for Tion Breezer 3S Lite configuration.

18 Tion Breezer 3S
5.3.10. Current Time
Time adjustment can only be performed manually (using control panel or remote
control), if MagicAir system (section 5.4) is not connected. If the device is controlled by
the MagicAir system, the current time is replaced by MagicAir time settings.
The "current time" set point is used in the timer function (section 5.3.11).
To adjust the parameter, select it with [MENU] button (section 5.3.6). Press the
[FAN DOWN] or [FAN UP] buttons to switch between hour and minute adjustment. To
decrease/increase the selected value by 1 press [TEMP DOWN] or [TEMP UP] (press and
hold the corresponding button to increase the selection speed).
Once the maximal hours or minutes value is attained, further pressing of the
corresponding button will cycle back to the minimum value.
5.3.11. Timer
The timer is used for turning the device on and off (switching to/from Standby mode)
at a predefined moment.
Timer can be adjusted only from remote controller. To set up timer, select "Timer ON/
OFF" with the [MENU] button. Press the [TEMP DOWN] or [TEMP UP] buttons to enable/
disable the timer. The timer mode is displayed as "ON" / "OFF" indication:
After selecting the "timer on" mode ("ON" indication) press [FAN UP] to go to timer
adjustment.
Press the [FAN DOWN] or [FAN UP] buttons to switch between hour and minute
adjustment. To decrease/increase the selected value by 1 press [TEMP DOWN] or [TEMP
UP] (press and hold the corresponding button to increase the selection speed).
To adjust the turn-off time press [FAN UP] once again. Next press [FAN DOWN] or
[FAN UP] to select between hours and minutes. To decrease/increase the selected value
by 1 press [TEMP DOWN] or [TEMP UP].
If maximal hours value is attained (23 h), then subsequently pressing the [TEMP UP]
button will cycle the parameter back to the minimal value (00 h).
When switched on by timer, the device will be engaged with the same settings as at
the moment of timer activation.
If the appliance is controlled by MagicAir (p.5.4), all previous timer setting are disabled.
Other manuals for Breezer 3S
2
Table of contents
Other Tion Fan manuals
Popular Fan manuals by other brands

Novy
Novy 6830.052 Operating and installation instructions

Goldair
Goldair PLATINUM GPPF200 operating instructions
Oster
Oster OBF851 instruction manual
Greenheck
Greenheck SP-AP0511W Installation, operation and maintenance manual
Hunter
Hunter Presto installation manual
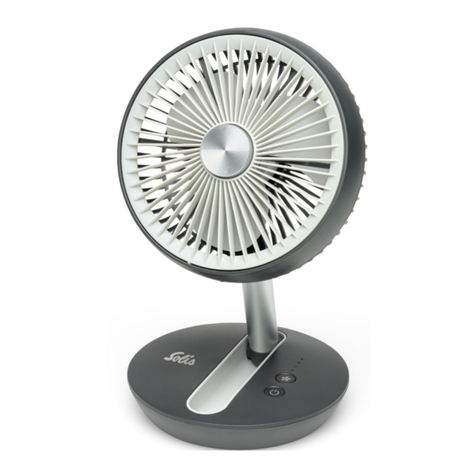
SOLIS
SOLIS CHARGE & GO DF-EF0516D quick start guide
